3 to 6 Art – Early Childhood Montessori Teaching Resources

Sensory Cognitive Child Art Method, montessori

This is a guide to teaching art literacy to 3 to 6-year-old students. There is a downloadable resource available for Montessori guides. In this blog, I will highlight the important aspects of teaching early childhood art lessons. Below, you will find more information on Montessori Early Childhood for ages 3-6, following the International Arts Standards.

Children of all ages can learn visual arts and benefit from guided artistic exploration. Each developmental stage necessitates specific teaching methodologies and approaches. After extensive research and observation of children’s art education. I have discovered that youngsters acquire diverse artistic skills at various developmental planes. You can get more insights by ordering the book Montessori Art Guide – Early Childhood First Plane HERE

3 to 6 kids painting rocks, early childhood

Art making for young children involves exploration and discovery. Montessori students in the first plane, 3 to 6 years old, are prepared for simple art tasks. The most effective approach to teaching art lessons at this stage is through process-based art.

Process-based art focuses on the experience rather than the final artwork’s appearance. It emphasizes exploration and imaginative expression rather than creating recognizable pieces.

3 to 6 Art – Early Childhood Montessori Teaching Resources kids making clay

When implementing process art, provide a brief introduction to how art mediums function and can be utilized. Children in the 3-6 age group are highly curious about art materials and are rapid learners. Art lessons in Montessori early childhood education should encourage students to experiment freely. Without predetermined outcomes, fostering a spirit of exploration.

Incorporating specific activities in the Montessori art curriculum can aid in enhancing young students’ fine motor skills. Engaging in art activities helps refine both large and small muscle groups, promoting controlled movements in young learners. Introducing activities like clay modeling, brush stroking, and safe scissor usage can expedite the development of fine motor skills in children at this stage.


3 to 6 Art – Early Childhood Montessori Teaching Resources

Exploring Different Nature of Art® Modes

  • Creative-Mode: This mode serves as the foundation for process-based art learning, where children initiate their art-making journey. In creative mode, students are encouraged to explore art mediums without a specific reference or image to replicate. They rely on their imagination, thoughts, and ideas to craft unique creations.
  • Introducing Copy-Mode: Copy-mode entails structured, step-by-step art instruction. However, in early childhood education, direct replication of images should be avoided. Children at this stage enjoy imitating simple tasks observed in adults, like cleaning, painting, or gardening. Incorporate these activities into art lessons, allowing them to mimic your actions.
  • Transitioning to Copy-Mode: Begin with students replicating a basic design involving one to two steps. Once they grasp the initial concept, encourage them to transition back to creative-mode. This helps them to personalize and complete their projects according to their imagination and preferences.
3 to 6 Art – Early Childhood Montessori Teaching Resources

Art Activities & Mediums

Explore these engaging Montessori Early Childhood art projects designed for children aged 3 to 6. These activities aim to enhance fine motor control and strengthen small muscles in the fingers and hands. All while providing opportunities to engage in both creative-mode and copy-mode techniques. For the necessary non-toxic and kid-friendly art supplies, you can check out Nature of Art for Kids.

  • Doodling: Utilize crayons, colored pencils, tempera sticks, and more.
  • Painting: Experiment with watercolor paints, tempera paints, finger paints, homemade veggie dyes, etc.
  • Color Theory Play: Engage in activities like watercolor painting, dropper painting, and squeeze bottle painting to explore color theory.
  • Clay Modeling: Work with materials such as earth clay, homemade playdough, sculpting tools, beeswax, and non-hardening plasteline clay to mold and create.
  • Simple Crafts: Enjoy activities like paper cutting, string weaving, gluing, block building, and constructing with large popsicle sticks to foster creativity and dexterity.


Sensory Cognitive Child Art Method, montessori

Having the right art material for your early childhood classroom is just the first step. If you want more information on how to use each material. Or how to set up an art shelf with the materials. Plus how to teach lessons that actually help early childhood students learn art.

I’m currently selling my brand new, Early Childhood Art Guide. It includes everything you need to know to successfully bring art lessons into your early childhood classroom—without the stress. I go into more detail about art materials (such as how to use them and where to find them). And a ton of other valuable information that makes teaching art and setting up your shelf so much easier. And, right now, you can order yours today!, so don’t miss out!

3 to 6 Art – Early Childhood Montessori Teaching Resources

Sign-up to receive video

The Phases of Art Development is a quick digital course that explains how art making can help students develop their creativity, fine-motor skills, and focus. More importantly, I share what types of projects students at every age are capable of completing safely, and without making a mess.

Best of all—it’s free! To sign up for the course, click here.


3 to 6 Art Resources

If you would like to understand more about which types of art projects children can work on, register for my free video course, Phases of Arts Development.

You can learn about Art Literacy Standards and the benefits of visual arts by reading Defining Visual Arts Paperback (paperback book).

3 to 6 art guide for Montessori education

Buy Guide Now!

arts and craft book by Spramani Elaun

Spramani’s Books

Teach children visual arts

Curriculum For Children

Get step-by-step art curriculum to teach visual arts. Check out our 4 art curriculums:
Painting
Drawing
Color Theory
Clay Modeling

All rights reserved © 2024, Nature of Art®

No part of this blog may be used or be reproduced in any manner whatsoever including reproducing, publishing, performing, and making any adaptions of the work – including translation into another foreign language without written permission except in the case of brief quotations embodied in critical articles and reviews. Nature of Art® Publishing P.O. Box 443 Solana Beach, California 92075.

Preschool Art Teaching Methods

Sensory Cognitive Child Art Method, Montessori


Preschool Art

In Montessori preschool art, children of all ages can learn visual arts with personalized guidance. Different developmental stages require different teaching techniques. Here’s a simple guide for teaching preschool Montessori art, following international standards for arts education and sensory visual arts. This method aligns with a child’s growth. Having worked with thousands of preschool children over 25 years, I’ve found that preschoolers develop artistic skills at different levels. In this blog series, I’ll share effective methods and ideas for teaching art to preschoolers.

Art Teaching Resources

To explore art projects suitable for children, enroll in my free video training, “Phases of Arts Development,” which focuses on teaching methods for preschool aged learners. Discover art literacy standards and the benefits of visual arts by reading my Montessori Early Childhood Art Guide available in digital and paperback. Learn how to incorporate preschool art lessons into the Montessori environment.

Preschool Montessori Art Teaching Methods

Art Exploration

In preschool, creating art is an exploration and discovery journey. Children in the Montessori first plane are still grasping the concept of visual arts and are filled with curiosity about different art mediums. During this stage, it’s important for preschool children to freely explore art materials without any predetermined expectations.

Process-Based Learning

Process-based art is a fantastic way to introduce art lessons. It’s all about the experience and the journey, rather than focusing on creating a final piece that resembles recognizable art. The emphasis is on exploration and using one’s imagination.

When teaching process art to preschoolers, start with a simple explanation of how different mediums work and demonstrate a few techniques for using them. This helps children see the possibilities of each medium.

After the introduction, let them freely explore their own ideas and techniques. Encourage them by emphasizing that there are no right or wrong ways to use the medium. Allow them to add to their projects and experiment with various ways to finish their artwork using the introduced medium. Remember, process-based art is all about trying new things and uncovering creativity! Learn more about process-based learning.

Building Fine-Motor Skills

A key focus is engaging children in tasks that develop fine-motor skills. Creating art helps enhance both major and minor muscle groups, improving young learners’ coordination. It’s important to provide plenty of opportunities to practice these skills.

Typically, preschool to kindergarten-aged children have limited finger and hand strength. Recognizing the importance of fine-motor growth is crucial, as it affects various aspects of a child’s daily life, from self-care tasks to early cognitive functions.

In your Montessori art classroom, incorporating specific activities can help young students strengthen their small muscle groups. Starting with activities like clay modeling, brush stroking, and safe scissor use can effectively boost their fine-motor skills development. Learn more about fine motor art development methods here.

montessori art early childhood toddler
Preschool Montessori Art Teaching Methods

Engaging Preschool Activities & Mediums

You can find safe and child-friendly art supplies for these activities at Nature of Art for Kids online store. Here are some wonderful art projects suitable for preschool grades, designed to enhance fine motor skills in their fingers and hands:

Doodling & Drawing: Use crayons, colored pencils, tempera sticks, and more.

Painting: Explore watercolors, tempera paints, finger paints, homemade veggie dyes, and other mediums.

Color Theory Play: Engage in activities like watercolor painting, dropper painting, and squeeze bottle painting.

Clay Modeling: Experiment with earth clay, homemade play dough, sculpture creation, beeswax forming, and more.

Simple Crafts: Include tasks like paper cutting, string weaving, gluing, building with jumbo Legos, and creating large popsicle-stick structures. (Note: Avoid crafts with small parts for students under 3 years old.)

Looking for a shortcut? Consider purchasing the Early Childhood Guide for tailored guidance on art materials, setting up an art shelf, delivering effective art lessons to early childhood students, and more. This resource offers detailed insights and step-by-step instructions to simplify the process of teaching art to young learners.

arts and craft book by Spramani Elaun

Spramani’s Books

Teach children visual arts

Curriculum For Children

Get step-by-step art curriculum to teach visual arts. Check out our 4 art curriculums:
Painting
Drawing
Color Theory
Clay Modeling

All rights reserved © 2024, Nature of Art®

No part of this blog may be used or be reproduced in any manner whatsoever including reproducing, publishing, performing, and making any adaptions of the work – including translation into another foreign language without written permission except in the case of brief quotations embodied in critical articles and reviews. Nature of Art® Publishing P.O. Box 443 Solana Beach, California 92075.

Valentine’s Day Art Projects: Potato Stamp Cards

Looking for fun Valentine’s Day art projects for your classroom? I love making homemade cards for my family, friends, and special people in my life, and I’m sure your early childhood Montessori students would too!

I started a tradition of making potato Valentine cards with my young art students and every year, they look forward to this art project.

Valentine’s Day Art Projects: Potato Stamp Cards

Here’s a quick and fun way to bring a little love into your classroom—and all you really need is a few potatoes. The spud makes a great, inexpensive stamp and are easy for little hands to grasp and hold. Plus, you can carve almost any shape you want out of a potato, so while I do this art lesson with my students for Valentine’s Day, you can really do it with your Montessori class any time of the year!

Potato Stamping Supplies

  • Potatoes — large Russet potatoes work best; organic potatoes are even better because they have no pesticides sprayed on them
  • Knife — a medium size paring knife (you may want to cut the potatoes ahead of time, that way you don’t have to worry about safety)
  • Newspaper — a few sheets to lay out and keep the work area clean
  • Paint Brushes, Sponges, or Popsicle Sticks — to spread paint on the stamps
  • Paints — tempera, acrylic, watercolor, and/or natural veggie dye will work
  • Paper or Card Stock — card stock, news print, construction paper, copy paper or any type of stationary cards
  • Writing Utensils — Crayons, pencils, etc.; for Valentines, I usually put out warm colors (red, pink, purple, white, teal blue)
  • Napkins — napkins or rags to clean off potatoes between use
  • Water Jar — for cleaning paint brushes in between color changes
Valentine’s Day Art Projects: Potato Stamp Cards Montessori

Potato Stamp StepsP

  1. Cut or carve a heart shape out of the potato.
  2. Pat dry the potato with a napkin or rag before stamping. Potatoes are a root vegetable, so they hold and release lots of water when cutting open; potatoes work much better at stamping and absorbing paint when they are dry.
  3. Cover the flat, stamp portion of the potato with paint.
  4. Press potato stamp on the paper and lift to see impression that’s been left.

Your students may need to practice a couple of times to thin out the layer of paint on the potato, which results in a clearer and better desired shape impression. I always tell kids to practice on a scrap paper before making their impressions on a nicer paper or card.

montessori art hearts

Potato stamping can be an earth-friendly art project! You can make this project totally earth-friendly by using recycled paper, organic potatoes, and non-toxic paints for kids! If you’re using veggie dyes, then you can even compost all your scraps once you’re done with this project.

Teachers Say…

I’ve had teachers email me later and tell me how they’ve started doing this Montessori art project in their classroom, and how their students have been making quick cards, banners, and gift wrap for different holidays and seasons throughout the year. Think about carving out leaves for fall, pumpkins for Thanksgiving, and trees and flowers for spring or Earth Day!

Valentine’s Day Art Projects: Potato Stamp Cards, montessori art

Want more ideas for Montessori art projects? Download the Ultimate Winter Arts & Crafts Idea Guide! It’s packed with a more than 40 of fun and educational Montessori art projects that’ll get your students pumped and excited about art!

arts and craft book by Spramani Elaun

Spramani’s Books

Teach children visual arts

Curriculum For Children

Get step-by-step art curriculum to teach visual arts. Check out our 4 art curriculums:
Painting
Drawing
Color Theory
Clay Modeling

All rights reserved © 2024, Nature of Art®

No part of this blog may be used or be reproduced in any manner whatsoever including reproducing, publishing, performing, and making any adaptions of the work – including translation into another foreign language without written permission except in the case of brief quotations embodied in critical articles and reviews. Nature of Art® Publishing P.O. Box 443 Solana Beach, California 92075.

3 Montessori Art Projects for Winter

Montessori Art Winter Art Project Ideas For teaching kids

Now that we’re smack in the middle of winter, I’m sure you’re looking for a few exciting Montessori art projects to keep your students occupied on days they’re stuck inside. Well, I say, embrace the season and have your students participate in a few winter art projects.

Here are 3 Montessori art lessons I’m sure your students will be excited about. Plus, they’re easy to set up and fun to do!

Project 1. Snow Coloring: Color Theory

Winter art project activities for monessori classroom

I love teaching young students color theory, and one of the funnest ways to do so during the winter is with snow! Living in California, seeing snow—let alone using it for art projects!—is very rare, but if you’re in the middle of a winter wonderland, bring it into the classroom and have some fun with this project.

Supplies:

  • Food coloring or mixing paint in the primary colors: red, blue, and yellow; or this Primary Mixing Kit
  • Empty dropper bottles
  • Tap water
  • Containers, tubs, or buckets (for the snow)
  • Snow
  • Towels
primary mixing paints for kids art projects winter art idea

How to:

  1. You can do this part yourself, or you can have students go outside and fill up containers of clean snow. Each child should have their own container.
  2. Fill up dropper or squirt bottles with the food coloring or mixing paint plus tap water to dilute it.
  3. Have students squirt a little bit of each color onto different areas of the snow.
  4. Then, allow students to experiment with creating secondary colors. They can squirt one color on top of another to mix them and see what colors they can create on their own.
montessori art activities for kids, tear collage

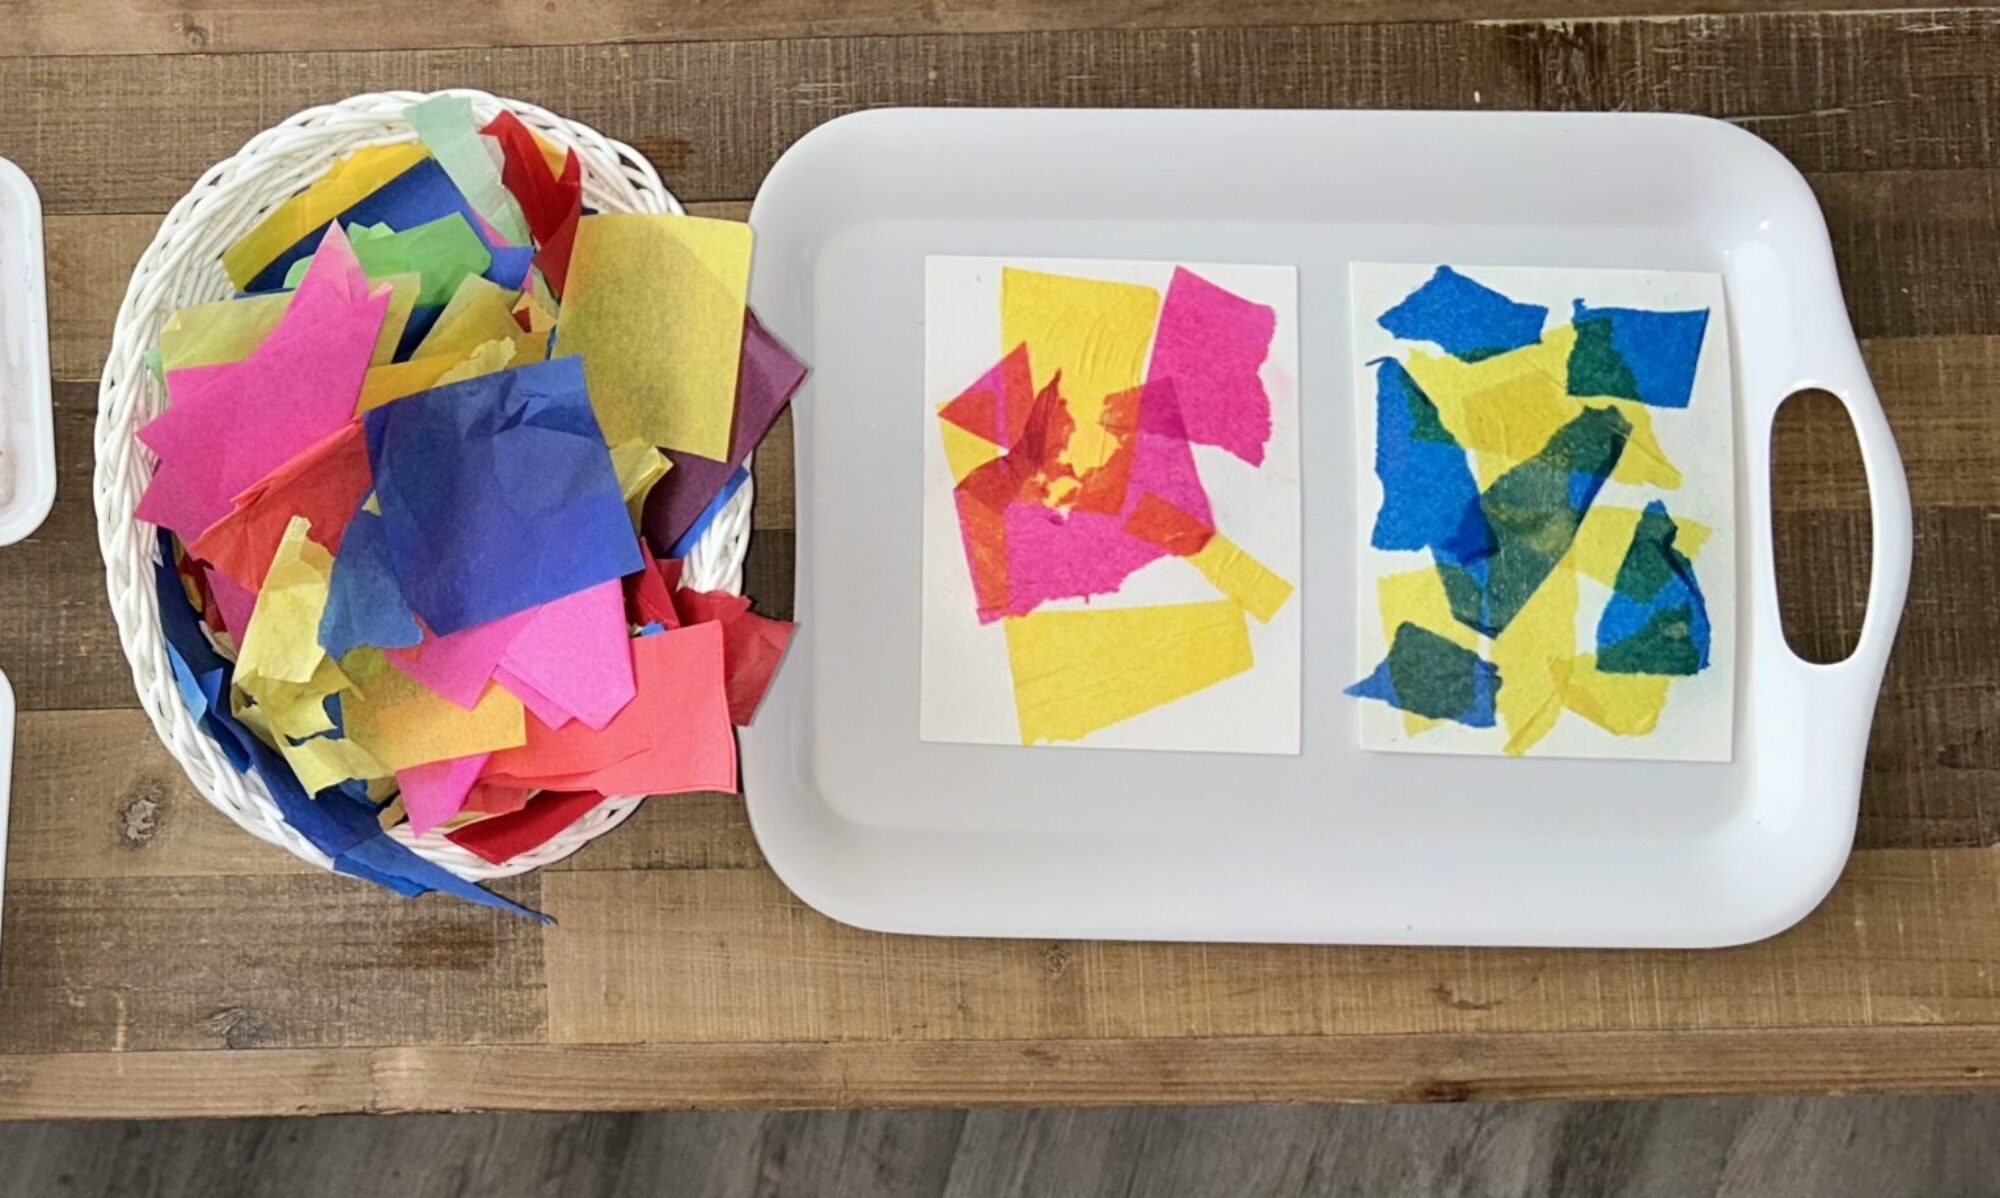
Project 2. Wrapping Paper Collage: Tear, Collage, & Glue

Do you still have scraps of wrapping paper laying around your home? Bring them into the classroom and recycle it to give students the opportunity to create unique pieces of art. This is one of the simplest Montessori activities to keep kids busy. And while I put this into the winter art projects category, you can really do this any time of year, with any type of paper you have in your classroom. (For more Montessori activities related to this project, download my Ultimate Winter Arts & Crafts Idea Guide and check out page 9.) Need more Collage ideas? Read my Collage Ultimate Montessori Collage Guide

Supplies:

  • Wrapping paper scraps
  • Scissors
  • Glue
  • Paper
  • (Optional) pencil and eraser

How to:

This project can be done two ways:

  1. Let students choose the paper designs they want to work with
  2. Cut or rip pieces into different shapes
  3. Using these pieces, they can aim to create a specific object/design or keep it abstract
  4. Have them move the pieces around their paper and experiment with the design
  5. Once they’re happy with their image, have them glue the pieces onto their paper

Or,

  1. Have students decide on an image they want to create (fish, butterfly, face, mountains, etc.)
  2. Lightly draw an outline of the design onto their paper
  3. Cut the wrapping paper into shapes that will fit within their image
  4. Once they’ve put the pieces together to their liking, glue them onto their paper drawing
Winter art lesson idea, painting art project for Montessori how to

Project 3. Watercolor Painting the Northern Lights: Wet-on-Wet Painting, Wax Resist

Seeing the Northern Lights is on a lot of people’s bucket lists. What you may not know is that they’re easier to see in the winter—especially after making this artwork! Watch the video below to see how to use just paints and crayons to create this Northern Lights landscape, complete with a colorful sky and mountain peaks.

Supplies:

  • Jar of water
  • Crayons
  • Watercolor paints
  • Wide and thin paint brushes
  • Basic sketching pencil
  • Napkins
  • Watercolor paper (or another thick paper)

Where to Start: Ultimate Winter Arts & Crafts Free Download

Want more ideas for winter art projects? Download the Ultimate Winter Arts & Crafts Idea Guide! It’s packed with a more than 40 of fun and educational Montessori art projects that’ll get your students pumped and excited about art!


Winter Arts & Crafts montessori art activities

arts and craft book by Spramani Elaun

Spramani’s Books

Teach children visual arts

Curriculum For Children

Get step-by-step art curriculum to teach visual arts. Check out our 4 art curriculums:
Painting
Drawing
Color Theory
Clay Modeling

All rights reserved © 2024, Nature of Art®

No part of this blog may be used or be reproduced in any manner whatsoever including reproducing, publishing, performing, and making any adaptions of the work – including translation into another foreign language without written permission except in the case of brief quotations embodied in critical articles and reviews. Nature of Art® Publishing P.O. Box 443 Solana Beach, California 92075.

Practicing Brushstrokes for Chinese New Year – Montessori Art

chinese new year cultural arts kids

With the Chinese New Year just a few days away (in 2020, it falls on January 25th), why not use the holiday as inspiration for cultural arts or history art lessons? Chinese calligraphy and many pieces of Chinese art focus on brushstrokes and can easily be incorporated into a Montessori art lesson plan.

Thousands of years ago, painting and calligraphy emerged simultaneously, largely in part because they require the same tools: brush and ink. You might be surprised to know though, that calligraphy was considered to be “fine art” long before painting ever was. In fact, it wasn’t until the Song dynasty (960-1279), that painting was finally thought of as art.

montessori art lesson chinese

We can learn a lot about Chinese art—both painting and calligraphy. Namely, the importance and variety of the Chinese brushstroke.

3 to 6 Art – Early Childhood Montessori Teaching Resources

Sign-up to receive video

The Phases of Art Development is a quick digital course that explains how art making can help students develop their creativity, fine-motor skills, and focus. More importantly, I share what types of projects students at every age are capable of completing safely, and without making a mess.

Best of all—it’s free! To sign up for the course, click here.

Sumi-e Brushstrokes

Sumi-e ink painting is perfect for children to learn because of its simplistic pictorial nature-inspired images created using simple brushstrokes and without very many details or added texture.

In fact, I would say sumi-e paint exercises are ideal for beginner painters to start out with since it focuses on controlling brushstrokes—balancing between thin and thick. This is actually how I start painting lessons in my classes.

sumi-e brushstroke painting kids

I’m currently in the process of building out a complete lesson around Chinese brushstrokes, but here’s a look at the exercises I’ll be including.

montessori art painting chinese ink brushstroke
  • Lesson 1: Load paintbrush without twisting the fibers
  • Lesson 2: Wipe excess ink off the brush using the sides of a jar or ink stone
  • Lesson 3: Practice making thin, long brushstrokes with the tip of the paintbrush
  • Lesson 4: Practice making thick brushstrokes with a larger amount of the paintbrush
  • Lesson 5: Practice making spirals and lines very slowly
  • Lesson 6: Practice making dots and dashes
  • Lesson 7: Practice making bamboo leaves, with simple short and long strokes all in only one try
montessori chinese new year art project kids

Now, here’s a quick look at the Chinese New Year—feel free to share this information with your students!—and a way to practice brushstrokes to celebrate the holiday.

Chinese New Year

Chinese New Year is celebrated by more than 20% of the world. It’s the most important holiday in China and to Chinese people all over. It is a festival that celebrates the beginning of a new year on the traditional Chinese calendar.

2020 is the year of the rat.

2019 is the year of the pig.

In Chinese culture, pigs are the symbol of wealth. Their chubby faces and big ears are signs of fortune as well. Pigs have a beautiful personality and are blessed with good fortune in life.

Chinese New Year Art Project

Year Of The Pig, Chinese Sumi-e Ink Painting Lesson

The Chinese New Year is a great time to show students a way to embrace Montessori cultural arts. Here is a simple sumi-e ink brushstroke lesson. You will be creating—to celebrate the Year of the Pig—using simple brushtrokes and in just six steps.

chinese brushstroke art lesson for children how to
Basic round pointed tip paintbrush can work

Supplies:

chinese new year, pig, painting art project for kids

Steps:

  1. Make the head with a rounded line circle shape
  2. Inside of that circle, create the pig’s snout with another, smaller rounded line circle; add two slight dots for the nostrils
  3. Paint two eye marks above the snout, plus two ears on the top of the head
  4. Make a long oval line to shape the body, attached to the head
  5. Add two line strokes at the bottom of the oval shape for its legs
  6. Make a curly corkscrew twirl on the side of the oval body; this will be the pig’s tail
year of the pig, cultural art for kids, project kideas
spramani montessori art trainer in china
Teaching art lessons and training Montessori Teachers 3 – 6, in Yiwu, Province Zheijiang China.

If your students get excited about this project, make sure you sign up for my newsletter to get more Montessori art lesson ideas to share with them!

Buy Sumi-e Ink Now!

3 to 6 Art – Early Childhood Montessori Teaching Resources

Sign-up to receive video

The Phases of Art Development is a quick digital course that explains how art making can help students develop their creativity, fine-motor skills, and focus. More importantly, I share what types of projects students at every age are capable of completing safely, and without making a mess.

Best of all—it’s free! To sign up for the course, click here.

All rights reserved © 2024, Nature of Art®

No part of this blog may be used or be reproduced in any manner whatsoever including reproducing, publishing, performing, and making any adaptions of the work – including translation into another foreign language without written permission except in the case of brief quotations embodied in critical articles and reviews. Nature of Art® Publishing P.O. Box 443 Solana Beach, California 92075.

Montessori Art Early Childhood Guides

Early childhood montessori art


Below you’ll find a general arts literacy guide for Montessori Early Childhood ages following the International Standards for the Arts Education & Sensory Visual Arts method that aligns with a child’s growth – Nature of Art®.

Children of all ages can be taught visual arts and guided through the artistic process.

Each developmental phase requires different teaching styles and approaches.

Resources

If you would like to understand more about which types of art projects children can work on, register for this free video course Phases of Arts Development discussing Early Childhood, 3 – 6, and 6 – 13 years age.

You can learn about Art Literacy Standards and the benefits of visual arts read Defining Visual Arts Paperback (paperback book).Get information on how to bring art lessons into the Montessori classroom by reading Introducing Visual Arts into the Montessori Classroom (paperback book).

Get information on how to bring art lessons into the Montessori classrom by reading Introducing Visual Arts into the Montessori Classroom (paperback book).

montessori art early childhood toddler

Early Childhood, Toddler Art Teaching : 18 months to 3 years

For young children art making will be an exploratory and discovery based experience. Early childhood children do not understand the placement of visual arts, and are in a very curious state about mediums. Children should explore art mediums without any expected outcome.

So the best instruction method to introducing art lessons will be process based art, Process based art is about the experience and the process, and not focused on the child’s final piece of artwork, or whether it resembles art adults recognize.


And finally the important thing you want to focus on is giving children task for fine-motor skill development. Art creating helps develop muscles both small and large, which improves controlled movements. Be sure to provide plenty of opportunities to practice these skills.

Art Activities & Mediums For Early Childhood

Doodling – crayons, color pencils, tempera sticks

Painting – watercolor paints, tempera paints, finger paints, homemade veggie paints

Color Theory Play – water color paints

Clay Modeling – earth clay, homemade play dough

Simple Crafts  – cutting paper and weaving string. I recommend waiting to do crafts with small parts till after age of 3 years.

Learn more by registering for this free mini digital course, Phases of Art Development Video.

All rights reserved © 2024, Nature of Art®

No part of this blog may be used or be reproduced in any manner whatsoever including reproducing, publishing, performing, and making any adaptions of the work – including translation into another foreign language without written permission except in the case of brief quotations embodied in critical articles and reviews. Nature of Art® Publishing P.O. Box 443 Solana Beach, California 92075.

The Value of Art Journaling for Kids, Montessori Activities

I’ve shared with you the importance of stimulating positive art talk in your Montessori classroom. It’s one of the easiest ways to get students interested in art. Once they’ve been allowed to explore their creativity through visual art, chances are, they’re going to be hooked and want to learn so much more. I’ve see it happen so many times! One of the best ways to keep them captivated, allow them to explore even more, and track their progress is through art journaling.

What I love about art journaling is that there’s no minimum talent or skill required—students of any age can benefit. All you really need is a journal, some simple art materials, and the willingness to get creative and have some fun.

What is Art Journaling?

An art journal is a book kept by artists as a visual—sometimes verbal—log of their thoughts, ideas, and creations. Art journaling the same concept as a written journal, but it combines writing with art and visual aspects. It’s a way for children to record their ideas and observations or respond to information they’ve learned with simple drawings and basic written descriptions.

It also gives them a space to explore. With art journaling, anything goes! Every style, medium, and technique can be used.

Art making is also powerful and therapeutic. Journaling gives students a healthy outlet to express their feelings and work through their emotions. For example, communicating through doodles can be much easier for children than talking.

How Art Journals Works

There’s no right or wrong way to do art journaling because they are personal to each artist! Students can use it to try out new techniques, document what happened to them that day or week, or artistically express the different emotions or issues they’re experiencing.

Students can keep their art journals with them or you can store them in a specific place on your art shelf or in a cabinet where they can grab them when they’re feeling creative. They can use the art supplies you put out on your art shelf to fill in the pages of their journal.

For the most part, journaling is an independent project and doesn’t require any lessons to complete. However, if you want to, you can provide simple prompts to inspire them; some examples may be: elaborate doodling, depicting poems, illustrating specific emotions, and creating patterned pages.

Make & Decorate Your Own Art Journal

Making an art journal is simple, all you really need is the journal itself—preferably filled with blank, un-lined pages.

Composition notebooks—although lined—usually cost about $1 or $2 each, and bulk pasts can be even cheaper. But I know purchasing a journal for each child in your class can still add up…so I’m offering you two solutions to cut down on costs.

1. Ask parents to donate journals. You’ll be surprised at how many parents will be willing to donate a few notebooks for your classroom.

2. Create a mini art journal out of plain paper:

  1. Take 4 sheets of 8 1/2 x 11 plain white copy paper
  2. Cut sheets in half (8 1/2 x 5 1/2), then fold in half into a mini booklet
  3. Bind loose pages with a rubber band or stitch together (along the fold)
  4. Stitching Instructions: get a thumb tack and press to make 3 holes along the fold; bind pages using a simple string stitch (watch video below).

Once you have your journal figured out, give students the opportunity to decorate their notebooks. If they’ll be using their own individual books make sure they put their names on them. Then put out a few basic art supplies (markers, stickers, glue, scissors, colored paper, beads, ribbons, etc.) and let them have fun. These will more than likely be the same supplies they’ll use to decorate the inside of their journals as well.

If your students choose to share their art journals with you, make sure you offer them supportive and nurturing language.

You never know…creating and encouraging your students to keep art journals might inspire you to start one yourself!

Learn more about teaching kids art lessons

Want more information on the types of techniques your students can handle or ideas for art projects outside of journals? Sign up for my absolutely FREE mini course, Phases of Art Development Guides & Art Project Ideas. It’s a quick guide to what your students are capable of and what to teach them at each age. They’re bite-sized videos that have proven helpful to many other Montessori teachers and they’ll give you a solid foundation to begin teaching art in your classroom!

3 to 6 Art – Early Childhood Montessori Teaching Resources

Sign-up to receive video

The Phases of Art Development is a quick digital course that explains how art making can help students develop their creativity, fine-motor skills, and focus. More importantly, I share what types of projects students at every age are capable of completing safely, and without making a mess.

Best of all—it’s free! To sign up for the course, click here.

Of course, if you want to stay up-to-date on more teaching tips and art project ideas, make sure you sign up for my newsletter!

All rights reserved © 2024, Nature of Art®

No part of this blog may be used or be reproduced in any manner whatsoever including reproducing, publishing, performing, and making any adaptions of the work – including translation into another foreign language without written permission except in the case of brief quotations embodied in critical articles and reviews. Nature of Art® Publishing P.O. Box 443 Solana Beach, California 92075.

5 Ways to Become an Art-Trained Montessori Teacher Over Winter Break

Usually when I tell Montessori teachers they can start teaching art in their classroom, they look at me like I’m crazy! So many of them tell me they have no training, they’re not creative, or they struggle with just drawing stick figures! Trust me though, you CAN become an art-trained Montessori teacher!

In fact, winter break is one of the best times to get started. Think about how excited your students will be to come back to school and find out you’ll be introducing art lessons to them. They’ll love it! Not only will it help develop their creativity and art literacy, but it helps them make connections between all the other subjects they’re learning—such as the Great Lessons.

So, now I’m sure you’re thinking, “Look, Spramani, I definitely want to become a better Montessori teacher, and it would be really cool to start providing visual arts in my classroom, but how can I become art trained in a matter of weeks? Winter break is only so long.

I’ve done the hard work for you. After 20 years of observing the way kids learn art, I’ve created a simple way to teach art that works perfectly in the Montessori classroom. It really doesn’t require much leg work from you, and students get to explore the entire artistic process. Of course, you’ll have to sign up for my Art Teaching Blueprint and get all the info you need (I’ll touch on what the course is and why it’s so awesome further below), but here are five things to do to get you started to becoming art trained over winter break.

1. Buy Some Supplies

The first step to becoming art trained is setting yourself—as well as your classroom and students—up with the right tools and supplies. (I’ve broken down the essential art supplies every Montessori classroom needs in this blog post.) Starting with a stocked classroom gives you the foundation to explore the visual arts.

2. Set Up an Art Shelf

As you know, subject-based shelves are the basis of a successful Montessori classroom, so it only makes sense that you should set up an art shelf. You can read how to set up an art shelf in your classroom here. A proper art shelf supports art literacy and helps keep all your supplies organized in one easy-to-reach place for your students to access.

3. Build an Inspiration Gallery

Another way to get your classroom set up for teaching art is to create an inspiration gallery. It can give students a place to observe and talk about artwork, which can increase their art literacy, language, and self-esteem. While an inspiration gallery is a simple concept, there are some tricks to it. For instance, you don’t want to solely include fine art examples; it’s important to incorporate students’ own work too. (If you want to learn more about how inspiration galleries work, read this blog post.)

4. Pick Up a Book

Once you’re all set with supplies, an art shelf, and an inspiration gallery, it’s time to start your training. You can give yourself a great base by doing some quick reading. I’ve written two visual art books that create a framework for learning the subject. Defining Visual Arts focuses on the latest standards and the most important projects, mediums, and techniques to teach. Introducing Visual Arts to The Montessori Classrooms gets a little more specific in providing solid guidance for teaching art in a Montessori environment. Either one—but of course, both—of these books are helpful in giving you the context for how children learn art and are a great option in kicking off your art training.

5. Register for my FREE teacher course: Phases of Art Development Guides & Art Project Ideas!

I created a free video course to teach Montessori teachers like you the phases of art development—or what art skills your students are capable of learning in each age range. The course also includes three bonus videos of art lessons, projects, and techniques to use in your classroom, no matter what grade you’re teaching. Best of all, you can go through this mini training in the comfort of your own home (while on winter break!).

You can do it, YOU can become an art-trained Montessori teacher. I believe in you and your students will thank you for taking the time to learn how to teach art in your classroom. If you have any questions or want to connect with other Montessori teachers who are going through my course, make sure you go like my Facebook page.

All rights reserved © 2024, Nature of Art®

No part of this blog may be used or be reproduced in any manner whatsoever including reproducing, publishing, performing, and making any adaptions of the work – including translation into another foreign language without written permission except in the case of brief quotations embodied in critical articles and reviews. Nature of Art® Publishing P.O. Box 443 Solana Beach, California 92075.

Setting Up Your Montessori Classroom Art Space

Setting Up Your Montessori Classroom Art Space

By Spramani Elaun

Inspiring children to be creative is my business! I’ve spent more than 20 years observing how they learn and teaching them visual art. In my experience, one of the most essential components of students exploring and learning art is their environment. Luckily, it’s actually so easy to set up your Montessori classroom art space!

If you’ve been following this blog, then you know I believe every Montessori classroom should have an inspiration gallery and an art shelf, so I bet you’re wondering what else you could possibly need. I can go on and on about all the things you can use to set up an art space, but to keep it simple, I’ll just share the five basic necessities with you. (Of course, you can dive deeper and learn about all the fun, unique, colorful, exciting things that you can add to your classroom by reading my books Introducing Visual Arts to The Montessori Classroom and Defining Visual Arts.)

The most important thing to understand is that making a space for art means making space to get creative and have fun. Now, when I say that, I know a lot of teachers think fun means mess. While that’s the case sometimes, if you set up a designated space for making art, it’ll contain the mess, while still giving students the freedom to create as they please.

Setting Up an Art Space

Kids need an art space to doodle, draw, write, paint, craft, sew, knit, cut, glue, build, construct, and play with clay. For kids to make these types of art projects successfully, they need the proper space. Here are the five basic necessities for creating a place for art in your classroom.

1. Rugs & Floor Coverings

Spills are inevitable, so it’s important to consider the flooring of your art space. If your classroom has wood, tile, or linoleum floors then spills will be an easy, worry-free clean up. However you may still want to a rug to lay out that will protect your floors—especially if your floor is carpet.

Rugs come in many sizes and can be inexpensive or pricey. If you don’t want to invest in a rug, then you can use a drop cloth or tarp while your students are working, and then fold it up and put it away when they’re done.

Setting Up Your Montessori Classroom Art Space

2. Table

Table size will not affect your students’ ability to be creative, but the sturdiness of it will. I’ve witnessed kids create beautiful works of art on a surface as large as their lap, so don’t feel like you need a huge, glorious art table in your classroom.

When I’m hosting events and teaching art classes I’m usually setting up on the fly and rely on a small (but sturdy!), cheap, portable fold-up tables. These are great—not just for my events but in the classroom as well—because you can set them up when you need to and not be limited to a full-time art table since they can be folded up and tucked out of the way when not in use.

3. Chairs

Along with a sturdy table, kids need a sturdy chair or stool to sit on safely. A bench or folding chair can work just fine, as will pulling a chair from elsewhere in your classroom. Having a table and chairs available makes invites a child to create and lets them know art should be made in that specific place (containing any mess to that space as well).

Setting Up Your Montessori Classroom Art Space

4. Light Source

I’ve spent many years observing children making artworks, and the ways in which they visually perceive their work is key to developing their artistic skills. That’s why a good, bright light source is important—it helps them identify pigments and color hues. Natural sunlight is the best, but a lamp light source can work just as well.

5. Art Supply Storage

Every art space should have a place where art supplies are stored. I’ve found that children can be overly stimulated or even get bored if they’re given total access to every art supply in your classroom. The best way to keep them excited and engaged with art is to keep rotating the materials that are available to them. You can use jars, baskets, or closed plastic containers to separate different types of art supply and store them away from the art space when necessary.

Setting Up Your Montessori Classroom Art Space

Creating your Montessori classroom art space doesn’t need to be fancy or complicated; it’s really not that different from the areas you have set aside for other lessons.

If this has you inspired and eager to start teaching art in your classroom, you should definitely sign up for my online training, Art Teaching Blueprint. It’s a quick, seven-week course that takes everything I’ve learned about teaching art to students and breaks it down into 43 short, easily-digestible videos. It’ll help you build a foundation for teaching a quality visual arts program in your school or classroom. I’m so excited to offer this course to you and I really think it’ll empower you and give you invaluable teaching skills. You can click here to register.

arts and craft book by Spramani Elaun

Spramani’s Books

Teach children visual arts

Curriculum For Children

Get step-by-step art curriculum to teach visual arts. Check out our 4 art curriculums:
Painting
Drawing
Color Theory
Clay Modeling

All rights reserved © 2024, Nature of Art®

No part of this blog may be used or be reproduced in any manner whatsoever including reproducing, publishing, performing, and making any adaptions of the work – including translation into another foreign language without written permission except in the case of brief quotations embodied in critical articles and reviews. Nature of Art® Publishing P.O. Box 443 Solana Beach, California 92075.