Best Drawing & Painting Papers Size For Kids

Best Drawing & Painting Papers Size For Kids

Today day I want to share Best Drawing & Painting Papers Size For Kids, and why I Use Small Papers instead. My signature hack which you can learn by reading my books and curriculum, is to use always start with small quarter-size papers instead of large paper size.  It might seem too small, but there are many amazing reasons why I have been doing this for years. So let me share all my reason why you want to choose the best drawing & painting papers sizes for kids.

Best Drawing & Painting Papers Size For Kids, boy watercolor painting

Best Small Paper Sizes

First, after teaching thousands of children how to draw and paint, I realized a large piece of paper is really hard to fill up. The second thing is young children are not planning just quite yet, and they go through paper fast. Older kids plan more ideas out, but beginner artists are just exploring. So I like to slow them down by giving them small paper sizes to work with. This is why the Best Drawing & Painting Papers Size For Kids is to use smaller choices.

boy painting a small acrylic paper

Use Quality Paper

Another important thing is that I only use quality types paper for drawing and painting. Choose thick uncoated card stock or watercolor paper. This way you can give more quality paper to kids by taking one large size and getting four parts out of it! For drawing, you can use simple copy paper, the kind you use in your printer. 24# bond uncoated. I quarter these from an 8.5 x 11 sheet and get 4.25 x 5.5. You can also quarter doodling scrap paper to this size. Kids love rummaging through baskets of small papers. This is my signature hack! I have been sharing this tip for years.

Best Drawing & Painting Papers Size For Kids, download
texture small paper size, boy dipping in blue watercolor paint with string

Small Paper For All Grades

I even give elementary-grade children the same sizes of small paper. If children need or ask for a larger piece of paper, you can give them the size they need. I just like to encourage them to plan and have intention before they use a larger drawing or painting paper. The important thing is to give children quality materials without wasting. So the smaller papers are best for kids to start with.

Art Resources

toddler using tempera sticks on small drawing paper size

You can learn more about my art teaching method by reading my books, curriculum, and viewing my art training videos. Many parents and teachers internationally have adopted this idea and given me positive feedback! You can stage these papers on a tray, in a basket, or a card stand. Check out my Best curriculums for drawing and painting grades 6 – 12 years blog here.

Be Eco Friendly,

Spramani

girl outdoor sketching on small drawing paper with pencil.

Best Paper Size Blog Summary

Using small papers for drawing and painting in art classes has many benefits. Spramani suggests using small, quarter-size sheets to save resources and boost creativity. These smaller papers make it easier for young artists to focus, as they don’t have to fill large sheets, which can be overwhelming. High-quality materials like thick card stock or watercolor paper ensure good results without wasting paper, since one big sheet can be cut into several smaller ones. This method is good for any grade level and is eco-friendly. Spramani encourages planning before using bigger sheets to help students create intentional art. Many teachers and parents have adopted this approach and found it helpful. For more tips, Spramani provides resources in her books and art videos.

Best Drawing & Painting Papers Size For Kids, materials list download
Best Drawing & Painting Papers Size For Kids, elementary pdf download

arts and craft book by Spramani Elaun

Spramani’s Books

Teach children visual arts

Curriculum For Children

Get step-by-step art curriculum to teach visual arts. Check out our 4 art curriculums:
Painting
Drawing
Color Theory
Clay Modeling

All rights reserved © 2024, Nature of Art®

No part of this blog may be used or be reproduced in any manner whatsoever including reproducing, publishing, performing, and making any adaptions of the work – including translation into another foreign language without written permission except in the case of brief quotations embodied in critical articles and reviews. Nature of Art® Publishing P.O. Box 443 Solana Beach, California 92075.
What Are The Best Montessori Art Materials For Beginners?

Today, I want to share the best Montessori art materials I recommend for beginners. These are basic art materials you can find almost anywhere and order online at Montessori-art.com or Store.EcoKidsArt.com

The reason I recommend these materials is that they are safe non-toxic, and are good quality. I have used them for many art lessons, and they work great. You can find them at a low to mid cost.

To download my comprehensive list of art materials suitable for teaching all art subjects to students of all ages, especially ideal for beginner Montessori students, please click downloads here:

best Montessori art materials for beginners

Kids love doodling and drawing with these

Beginner’s Art Supplies List

Drawing Materials Beginning (BUY NOW)

  • Pencil, eraser, and pencil sharpener
  • Crayons in different sizes and shapes
  • Colored pencils (short or jumbo tips for small hands)
  • Oil pastels in a variety of colors
  • Tempera sticks
  • Markers
What are the best Montessori art materials for beginners?

Painting Materials for beginners (BUY NOW)

  • Tempera paint sticks (easy for beginners to glide)
  • Tempera liquid paint
  • Dot Stampers
  • Watercolor paints (start with primary red, yellow, blue for color mixing)
  • Watercolor dry cakes
  • Paintbrushes
  • Palette
  • Smock cover up
  • Simple surfaces to paint on (paper, cardboard, watercolor paper, rocks, sticks, canvas)
  • Glass droppers
  • Sponges
  • Wash Jar
What are the best Montessori art materials for beginners?

Beginning Clay Modeling Materials (BUY NOW)

  • Non-hardening clays
  • Air-dry clay
  • Pottery clay
  • Wood clay tools
  • Stamps
  • Rollers
  • Cookie cutters

MODELING CLAY

What are the best Montessori art materials for beginners?

Beginning Crafting Supplies (BUY NOW)

  • Scissors
  • Glue
  • Low-temp glue gun
  • Yarn
  • String
  • Tissue paper
  • Cardboard
  • Fabric
  • Sewing materials (needles, thread)
  • Pom poms
  • Googly eyes

This comprehensive list is curated from the 5 domains of art areas featured in all my books, curriculum, and art training. For further insights, you can explore more [here](link to additional resources).

Montessori art materials for

Art Essentials: Safe, Non-Toxic, and Process-Based

boy painting with Montessori

https://montessori-ami.org/resource-library/materials

https://montessoridigital.org

All rights reserved © 2024, Nature of Art®

No part of this blog may be used or be reproduced in any manner whatsoever including reproducing, publishing, performing, and making any adaptions of the work – including translation into another foreign language without written permission except in the case of brief quotations embodied in critical articles and reviews. Nature of Art® Publishing P.O. Box 443 Solana Beach, California 92075.

10 Fun Art Activities

By Spramani Elaun

Share With Your Montessori Students

As a Montessori teacher, you know it can be overwhelming to choose the right fun art activities. But, that is why I’m here with some guidance on which Montessori art activities for The Great Lessons are appropriate for your classroom and enjoyable! Art activities related to The Great Lessons are my favorite to teach. Because they allow children to explore their imaginations and get creative in a concrete, meaningful way. From drawing explosions to painting supernovas, students can visualize and understand such a big concept.

color pencil mandala fun art lesson idea

Integrating art with science helps children express ideas creatively, stimulates their senses, and provides tactile experiences. So when it comes to teaching the universe, there is no reason you can’t integrate art and science to have some fun. To get started, take a look at some of your classroom books for visual inspiration. One of my favorite books to use is “Born With a Bang: The Universe Tells Our Cosmic Story” by Jennifer Morgan. The illustrations are colorful and beautiful and can be used for many art activities.

art activities, blow paint

And for more fun art ideas, download my top 5 Montessori Big Bang Art Activities.

art download for Montessori children

Adjustable Activities

These activities can easily be adjusted to fit early childhood, lower elementary, or upper elementary classrooms. Older students will, of course, pay more attention to details, while the early childhood students will engage with these art activities in an open-ended fashion. Fun and fascinating science topics you can incorporate into art projects. Below are ten art projects that Montessori teachers can use to teach elementary students.

collage paper art activities

Art Ideas

1. Create a Cosmic Painting: Take your students on a journey through the universe with a cosmic painting activity. Discuss the Big Bang and the creation of the universe with your students, then have them create a painting depicting the birth of the universe.

2. Constellations: Give your students a chance to create their own constellations using paint or clay. Educate them on how the Big Bang gave birth to stars and how stars are the building blocks of constellations.

3. Paper Mache Planets: Introduce the concept of planets and solar systems by having your students make paper mache planets. You can use this opportunity to discuss the origins of planets and how they were formed following the Big Bang.

4. Galaxy in a Bottle: Encourage your students to learn about galaxies by creating a galaxy in a bottle. This can be a great way to explore the vastness of space and how galaxies form after the Big Bang.

5. Moon Phases Art: Discuss the moon phases and how they are caused by the changing position of the moon. Have your students create art that depicts the different phases of the moon using paint or chalk.

6. Starry Night Sky: Teach your students about stars by creating a starry night sky mural. This activity can help them learn about the different types of stars and how they are formed.

7. Cosmic Collage: Give your students an opportunity to create a cosmic collage by cutting out pictures of planets, stars, and galaxies from magazines and newspapers. Discuss the Big Bang and how all these celestial bodies came into existence.

 Science Art Montessori

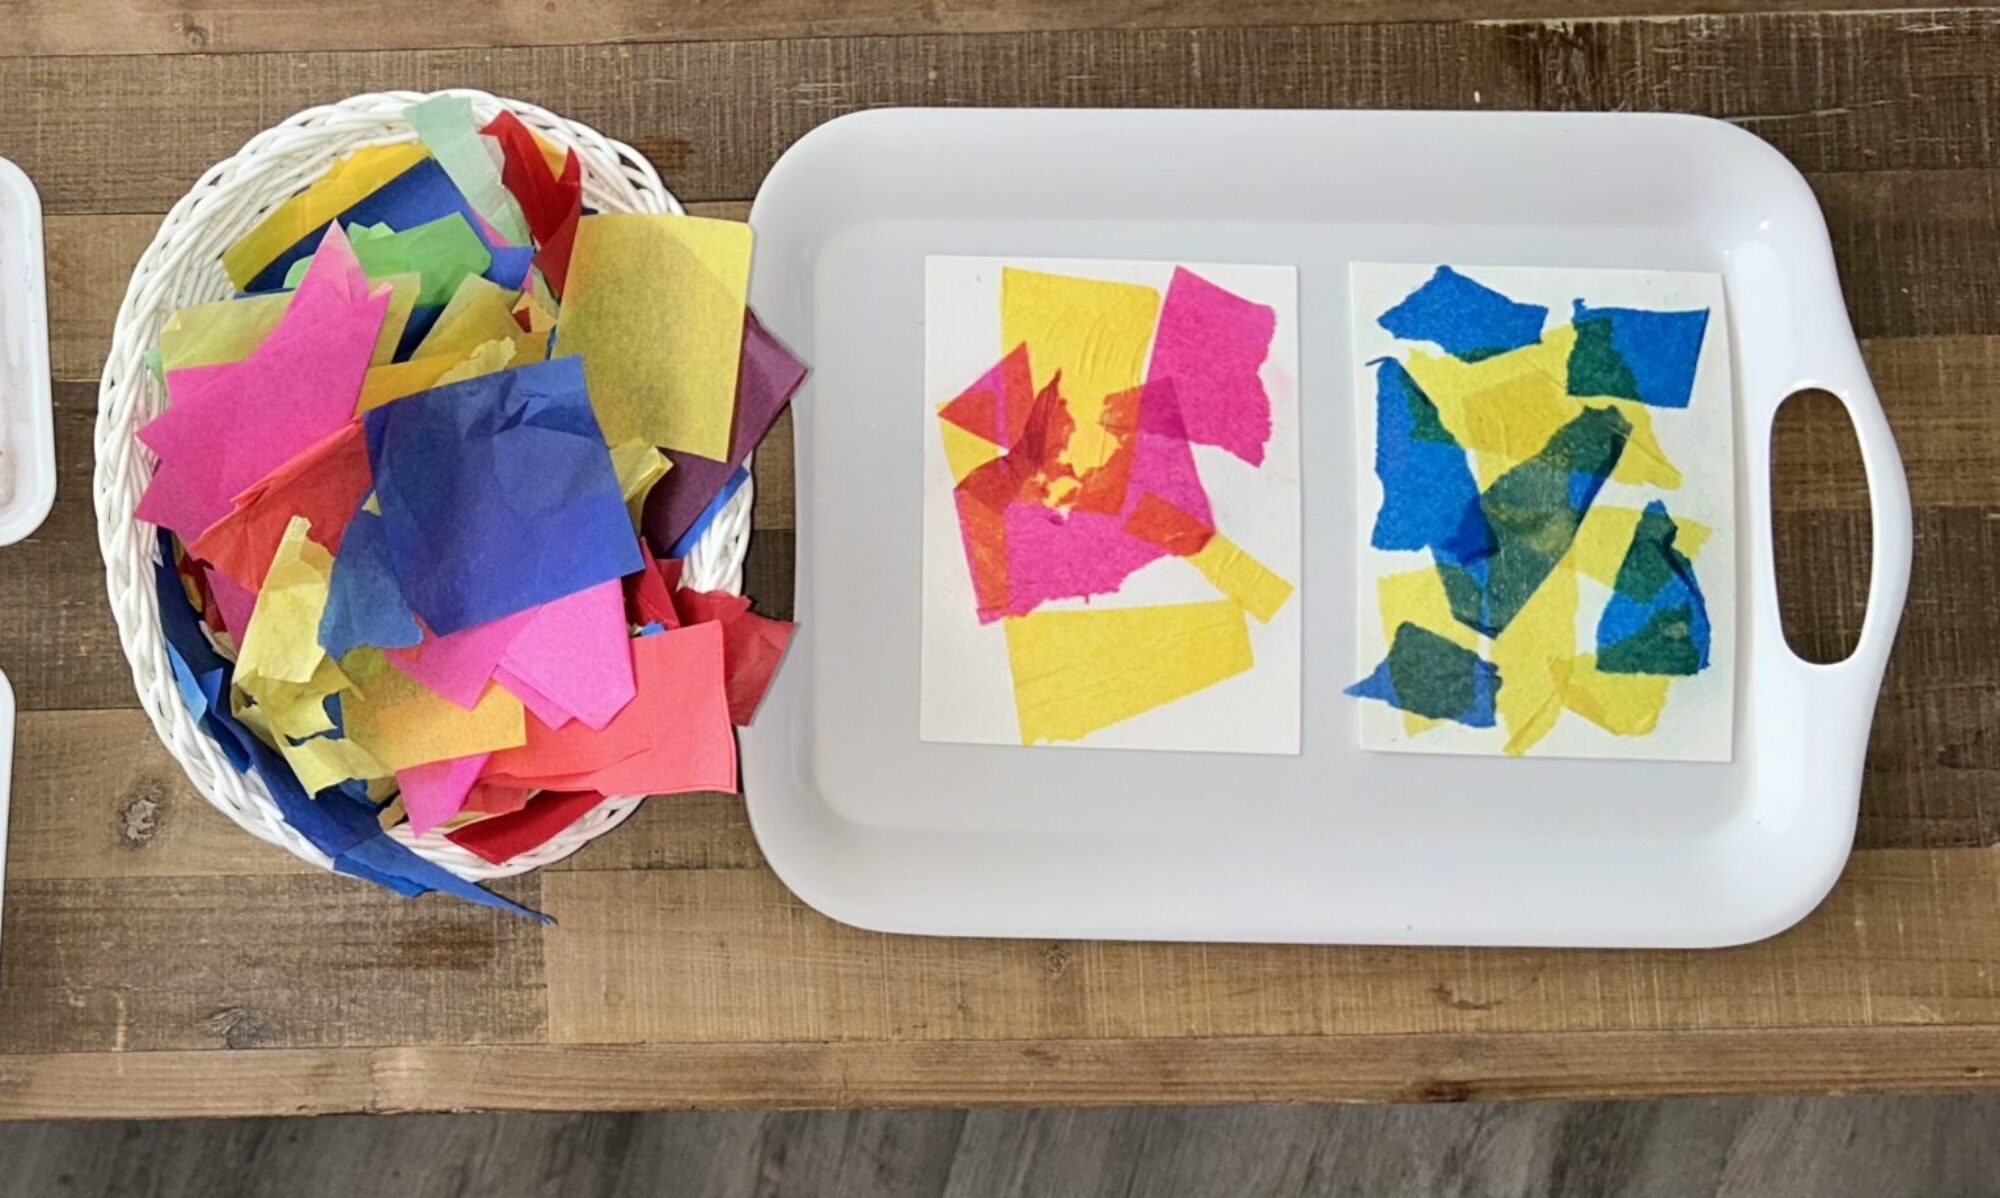
8. Sun Catchers: Discuss the origins of our solar system’s star, the sun, and have your students create sun catchers using colorful tissue paper. This can be a great way to explore the different colors of the sun and how they are visible to us.

9. Universe Mobile: Make a universe mobile to showcase the Big Bang and the creation of our universe. Students can create planets, stars, and galaxies to hang from the mobile.

10. Astronaut Art: Discuss space travel and astronauts’ role in exploring space. Let your students create astronaut art that depicts them exploring the galaxies and space beyond, giving them a glimpse into the vast universe beyond our planet.

children making clay objects in a montessori classroom with spramani

By incorporating these art projects into your Montessori lessons, your students can learn the vastness of space in a fun and interactive way.

montessori art curriculum

Order my Montessori Art Books & Curriculum HERE

arts and craft book by Spramani Elaun

Spramani’s Books

Teach children visual arts

Curriculum For Children

Get step-by-step art curriculum to teach visual arts. Check out our 4 art curriculums:
Painting
Drawing
Color Theory
Clay Modeling

All rights reserved © 2024, Nature of Art®

No part of this blog may be used or be reproduced in any manner whatsoever including reproducing, publishing, performing, and making any adaptions of the work – including translation into another foreign language without written permission except in the case of brief quotations embodied in critical articles and reviews. Nature of Art® Publishing P.O. Box 443 Solana Beach, California 92075.

Montessori Art – Why Teach Primary Color Mixing Curriculum

Montessori Art – Why Teach Primary Color Mixing Curriculum

Is primary color mixing essential for kids?

Preparing a Montessori art curriculum might feel overwhelming. Especially if you don’t know what should come first when teaching Montessori students art. In this blog, I’m sharing why you should teach primary color mixing to Montessori students. I’ll give you my art teacher advice on what’s important to focus on first.

Primary color mixing should be on the top of your art curriculum scaffolding. Why is teaching it so essential? Because all visual arts are connected to color theory.

If you want to teach children how to paint, they will need to learn how to achieve the colors they need when those colors are not available in their palette. And when learning how to create realistic images you need to know how to control color values by mixing primary colors together. Artists also tint and shade by understanding basic primary and secondary mixing ideas. To create color pop in designs you need to understand warm, cool, and complementary color ideas as well.

So start with teaching the basics of color mixing, then move into more advanced color theory ideas. Be sure to check out my store for the art supplies you may need for this curriculum.

Montessori Art – Why Teach Primary Color Mixing Curriculum

Good news!

As a homeschool mom, artist, and art teacher I know how difficult it can be to create an art curriculum. I’ve spent the last five years developing an easy-to-follow sequential step-by-step curriculum for parents and school teachers…so you don’t have to!

It took me twenty years to create this method. I start my color theory curriculum modules first with primary colors into secondary color mixing, then move into more important color theory ideas with easy lessons. I can save you valuable time from trying to figure this all out, so check out my links below!

I hope you find this valuable.

Warmly,

Spramani

Montessori Art – Why Teach Primary Color Mixing Curriculum

Order Here: Kids Color Theory Book
Order Here: Kids Color Theory Curriculum – 37 Master Color Mixing Key Lessons

Montessori Art – Why Teach Primary Color Mixing Curriculum

arts and craft book by Spramani Elaun

Spramani’s Books

Teach children visual arts

Curriculum For Children

Get step-by-step art curriculum to teach visual arts. Check out our 4 art curriculums:
Painting
Drawing
Color Theory
Clay Modeling

All rights reserved © 2024, Nature of Art®

No part of this blog may be used or be reproduced in any manner whatsoever including reproducing, publishing, performing, and making any adaptions of the work – including translation into another foreign language without written permission except in the case of brief quotations embodied in critical articles and reviews. Nature of Art® Publishing P.O. Box 443 Solana Beach, California 92075.

Painting With Primary Colors | How-to Montessori Art Ideas With Early Childhood

Painting With Primary Colors | How-to Montessori Art Ideas With Early Childhood, spramani elaun

Painting With Primary Colors | What to start with?

Sometimes I get a lot of questions from teachers and parents wanting to know which colors they should first introduce to their students. So, I often recommend starting with primary colors red, yellow, and blue (water-soluble mediums). 

Just start with these three primary colors if your student is new to painting. Learning to mix primary hues can teach lots of valuable secondary mixing lessons. 

A book I published a couple of years back called  Kids Color Theory is available in my store, and a recently designed Kids Color Theory Curriculum is now available too. You can order both in digital form or paperback copy here.

montessori art early childhood
Kids Color Theory Book
Painting With Primary Colors | How-to Montessori Art Ideas With Early Childhood

Primary hues can come in lots of different mediums.

If you look at my pictures I have primary hues in all of these mediums which can be used to teach color theory:

  • Acrylic
  • Watercolor
  • Watercolor crayons
  • Watercolor pencils

As you can see, there are many options to choose from. Many are available in my store.

I review each one of these mediums in my book Kids Color Theory and how they work.

Painting With Primary Colors | How-to Montessori Art Ideas With Early Childhood

Painting with primary colors is a lot of fun. My book will show you how you can teach your students primaries. It will show how they can mix their own secondary colors, and fun value color mixing ideas. In my Montessori Color Mixing Curriculum, I have over 37 color mixing lessons you can follow. Check out my color mixing curriculum here.

Montessori art curriculum, painting
Painting With Primary Colors | How-to Montessori Art Ideas With Early Childhood

Excerpt from Kids Color Theory Book:

Water Tub Primary Color Play

Water tub color play evolved many years ago for me when introducing toddlers to primary color lessons. Watching the children, I noticed children getting transfixed on colors when pouring from bowl to bowl.

They became delighted when colors transformed into another different hue. Then, I even witnessed toddlers try to correct the colors by pouring other combinations of colors together.

Toddlers were no longer distracted by their surroundings and became totally absorbed by these color transformations. It was exciting to notice calmness and relaxation set in with the children as they painted. Although I knew they were not mixing colors intentionally, they were processing discovery. And, they knew something was happening because of their actions. Order my book Kids Color Theory Curriculum to help you teach your kids about primary colors while having fun!

Spramani Elaun

Order Primary Color Mixing Paint HERE!

arts and craft book by Spramani Elaun

Spramani’s Books

Teach children visual arts

Curriculum For Children

Get step-by-step art curriculum to teach visual arts. Check out our 4 art curriculums:
Painting
Drawing
Color Theory
Clay Modeling

All rights reserved © 2024, Nature of Art®

No part of this blog may be used or be reproduced in any manner whatsoever including reproducing, publishing, performing, and making any adaptions of the work – including translation into another foreign language without written permission except in the case of brief quotations embodied in critical articles and reviews. Nature of Art® Publishing P.O. Box 443 Solana Beach, California 92075.

How-to PAINT PAPER like Eric Carle | Montessori Art

How-to PAINT PAPER like Eric Carle | Montessori Art

Paint paper like Eric Carle

Every summer, I host art camps in San Diego, and my students’ top favorite project to do with me is to paint papers! In this post, we will teach you how to paint paper and collage like artist and author Eric Carle. So I thought I would share this fun Montessori art activity you can introduce to your students.

I like to give my students unusual tools, bright paint colors, different colored papers, and crazy things to make interesting textures and patterns. This also prepares papers for future projects that can be cut and be collage into interesting shapes.

Teach the Elements

Painting papers is a great way to teach the Elements and Principles of Design. You can teach texture and patterns, a vital art standard topic children should learn in Montessori art lessons. The artist and author Eric Carle is famous for doing this fun and vibrant method in his book illustrations. Eric Carle is famous for PAINTED PAPERS and collaging them into beautiful creatures featured in all his books. 

Eric Carle, artist and children’s book author


Paint paper like Eric Carle
How-to PAINT PAPER like Eric Carle | Montessori Art

What is paint paper?

Painted paper is basically paint applied onto paper.  You can paint plain white paper or colored paper.  Paper painting can be created with different mediums like watercolor, gel paints, tempera, or acrylic paints (any paint). 

Children painting colors

What can you do with painted paper?

Like Eric Carle, the famous artist, paint the papers first, let them dry second, then third cut them up into new collage artworks. Eric Carle’s famous painting papers created The Very Hungry Caterpillar book with this unique painted technique.

Collaging with painted papers
ColColl
Montessori art painting supplies

What tools do you need to make painted papers?

  • Paint mediums
  • Paper
  • Paintbrushes
  • Interesting objects that make patterns and textures
  • Drying rack
  • Interesting tools
Painting supplies

Painted papers can be taught in a process-based manner

Process-based painting is more about the experience rather than following directions. When kids paint process-based, they are able to go in any direction they choose. They can explore any texture, use any color, and have any outcome happen, but have very cool painted paper; they can later cut turn into another art piece. Process-based art lessons and painted papers are a great way to start teaching Montessori art lessons.

Spramani Elaun

Check out my Kids Painting Book Here


Early Childhood Guide – Book

You’ll learn:

  • The importance of early Art Literacy
  • How to speak the ‘Artist Language’
  • The art subjects students need to know
  • The characteristics of child artists
  • Methods and approaches to teaching
  • How to create art activity environments
  • The best art materials for your classroom
  • How to plan level-appropriate activities

Buy Guide Now!

arts and craft book by Spramani Elaun

Spramani’s Books

Teach children visual arts

Curriculum For Children

Get step-by-step art curriculum to teach visual arts. Check out our 4 art curriculums:
Painting
Drawing
Color Theory
Clay Modeling

All rights reserved © 2024, Nature of Art®

No part of this blog may be used or be reproduced in any manner whatsoever including reproducing, publishing, performing, and making any adaptions of the work – including translation into another foreign language without written permission except in the case of brief quotations embodied in critical articles and reviews. Nature of Art® Publishing P.O. Box 443 Solana Beach, California 92075.

Holiday Craft | Painting Ornaments

During the holiday things get busier, but we also create space for special moments, even in the Montessori classroom. Painting holiday crafts are a fantastic way for children to express their creativity and independence. I’ve painted ornaments with countless kids in classrooms and workshops during the holidays, and they all enjoy this craft immensely! It’s a keepsake that students and their families can cherish for years. Every year, I have kids coming back to create a new ornament for their collection.

Holiday Craft | Painting Ornaments

Setting Up a Kids Craft Activity

One of the great things about this kids’ holiday craft is its simplicity in setup, requiring just a basic paint kit without the need for many special items. Opting for woodcraft ornaments is beneficial as they are environmentally friendly compared to plastic and safer for younger children than glass ornaments.

Here are some handy tips for organizing this festive art activity for your students (or for kids at home too!):

Holiday Craft | Painting Ornaments, child painting

Creating a Mess-Free Painting Area

Ensure the painting space is located in an area where children can freely engage in a bit of messiness. Consider using a drop cloth, especially if painting indoors. Provide smocks, aprons, or large old t-shirts for the kids to wear, protecting their clothes from potential stains—some paints are challenging to wash off fabrics.

To enhance the painting experience, place the materials at eye level on a flat and stable surface, such as a table. Adding another layer of protection with a drop cloth or old newspaper on top can further safeguard the painting area from spills and splatters.

Holiday Craft | Painting Ornaments

Ornament Supplies

Here’s a list of everything you’ll need for this kids’ holiday craft:

  • Wooden ornaments – any shape will work, but ‘holiday shapes’ add to the festive spirit
  • Acrylic paint – for the best and longest-lasting results
  • Paintbrushes – various sizes, including fine/tiny ones for details
  • Paint palette – any size works, even a simple paper plate
  • Glitter – choose any color; white glitter adds a lovely touch to painted ornaments
  • Smock – or another cover-up to protect kids’ clothes from acrylic paint stains
  • Napkins – for cleaning paintbrushes between color changes
  • Water jar – for rinsing paintbrushes
  • Hairdryer (optional) – handy for speeding up the drying process, especially for older kids or adults working on intricate details
kids painting crafts
Painting Tips

Ornaments: You can purchase unfinished wood craft shapes at local superstores, craft stores, or online. Glass orb ornaments can also be used, but caution is advised with younger children. Consider recycling old ornaments by refreshing their designs or allowing kids to create new ones from scratch.

Paint: Opt for acrylic paint for its durability and longevity. Memories can last a lifetime—I still display ornaments my kids painted when they were young every holiday season! Ensure you use kid-safe, non-toxic acrylic paint for this activity.

Holiday Ornaments

How to choose colors

Encourage children to express their creativity freely by allowing them to paint whatever inspires them, whether traditional holiday themes or personal creations. While kids may opt for symbols of Christmas, Hanukkah, Kwanzaa, or other winter holidays, they have the freedom to choose.

Here are some recommended colors to kickstart the painting process:

  • Red
  • Black
  • White
  • Gold
  • Silver
  • Dark Green
  • Yellow
  • Orange
  • Pink
  • Purple
  • Brown
  • Burgundy deep red

If you don’t have all these colors, that’s perfectly fine; beautiful ornaments can still be created using just three to four colors!

Remember, when using glitter, ensure children apply it while the paint is wet. If they wait until the paint dries completely, the glitter won’t adhere well and may not stick effectively.

Take it a Step Further: Grab Your FREE Kids Holiday Crafts Painting Checklist!

If you’re new to painting activities with your students, get ready for a delightful experience—kids truly enjoy this craft! The setup is straightforward, making it easy to repeat with your students multiple times throughout the holiday season. You can also explore related activities like rock painting or painting on paper using the same materials; only the images, paint colors, and canvases may vary.

Buy Kids Painting Online Here

Painting Guide for Teachers and Parents

Discover a straightforward guide tailored for teachers and parents to kickstart painting lessons with ease. This book equips you with essential knowledge on the required materials, the best paints suited for kids, fundamental painting techniques, and my top tips for creating an exciting painting exploration experience for your students. Get ready to ignite a passion for art in your students as you embark on this colorful journey of creativity and learning. Unleash the joy of painting and inspire young minds to express themselves through art! ORDER NOW

A Short Cut Just for You

Once you see how much your students love painting, you’re going to want to include it as a regular part of your curriculum. My Kids Painting Practice & Process Curriculum has 57 master lessons that walk students through everything they need to know to be successful at painting, from setting up a paint station and holding a brush all the way to creating beautiful nature landscapes and painting different types of animals!

Each lesson is part of a sequence and includes all the components, tips, materials lists, and instructions you need to ensure you will be able to actually teach your students to become skilled painters. All you have to do is simply follow the instructions and easily present the activities to your students.

Kids Painting Practice & Process Curriculum sets the foundation for their art education and will help them transform into little artists! To purchase the curriculum, click here.

arts and craft book by Spramani Elaun

Spramani’s Books

Teach children visual arts

Curriculum For Children

Get step-by-step art curriculum to teach visual arts. Check out our 4 art curriculums:
Painting
Drawing
Color Theory
Clay Modeling

All rights reserved © 2024, Nature of Art®

No part of this blog may be used or be reproduced in any manner whatsoever including reproducing, publishing, performing, and making any adaptions of the work – including translation into another foreign language without written permission except in the case of brief quotations embodied in critical articles and reviews. Nature of Art® Publishing P.O. Box 443 Solana Beach, California 92075.

Halloween Rock Painting | Kids Art Project

Let’s start this blog off with a fun fact: I have painted thousands of rocks with kids throughout San Diego! It’s one of my go-to art activities because kids love painting rocks. Easy to set up, and leads to really diverse artworks. Now that Fall and Halloween season is upon us Halloween rock painting is a perfect activity. In this blog I want to share my fast quick best tips for setting up this activity. And you will have the least amount of mess and stress while preparing for halloween rock painting with Montessori kids.

Halloween rock painting kids art project ideas for fall

Setting up for painting

When you’re setting up you really only need three things: rocks for painting, kid-safe painting supplies, and a painting space. There are a few materials you will need which I share below in detail. But set up can be easy.

Collecting Rocks

Kids love collecting rocks outside! You can find rocks everywhere, they’re a free resource that helps make this project really affordable. However, if your class is unable to go out and collect rocks, you can always find bags of rocks in the garden stores. If you are using collected rocks, make sure you clean and dry them before painting.

Natural rocks come in different sizes and shapes. Have your students imagine what they would like to paint, then look for rocks similar in shape. The best rocks for this project will have a nice, flat surface to paint.

girl painting rocks, fall halloween

Preparing The Painting Space

Set up the painting area where kids can make a mess. Use a drop cloth to protect the floor. Make sure students wear clothes that can get dirty, as some paints don’t wash out easily. Keep materials at eye level on a flat, sturdy surface like a table. You can also cover the table with a drop cloth or old newspaper.

Rock Painting Materials

Here’s what you need for this fun Halloween rock painting project:

  • Acrylic Paint: Use safe, non-toxic acrylic or thick craft paint.
  • Paintbrushes: Have very small brushes for details and medium brushes for painting the whole rock surface.
  • Water Jar: For rinsing paint off brushes between colors.
  • Napkins: To wipe water and paint off brushes.
  • Palette: Use small palettes, or substitute with paper plates or recycled egg cartons for holding paint.
  • Newspaper: To cover the work area and catch any paint spills.
  • Smock, Apron, or Old Clothes: To keep children’s clothes safe from paint.
Halloween paint colors for rockss

Halloween Colors

Acrylic paint is the best choice for painting natural rocks because it sticks well and lasts a long time. Be sure to use kid-safe, non-toxic acrylic paint, especially for children under 12 years old.

You can create fun Halloween designs on rocks with just a few paint colors. These designs are simple enough for kids to copy.

  • White: ghosts, mummies, skulls, eyeballs, spider webs
  • Black: jack-o’-lanterns, black cats, bats
  • Orange: pumpkins, jack-o’-lanterns
  • Red: eyeballs, drops of blood
  • Green: witches, monsters, Frankenstein
  • Purple: monsters, spiders, witches’ hats
  • Yellow: candy corn, scary eyes

Remember, the final artwork will depend on your students’ ages and how much painting experience they have had before this activity.

For another spooky fun Halloween art project, check out my post on painting pumpkins!

Where to Start: Follow My Halloween Rock Painting Tips

This Montessori Halloween rock painting activity is quite simple. Just show how to use the materials—paintbrushes, water jar, napkins—and then let kids create their artworks on their own. Here are three quick tips to make the project smoother.

Tip 1: Rocks are not like paper; they don’t absorb paint as easily.

When kids clean their paintbrushes between colors, ensure they wipe all the water off the brush before dipping it back into the paint. You want to avoid runny paint on rocks, as it makes controlling the paint harder and the image less clear.

Halloween rock painting ideas

Tip 2: Paint the background color first and let it dry completely before adding more paint.

If you want the rock to have a solid background color, paint that part first. Allow the paint to dry before adding more details. This helps the image look clear and prevents colors from mixing.

Example: For a ghost rock, paint it white first, let it dry, then add black eyes and a mouth once the white is dry.

Tip 3: If possible, paint rocks in direct sunlight.

Acrylic paint dries faster under a heat source. Rocks take longer to dry in cool temperatures. Once your students finish painting, place the rocks in direct sunlight to dry.

!

Halloween Rock Painting | Kids Art Project, check list

If you’d like a free downloadable version of the materials list above (plus a few extras), grab my Kids Painting Materials Checklist now.

One Step Further: Download My FREE Kids Painting Materials Checklist

Students can explore rock painting in countless ways and themes! The basic idea and materials remain the same; only the images and paint colors might change. With any painting project, as long as kids have the right materials, they’ll learn and have fun!

Halloween Rock Painting | Kids Art Project, curriculum

A Short Cut Just for You

Painting—whether it’s rocks or on paper—is always such a fun activity for kids. I encourage you to set up painting projects and lessons for your class on a regular basis. My Kids Painting Practice & Process Curriculum has 57 master lessons that take kids from setting up a paint station and holding a brush all the way to creating beautiful nature landscapes and painting different types of animals! Each lesson is featured as part of a sequence and includes all the information—materials, demonstration technique, and direct and indirect aims—so you can simply follow the instructions and easily present the activity to your students.

Kids Painting Practice & Process Curriculum sets the foundation for their art education and will help them transform into little artists! To purchase the curriculum, click here.

Check out my Kids Painting Book:

arts and craft book by Spramani Elaun

Spramani’s Books

Teach children visual arts

Curriculum For Children

Get step-by-step art curriculum to teach visual arts. Check out our 4 art curriculums:
Painting
Drawing
Color Theory
Clay Modeling

All rights reserved © 2024, Nature of Art®

No part of this blog may be used or be reproduced in any manner whatsoever including reproducing, publishing, performing, and making any adaptions of the work – including translation into another foreign language without written permission except in the case of brief quotations embodied in critical articles and reviews. Nature of Art® Publishing P.O. Box 443 Solana Beach, California 92075.

Pumpkin Painting | Kids Art Project

It’s finally autumn! Hopefully where you are the leaves are turning beautiful hues and you’re enjoying the season! To me, nothing says autumn more than being surrounded by pumpkins! And, based on experience, I think a lot of Montessori students would agree! This pumpkin painting Montessori art project is a favorite among children (and teachers) every year!

giant pumpkin with art teacher Spramani Elaun

Pumpkins add a festive touch during the fall holiday season, and this art activity gives you the chance to talk about plant life cycle or a number of other Montessori topics!

What I love most about this pumpkin painting Montessori art activity for kids is how easy it is! It’s a great alternative to carving pumpkins, which can be difficult or even dangerous to do with Early Childhood and Lower Elementary students. This project is very safe and lots of fun children of all ages.

picture of pumpkins and green paint

Pumpkin Painting in the Classroom or Home

When you’re setting up this pumpkin painting project, you really only need three things: a pumpkin, painting supplies, and a painting space.

white pumpkin with paint palette

Picking a Pumpkin

First, your pumpkin. Any size pumpkin will work but try to choose one that has little to no blemishes—this will make painting easier and actually make the pumpkin last longer. Once your child picks the pumpkin they want, clean its surface gently with soap and water or a wipe. Then allow the pumpkin to air-dry or dry it with a cloth before painting.

Setting Up a Painting Space

The space you set up should be in an area where children can get messy. If you want to protect your floor, use a drop cloth. Make sure your students are also prepared for a little mess; they should be dressed in clothes that can get messy, some paints do not easily wash off clothes.

It’s much easier for kids to paint if the pumpkins are at eye level and on a flat and sturdy surface (like a table). You may want to put a drop cloth or old newspaper on top of that too.

painted pumpkin by elementary student

Pumpkin Painting Art Supplies

Here’s everything you need for this art project:

  • Clothes to get messy in; artist smocks and aprons work too
  • Paint brushes – small ones for little pumpkins and large ones for bigger pumpkins (kids can paint with sponges and their fingers too!)
  • Water jar – for washing brushes between paint colors
  • Napkins – for paintbrushes and paint spills
  • Baby wipes (optional) – I love having these around for quick clean-ups, they get all types of paint off kids’ skin, even acrylic
  • Palette – to hold paints (paper plates and egg cartons work too)

Remember, this is a seasonal project and will only last the life of the pumpkin. So safe, non-toxic paints will work perfectly. I recommended using water-based paints like mineral paint, milk paint, acrylic paint or tempera when working with young kids.

popular halloween paint colors

You can choose whatever paint colors you have in your classroom, but I suggest using a mix of fall colors like green, white, red, orange, yellow, brown, and purple, which all stand out on a pumpkin.

Note: I recommend leaving black paint out of young children’s paint palettes. The smallest amount of black will turn all colors gray. Your child’s pumpkins will still look wonderful without black paint.

How To Present Pumpkin Painting Lessons

The best part about this project is that it’s so simple! Kids can have fun and their pumpkins will look fantastic no matter what! There aren’t any complicated instructions, just three steps.

  1. Squeeze out just a quarter-size dollop of paint, you can add more as you go along
  2. Demonstrate how to do simple strokes so children have an understanding of how to use the paintbrushes and other materials (like the water jars and napkins for cleaning their brushes)
  3. Leave the rest to them!
jack o lantern painted

Where to Start: Pumpkin Painting

It’s important to let your kids explore and work independently with this project. Process-based learning is especially important for Early Childhood and Lower Elementary students.

three pumpkins painted scary

However, it is okay to give them inspiration. Here are a few ideas:

  • Purple paint for Dracula, monsters, or bats
  • Green paint for witches, goblins, or aliens
  • White paint for ghosts and spider webs 
  • With older children, you can include black paint for spiders and bats

While this is a painting project, you can also put out other art materials for students to use, such as googly eyes, recycled scraps, and raw or dried veggies to make funny faces.

https://spramani.lpages.co/painting-materials-checklistOne Step Further: Download My FREE Kids Painting Materials Checklist

I see so many teachers overcomplicate painting lessons. It really is simple though! As long as children have the right painting materials, they will learn! If you want a free downloadable version of the paint materials listed above (plus a few more), get my Kids Painting Materials Checklist now by clicking here.

painting lessons for children, cover of curriculum

Order painting curriculum, 57 brushstroke lessons

Once you see how much your students love this project, you’re going to want to include even more painting activities in your classroom! Students should be given ample time to just discover and experiment, but structured lessons can help them really improve their skills and become better artists! My Kids Painting Practice & Process Curriculum has 57 master lessons that take kids from setting up a paint station and holding a brush all the way to creating beautiful nature landscapes and painting different types of animals! Each lesson is featured as part of a sequence and includes all the information—materials, demonstration technique, and direct and indirect aims—so you can simply follow the instructions and easily present the activity to your students.

Kids Painting Practice & Process Curriculum sets the foundation for their art education and will help them transform into little artists! To purchase the curriculum, click here.

Check out my Kids Painting Book:

arts and craft book by Spramani Elaun

Spramani’s Books

Teach children visual arts

Curriculum For Children

Get step-by-step art curriculum to teach visual arts. Check out our 4 art curriculums:
Painting
Drawing
Color Theory
Clay Modeling

All rights reserved © 2024, Nature of Art®

No part of this blog may be used or be reproduced in any manner whatsoever including reproducing, publishing, performing, and making any adaptions of the work – including translation into another foreign language without written permission except in the case of brief quotations embodied in critical articles and reviews. Nature of Art® Publishing P.O. Box 443 Solana Beach, California 92075.

Drawing and Painting Water | Montessori Art Activities

This blog post is a part of a three-month series: Montessori Art in the Natural World: Kids Nature Journal Color Lessons. This series is about growing kids’ knowledge about the natural world by taking them outside their home or classroom and challenging them to create focused art, based on the nature around them. Every aspect of nature—seasons, layers of the earth’s soil, energy, rocks and minerals, fossils, landforms, water, flora, fauna, the atmosphere—can all be represented and expressed through art lessons. The water texture art techniques in this blog will help your students learn how to paint water to use in their nature art projects. Drawing and painting water is an excellent way to teach students more about nature and our world’s waters!

painting water

With 71 percent of the earth’s surface being covered with water, chances are, your kids will encounter drawing or painting some kind of water feature in their artworks or biome field notes. Luckily, there are a ton of water texture techniques that can be explored for learning about our ocean salt water, fresh water, frozen ice formations, and water within our atmosphere. Focusing on our planet’s natural water systems is also a great way to connect them to nature! Another fun way to engage students in studying zoology is to draw or paint whales, sharks, rainbow fish, crocodiles, eels, and algae in the water they live in. 

Teaching students a unique way to express water images will make learning about the science aspects of lessons a lot more fun. Drawing and painting water textures open up childrens’ curiosities and will lead to interesting and enriching conversations within your Montessori classroom.

Fun Water Art Learning Prompts:

You can continue to guide your students’ interests and curiosities by exploring the questions:

  • Why is the ocean blue?
  • Why do some parts of the ocean (or large lakes) look darker or lighter? (This is also a great question to help them explore color values and color tones!)
  • What is a coastline?
  • What causes waves in the ocean? Why aren’t there waves in lakes?
  • How much water covers our planet?
  • Why is the largest body of water salty?
  • What kind of animals live in the different depths of the ocean?
  • How do freshwater biomes and saltwater biomes differ?
  • How are sea mammals and fish different?
  • Why is water so important to human life?
  • How can we protect our planet’s water systems?
how we montessori art lessons painting and drawing

Learning About Nature By Painting Water Texture 

Kids learn by connecting information through the process of expressing, which leads to meaningful learning. As a teacher, you can lead students through many engaging water texture art lessons which will help them make their artworks unique and personal. Rather than students slapping down blue paint to represent oceans, seas, lakes, rivers, or streams, they can look closer to the natural patterns found in water and try to replicate the movements and textures in their artworks. 

Water texture drawing or painting can be explored in primary and elementary grades. Younger students will need more hands-on assistance and need to work process-based, giving them more time to discover and explore. Lower and upper elementary children will be able to do the projects completely independently by following demonstrations and steps. There are many techniques to create water texture art with interesting lines and patterns, such as:

  • Crayon wax resist
  • Salt sprinkled over watercolor
  • Bubble wrap
  • Painting yarn to create line textures 

Where to Start: Bubble Wrap Water Painting Montessori Art Activity

Drawing and Painting Water | Montessori Art Activities

There are so many ways to create water texture drawings and paintings, but this technique is one of my favorites! It’s so much fun for kids and easy to do too. (Plus, it helps you recycle any bubble wrap you get from packages!)

One Step Further: Download My Montessori Nature Journal Checklist

how to teach kids montessori art lessons

If you’re lucky enough to live by a body of water you can take your students to, I highly encourage you to have students make and record their observations in their nature journals. (For information and instructions on how to create a nature art journal, click here.) 

montessori arts and crafts, painting and drawing

To download the checklist for FREE, click here.

I created this Outdoor Nature Journal Checklist to help you guide your students in their observations and recordings to make sure they’re following scientific principles and standards. This will help ensure your students are including data that helps them implement both scientific and artistic principles during their expedition. Print it out or save it on your phone so you have it with you the next time you lead your students outside.

montessori painting lessons and curriculum

A Short Cut Just for You

I like painting water texture activities because it opens up a whole world of painting for kids. It shows them how you can paint with tools other than fingers or paintbrushes! However, it’s essential that kids do learn paintbrushes and brushstroke techniques to help them develop their painting skills.

My Kids Painting Practice & Process Curriculum has 57 master lessons that take kids from setting up a paint station and holding a brush all the way to creating beautiful nature landscapes and painting different types of animals! Each lesson is featured as part of a sequence and includes all the information—materials, demonstration technique, and direct and indirect aims—you need to properly present the activity to your students.

To purchase the curriculum, click here.