Crafting With Natural Found Objects | Montessori

This blog post is a part of a three-month series: Montessori Art in the Natural World. This series is about growing kids’ knowledge about the natural world by taking them outside their home or classroom and challenging them to create focused art, based on the nature around them. Every aspect of nature—seasons, layers of the earth’s soil, energy, rocks and minerals, fossils, landforms, water, flora, fauna, the atmosphere—can all be represented and expressed through art lessons including, nature crafting and crafting with natural objects.

Crafting With Natural Found Objects | Montessori

Crafting With Natural Objects

There are so many fun ideas and engaging, hands-on ways to teach your Montessori students about nature through crafting with natural objects. It’s a wonderful gateway to introduce and connect kids to the natural world. Also, the outdoors offers an endless selection of natural objects that are just waiting to be found and designed into clever nature crafts. 

These are a few commonly found, natural items that can be used for crafts:

  • Alabaster
  • Corn husks
  • Eggs shells
  • Feathers
  • Flowers
  • Gems
  • Gourds
  • Grasses
  • Leaves
  • Mushrooms
  • Pinecones
  • Rocks
  • Sandstone
  • Seashells
  • Seed pods
  • Twigs
  • Weeds
Crafting With Natural Found Objects | Montessori cultural studies
This is a simple dress similar to what may have been worn by Sacagawea 

History and Natural Found Objects

Crafting with natural objects is a great segway to teach students part of the Coming of Humans Great Lesson!

So much of human history and culture revolves around crafting. Our ancestors used natural found objects for making important tools that helped them survive their day-to-day lives. They would collect stones and bones to use for grinding, scraping, mortars for cooking, and as weapons to protect their villages from attacks and predators. They used stones and seashells in gift-giving. In addition, seeds and feathers were often used in ceremonial activities. These nature crafting activities have been found across all cultures!

Crafting With Natural Found Objects | Montessori

As society evolved, nature crafting evolved into a more leisure activity (although many people still used natural objects for daily tools too). Some nature crafts transcended both uses—being useful everyday items and also relaxing and calming to create! For example, in colonial times, the early settlers would craft candles from natural beeswax, make dolls from grass and reeds, and quilts were sewn together with naturally-woven materials. Crafting with natural objects was a normal event for so many generations. Unfortunately, many kids today have never been introduced to these types of nature crafts.

Many parents ask me the best ways to teach kids about nature and art and I always tell them to start crafting! Making crafts using only objects found in nature is an amazing way to have children slow down and become more present. This connects them not just to nature, but to our past and ancestors as well.

Take a look at ancient clothing and you can see natural objects—like bones, seeds, flowers, feathers, seashells and so much more—fastened and attached throughout the garments. Native American cultures used many objects found in nature to create elaborate headdresses too.

Crafting With Natural Found Objects | Montessori

Crafting with Natural Objects Helps Develop Fine-Motor Skills

Almost every crafting activity provides kids with excellent opportunities to develop their fine motor skills! Improving these skills is so important for kids to build their independence. Nature crafting activities like collecting (picking up) small natural objects, pasting, sewing, and cutting all require and strengthen fine-motor coordination.

Nature Crafts Can Teach Kids About Nature’s Limited Resources

Another great bonus of crafting with natural found objects is that they can teach kids important ideas and lessons about the limited natural resources of our world. It gives you a chance to teach students that although Mother Nature is plentiful when it comes to resources, today’s climate change and growing industrialism and commercialism mean we have to be diligent in protecting them. So, make sure you emphasize the need to gather the materials they find in nature responsibly. I love these types of crafts because they help our future leaders connect to nature and understand their role in protecting our environment and keeping our ecological systems balanced.

Crafting With Natural Found Objects | Montessori

Where to Start: Crafting With Natural Objects Ideas for Montessori Students

Forging natural items and using them to create heirloom gifts and artworks is a great way for students to receive from all the benefits of crafting with found nature objects. They are learning history, strengthening their fine motor skills, and taking responsibility for our Earth. 

Nature crafting activities for kids may include creating:

  • Baskets
  • Ceremonial bowls
  • Cornhusk dolls
  • Friendship bracelets
  • God’s eye mandalas
  • Lanterns
  • Memory boxes
  • Nature souvenirs boxes
  • Nature tapestries
  • Necklaces and other jewelry
  • Paper crafts, like collages
  • Pottery
  • Sandcastle jars
  • Sandstone sculptures
  • Shell medallions
  • Windchimes
How-to Teach Nature Journaling to Montessori Kids

One Step Further: Montessori Nature Activity Outdoor Journal Checklist

How-to Teach Nature Journaling to Montessori Kids

Here’s a bonus nature art activity for you! While your students are out collecting nature objects for crafting, have them take out their nature journals and record their observations. (For information and instructions on how to create a nature art journal, click here.) 

Nature journaling is a relatively independent activity, but you should still guide your students to make sure they’re following scientific principles and standards. This Nature Journal Checklist will help you make sure your students are including data that helps them implement both scientific and artistic principles during their expedition.

Print it out or save it on your phone so you have it with you the next time you lead your students outside to journal or collect nature objects for crafting.

To download the checklist for FREE, click here.

A Short Cut Just for You: Painting Curriculum For Kids

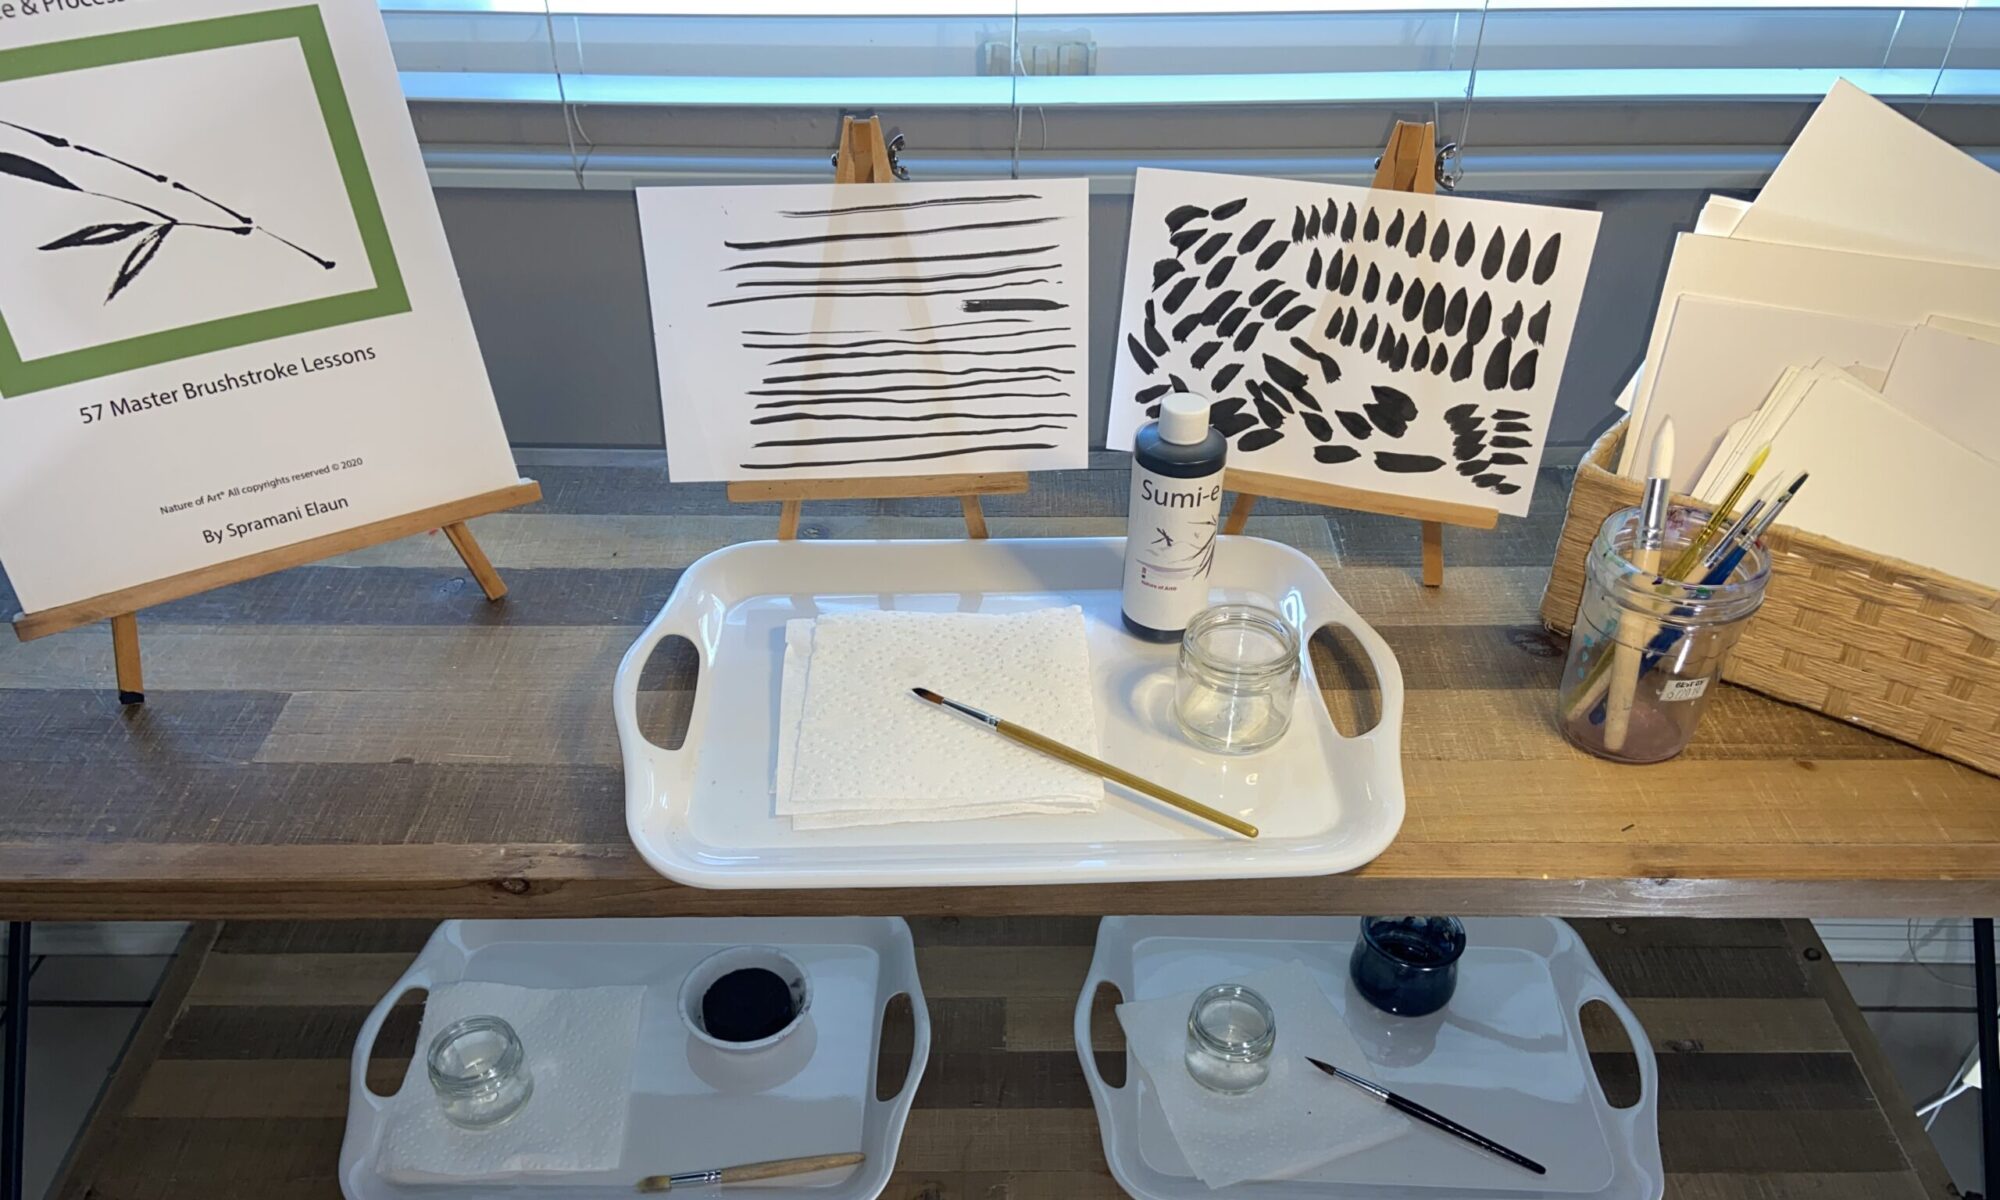
Along with crafting with natural objects, students can also use their found nature objects in painting lessons! My Kids Painting Practice & Process Curriculum has 57 master lessons that take kids from setting up a paint station and holding a brush all the way to creating beautiful nature landscapes and painting different types of animals! And, each lesson is featured as part of a sequence and includes all the information—materials, demonstration technique, and direct and indirect aims. So, you can simply follow the instructions and easily present the activity to your students.

Kids Painting Practice & Process Curriculum sets the foundation for their art education and will help them transform into little artists! To purchase the curriculum, click here.

Montessori Art in the Natural World: Kids Nature Journal Color Lessons

This blog post is a part of a three-month series: Montessori Art in the Natural World: Kids Nature Journal Color Lessons. This series is about growing kids’ knowledge about the natural world by taking them outside their home or classroom and challenging them to create focused art, based on the nature around them. Every aspect of nature—seasons, layers of the earth’s soil, energy, rocks and minerals, fossils, landforms, water, flora, fauna, the atmosphere—can all be represented and expressed through art lessons.

Nature Journaling Part lll

One of the most relaxing and rewarding parts of being in nature is experiencing its colors and beauty. Nature can teach us a lot about the color theory aspects of art and nature journaling, in particular, is a great way to teach Montessori art lessons.

Montessori Art in the Natural World: Kids Nature Journal Color Lessons

As an artist, art teacher, and naturalist, I find color so fascinating! Color inspires kids to gain new knowledge about the natural world. Nature journaling can be an amazing tool to lead outdoor exploration and discovery. Having your kids take their nature journals outdoors can enrich their learning experience and help them make a meaningful connection between science and art. 

Kids nature journaling activities give educators many chances to teach the Elements and Principles of Design while integrating science methods, such as observation. You can actually teach multiple Montessori color lessons using just the basic nature journal materials, a guided outdoor activity, and engaging your students’ imaginations.

Understanding the Importance of Color in Art & Science

Color theory is a foundational area of visual arts studies. Understanding color and color theory is essential to developing art skills. All artists must learn how different colors complement each other; part of this means understanding the principles of the color wheel and creating mixtures of color values and intensities of different hues.

Beyond being an important part of art, color also plays a significant role in science! Did you know that Sir Isaac Newton not only discovered gravity, but he also observed how light bends as it passes through the prism—which was the first step in giving us what we now know as “ROY G BIV!” So, teaching kids about color is both artistically and scientifically important.

[For more details on creating an art journal and its benefits, read: Montessori Art in the Natural World: Kids Art Journaling, Part I]

Using Kids Nature Journals to Teach Montessori Color Lessons

Color theory lessons can be easily integrated into nature journaling. Nature journals offer kids the opportunity to investigate and observe color while recording their nature and outdoor observations.

When they’re completing their nature journals, have students describe the colors they observe with written words, and also by choosing specific color mediums (such as crayons, colored pencils, and/or paint) to represent the objects they see. For instance, they might doodle leaves, tree bark, ponds, or the atmosphere, and then assign these observation notes with descriptive color words.

Examples:

  • “The tree had small, bright green leaves growing.” 
  • “The bark on the tree had a cool feeling and looked dark brown.”
  • “A bird with reddish feathers flew by.”
Kids Nature Journal Color Lessons

Where to Start: Simple Nature Journal Color Prompts

It can be overwhelming to think about taking your class outside for an art lesson. Maybe the idea of rounding up your students and keeping them focused on lessons outside the classroom—when all they want to do is climb a tree or jump on fallen leaves—stresses you out. I get it and I’ve been there! Kids have minds of their own and once they’re outdoors, their playful instincts tend to take over. However, getting them to focus on Montessori color lessons can be done. 

Keeping young students’ attention comes down to giving them something specific to focus on while they’re outside. Color can be found in outdoor environments in all different shades, hues, and tones:

  • The colors of a rainbow (ROY G BIV)
  • The natural pigments found in flowers and minerals
  • The iridescent colors of a butterfly wing
  • The color differences in males and females of a species
  • The green tones in different types of tree leaves
Montessori Art in the Natural World: Kids Nature Journal Color Lessons

Color even plays a role in the survival of particular organisms in certain biomes! There are amazing teaching opportunities to point out how color is represented in the natural environment and different ecosystems. These kinds of observations can lead to fun and insightful scientific discussions in your classroom! Observing nature and recording natural color values are great ways to integrate science and art.  

Here are some color topics you can explore with your Montessori students:

  • Warm and cool colors
  • Colors in plants
  • Colors of wildflowers
  • Colors in different species
  • Colored chemicals
  • Wavelengths of light
  • Pigments in rocks and minerals
  • Color adaptation in different species
  • How chlorophyll makes plants appear green
  • What causes the sky to appear blue

[To learn more about how to get your students started with a kids nature journal, read: Montessori Art in the Natural World: How to Teach Nature Journaling, Nature Journaling Part II]

One Step Further: Download the Outdoor Journal Checklist

Using the prompts above will help give your students focus and purpose while they’re outdoors. While I focused on the importance of including color observations when students are recording in their nature journals, to make it a true scientific activity, students should include other datum and information as well.

Kids Nature Journal Color Lessons

This Outdoor Journal Checklist will help you guide your students and keep them on track to make sure they’re implementing both scientific and artistic principles during their expedition. You can print it out or save it on your phone so you have it with you the next time you lead your students outside to journal.

A Short Cut Just for You

I think nature journaling is the perfect way to introduce art to Montessori students, since it relies so heavily on natural and scientific observations. It opens to the door for so many more interesting art projects!

If you know that you want to bring art into your classroom but aren’t sure how to do it, check out my Theming Art & The Natural World

All rights reserved © 2024, Nature of Art®

No part of this blog may be used or be reproduced in any manner whatsoever including reproducing, publishing, performing, and making any adaptions of the work – including translation into another foreign language without written permission except in the case of brief quotations embodied in critical articles and reviews. Nature of Art® Publishing P.O. Box 443 Solana Beach, California 92075.

Montessori Art in the Natural World: Kids Art Journaling

Montessori Art in the Natural World: Kids Art Journaling

In honor of the 50th anniversary of Earth Day, I’m excited to kick off a three-month blog series: Montessori Art in the Natural World! This blog post is a part of a three-month series: Montessori Art in the Natural World. This series is about growing kids’ knowledge about the natural world by taking them outside their home or classroom and challenging them to create focused art, based on the nature around them. Every aspect of nature—seasons, layers of the earth’s soil, energy, rocks and minerals, fossils, landforms, water, flora, fauna, the atmosphere—can all be represented and expressed through art lessons.

Montessori Art in the Natural World: Kids Art Journaling

The first part of this series—Kids Art Journaling, Part I—starts with explaining how one of the best ways to observe and record nature is through kids art journaling. Art journals can promote scientific exploration, support writing, allow for freedom of expression through creative artistic techniques. They also help students understand the elements and principles of design and the artistic process.

So let’s start with the basics.

Montessori Kids Art Journaling

What is art journaling?

Art journaling is a way of recording observations, ideas, learned topics, emotions, and self expression through illustrations, doodles, painted images, and collages, using a variety of art mediums. These artistic works are created and arranged in an art journal—a binded book of blank pages; art journals can vary in size and are similar to a self-reflective written diary.

For educators, art journaling can be an extension to other lessons you present. It can give students the chance to reflect on other subjects through an artistic lens, which can help them gain a deeper understanding of what they’ve learned.

It’s most important to note that art journaling can be done in any fashion, there’s no right or wrong way to create an art journal. The owner of the art journal is the curator of its life.

“If kids reflect on their days, they will become better problem-solvers of life.”
― Trevor Carss, author

What do my students need to start art journaling?

You really don’t need much for kids art journaling. The basic materials are simple: kids just need a blank paper, pencil, and eraser to start. You can then transition them into using more colorful mediums, such as crayons and colored pencils, and eventually paint and collage materials. The idea is to mix up the mediums students have access to; offering different materials to create with helps their brains make new connections to the concepts and subjects they’re learning.

If you want more information about how to create an art journal, read this post: The Value of Art Journaling for Kids, Montessori Activities

Montessori Art in the Natural World

How are art journals used for Montessori nature activities?

Integrating the study of the natural world into art journaling can give children their own unique learning experience. Art journaling provides a dynamic spatial intellectual understanding that is wired by their sensory inputs through critical observations, notations, writing skills, and storytelling.

Montessori Art, Natural World: Kids Art Journaling, activities

Where to Start: Head Outdoors for Montessori Nature Activities

Bounded art journals are really exciting for kids! They love having a special place where they can keep all their artwork, thoughts, and observations! BUT, you don’t have to have or do anything fancy to start with—truly, the first step to nature art journaling is to go outside!

Set aside some time for your students to head outdoors and just observe the natural world around them. It can be a backyard, school yard, garden, local park, local trail, or even a city street, so long as there are aspects of nature for them to see. Going outside is even more essential these days, since kids spend so much time in front of screens. Spending just a few minutes outside each day is so important for helping children connect with nature!

how to teach montessori art activities

One Step Further: Watch My FREE Mini Course

So many teachers want to teach their Montessori students art, but they don’t know where to start. They’re not sure what their students are capable of, how to present lessons, or even what items to make available. That’s why I love art journaling—it makes art open-ended and easily accessible (to students and teachers). 

Teaching students art doesn’t need to be intimidating though. Understanding how students learn art makes it easier for you to teach them and help them develop their skills. If you would like to learn more how to nurture children in the visual arts, now’s your chance! Register for my FREE mini digital course, Phases of Art Development. You’ll learn how art making can help students develop their creativity, fine-motor skills, and focus. More importantly, I share what types of projects students at every age are capable of completing safely, and without making a mess.

Best of all—it’s free! To sign up for the course, click here.

A Short Cut Just for You

early childhoood montessori art

I’ve created a ton of resources on how to bring both nature and art into your classroom; if you’re unsure of where to start and want a guide to help you introduce art to your Montessori students, I’d recommend my books: Early Childhood Art: Visual Arts Teaching Guide and Introducing Visual Arts to the Montessori Classroom.

Together, they provide everything you need to know to be able to teach your own Montessori students about art. They’re filled with tips and tricks for setting up an art environment, using proper art materials and mediums, and planning age-level-appropriate art lessons.

how to teach kids montessori art lessons

I know the value of art in the Montessori classroom, especially when it embraces and celebrates nature!

Click here to get your copy of my Early Childhood Art guide!

And click here to get Introducing Visual Arts to The Montessori Classrooms as a digital copy or paperback.

All rights reserved © 2024, Nature of Art®

No part of this blog may be used or be reproduced in any manner whatsoever including reproducing, publishing, performing, and making any adaptions of the work – including translation into another foreign language without written permission except in the case of brief quotations embodied in critical articles and reviews. Nature of Art® Publishing P.O. Box 443 Solana Beach, California 92075.

The Ultimate Guide for Creating Montessori Art Lessons

Ultimate Montessori Art Lesson Guide, elementary schools

The Ultimate Montessori Art Lesson Guide is the perfect resource for Montessori teachers who want to learn how to prepare art lessons that keep students engaged and that follow art literacy standards.

If you are new to Montessori art—or even just art in general—it may feel overwhelming to try and teach a room full of students anything about art. I get that… but in many ways, art lesson planning is no different than any of your lesson plans for other Montessori subjects.

My objective in this ultimate guide is to clear the confusion on preparing effective art lesson plans, and save you time and stress from worrying about creating art lessons that don’t support independent creative art making or art literacy.

Ultimate Montessori Art Lesson Guide

The resources included in this Ultimate Guide offer insights for Montessori teachers of early childhood (3-6), lower elementary, upper elementary students, and even Montessori-at-home parents. I created this guide to give you tips and ideas for creating art lessons—that are exciting, engaging, and promote independent working—for your Montessori students.

What is a Montessori art lesson?

Before we even start with tips, I think it’s important to understand exactly what comprises and defines a Montessori art lesson. It’s a sequence of visual-arts related instructions that are broken down into steps; they should be done using the proper art mediums and tools in a way that highlights an artist technique and supports art literacy standards. Art lessons can (and should) also be integrated into Montessori core subjects.

The truth is, preparing a Montessori art lesson is more about organizing the steps to giving students exploratory experiences related to their current learning. If you’re planning these properly, you really don’t have to worry about figuring out new ideas to teach for every single lesson. 

Ultimate Montessori Art Lesson Guide, early childhood

By reviewing the Ultimate Montessori Art Lesson Guide, it will become easier for you to understand art lesson planning ideas, and ensure the right key features are included in the lessons you present to your students.

You’ll be surprised at how quickly you can implement these ideas in your classroom!

Where to Start: Read Through These Montessori Art Lesson Resources

There’s a treasure trove of Montessori and art-teaching resources on the internet, but going through each of them and finding ones that quality, and actually relative to your classroom, can be overwhelming, confusing, and even exhausted. The pages below offer actionable, practical information, based on the cumulation of all my years of experience as an art teacher and Montessori art teacher trainer. 

Ultimate Montessori Art Lesson Guide, resources

Though you can jump around between the different links, I recommend you read through these seven resources in the order they’re numbered. Once you feel like you have the basic concepts of creating art lessons, I’d encourage you to continue your Montessori art journey by learning more about my proprietary art teaching method, creative techniques for each visual art domain, and building a Montessori art curriculum for the school year. I have several Montessori art and visual art books, plus, teacher workshops and trainings to help you gain a deeper understanding and confidence in teaching art to your students!

Ultimate Montessori Art Lesson Guide

Ultimate Montessori Art Lesson Guide

1. 5 Ways to Integrate Art Activities into Montessori Great Lessons

When you combine the concepts of art and the Great Lessons, you can seamlessly support your students learning without any disconnection!

2. Building a Montessori Art Lesson Calendar to Keep Students Busy Every Month

If you take some time to plan out your calendar, presenting art lessons will be so much easier for you during the school year. The best part of all this? There’s a simple, stress-free way to break it down, this blog shares how.

3. 5 NEW Ways to Tackle Montessori Art Projects

This article is a little inspiration for tackling art lessons, activities, and projects. Because, sometimes, you need a different way of looking at things to come up with fun, creative art lessons for your students. 

4. Montessori Art Lesson Planning How-To

Without the proper art training, it’s difficult to know what a great art lesson should actually cover and include. This post sets the foundation to help you choose lessons, set up for activities, and create a schedule for the year.

5. Montessori Art Activities | Big Bang Art Lessons

There are so many different art activities you can present to your students that incorporate the lessons about the Big Bang. Combining art activities with science is the perfect way for students to explore their imaginations and support traditional learning methods.

6. Montessori Art Lesson Planning: My Beautiful (Disastrous) Trip to Bali

Teaching art in Bali was, hands down, the most beautiful art trip I’ve taken this year, but that doesn’t mean everything went exactly as planned. Hopefully you will read about my experience and understand a few ways to work through difficult lessons—and maybe even learn from my mistakes! 

7. Montessori Art Lesson Plan Cheat Sheet

One of the most important factors when it comes to lesson planning is staying organized. Download this FREE, handy, three-step cheat sheet and refer to it when you start planning your next art lesson.

Ultimate Montessori Art Lesson Guide, teachers
montessori art guide

One Step Further: Register for My FREE Online Mini-Course

I’ll be honest, creating a Montessori art lesson is one of the most challenging parts about teaching art to your students. However, challenging does not mean impossible!

If you can understand how young children learn art—because it’s often slightly different than with other subjects—creating lessons becomes infinitely easier! It’s the key to keeping your students interested in and excited about your demonstrations and keep the mess down to a minimum. And I’ve developed a FREE digital mini-course—the Phases of Art Development—to help you do just that!

It’s an online course that explains how art making helps kids develop their creativity, fine-motor skills, and focus. Not only will it help you teach your students, but I make it easier on you by giving you a type of Montessori art lesson guide with examples of projects your students will enjoy creating.

Best of all—it’s free! To sign up for the course, click here.

A Short Cut Just for You – Montessori Art Teaching Book

All rights reserved © 2024, Nature of Art®

No part of this blog may be used or be reproduced in any manner whatsoever including reproducing, publishing, performing, and making any adaptions of the work – including translation into another foreign language without written permission except in the case of brief quotations embodied in critical articles and reviews. Nature of Art® Publishing P.O. Box 443 Solana Beach, California 92075.

Montessori Professional Development: My Trip to Vietnam

Last month I flew to Vietnam for the very first time to lead early childhood and elementary teachers in a Montessori professional development workshop. It was such an incredible trip! From the beautiful sights, to the buzzing of holiday cheer in the city, to all the warm, welcoming people I met, I feel so blessed to have been given this opportunity to share my passion for the arts.

I worked and traveled for 16 intense days. My trip included stays and workshops in two of the biggest cities of the country—Ho Chi Minh City and Hanoi, with populations of nearly 9 million and 8 million, respectively. This was the first official certified Montessori art training to be held in Vietnam and everyone was so eager to learn everything I had to share. I conducted two five-day training sessions, plus two parent lectures; in total, I spoke to well over 400 attendees during the time I was there.

Throughout the course of my trip, I had many deep, beautiful conversations about culture and art, with several thought-provoking ideas exchanged between Montessori administrators, teachers, parents, and myself. I truly learned so much from their community!

The hospitality in Vietnam was amazing! The food was incredible and colorful. I had the chance to try so many fruits that I had never even heard of or tasted before! Of course I’ve had phở before, and I was looking forward to eating an authentic bowl while on my trip, but I also had so many other dishes I wasn’t expecting. I can’t wait to return and try the cuisine again!

Visiting Vietnam was an exhilarating experience that I’ll never forget. I got to spend Christmas in the country, and while I was sad to be spending the holiday away from my children, I was pleasantly surprised by how cheerful and festive everything was! The stores and downtown areas were decorated with lights, and I got to spend Christmas Eve singing carols in the city square with thousands of other people! On top of that, the country was preparing for the even larger holiday—Tết, or the Vietnamese New Year—which will be celebrated later this month. I loved hearing about their traditions and getting to experience something new. 

The Montessori Professional Development Workshops

My Montessori professional development workshop was sponsored by VietNam Montessori Centre (VMC). I was excited to celebrate with the two groups who completed the workshop, because they were the first Vietnamese teachers to become certified in my Nature of Art® visual art training!

I was inspired by how motivated and dedicated the teachers were to learn the missing component to the way they taught Montessori principles. During our sessions, they really opened up and expressed how art education has always been something they wanted to bring to their own children and students, but were unable to because they had never had a proper introduction to the subject. What I learned was that most of the country has been in such a “survival” mode; they’ve focused on more compulsory and disciplined subjects, and have never been taught or encouraged to embrace art.

The teachers really enjoyed the free-flow techniques of process-based, learning about art literacy and artistic techniques, and creating their own art works during the intense (but fun) training sessions. 

The main focus of the Montessori professional development training was to educate teachers on four main points:

  1. The importance of art literacy
  2. How to create dynamic art programing for children at different skill levels and capabilities
  3. The framework for understanding the artistic process
  4. The elements needed for teachers to write their own art curriculum and create art programming for their classrooms

The overarching theme of the weeks I was in Vietnam was teaching how different societies, cultures, and ideologies can interfere with raising creative, independent-thinking children. This training was a huge success with the hundreds of attendees sharing revelations and heartfelt testimonials. Many teachers had never worked with fine-art mediums before and were very excited to see how fun and relaxing art making could be. This gave them the enthusiasm to get their art programing into place.

I am very excited to be working with many of these teachers in the future and developing even more trainings in the region.

One Step Further: Bring Montessori Art Programming Into Your Classroom!

If you are interested in bringing this type of Montessori programming to your training center, school, or classroom, you’re in the right place. I want to help you make 2020 your most organized school year, while giving you the confidence to introduce art lessons and Montessori art activities to your students. 

Imagine finishing off the school year feeling full of clarity, direction, and confidence. Imagine not needing to worry about looking up art activities or wasting time crafting lessons that flop or lead to huge messes. Sounds great, right!?

You just need a simple roadmap and resources to design your own art programing the right way. I’d love to start you off with a FREE online mini-course, Phases of Art Development. It’s a quick, stress-free way to set a foundation for understanding how young children learn art. I also share a few Montessori art lessons and activities you can teach your students.

A Shortcut Just for You, Order Book!

Montessori Early Childhood Art Guide

The only way to get a full picture of how to really help your young students learn art, is through my new book, Early Childhood Art: Visual Arts Teaching Guide. It compiles all my experience in teaching young students art in a way that lays the groundwork for you to be able to teach your own Montessori students everything they need to know about art. I also provide tips and tricks for setting up an art environment, using proper art materials and mediums, and planning level-appropriate art lessons.

If know the value of art in the Montessori classroom, especially for young students, and you want to be able to introduce art to your early childhood students, then this book is for you! Click here to get your copy of my Early Childhood Art guide!

All rights reserved © 2019, Nature of Art®

No part of this blog may be used or reproduced in any manner whatsoever without written permission except in the case of brief quotations embodied in critical articles and reviews.

Ultimate Montessori Art Collaging Guide

Ultimate Montessori Art Collaging Guide

How to Create Montessori Art Collaging Lessons

Collaging is the process of selecting, assembling, and pasting materials down into a unique arrangement. It’s a way for artists to take many different ideas and art mediums and put them together into a beautiful work of art. It’s a great way for students to express their creativity too, which is why I think Montessori art collaging lessons should be taught in the classroom. 

The word collage actually derives from “la colle,” which means glue in French. The art of collage making goes all the way back to the 1800s; even famous artists like Pablo Picassco and Georges Braque incorporated it into their works. Today’s collage artists astound us with treasures like antiques, special handcrafted papers, and upcycled toys; it’s an art form that’s transformed into the most unimaginable spectacular of materials. 

Ultimate Montessori Art Collaging Guide, kids activities

Collaging can honestly be done with any type of material, from paper, natural elements, and fabrics, to recycled objects, like buttons, tiny beads, sequins, and other kinds of man-made embellishments. Even textured materials like foil, glass, wire, and burlap can be used. There’s really nothing that can’t be collaged!

Artists of the past and present have cleverly designed so many interesting collages using some of the most unusual materials and textures, so there’s no shortage of inspiration when it comes to this art form. It’s an ideal craft to introduce children to because collages are intuitive arrangements; they’re the perfect artful playground for kids to craft in.

I’m excited to write this blog because I know the importance of children working independently, building their fine-motor skills, and strengthening the small muscles in their hands, but I’m even more excited to give students a crafting experience that gives them the freedom to experiment, assemble objects, and design interesting textured artworks, with almost no effort or stress. Collaging gives children the opportunity to be creative, independent, and original.

Benefits of Teaching Art Collaging to Montessori Students

Collage crafting can lead your students into creating more complex crafts and projects that require developed coordination. Four of the direct benefits of collaging are:

  1. Learning to cut with scissors, which builds finger and hand strength
  2. Building implied memory with the repeated movements of gluing the elements
  3. Introducing the Elements and Principles of Design, including line, shape, form, texture, color, and symmetrical balance ideas
  4. Conjuring up creative thoughts, ideas, and arrangements

Teaching children how to choose pieces of material to arrange into composition whether through a planned idea or simply through process-based learning is exciting for children. When they discover the power of glue—and all its possibilities—their imaginations and creations become endless.

Montessori Art Collaging ideas for kids art projects

Gluing and pasting are essential art practices that leads to more advanced craft skills. Crafting is a visual art domain that develops three-dimensional spatial awareness. By experimenting with arranging materials into multiple layouts (using different shapes, sizes, proportions, colors, values, textures, etc.) students learn the Elements and Principles of Design concepts. They can play with symmetrical balance, patterns, and create abstract designs or realistic imagery—collaging has no rules! Children can be as playful and experimental as they choose.

Ultimate Montessori Art Collaging Guide, activites children

Collaging is Sensorial & Tactile

Collaging is highly sensorial because it involves touching and feeling the textures of materials being used to create. It’s a wonderful way for children to experience crafts; the different textures of materials can be both exciting and calming. Plus, when kids work directly with their hands, it can have a calming effect, since they become focused on the feeling and application of each piece their working on. In fact, in many cases, children will select items solely based on the satisfaction of the tactile feeling rather than the visual aesthetics. This is why I consider collaging a very intuitive craft.

The other reason collaging is sensory focused is because it gives students the freedom to use their tactile sense (feeling) to select by their own art pieces. Children love having the choice of selecting their own mediums. Putting collaging objects in different baskets and containers keeps things organized while allowing children the enjoyment of feeling and selecting the items they want to use. If you are a fan of the idea of loose items arranged in the classroom, then you can use this concept to set-up an art collaging invitation for your Montessori students. 

Ultimate Montessori Art Collaging Guide

Where to Start: Simple Montessori Art Collaging Projects First

I know Montessori classrooms introduce a gluing station as a practical life activity. But, collaging is so much more than just practicing glue motions. It’s an art Montessori students at every level will love to explore.

I recommend starting simple, using just one material with the goal of practicing the idea of gluing and pasting down. Start with a small, firm cardboard around 5” x 5”, and small pieces of paper with sides ranging from .5” to 1”; these sizes are easy to work with and paste for little hands. I also recommend starting with thin paper that’s easy to cut or tear, like tissue paper or magazine pages. The idea is to keep it lightweight so it’s easy to glue, cut, and arrange. You can have students paste the papers as they are or allow them to cut the papers into other shapes using scissors. 

When students first practice collaging, they shouldn’t focus on creating anything realistic; don’t have them try to copy a template or prompt, instead, let them work free form. Let kids feel and be intuitive in what they decide to arrange. Just make sure you walk through the process and have finished examples for them to see so they can understand the goal of activity. 

Work process-based first—especially with early childhood and lower elementary students—then move into themed ideas with specific examples once they have the chance to explore and experiment. You can provide inspiration and examples, but leave the layout and composition arrangement up to the student.

kids collage ideas and materials to use

Montessori Art Collaging Tips

Best Adhesive

There really is no right way to collage; it’s all up to the artist. Introduce multiple gluing methods—glue sticks, craft glue with a popsicle stick, decoupage, etc.—and allow students to use whatever they gravitate to and feel more comfortable working with. 

Keeping Parts and Pieces Organized

As a collage artist myself and working with a number of professional collage artists, I’ve learned the importance of keeping materials organized and easily accessible. It prevents the creative process from being interrupted and minimizes messes and clean up. I’ve seen Montessori gluing boxes on the market, and while they can keep materials tidy, they are not necessary; instead, use baskets, trays, caddies, drawer organizers, or small boxes to organize and display collaging materials, including scissors and glue.

For the most part, I don’t recommend children work inside trays. If you’re worried about glue messes, use newspaper or a plastic tarp to cover the table surface. You can even keep wipes and sponges nearby to help keep students’ hands clean from glue. However, kids love sticky hands—it’s all part of the tactile experience. I remember loving to play with the glue on my hands myself as young artist!

Interesting Collaging Materials

While you should start with very simple materials at first, slowly graduate your students to more interesting and diverse collaging items. Such as:

  • Bottle caps
  • Bubble wrap
  • Cardboard strips
  • Corrugated paper
  • Cotton balls
  • Crepe paper
  • Fabric
  • Feathers
  • Foil
  • Gift wrap
  • Magazines
  • Paper
  • Small emebishhemnts (sequins, string, buttons, seeds, etc)
  • Stickers
  • Tissue

One Step Further: Sign Up for My FREE Online Mini-Course

Collaging is just one example of an art activity Montessori students will love, but there’s an infinite amount of art projects they can create! If you want to give them limitless options, you have to first understand what they’re capable of learning. I’ve developed a FREE online mini-course to teach you exactly how children learn art—based on their plane of development. That way you can present and demonstrate really fun art projects to them without you stressing or them getting bored or making a mess!

Sign-up to receive video course & Montessori art teaching e-newsletter.

The Phases of Art Development is a quick digital course that explains how art making can help students develop their creativity, fine-motor skills, and focus. More importantly, I share what types of projects students at every age are capable of completing safely, and without making a mess.

Best of all—it’s free! To sign up for the course, click here.

All rights reserved © 2024, Nature of Art®

No part of this blog may be used or be reproduced in any manner whatsoever including reproducing, publishing, performing, and making any adaptions of the work – including translation into another foreign language without written permission except in the case of brief quotations embodied in critical articles and reviews. Nature of Art® Publishing P.O. Box 443 Solana Beach, California 92075.

Ultimate Montessori Scissor Cutting Lesson Guide

Ultimate Montessori Scissor Cutting Lesson Guide

How to Teach Important Scissor Development Skills

As adults, using scissors is something we take for granted. Whether it’s clipping coupons or slicing through wrapping paper, using scissors is often a part of our day-to-day activities. However, we forget that we had to actually learn how to use scissors at some point—and there is a surprising number of young students these days who can’t properly use scissors! And if they don’t know how to use scissors, there are many other things in the classroom they’ll be unable to do. That’s it’s so essential to spend some time to present a specific Montessori scissor cutting lesson to your students.

Learning to use scissors at a young age provides so many benefits! When students are able to develop their scissor-using skills, they’re able to do so many artful and creative things, such as cutting paper, following patterns, cutting strings and yarn, and cutting fabric.

Ultimate Montessori Scissor Cutting Lesson Guide, how to teach

Benefits of Scissor Cutting for Young Students

The constant dynamic motion that comes from using scissors helps young students develop spatial intelligence and fine-motor movements that relate to other important tasks inside the Montessori classroom. Introducing scissor skills to children—even as young as two or three years—can help them move through critical milestones directly related to other areas of childhood development. Cutting activities build muscle control, develop eye and hand coordination, and deepen their tactile spatial awareness. 

Ultimate Montessori Scissor Cutting Lesson Guide, art activities

A few years ago, I started to notice more and more teachers were sharing their frustrations about how the majority of young students coming through their classrooms were lacking in fine motor skills; they were too weak to apply pressure while writing or coloring and lacked the coordination to write their ABCs, tie their own shoes, or zip up their own jackets. Now, I’ve worked with thousands of students over the years, and I’ve also observed that students are lacking the developmental skills that would allow them to craft and create art. 

Both of my own two children had the freedom to use safety scissors at very young ages. And, as a result, they both learned how to tie their shoes, feed themselves, write, and even craft, at a very early age. Truth is, kids love using scissors! 

There’s a ton of research linking handwriting success to muscle coordination developed by scissor movements, and practical life skills like eating, dressing, and holding and carrying small objects. But most importantly, teachers agree when children have had the chance to develop these muscles and skills, teaching them writing becomes easier. A child that has scissor practice will be able to excel in complex steps to create and work independently. 

Ultimate Montessori Scissor Cutting Lesson Guide, art teacher spramani elaun

In one of my early years, I was working with a five-year-old boy in an art therapy session. I recall him eagerly asking to use scissors while we crafted. He was very awkward at first, but with some coaching he quickly got the hang of it. He spent an hour cutting soft yarn into tiny pieces over and over, until it became easy to grab the scissors, get them into position, and make the opening and closing motion of cutting. Within that hour, he strengthened the mobility with his thumb, hand, and wrist.

Ultimate Montessori Scissor Cutting Lesson Guide

The minute his mom returned to my art studio to pick him up, she ran toward him screaming, “You’re going to hurt yourself! Give me those!” It clicked. I realized that he was a late bloomer when it came to using scissors—a simple, practical life task—because his mom had it in her mind that he would end up running with scissors and hurting himself. She was shocked when she saw him using them safely to cut yarn. And not only that, but he was having a pretty good time doing it! She promised to buy scissors for home.

Ultimate Montessori Scissor Cutting Lesson Guide

Where to Start: Tips for Presenting a Montessori Scissor Cutting Lesson

In my experience, giving a child a Montessori scissor cutting lesson at age five is a little too late.

If a child can sit and focus for 15 minutes at a time (between the ages of 3 and 5), they can start practicing their scissor cutting. When I meet young students who cannot sit through my scissor demonstration or follow my basic movements, then I know they are too young and need more time before they’re able to safely and properly use scissors on their own. But if students can focus on the actions of a presentation and watch the outcome, then they can start practicing—with supervision, of course!

Don’t hand your students scissors and walk away expecting them to create, give them time to practice cutting motions. You can introduce students to using scissors through either copy-mode or process-based activities. Here are a few tips for bringing scissors safely into your classroom.

Ultimate Montessori Scissor Cutting Lesson Guide
  1. Don’t jump into challenging cutting projects until students have had practice with scissors first. So many teachers make the mistake of trying to present a multi-step lesson that includes using scissors, even though their students aren’t able to use them yet. It just leads to frustration! So, practice a simple, process-based Montessori scissor cutting lesson first, before you approach any copy-mode craft or activity.
  2. Begin by showing students the simple motion of using scissors. Have them start by holding the scissors, and opening and closing the arms using just their one hand (keeping their other hand safely away from the blades). Then you can progress to showing them how the blade can be angled to create a sharper cut.
  3. Think about the process rather than focusing on a project. Give them papers to cut, simply to practice the action of cutting. Don’t worry about how their project turns out; it’s all about the process and practice.
  4. Be patient. You have to understand, your students’ little brains and hands are wiring together and getting things to work together smoothly will take some time. Keep allowing them time to practice until you see they are able to cut without struggling.
  5. Plan activities based on your students’ capabilities. For example, early childhood students (aged 3 to 6) can do simpler cutting activities, like following simple lines and shapes. Lower elementary students should be able to begin collaging and upper elementary students will be able to cut out more intricate designs.

One Step Further: Sign Up for My FREE Digital Mini-Course

Knowing that your students are capable of safely using scissors opens up so many doors for all the amazing art projects and activities you’ll be able to do in your classroom! In order to keep them interested in the lessons you’re presenting—and able to handle and understand whatever it is you’re teaching—you have to first be able to know exactly how they learn art. I’ve developed a FREE online mini-course to help you do just that!

Sign-up to receive video course & Montessori art teaching e-newsletter.

The Phases of Art Development is a quick digital course that explains how art making can help students develop their creativity, fine-motor skills, and focus. More importantly, I share what types of projects students at every age are capable of completing safely, and without making a mess.

Best of all—it’s free! To sign up for the course, click here.

Montessori Art Lesson Planning: My Beautiful (Disastrous) Trip to Bali

Late last month, I loaded onto a plane from LAX, and more than 24 hours later, I arrived in beautiful Ubud, Bali to host an art studio at the 2019 Family Adventure Summit. I was so excited to study art in this foreign culture and help some of the 400+ attendees create beautiful artworks. Teaching art in Bali was, hands down, the most beautiful art trip I’ve taken this year, but that doesn’t mean everything went exactly as planned. In fact, the whole art studio experience could have been a complete disaster if I hadn’t thought on my feet and set some time aside before take off for some serious Montessori art lesson planning. Here’s how my trip went and how you can learn from my mistakes.

Montessori Art Lesson Planning: My Beautiful (Disastrous) Trip to Bali

Our accommodations were the most luxurious museum-hotel hybrid where the check-in desk was outside. The grounds and gardens were all designed as outdoor art, with stairs, statues, water features, and plants planned out to provide a balance between man and environment. I was truly stunned at what a beautiful (albeit humid) paradise it was!

Montessori Art Lesson Planning: My Beautiful (Disastrous) Trip to Bali, art teacher spramani

The first few days I got to explore found a traditional Batik class taught by a local artist. I have to say, this class was one of the highlights of my trip! Seeing and experiencing different painting methods and tools is one of my travel passions. I’m always on the hunt to bring back methods to my young and adult art students, and Bali is an artist’s paradise!

Montessori Art Lesson Planning: My Beautiful (Disastrous) Trip to Bali, teaching art teacher spramani

I also learned how friendly the Balinese people are and how wonderful their culture is. Every day, I got to experience the daily Canang sari offerings, which are prayers of peace, for balance and gratitude to different gods of Balinese Hinduism. The frangipani flowers were also everywhere, and the petals falling from the trees wherever I walked was a reminder of nature’s beauty. And the Southeast Asian sunsets could have inspired a million paintings!

Montessori Art Lesson Planning: My Beautiful (Disastrous) Trip to Bali, spramani elaun

While teaching on this trip, I, of course, had the opportunity to teach my young students new and different art techniques. Before my trip I did some investigating and found out that Ubud had a huge tourist attraction—a natural habitat that was home to more than 1000 rescued monkeys! I decided to work this into my Montessori art lesson planning, and created a clay activity where they would sculpt a monkey, that they could then take home with them as a souvenir.

Montessori Art Lesson Planning: My Beautiful (Disastrous) Trip to Bali, spramani

I traveled with white air-dry clay that usually takes about 24 hours to harden; I planned two days for the activity—that should have given my students enough time to sculpt their little monkey, allow it to harden, and then paint it. I’ve taught projects like this hundreds of times and nothing has ever gone wrong…except this time!

Montessori Art Lesson Planning: My Beautiful (Disastrous) Trip to Bali, art instructor spramani elaun

The day of my clay workshop I showed my students basic clay forming methods, and gave each of them a portion of clay so they could begin working on their monkeys. About five minutes into the lesson, I realized that everyone’s clay was drying out fast and was quickly becoming unworkable. Hands started popping up for my help, and I realized the humidity was so high that it was drying the clay out instantly. I started to panic while helping everyone, plus I was sweating and super hot—I wasn’t used to that kind of humidity myself!

Montessori Art Lesson Planning: My Beautiful (Disastrous) Trip to Bali, art teacher spramani elaun

After 20 minutes of trying to remedy the situation, I decided to collect all 30 monkeys (or attempts at monkeys) that all looked the same, and placed them in plastic bins. I tried to label each project to remember whose was whose, and told the students we would finish the monkeys the next day.

After all the kids left for the day I had the brilliant idea of spraying their monkeys with water to try and rehydrate the clay, which is a sculpture trick that has usually worked a thousand times before…but again, not this time!

The next day after everyone took their seats, eager to work on their cute little monkeys, and as I passed them out to smiling faces I started hearing the kids say, “gooey” and “gross.” The water I sprayed the night before turned the clay into a gooey dough that stuck to everyone’s hands. I had ruined everyone’s projects! Some kids started crying because out of the 30 monkeys, only four survived, allowing their child to finish with their creation. I had 26 upset kids trying to scrape gooey clay off their hands and all running towards the bathroom; it was total chaos!

Montessori Art Lesson Planning: My Beautiful (Disastrous) Trip to Bali

Why I’m sharing my art disaster? 

I want you to know how to work through difficult lessons. Honestly art making is trial and error; it’s 90 percent mistakes. Artists are rarely satisfied with their work, and as an artist and art teacher, I can truly say that art making is all about experimenting. Art making builds resilience! 

That’s why I always teach that the process is what’s important, not the product or outcome. I think teaching in the heat to loud kids outdoors, plus hours and hours of traveling got the best of me and I forgot my own golden rule!

Montessori Art Lesson Planning: My Beautiful (Disastrous) Trip to Bali, spramani

I was able to avoid complete disaster by gathering the kids and fessing up to my mistake. I explained how art making is trial and error, and mistakes happen frequently for artists. I invited everyone to watch me try to sculpt a monkey step-by-step so they could see me struggle on my own through the process right in front of them. I changed my technique a few times and reminded them that there’s more than one way to do things. In the end, I created something that kind of looked like a monkey, everyone calmed down. They were inspired to go back to their gooey clay and get back to work—they even shared bits of workable clay with each other and some kids started creating other things, like bananas and trees.

Montessori Art Lesson Planning: My Beautiful (Disastrous) Trip to Bali, teaching clay modeling

Where to Start: Focus on Isolated Skills

So, where did I go wrong in all of this? First off, I gave my students perfect images of monkeys as inspiration for their work. This means I built up an expectation that they themselves would be creating and taking home an artwork representation of a perfect monkey. I should have encouraged the group to explore with the clay and brainstorm their own ideas of what a monkey looks like. Then we could have looked at the art experience as practice and a way to learn basic art skills. 

Art lessons should focus on a series of isolated skills—if they result in beautiful monkeys, then that’s just a bonus! When you teach children art lessons, you need to put emphasis on the process: brainstorming, innovating, creating, and problem solving. Try to stay away from giving kids the perfect image in their head and try to focus on isolated building skills and have them reflect on the experience.


One Step Further: Download My Montessori Art Lesson Planning Guide

The only way I was able to recover those art lessons gone wrong, was because I had a solid foundation for art lesson planning. It’s taken me years to perfect it—and clearly, not everything goes “perfect”—and I’ve gotten it down to a simple three-step process. This Montessori art lesson planning guide will help you too, to easily create art experiences for your students. Download it, keep it in your desk or folder, and refer to it whenever you’re mapping out your curriculum or planning your next art activities. (Just remember, even with the best laid plans, sometimes you have to breathe and just go with the flow!)

Montessori Art Lesson Planning: My Beautiful (Disastrous) Trip to Bali

Click here to download the guide.

Montessori early childhood

Early Childhood Art Guide

Visual Arts Teaching Guide
for 13 Months – 6 Years Old

This book includes:
✅ My proprietary art teaching method
✅ The proper and complete list of art materials
✅ A guide for staging and setting up a successful art environment
✅ Tips and art lesson ideas for early childhood
✅ A convenient three-ring binder presentation

Buy Guide Now!


All rights reserved © 2024, Nature of Art®

No part of this blog may be used or be reproduced in any manner whatsoever including reproducing, publishing, performing, and making any adaptions of the work – including translation into another foreign language without written permission except in the case of brief quotations embodied in critical articles and reviews. Nature of Art® Publishing P.O. Box 443 Solana Beach, California 92075.

Montessori Art Direct and Indirect Aims

If you don’t come from an art background or haven’t had any art training, then introducing art lessons to your students might feel like unfamiliar territory. What makes it worse, is that there are no real guidelines or proper art literacy standards available in traditional Montessori training. I know how frustrating it can be to take something so foreign and bring it into your classroom with confidence. The secret is using Montessori concepts to merge the two together. Here’s how to create your own, effective Montessori art direct and indirect aims.

I’ve worked with Montessori teachers and in Montessori classrooms all over the world, and I also have a background in all types of visual art. It took years of observation and teaching art directly to students, but I’ve figured out a way for you—even if you have no art experience—to support art literacy in your Montessori classroom. 

Montessori Art Direct and Indirect Aims, art lessons

I’m sure you know how important it is to support students in their own self discovery using their hands and senses within the classroom environment. This exploration process is similar to how artists discover and create with their own hands too. Our hands are the neural connection that feeds our brain information; they’re also the way we develop and hone our fine-motor skills

So, as a Montessori teacher, how can you support students in the artistic process and inspire them to think creatively? Start with understanding how direct and indirect aims relate to artistic development and progression.

For an artist to create, they must move through the artistic process, which is the four actions an artist experiences while creating and producing artworks. It starts with self discovery through their hands, then designing with their imaginations, then constructing with materials, and finally, reflecting about their process through expression by using art language, creative writing, or community sharing.

Where to Start: Using Montessori Art Direct and Indirect Aims

So let’s compare these actions to Montessori’s method of direct and indirect aims to teaching as a guide.

Art Lesson: Direct Aims

In an artistic environment, your Montessori art direct aim can be to prepare the work space, explore different artist materials, and manage time for art creation—while following art standards. You can also demonstrate and isolate techniques that promote independent exploration, engagement, and how to work in a respectful, artful way within the classroom.

The Artistic Process: Indirect Aims

Indirect aims are accomplished by stepping back and allowing the artistic process’s four actions to unfold. Self discovery by sensory tactile spatial exploration with the eyes, hands and mind; improvisation and creative selection of the elements and principles of design; the hands-on construction of ideas; and finally, the opportunity to reflect on the process verbally or through writing. Indirect aims unfold during the artistic process. Creativity is the result of the process.

POSTED ONEDIT”MAKING ART STIMULATES KIDS’ BRAIN DEVELOPMENT”

Making Art Stimulates Kids’ Brain Development

I talk to so many adults and teachers who think art is just a frivolous subject, an activity to give kids to do to keep them quiet for an hour or so. Some might even know the value of art in that it encourages kids to think creatively and and work through complex emotions. Art benefits both their mental health and their fine motor skills too, but did you know art making stimulates kids’ brain development!? It goes beyond creative expression (although that’s important too) and actually has lasting positive effects on kids’ brains!

You may think that the art projects and lessons you’ve been doing in your Montessori classroom is just busy work—filling time and keeping kids busy, but there is a lot of behind-the-scenes action going on during each art activity that fuels students’ brain development. We know that when a child touches an object, information is sent through their sensory nerves to their brains.  Visual art learning often happens through direct sensory interactions which stimulates learning in different ways than visual and audio learning. 

These sensory experiences can help young students learn more, better understand different ideas and concepts, and art making stimulates kids’ brain development. Here are a few areas where art directly benefits kids’ brain development.

Gross Fine-Motor Skills

Visual arts provides kids with the opportunity to use their hands on a regular basis—holding pencils, pinching and sculpting clay, cutting with scissors, and making fluid brushstrokes all help kids build their hand muscles and strengthen their hand-eye coordination as well as fine motor movements

Connection to Vocabulary and Communication

Visual arts help kids make connections across different subjects and ideas to be able to better understand things. So when kids explore different art activities, they’re actually learning how to communicate what they see in their artworks and how to describe the artistic process they use to create. In doing this, they unknowingly start making observations such as, “I see color,” “I see pink,” “I see a squiggly line,” “I see zigzags.” When they communicate those observations to you or each other, they begin to develop their art language and a greater vocabulary, which is a part of cognitive processing.

Stress Regulation

Creating art also helps children wire their brains to regulate stress. Art gives them the tools to learn how to calm themselves down. Tactile cognitive processing occurs when children create art; the neural networks in their brains fire up and signal their brain to focus solely on what they’re doing with their hands, blocking out outside thoughts and stimuli. What happens is, if kids are stressed out or upset about something and they’re making art, they can’t focus on that. Art involves active learning, meaning they have to focus on what they’re doing immediately, which takes away the upsetting, stressful things that are happening in their environment.

Implicit Memory

Another area of brain development art fuels is Implicit memory. When kids learn repeated movements, they’re strengthening their Implicit memory and are actually storing this new information. The next time that they go about making an art, their Implicit memory kicks in and their hand movements will come naturally—the actions are wired into their memories. That means they don’t have to consciously think about every minute action; they will see a paintbrush, and instinctively know to pick it up, dip it into the palette or water, and start creating. The sensory information of seeing the paintbrush and then holding it in their hand immediately sends that information to their brain, triggering an action. Building this Implicit memory helps develop more skills down the road; they’ll have this Implicit memory already stored in their brains and can then focus on the next steps or deeper ideas.

Spatial Intelligence

Spatial intelligence is learned through creating with forms in space. When children make art, they become aware of the spatial relationships among objects in the realm of their own experiences. This gives them the ability to visualize and manipulate elements, rotate objects, and distinguish depth and balance—which is critical in early childhood brain development. It’s important to note that spatial intelligence is something that cannot be taught unless kids are actually doing an activity; art gives them the experience of seeing how things interact and happen dynamically or statically. 

Where to Start: Lesson Plans to Ensure Art Stimulates Kids’ Brain Development

Here’s some great news: students will automatically start getting all these benefits any time they create art! That means you don’t have to have any fancy art mediums or materials or complicated lesson plans. You can do simple activities to make sure art stimulates kids’ brain development. The more art lessons and activities you plan for your Montessori students, the more they’ll deepen their neural networks and build on all these developmental skills. Any art lesson, especially those that involve process-based or exploratory learning, will benefit kids’ brain development. 

One Step Further: Watch My Training, ‘How-to Teach Art Montessori Art Lessons Using Storybooks

I’ve worked with so many Montessori teachers from all over the world and they’ve all told me how intimidating it is to actually teach art in their classrooms. I want art to be accessible to every child, from early elementary on up—and to do that, I know that actually teaching art needs to be easy. 

One way I love to introduce teachers to the idea of how to teach art is by showing you how to work with tools you already have—like storybooks! I created a virtual training that teaches you how to teach art by using storybooks to create art lesson themes. And as a bonus, I share some quick-planning ideas to help you regularly and easily schedule art activities in your Montessori classroom. 

To get access to this incredible training (for free!), click here!

All rights reserved © 2024, Nature of Art®

No part of this blog may be used or be reproduced in any manner whatsoever including reproducing, publishing, performing, and making any adaptions of the work – including translation into another foreign language without written permission except in the case of brief quotations embodied in critical articles and reviews. Nature of Art® Publishing P.O. Box 443 Solana Beach, California 92075.

Montessori Curriculum | Art Planning Tips

The start of a new school year is the time to get organized for the next nine months (or so) ahead. Of course, you know the general subjects and lesson themes you’re going to teach, but doing your Montessori curriculum planning for the entire school year, or even the next month, can seem overwhelming.

In all honesty, coming up with art lessons for Montessori students just takes a bit of preparation and basic knowledge of what your students are capable of learning and understanding.

I’ve worked with Montessori teachers from all over the world. I know that far too often, art curriculum can take a back seat to other presentations like science, practical life, or language arts. However, it’s SO important for children to be introduced to visual art! You don’t have to deviate far from the Great Lessons to teach it either, in fact, I recommend using a Great Lesson theme as art idea inspiration when you’re creating your Montessori curriculum.

Let’s back up a second, though. I know it can be challenging—stressful even—to try and come up with Montessori art lessons when you have no art experience. Look, I’m a professional artist, I’ve done it! However, truth be told, I rarely get to show off the complete extent of my skills to elementary students, because they’re too young for this type of instruction and aren’t developmentally ready for these types of lessons.

It’s been the norm to think we need to be teaching children the classical Masters along with the elements and principles of design—but that’s not the case! Students struggle to learn those high-level, in-depth concepts because they need a foundation of simple art curriculum first. The truth is you CAN present great art lessons without being an artist!

Montessori color mixing curriculum for first and second plane

Montessori Curriculum – Art Planning

Isn’t that great news!? You don’t have to be an artist to teach your Montessori children art literacy and concepts. (But I do have an online course, Art Teaching Blueprint, that does train you in how to teach art if you’re interested.) As an adult you have enough experience and knowledge to teach a basic one- to two-step Montessori art lesson sequence and activity.

But I know without the proper art training it’s hard to know what a quality art program should actually cover. Or how to go about choosing art lessons, setting up for activities, and creating a schedule for the year. I get it! Let me fast track you with some tips on creating Montessori art lessons. 

how to create Montessori curriculum for art

What you decide to present for your art lessons is entirely up to you. I always suggest trying to integrate art lessons with other lessons you’re already presenting. You might also want to think about cultural special events or the Great Lessons as you map out your Montessori art curriculum lesson plans. For instance, U.S. Earth Day is in April, so your lessons that month can focus on nature and the earth.

Download 3 Step Montessori Art Lesson Planning How-To Guide

Montessori free art lesson guide to building art curriculum

One of the most important factors when it comes to Montessori curriculum planning is staying organized. When I’m training Montessori teachers how to bring art into their classroom and create an art lesson plan, I try to keep it simple by breaking it down into three easy steps. 

Basically, you can make art lesson presentations much easier on yourself by:

  • Planning and scheduling ahead of time
  • Keeping organized
  • Ordering materials ahead of time
  • Integrating important Montessori subjects (to keep you from struggling on what to teach about)
  • Giving children their own unique way to learn topics
  • Downloading my Montessori Art Lesson Plan Guide

Because I’ve been in your shoes and know exactly what it’s like to spend all your time searching for Montessori art lesson plans and ideas, I’m helping you out with this handy guide. Download it, keep it in your desk or folder, and refer to it whenever you’re mapping out your curriculum or planning your next art activities. Click here to download the guide.


two drawing curriculum covers, best curriculus for drawing and painting lessons for students 6 12 years of age

Best curriculums for drawing and painting grades 6 – 12 years

These curriculums meet and exceeds the national and international core arts standards for children. It teaches the Elements and Principles of Design and the artistic process through the Science Art Method™. These are sequential step-by-step, drawing lessons that are easy to follow in scope and sequence. So you can save time with prepared lessons that are ready to schedule weekly, biweekly, or monthly. This is the best Montessori art curriculum for early childhood/elementary grades. Children love these fun drawing lessons.

Yes this is a stand-alone curriculum.

Yes this shows you how to teach progressive art skill sets

LEARN MORE:

Drawing Curriculum – ORDER HERE

Painting Curriculum – ORDER HERE

Color Theory Curriculum – ORDER HERE

Clay Modeling Curriculum – ORDER HERE

Publisher: Nature of Art®

All rights reserved © 2024, Nature of Art®

No part of this blog may be used or be reproduced in any manner whatsoever including reproducing, publishing, performing, and making any adaptions of the work – including translation into another foreign language without written permission except in the case of brief quotations embodied in critical articles and reviews. Nature of Art® Publishing P.O. Box 443 Solana Beach, California 92075.