Have you ever set up a clay activity and found yourself unsure of where to begin? Or perhaps you’ve struggled with determining the desired outcome of the project?
Allow me to share my experience and shed some light on the importance of early childhood clay play sessions.
In fact, I refer to this approach as “Clay Play.” Engaging in clay play offers numerous benefits for a child’s overall development.
When it comes to teaching children, this process-based exploratory approach should always come first! This type of play should happen before getting into foundational clay modeling skills.This this play should happen before getting into foundational clay modeling skills.
Playing with clay provides a highly tactile and sensory experience. As children squeeze, press, and manipulate the clay, they are actively engaging their senses. Sending valuable sensory information to their brain.
However, the benefits of clay play extend far beyond the realm of sensory development. In fact, there are numerous cognitive advantages associated with this activity. Montessori education highlights the importance of hands-on learning and developing real-world skills. Clay play aligns perfectly with Montessori philosophy.
Clay Play has been found to have positive effects on emotional well-being. Many studies and my first hand experiences have shown that playing with clay can help children regulate stress levels. In my early childhood art guide, I discuss this topic and provide more insights into Clay Play for emotional health.
I recommend incorporating clay play for young children in early childhood education. Montessori schools and daycare centers can introduce clay modeling stations into their classrooms to provide children with the opportunity to explore. Plus support creative and cognitive skills. To learn more about setting up clay modeling environments, please refer to this comprehensive guide Monessori Early Childhood Art Guide.
Clay comes in various forms, ranging from very messy to less messy Clay comes in various forms, ranging from very messy to less messy options. Additionally, clays can be homemade, which can be particularly useful for sensitive children. Earth clay, in particular, is a wonderful material to introduce to children, similst to making mud pies. If you’re interested in setting up earth pottery clay play stations, I recommend checking out this book, which contains numerous photos and examples illustrating how to arrange and select the most suitable clay play materials for exploring clay with toddlers and children aged 3-6 years old.
The important thing to understand about clay play is that it should be a process-based activity, providing children with ample time to freely play and explore clay. There are various ways to engage children in exploring clay, including the use of simple tools such as natural elements, beads, seeds, rolling pins, and cookie cutters. Emphasizing the play aspect of clay play is crucial, as it allows the child to take the lead in their learning and discoveries. By letting the child guide the fun, experiments, and creations, you can enhance their experience.
When are children ready for guided clay modeling lessons? Once children have had ample opportunities for clay play and have reached the age of 4 or 5, you can begin introducing clay modeling skill sets. This includes teaching them how to create forms, attach pieces, cut, and carve. If you would like to learn more about my clay curriculum designed for ages 3-6 and elementary grades, you can explore the Clay Modeling Curriculum HERE. Order Clay Play Tools HERE
Clay Play Classes in San Diego with Spramani Elaun – Nature of Art® School
No part of this blog may be used or be reproduced in any manner whatsoever including reproducing, publishing, performing, and making any adaptions of the work – including translation into another foreignlanguage without written permission except in the case of brief quotations embodied in critical articles and reviews. Nature of Art® Publishing P.O. Box 443 Solana Beach, California 92075.
I’m excited to share a little secret with you about having an engaging art lesson opener. However, at times, we tend to overlook its significance, and that’s something we need to change.
As educators, it’s imperative that our lesson openers not only pique interest but also align with our students’ existing knowledge. If the opener fails to captivate or doesn’t resonate with the students, its impact dwindles. My art method is firmly grounded in this principle; I love connecting art lessons with what my students are already familiar with or studying in the classroom! In some educational approaches, anticipatory sets are used in a similar manner.
So, what exactly are Anticipatory Sets?
In simple terms, anticipatory sets function like a warm-up or introduction to prepare you for something exciting. Just like stretching before exercising or watching a movie trailer before the main film, anticipatory sets serve to prime your mind, ignite curiosity, and generate excitement about what’s in store for your learning journey. In the realm of education, anticipatory sets are activities or prompts that teachers employ at the start of a lesson to activate your prior knowledge, stimulate curiosity, and get you enthusiastic about what you’re going to learn. It’s like setting the stage for a fantastic learning experience!
Sadly, in some lessons, anticipatory sets are absence, which can lead to boredom or disengagement among students. Anticipatory sets effectively convey what students will be learning that day, which can fuel their engagement. We need to infuse creativity and engagement into our openers. For instance, we can kick things off with a short video highlighting a artist, delve into an intriguing news article, or foster interactive discussions. Technology, such as an appealing slideshow, can peek interest!
Now, let’s delve into the process of creating engaging art starters (Anticipatory Sets). Before crafting one, it’s a fantastic idea to gauge your students’ existing knowledge. You can accomplish this by asking them questions or conducting surveys. Simply inquire about their familiarity and interests related to the topic.
Furthermore, strive to establish a connection between the opener and your students’ lives. What’s currently capturing their interest or fascination? You can unearth ideas by exploring online resources or staying updated with the latest news.
Here’s where the fun begins – let your creativity soar! Think outside the box and devise unique ways to present your opener. When developing it, consider drawing comparisons between the new material you’re introducing and concepts your students are already acquainted with. This helps them forge connections and deepen their comprehension.
Here are some fun easy to use an anticipatory set to introduce an art project:
Artifacts and Props: Begin by gathering intriguing artifacts or props relevant to the upcoming art project. For instance, if your project involves clay sculpting, display small clay sculptures or pottery pieces in the classroom.
Mystery Box: Introduce a mystery box adorned with colorful wrapping paper, placing it at the center of the classroom. Share with the students that it holds a special surprise connected to their art project.
Sensory Exploration: Launch the anticipatory set by allowing students to explore the displayed artifacts and props. Encourage them to touch, smell, observe, and interact with these objects. Pose open-ended questions like, “What do you notice about these sculptures? How do they feel? What do they remind you of?”
Predictions and Discussion: Following the sensory exploration, facilitate a class discussion where students can share their observations and make predictions regarding the art project based on the artifacts and props. Encourage them to employ their imaginations and make educated guesses about the upcoming activity.
Unveiling the Surprise: This is my favorite!, unveil the mystery box to reveal the materials or tools required for the art project. Explain the connection between the artifacts and props and the project, detailing how students will have the opportunity to create their own artworks inspired by these items.
By using an anticipatory set, you’ve sparked curiosity, engaged their senses, and generated excitement for the forthcoming art project. In my art teaching method, I use inspiration to set up an art shelf, creating the same type of student curiosity. If you want to learn more about this topic, order my books and curriculum HERE.
I hope these suggestions and tips will inspire you to approach openers with creativity!
And remember, integrating art lessons with other academic subjects can create a comprehensive learning experience.
No part of this blog may be used or be reproduced in any manner whatsoever including reproducing, publishing, performing, and making any adaptions of the work – including translation into another foreignlanguage without written permission except in the case of brief quotations embodied in critical articles and reviews. Nature of Art® Publishing P.O. Box 443 Solana Beach, California 92075.
As a Montessori teacher, you know it can be overwhelming to choose the best art activities for your students. That’s why I’m here with some guidance on which Montessori art activities for Big Bang lessons are most appropriate for your classroom.
Art activities related to the Big Bang are some of my favorites to teach. They allow children to explore their imaginations and get creative in a concrete, meaningful way. From drawing explosions to painting supernovas, students can visualize and understand such a big concept.
Integrating art with science helps kids express ideas creatively, stimulates their senses and provides tactile experiences. And when it comes to teaching the universe’s and the Big Bang, there is no shortage of art inspiration.
To get started, take a look at some of your books for visual inspiration. One of my favorites is “Born With a Bang: The Universe Tells Our Cosmic Story” by Jennifer Morgan. The illustrations are sure to inspire your students to create.
And for more ideas, download my top 5 Montessori Big Bang Art Activities. These activities can easily be adjusted to fit early childhood, lower elementary, or upper elementary classrooms. Click here to get started!
The Big Bang Theory is a fascinating science topic that Montessori teachers can incorporate into their art projects to make the learning experience interactive and fun. Below are ten art projects that Montessori teachers can use to teach elementary kids about the Big Bang Theory.
10 Fun Big Bang Art
1. Create a Cosmic Painting: Take your students on a journey through the universe with a cosmic painting activity. Discuss the Big Bang and the creation of the universe with your students, then have them create a painting depicting the birth of the universe.
2. Constellations: Give your students a chance to create their own constellations using paint or clay. Educate them on how the Big Bang gave birth to stars and how stars are the building blocks of constellations.
3. Paper Mache Planets: Introduce the concept of planets and solar systems by having your students make paper mache planets. You can use this opportunity to discuss the origins of planets and how they were formed following the Big Bang.
4. Galaxy in a Bottle: Encourage your students to learn about galaxies by creating a galaxy in a bottle. This can be a great way to explore the vastness of space and how galaxies form after the Big Bang.
5. Moon Phases Art: Discuss the moon phases and how they are caused by the changing position of the moon. Have your students create art that depicts the different phases of the moon using paint or chalk.
6. Starry Night Sky: Teach your students about stars by creating a starry night sky mural. This activity can help them learn about the different types of stars and how they are formed.
7. Cosmic Collage: Give your students an opportunity to create a cosmic collage by cutting out pictures of planets, stars, and galaxies from magazines and newspapers. Discuss the Big Bang and how all these celestial bodies came into existence.
8. Sun Catchers: Discuss the origins of our solar system’s star, the sun, and have your students create sun catchers using colorful tissue paper. This can be a great way to explore the different colors of the sun and how they are visible to us.
9. Universe Mobile: Make a universe mobile to showcase the Big Bang and the creation of our universe. Students can create planets, stars, and galaxies to hang from the mobile.
10. Astronaut Art: Discuss space travel and astronauts’ role in exploring space. Let your students create astronaut art that depicts them exploring the galaxies and space beyond, giving them a glimpse into the vast universe beyond our planet.
By incorporating these art projects into your Montessori lessons, your students can learn about the Big Bang Theory and explore the vastness of space in a fun and interactive way.
Tactile Art-Making Is Beneficial for Stress Relief
Over my twenty years of naturalistic art observations, I’ve witnessed tactile art projects like clay modeling lead kids into relaxed states of mind time and time again. I’ve seen stressed children come into my classroom and quickly be able to transition into a calm and relaxed state. As a result, allowing them to focus on their handiwork. Most art activities are multi-sensory engaging and can help children relax and work calmly. Making art with your hands stimulates touch neural input, visual pathways communicate with both the left and right hemispheres of the brain. Therefore, auditory and smell sensory systems collect information all at once, entering an active multi-sensory learning state. In addition, making art modeling clay is high in visual-auditory connectivity in the brain. Strong connectivity occurs, and the child becomes intensely focused on their handiwork.
Children using their hands can be so engaged that other stress-related thoughts clear their minds, and they enter a state of flow. As a result, students can forget the stress-related emotions they were experiencing before entering a creative state of flow. The electrical activity stimulated in the brain becomes a different type of action. Then, firing connections occur that allow children to focus only on their creative process. Soon, a calming effect takes place because tactile cognitive processing is occurring as children form or manipulate objects with their hands. It’s good for children to develop good habits and activities during their sensitive periods so they can regulate their own relaxation early in life through creative handiwork. Consequently, I’ve coined the phrase “active multi-sensory learning” to explain this cognitive state.
Clay Modeling Activity Can Reduce Stress
Clay modeling can be a great way children can have active multi-sensory learning happen and reduce stress! I’ve been teaching these types of lessons for two decades with clay modeling activities and using a variety of clay mediums for multi-sensory learning. Also, the other important aspect of these types of lessons is that children love them and take to them well. To illustrate, if you find a child fidgety, highly stressed, or exhibiting anxiety, I recommend you engage them in clay modeling activities. In addition, another tip I would recommend is dedicating a place to these art materials and making them easily available in your classroom, home, or school. Because of this, if you observe students with these persistent signals, follow your school protocols or seek professional therapists. Most importantly, do not try to treat children exhibiting trauma yourself unless you are a licensed therapist.
Basic Clay Modeling Steps:
Prepare a bowl with malleable clay in plastic baggies to keep moist.
Start with calming, kneading movements (a ceramic technique).
Encourage students to knead the clay for long period (5-10 minutes).
Allow students to transition into process-based exploration forms.
Do not give students complex instructions to follow.
Leave simple clay books or activity instructions nearby.
This blog post is a part of a three-month series: Montessori Art in the Natural World: Kids Nature Journal Color Lessons. This series is about growing kids’ knowledge about the natural world by taking them outside their home or classroom and challenging them to create focused art, based on the nature around them. Every aspect of nature—seasons, layers of the earth’s soil, energy, rocks and minerals, fossils, landforms, water, flora, fauna, the atmosphere—can all be represented and expressed through art lessons. The water texture art techniques in this blog will help your students learn how to paint water to use in their nature art projects. Drawing and painting water is an excellent way to teach students more about nature and our world’s waters!
With 71 percent of the earth’s surface being covered with water, chances are, your kids will encounter drawing or painting some kind of water feature in their artworks or biome field notes. Luckily, there are a ton of water texture techniques that can be explored for learning about our ocean salt water, fresh water, frozen ice formations, and water within our atmosphere. Focusing on our planet’s natural water systems is also a great way to connect them to nature! Another fun way to engage students in studying zoology is to draw or paint whales, sharks, rainbow fish, crocodiles, eels, and algae in the water they live in.
Teaching students a unique way to express water images will make learning about the science aspects of lessons a lot more fun. Drawing and painting water textures open up childrens’ curiosities and will lead to interesting and enriching conversations within your Montessori classroom.
Fun Water Art Learning Prompts:
You can continue to guide your students’ interests and curiosities by exploring the questions:
Why is the ocean blue?
Why do some parts of the ocean (or large lakes) look darker or lighter? (This is also a great question to help them explore color values and color tones!)
What is a coastline?
What causes waves in the ocean? Why aren’t there waves in lakes?
How much water covers our planet?
Why is the largest body of water salty?
What kind of animals live in the different depths of the ocean?
How do freshwater biomes and saltwater biomes differ?
How are sea mammals and fish different?
Why is water so important to human life?
How can we protect our planet’s water systems?
Learning About Nature By Painting Water Texture
Kids learn by connecting information through the process of expressing, which leads to meaningful learning. As a teacher, you can lead students through many engaging water texture art lessons which will help them make their artworks unique and personal. Rather than students slapping down blue paint to represent oceans, seas, lakes, rivers, or streams, they can look closer to the natural patterns found in water and try to replicate the movements and textures in their artworks.
Water texture drawing or painting can be explored in primary and elementary grades. Younger students will need more hands-on assistance and need to work process-based, giving them more time to discover and explore. Lower and upper elementary children will be able to do the projects completely independently by following demonstrations and steps. There are many techniques to create water texture art with interesting lines and patterns, such as:
Crayon wax resist
Salt sprinkled over watercolor
Bubble wrap
Painting yarn to create line textures
Where to Start: Bubble Wrap Water Painting Montessori Art Activity
There are so many ways to create water texture drawings and paintings, but this technique is one of my favorites! It’s so much fun for kids and easy to do too. (Plus, it helps you recycle any bubble wrap you get from packages!)
If you’re lucky enough to live by a body of water you can take your students to, I highly encourage you to have students make and record their observations in their nature journals. (For information and instructions on how to create a nature art journal, click here.)
I created this Outdoor Nature Journal Checklist to help you guide your students in their observations and recordings to make sure they’re following scientific principles and standards. This will help ensure your students are including data that helps them implement both scientific and artistic principles during their expedition. Print it out or save it on your phone so you have it with you the next time you lead your students outside.
A Short Cut Just for You
I like painting water texture activities because it opens up a whole world of painting for kids. It shows them how you can paint with tools other than fingers or paintbrushes! However, it’s essential that kids do learn paintbrushes and brushstroke techniques to help them develop their painting skills.
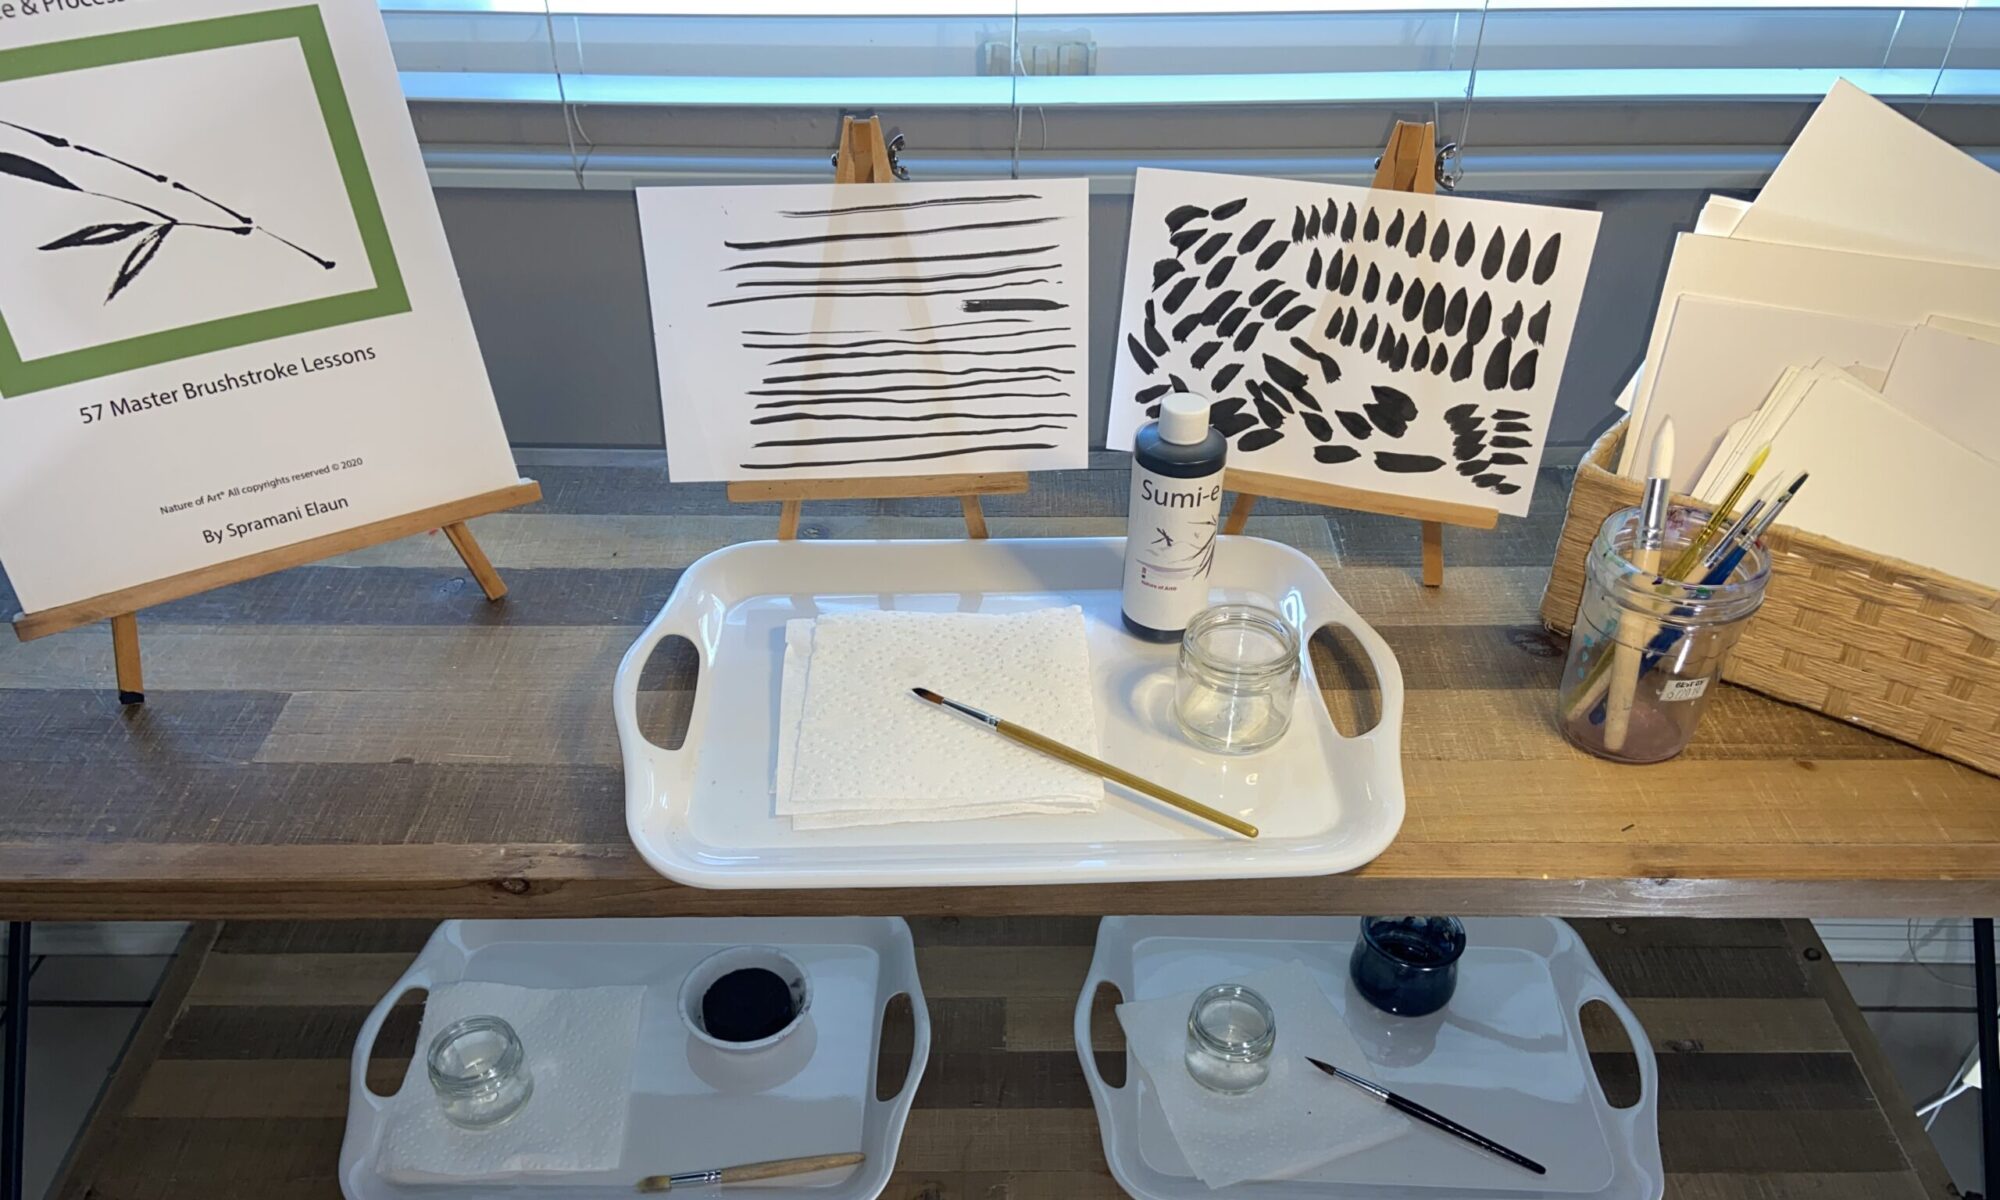
My Kids Painting Practice & Process Curriculum has 57 master lessons that take kids from setting up a paint station and holding a brush all the way to creating beautiful nature landscapes and painting different types of animals! Each lesson is featured as part of a sequence and includes all the information—materials, demonstration technique, and direct and indirect aims—you need to properly present the activity to your students.
This blog post is a part of a three-month series: Montessori Art in the Natural World. This series is about growing kids’ knowledge about the natural world by taking them outside their home or classroom and challenging them to create focused art, based on the nature around them. Every aspect of nature—seasons, layers of the earth’s soil, energy, rocks and minerals, fossils, landforms, water, flora, fauna, the atmosphere—can all be represented and expressed through art lessons including, nature crafting and crafting with natural objects.
Crafting With Natural Objects
There are so many fun ideas and engaging, hands-on ways to teach your Montessori students about nature through crafting with natural objects. It’s a wonderful gateway to introduce and connect kids to the natural world. Also, the outdoors offers an endless selection of natural objects that are just waiting to be found and designed into clever nature crafts.
These are a few commonly found, natural items that can be used for crafts:
Crafting with natural objects is a great segway to teach students part of the Coming of Humans Great Lesson!
So much of human history and culture revolves around crafting. Our ancestors used natural found objects for making important tools that helped them survive their day-to-day lives. They would collect stones and bones to use for grinding, scraping, mortars for cooking, and as weapons to protect their villages from attacks and predators. They used stones and seashells in gift-giving. In addition, seeds and feathers were often used in ceremonial activities. These nature crafting activities have been found across all cultures!
As society evolved, nature crafting evolved into a more leisure activity (although many people still used natural objects for daily tools too). Some nature crafts transcended both uses—being useful everyday items and also relaxing and calming to create! For example, in colonial times, the early settlers would craft candles from natural beeswax, make dolls from grass and reeds, and quilts were sewn together with naturally-woven materials. Crafting with natural objects was a normal event for so many generations. Unfortunately, many kids today have never been introduced to these types of nature crafts.
Many parents ask me the best ways to teach kids about nature and art and I always tell them to start crafting! Making crafts using only objects found in nature is an amazing way to have children slow down and become more present. This connects them not just to nature, but to our past and ancestors as well.
Take a look at ancient clothing and you can see natural objects—like bones, seeds, flowers, feathers, seashells and so much more—fastened and attached throughout the garments. Native American cultures used many objects found in nature to create elaborate headdresses too.
Crafting With Natural Found Objects | Montessori
Crafting with Natural Objects Helps Develop Fine-Motor Skills
Almost every crafting activity provides kids with excellent opportunities to develop their fine motor skills! Improving these skills is so important for kids to build their independence. Nature crafting activities like collecting (picking up) small natural objects, pasting, sewing, and cutting all require and strengthen fine-motor coordination.
Nature Crafts Can Teach Kids About Nature’s Limited Resources
Another great bonus of crafting with natural found objects is that they can teach kids important ideas and lessons about the limited natural resources of our world. It gives you a chance to teach students that although Mother Nature is plentiful when it comes to resources, today’s climate change and growing industrialism and commercialism mean we have to be diligent in protecting them. So, make sure you emphasize the need to gather the materials they find in nature responsibly. I love these types of crafts because they help our future leaders connect to nature and understand their role in protecting our environment and keeping our ecological systems balanced.
Where to Start: Crafting With Natural Objects Ideas for Montessori Students
Forging natural items and using them to create heirloom gifts and artworks is a great way for students to receive from all the benefits of crafting with found nature objects. They are learning history, strengthening their fine motor skills, and taking responsibility for our Earth.
Nature crafting activities for kids may include creating:
Here’s a bonus nature art activity for you! While your students are out collecting nature objects for crafting, have them take out their nature journals and record their observations. (For information and instructions on how to create a nature art journal, click here.)
Nature journaling is a relatively independent activity, but you should still guide your students to make sure they’re following scientific principles and standards. This Nature Journal Checklist will help you make sure your students are including data that helps them implement both scientific and artistic principles during their expedition.
Print it out or save it on your phone so you have it with you the next time you lead your students outside to journal or collect nature objects for crafting.
A Short Cut Just for You: Painting Curriculum For Kids
Along with crafting with natural objects, students can also use their found nature objects in painting lessons! My Kids Painting Practice & Process Curriculumhas 57 master lessons that take kids from setting up a paint station and holding a brush all the way to creating beautiful nature landscapes and painting different types of animals! And, each lesson is featured as part of a sequence and includes all the information—materials, demonstration technique, and direct and indirect aims. So, you can simply follow the instructions and easily present the activity to your students.
Kids Painting Practice & Process Curriculum sets the foundation for their art education and will help them transform into little artists! To purchase the curriculum, click here.
This blog post is a part of a three-month series: Montessori Art in the Natural World. This series is about growing kids’ knowledge about the natural world by taking them outside their home or classroom and challenging them to create focused art, based on the nature around them. Every aspect of nature—seasons, layers of the earth’s soil, energy, rocks and minerals, fossils, landforms, water, flora, fauna, the atmosphere—can all be represented and expressed through art lessons including, how to make natural pigments.
Using natural elements
One of the greatest ways to connect children to the natural world is to create and make art using natural elements. There are so many fun ideas for teaching kids how to make natural paint, ink, and dye from pigments derived from nature. These Montessori art activities are not only fun for students, but they can be connected to the Great Lessons. In addition, it will inspire so many other avenues of learning.
Coming of Humans Great Lesson
The Lascaux Cave
When I first introduce the concept of how to make natural ink, paint, or dye to students, I start by introducing the Coming of Humans Great Lesson. On Sep. 12, 1940, the entrance to the Lascaux Cave (Montignac, France) was discovered. The now-famous cave is covered in more than 600 Palaeolithic cave paintings! These images are primarily of large animals, which were once native to the region. Amazingly, they are estimated to be up to 20,000 years old! Of course, there weren’t any art stores around then, so these ancient artists had to create their own pigment in order to create these works of art.
Using Natural Pigments in Preshistoric Times
Natural pigments have been used since prehistoric times. The earliest record of their use dating all the way back to 5000 BC! Studying the types of pigments these cave artists used can be a great history art lesson. Also, It may inspire your students to experiment with natural pigments on their own!
This lesson leads students into learning more about the natural world and how pigments can be derived from living and non-living materials. The truth is, all color is driven from organic matter and that’s exciting to discover when you’re a kid!
How Pigments Evolved
Over time, the pigmenting process evolved. We went from processing pigments by hand to commercially manufacturing synthetic pigments. And, we now have the luxury of choosing from an infinite number of pigmented color swatches of so many different mediums!
If you want to learn more about how kids can use colors and pigments to create art and strengthen their art literacy, check out my book Kids Color Theory – Contemporary Color Mixing Guide with Pigmented Colorants for Children by clicking here.
I will show you that teaching kids how to make natural paint, ink, or dye can be a rewarding history lesson connected to multiple art activities.
What are pigments?
One of the activities of this lesson has to do with identifying pigments. But, before you can ask your students to find pigments in nature, you have to teach them what a pigment actually is.
Pigments are either mineral or plant-based. Mineral materials are from rocks or clay, and plant-based materials are leaves, flowers, fruits, and vegetables.
Pigment is truly color from nature, extracted from animals, plant tissue, or minerals. It’s natural colors from the natural world! For example, red beets, purple wild berries, green spinach, yellow turmeric, and brown coffee grounds are all natural pigments. Pigments can be extracted from all these things!
The Difference Between Natural Inks, Natural Paints, and Natural Dyes
The difference between colored mediums like ink, paint, and dye comes down to the binders that they’re processed with. Binders can come from plants, animal fat, or man-made synthetic material. A binder is a glue that holds the pigmented color together to lay on a surface.
Each medium is combined with specific binders for masterful artist application.
Inks are usually water-based and combined with water.
Dyes are usually combined with a mordant to help stain clothes.
Paints are combined with a thick binder so it’s able to adhere to a surface like wood or canvas, and may or may not be washable.
For example, tempera paint can be combined with egg yolks. Dyes can be combined with mordants to stain clothes without washing out. And, inks can be combined with water or safe water-soluble solutions so that they absorb into the paper.
A binder can also help a pigment be solid and opaque (not letting light through) or light and translucent (where light can be seen through it). So, I recommend that you use a safe water-based binder to teach these principles.
Where to Start: Natural Ink, Paint, and Dye Activities
There are so many activities your students can do with natural inks, paints, and dyes. It goes beyond just making natural pigments and creating with them.
Identify Pigment Sources
I start the conversation by asking students where our ancestors might have found pigments without art stores around. Then, once they collectively come up with ideas, we head outdoors for observation.
Observe Natural Pigments in Nature
Before I teach students how to make natural dye, paint, or ink, I want them to understand where the natural materials that make the pigment come from. I take the students on a nature walk around the schoolyard, backyard, vegetable garden, or food market to observe the color in living and nonliving matter. I have them look for natural colors and materials that may be able to create pigment.
Also, I have them hunt for color sources they may be able to use to make their own pigments. This creates an important connection between nature, science, history, and art. Approaching art through the lens of the natural world is an essential educational lesson. Also, it’s a great opportunity you won’t want to miss presenting to your students each year.
Discuss the Importance of Natural Pigments
Over the past twenty years of working with thousands of kids doing arts and crafts, I’ve seen incredible lessons unfold. The common link is that when children work with natural materials, it almost always leads to deep levels of thought and discussions about the planet’s resources and how things are made or manufactured. These conversations then create awareness about sustainability and current environmental issues.
Read About the Colors of Nature
Sometimes, I’ll help students find inspiration by reading books to them. A beautiful new book I’m currently loving is The Color of Nature by Pat Murphy and Paul Doherty.
Create a Shelf Display
You can create a lovely shelf display showing the relationship between natural materials (like fruit, vegetables, minerals) and pigments. Another idea is to use the same material, but display it in its natural state, its processed state, and as the finished pigmented medium along with a painted/drawn example (as shown in the photo below).
Make Nature-Based Pigments
One of the simplest ways I teach kids how to make paint, dye, or ink is by creating the pigments from fruits, plants, and locally-sourced colorful foods. Store-bought items can also be substituted to teach these lessons.
Try making your own natural inks, dyes, and paints using one of these methods. You can make ink with beets – blend beets in a blender with water, strain out the flesh, and add a drop of vinegar (natural ink ideas here)
Make paint with beets or kale veggies – blend your chosen veggie in a blender with water, strain out the flesh, add cornstarch if you want a thicker medium (full recipe here)
Make ink from tea – boil water and pour over loose-leaf tea, allow the tea to steep, strain out tea leaves. You can then add cornstarch (or gum arabic) to thicken (watch dye fabric with tea video here)
Creating a natural ink, paint, or dye in just one single color can lead to many, many art and color theory lessons. I created Kids Color Theory Practice & Process Curriculum to provide more than 30 art sequences to help kids learn more about this essential domain. It lays the foundation for basic contemporary color concepts that lead to more advanced art skills.
In addition, I encourage exploring the color theory domain with your students in more detail, with this FREElesson. It will help you get started. And, it includes step-by-step instructions and a list of the materials your students need to complete the activity them to create and explore within this lesson will open their eyes and spark their creativity. To download the Color Theory Mixing Lesson, click here.
A Short Cut Just for You: Buy Kids Color Theory Curriculum
I further explore the importance of color theory in my book, Kids Color Theory. In the book, I define color theory, share how to teach it to kids, and give tips for gathering the right materials and setting up a Montessori art environment for students. The book also includes 11 color-mixing lessons to help put your new natural inks, dyes, and paints to use!
This blog post is a part of a three-month series: Montessori Art in the Natural World: Kids Nature Journal Color Lessons. This series is about growing kids’ knowledge about the natural world by taking them outside their home or classroom and challenging them to create focused art, based on the nature around them. Every aspect of nature—seasons, layers of the earth’s soil, energy, rocks and minerals, fossils, landforms, water, flora, fauna, the atmosphere—can all be represented and expressed through art lessons.
Nature Journaling – Part lll
One of the most relaxing and rewarding parts of being in nature is experiencing its colors and beauty. Nature can teach us a lot about the color theory aspects of art and nature journaling, in particular, is a great way to teach Montessori art lessons.
As an artist, art teacher, and naturalist, I find color so fascinating! Color inspires kids to gain new knowledge about the natural world. Nature journaling can be an amazing tool to lead outdoor exploration and discovery. Having your kids take their nature journals outdoors can enrich their learning experience and help them make a meaningful connection between science and art.
Kids nature journaling activities give educators many chances to teach the Elements and Principles of Design while integrating science methods, such as observation. You can actually teach multiple Montessori color lessons using just the basic nature journal materials, a guided outdoor activity, and engaging your students’ imaginations.
Understanding the Importance of Color in Art & Science
Color theory is a foundational area of visual arts studies. Understanding color and color theory is essential to developing art skills. All artists must learn how different colors complement each other; part of this means understanding the principles of the color wheel and creating mixtures of color values and intensities of different hues.
Beyond being an important part of art, color also plays a significant role in science! Did you know that Sir Isaac Newton not only discovered gravity, but he also observed how light bends as it passes through the prism—which was the first step in giving us what we now know as “ROY G BIV!” So, teaching kids about color is both artistically and scientifically important.
Using Kids Nature Journals to Teach Montessori Color Lessons
Color theory lessons can be easily integrated into nature journaling. Nature journals offer kids the opportunity to investigate and observe color while recording their nature and outdoor observations.
When they’re completing their nature journals, have students describe the colors they observe with written words, and also by choosing specific color mediums (such as crayons, colored pencils, and/or paint) to represent the objects they see. For instance, they might doodle leaves, tree bark, ponds, or the atmosphere, and then assign these observation notes with descriptive color words.
Examples:
“The tree had small, bright green leaves growing.”
“The bark on the tree had a cool feeling and looked dark brown.”
“A bird with reddish feathers flew by.”
Where to Start: Simple Nature Journal Color Prompts
It can be overwhelming to think about taking your class outside for an art lesson. Maybe the idea of rounding up your students and keeping them focused on lessons outside the classroom—when all they want to do is climb a tree or jump on fallen leaves—stresses you out. I get it and I’ve been there! Kids have minds of their own and once they’re outdoors, their playful instincts tend to take over. However, getting them to focus on Montessori color lessons can be done.
Keeping young students’ attention comes down to giving them something specific to focus on while they’re outside. Color can be found in outdoor environments in all different shades, hues, and tones:
The colors of a rainbow (ROY G BIV)
The natural pigments found in flowers and minerals
The iridescent colors of a butterfly wing
The color differences in males and females of a species
The green tones in different types of tree leaves
Color even plays a role in the survival of particular organisms in certain biomes! There are amazing teaching opportunities to point out how color is represented in the natural environment and different ecosystems. These kinds of observations can lead to fun and insightful scientific discussions in your classroom! Observing nature and recording natural color values are great ways to integrate science and art.
Here are some color topics you can explore with your Montessori students:
Using the prompts above will help give your students focus and purpose while they’re outdoors. While I focused on the importance of including color observations when students are recording in their nature journals, to make it a true scientific activity, students should include other datum and information as well.
This Outdoor Journal Checklist will help you guide your students and keep them on track to make sure they’re implementing both scientific and artistic principles during their expedition. You can print it out or save it on your phone so you have it with you the next time you lead your students outside to journal.
A Short Cut Just for You
I think nature journaling is the perfect way to introduce art to Montessori students, since it relies so heavily on natural and scientific observations. It opens to the door for so many more interesting art projects!
If you know that you want to bring art into your classroom but aren’t sure how to do it, check out my Theming Art & The Natural World
No part of this blog may be used or be reproduced in any manner whatsoever including reproducing, publishing, performing, and making any adaptions of the work – including translation into another foreignlanguage without written permission except in the case of brief quotations embodied in critical articles and reviews. Nature of Art® Publishing P.O. Box 443 Solana Beach, California 92075.
This blog post is a part of a three-month series: Montessori Art in the Natural World: How to Teach Nature Journaling. This series is about growing kids’ knowledge about the natural world by taking them outside their home or classroom and challenging them to create focused art, based on the nature around them. Every aspect of nature—seasons, layers of the earth’s soil, energy, rocks and minerals, fossils, landforms, water, flora, fauna, the atmosphere—can all be represented and expressed through art lessons.
Nature Journaling – Part II
Nature journaling is a tool scientists and explorers use to record important field notes and observations. It can also serve as a way to record history. Sometimes we can’t disturb nature, but we can record the experience by carefully observing and taking specific notes. Students can improve their critical-thinking skills through nature journaling.
Nature journals are unique to each individual owner; they’re composed of what inspires the artist, or in this case, student. Usually, nature journals are a variety of artistic expressions based on the natural objects students see outdoors, including:
Observation notes
Descriptions of experiences
Simple diagrams
Simple sketches
Benefits of Nature Journaling
Keeping a nature journal strengthens students’ observational skills. For instance, when a child knows they’ll have to draw or record specific characteristics of the natural world, they’ll put care into taking a closer look at their subjects as well as noticing and memorizing details.
Nature art journaling is specifically suited for teaching Montessori students about biomes. It requires students to focus on, analyze, and record different parts of a biome. Each page can be dedicated to a different part of the biome. Montessori nature activities like art journaling can help students become naturalists who are more aware of and feel more responsible for their ecological footprints on earth.
You don’t need very many materials to start nature journaling; it requires the same basic items you’d need to start general art journaling. For more information on the benefits of art journaling, and how to create an art/nature journal with your students, read last week’s post by clicking here.
Once your students have a journal to work with, the next step is going outside; they can head out to the schoolyard, their backyards, or even a park or nature trail, depending on when and where they’re completing this Montessori nature activity. Instead of letting them wander, ask them to focus on and sketch one object for 5 to 8 minutes (this helps sharpen their observation skills). Then direct them to move on to another object and time them again. Once they’ve observed and drawn a few different specimens, head back into the classroom.
Before I take my students outside, I always remind them that they may only get a few minutes or even seconds to observe a specimen (especially animals and insects), so it’s important to observe and record details quickly. This will help them look up the correct information and do more research later; knowing how to observe and take notes can help put the pieces of the puzzle together once they’re back inside the classroom and can clean up their drawings.
It’s important to teach your students that nature journaling is about recording details—not creating perfect drawings. The key is to collect enough information quickly in pencil, with detailed observational notes. After they’re done observing and doing additional research, they can update their field notes and finalize their drawings with more details, colors, and descriptions.
Naturalists, botanists, and book illustrators (artists) use this same observation and drawing techniques; they go outdoors to observe, and collect and record information, then, at a later time, they finish their journal pages with detailed sketches in color pencil or watercolor paint. They also fill in the gaps by doing further reading and research.
Montessori Nature Activity Journal Prompts
While I encourage you to do a few “trial runs,” and give your students the freedom to observe and record whatever interests them, eventually you want them to complete and create more focused nature observations.
Every time students go out to fill in their nature journals, I ask them to record:
The date
The start and end time of their observations
The location where they’re observing
The atmosphere (dry, humid, etc.) and temperature
A description of the outside landscape
How they were feeling that day
You can also ask them to make observations using their sensory system. Ask them to record the answers to these questions:
What do you smell?
What do you hear?
What do you see?
How do things feel to the touch?
Other prompt ideas:
Recording a species, include:
General name of species
Size
Color
Unique features
Describe their actions
Any noticeable patterns or textures
Observe the seasons
Observe feelings and experiences
Observe interesting non-living objects
Observe plants
Observe states of matter
Observe local micro-biomes
Observe things in the sky, things in the grass, and/or things in the water
Now that your students are ready to head outside with their nature journals, I want you to be prepared too! While nature journaling is a pretty independent activity, there are ways—besides just sharing the above prompts—that you can help guide them. This Outdoor Journal Checklist will make sure you have everything you need to keep your students on track and ensure they’re implementing both scientific and artistic principles during their expedition.
You can print it out or save it on your phone so you have it with you the next time you lead your students outside to journal.
I think nature journaling is the perfect way to introduce art to Montessori students, since it relies so heavily on natural and scientific observations. It opens to the door for so many more interesting art projects!
If you know that you want to bring art into your classroom but aren’t sure how to do it, check out my Theming Art & The Natural World
No part of this blog may be used or be reproduced in any manner whatsoever including reproducing, publishing, performing, and making any adaptions of the work – including translation into another foreignlanguage without written permission except in the case of brief quotations embodied in critical articles and reviews. Nature of Art® Publishing P.O. Box 443 Solana Beach, California 92075.
In honor of the 50th anniversary of Earth Day, I’m excited to kick off a three-month blog series: Montessori Art in the Natural World! This blog post is a part of a three-month series: Montessori Art in the Natural World. This series is about growing kids’ knowledge about the natural world by taking them outside their home or classroom and challenging them to create focused art, based on the nature around them. Every aspect of nature—seasons, layers of the earth’s soil, energy, rocks and minerals, fossils, landforms, water, flora, fauna, the atmosphere—can all be represented and expressed through art lessons.
The first part of this series—Kids Art Journaling, Part I—starts with explaining how one of the best ways to observe and record nature is through kids art journaling. Art journals can promote scientific exploration, support writing, allow for freedom of expression through creative artistic techniques. They also help students understand the elements and principles of design and the artistic process.
So let’s start with the basics.
What is art journaling?
Art journaling is a way of recording observations, ideas, learned topics, emotions, and self expression through illustrations, doodles, painted images, and collages, using a variety of art mediums. These artistic works are created and arranged in an art journal—a binded book of blank pages; art journals can vary in size and are similar to a self-reflective written diary.
For educators, art journaling can be an extension to other lessons you present. It can give students the chance to reflect on other subjects through an artistic lens, which can help them gain a deeper understanding of what they’ve learned.
It’s most important to note that art journaling can be done in any fashion, there’s no right or wrong way to create an art journal. The owner of the art journal is the curator of its life.
“If kids reflect on their days, they will become better problem-solvers of life.” ― Trevor Carss, author
What do my students need to start art journaling?
You really don’t need much for kids art journaling. The basic materials are simple: kids just need a blank paper, pencil, and eraser to start. You can then transition them into using more colorful mediums, such as crayons and colored pencils, and eventually paint and collage materials. The idea is to mix up the mediums students have access to; offering different materials to create with helps their brains make new connections to the concepts and subjects they’re learning.
How are art journals used for Montessori nature activities?
Integrating the study of the natural world into art journaling can give children their own unique learning experience. Art journaling provides a dynamic spatial intellectual understanding that is wired by their sensory inputs through critical observations, notations, writing skills, and storytelling.
Where to Start: Head Outdoors for Montessori Nature Activities
Bounded art journals are really exciting for kids! They love having a special place where they can keep all their artwork, thoughts, and observations! BUT, you don’t have to have or do anything fancy to start with—truly, the first step to nature art journaling is to go outside!
Set aside some time for your students to head outdoors and just observe the natural world around them. It can be a backyard, school yard, garden, local park, local trail, or even a city street, so long as there are aspects of nature for them to see. Going outside is even more essential these days, since kids spend so much time in front of screens. Spending just a few minutes outside each day is so important for helping children connect with nature!
One Step Further: Watch My FREE Mini Course
So many teachers want to teach their Montessori students art, but they don’t know where to start. They’re not sure what their students are capable of, how to present lessons, or even what items to make available. That’s why I love art journaling—it makes art open-ended and easily accessible (to students and teachers).
Teaching students art doesn’t need to be intimidating though. Understanding how students learn art makes it easier for you to teach them and help them develop their skills. If you would like to learn more how to nurture children in the visual arts, now’s your chance! Register for my FREE mini digital course, Phases of Art Development. You’ll learn how art making can help students develop their creativity, fine-motor skills, and focus. More importantly, I share what types of projects students at every age are capable of completing safely, and without making a mess.
Best of all—it’s free! To sign up for the course, click here.
A Short Cut Just for You
I’ve created a ton of resources on how to bring both nature and art into your classroom; if you’re unsure of where to start and want a guide to help you introduce art to your Montessori students, I’d recommend my books: Early Childhood Art: Visual Arts Teaching Guide and Introducing Visual Arts to the Montessori Classroom.
Together, they provide everything you need to know to be able to teach your own Montessori students about art. They’re filled with tips and tricks for setting up an art environment, using proper art materials and mediums, and planning age-level-appropriate art lessons.
I know the value of art in the Montessori classroom, especially when it embraces and celebrates nature!
No part of this blog may be used or be reproduced in any manner whatsoever including reproducing, publishing, performing, and making any adaptions of the work – including translation into another foreignlanguage without written permission except in the case of brief quotations embodied in critical articles and reviews. Nature of Art® Publishing P.O. Box 443 Solana Beach, California 92075.