


One of the biggest challenges I hear from Montessori teachers is keeping their classrooms organized—especially when it comes to art. Many of them think that it can be messy, and, because there are so many cool art materials you’ll want to have in your classroom, it can become disorganized and chaotic fairly quickly. But that’s not the case at all! Once you know how to set up your Montessori art storage, you’ll be able to do shelf staging, presentations, and demonstrations without breaking a sweat! You’ll be able to teach your students fun art projects without needing to be an artist yourself, you just need to be able to master your art materials storage and set-up!
I’m all about organization! When I’m not training other Montessori teachers with how to bring art into their classroom, I’m setting up pop-up art lessons at museums, studios, workshops, and different classrooms all over the world. You can sometimes find me at local Montessori schools here in San Diego, and I’ve also taught art at the Children’s Museum in Seattle, in lower elementary Montessori classrooms in China, and at Montessori teachers conferences in Bali! I’m literally all over the world!
My key to success in being able to set up shop with everything I need is organized storage! Because I know exactly where all my art materials are within their storage containers, I can quickly grab what I need and set up an art presentation without any stress. And I’m sharing my storage secrets with you! (Click here to watch my video, How to Set Up Your Montessori Art Storage Stress and Mess Free.)

There are a lot of reasons to spend a little extra time unpacking your classroom and making your art storage a priority.
- It keeps your classroom and art shelf neat and tidy throughout the year.
- It allows you to quickly set up your art environment for lessons.
- Being able to see all your art materials while they’re in storage will make it easier to know what supplies you have on hand so you can quickly plan a lesson or project.
- You’ll be able to rotate art material out of storage and onto your art shelf, so students stay inspired all year.
- It models a good example for your students.
- It helps you know your art material inventory so you know what items should be added to your shopping list for future activities.
- Gives you assistant the ability to set up your art activities since everything is kept all in one place.

Where to Start: Understanding Art Shelf vs. Art Storage
It’s usually easier said than done, I know. At the beginning of the year you can start with a clean slate, but at the same time, you have all these cool new art materials you want to showcase and share with your students! Reel it in!
Not everything needs to be on your art shelf. In fact, if you put every art material out on your art shelf, it’ll probably backfire! Your students will lose interest in all the amazing mediums and art-making tools you’ve provided them. Plus, more things out on the shelf might very well lead to more mess!
One Step Further (Watch My Montessori Art Storage How-To Video!)
I know that you’re going to have your own preferences in how you like to set up your classroom and how you like to organize your storage. In my experience, every art storage area should:
- Include one container per art area, or domain
- Have clear containers
- Have containers with easy-to-open lids to access materials
- Be in an area near your staging containers
- Be in a place that’s away from your students’ reach
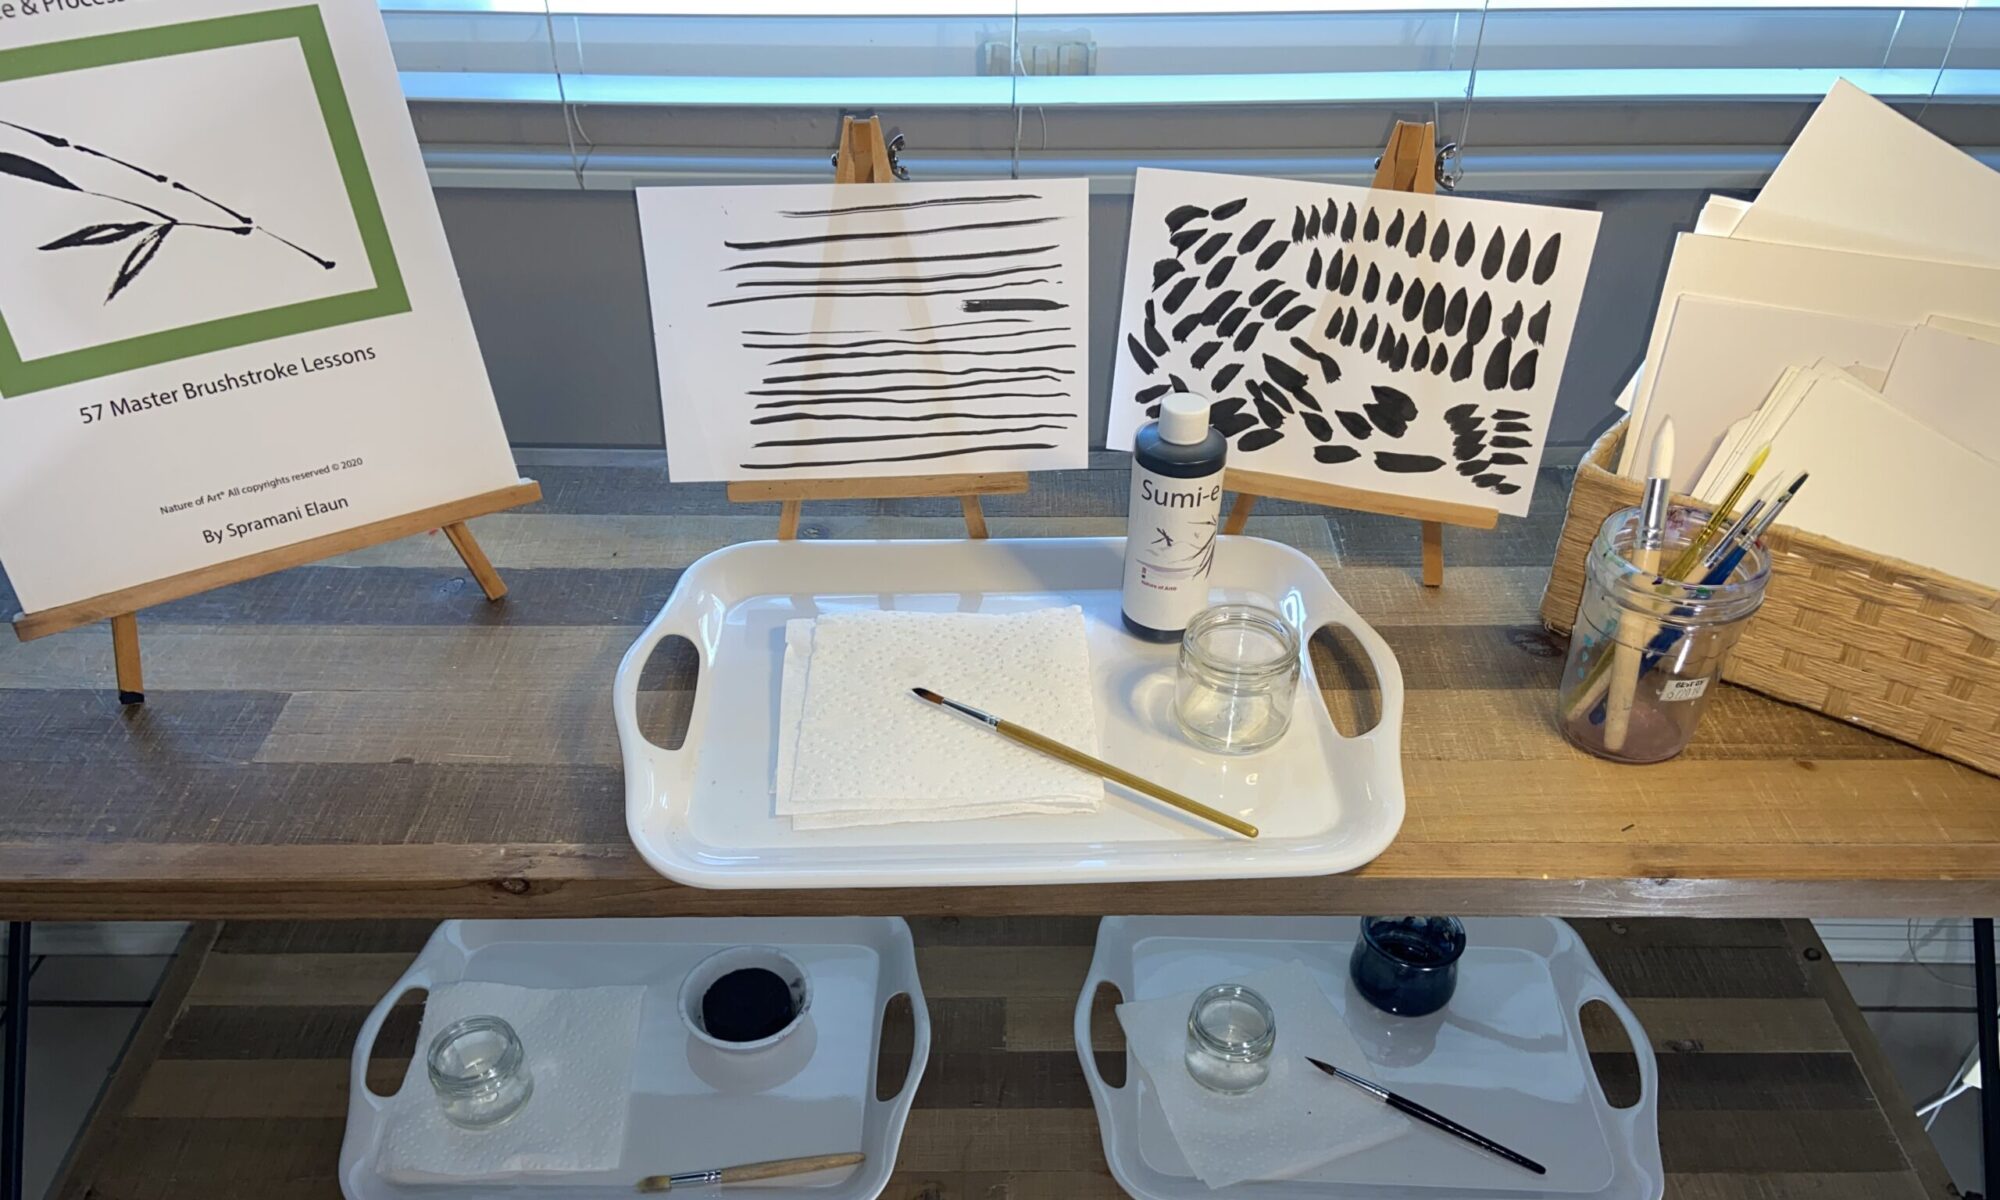
- Have everything you need to teach stored together (e.g., a container for watercolor painting should have paints, palettes, napkins, wash jars, paintbrushes, watercolor paper, inspiration, etc.)
Generally speaking, you want everything that’s in storage to be visible and accessible.
I’m a visual person, so I made this video for you to check out. I’m going to walk you through how I set up my own Montessori art storage place. You’ll see how I organize things overall, but I’ll also show you how I categorize my tubs and storage containers. And then, as a bonus, I’ll show you why it’s so important to have a functioning art storage system…I’ll walk you through how I use the art materials I have in storage to set up an art lesson without much thought. Trust me, it’ll save you tons of time if you get this down.
Click here to unlock and watch my video on How to Set Up Your Montessori Art Storage Stress and Mess Free.

A Short Cut Just for You
Staying organized is just one piece of the puzzle when it comes to having art in your classroom. Yes, Montessori art storage is important, but you need all the other puzzle pieces—knowing how kids learn art, understanding the components of an art lesson, being able to set up an art shelf, etc.—to be able to effectively teach your students art.
I’ve been helping Montessori teachers all over the world bring art into their classroom; I’ve honed and perfected the training so that you can do it too. In my online course, Art Teaching Blueprint, I give you everything you need to start teaching your Montessori students art.


All rights reserved © 2024, Nature of Art®
No part of this blog may be used or be reproduced in any manner whatsoever including reproducing, publishing, performing, and making any adaptions of the work – including translation into another foreign language without written permission except in the case of brief quotations embodied in critical articles and reviews. Nature of Art® Publishing P.O. Box 443 Solana Beach, California 92075.