Teach Your Kids Art At Home: Art Lessons Download Bundle

Whether you’re a teacher trying to continue to teach your students via computer or a parent who is looking for a way to keep their learning moving forward, coming up with fun and easy educational activities can be a challenge. Giving them a break from all the online learning they’re doing is so important! That’s why I’ve created this at home art lessons download subscription — to keep your kids learning, while getting out their energy and having some art fun!

Why teach children art?

As parents, we want the best for our children. We want them to grow up to be intelligent, capable, brilliant individuals, and art is a wonderful bridge that can help them get there.

Art offers several benefits to children, including:

  • Helping kids develop and refine their fine-motor skills
  • Getting kids to think creatively and problem solve
  • Strengthening their emotional literacy and self-esteem
  • Providing a place for kids to express their emotions and creativity
  • Giving them an outlet to quietly burn off some energy

When you’re not equipped or don’t have the experience to teach art, it’s overwhelming and the temptation is to just give your kids some markers and hope they don’t use your walls or floor as a canvas. I’d urge you to resist that temptation!

There are two important reasons you want your children to do guided art lessons and activities: 

  1. It encourages them to develop new skills and can add an extra layer to how they learn other subjects. (This is especially key when they’re learning from home and may need extra help remembering lessons and connecting dots.)
  2. It can ease your anxiety and give you peace of mind. When your kids are given a certain, specific art activity to complete—but it’s important to note the process is key, not the outcome—they’ll focus their energy and attention on what they are creating, leaving you with some time to focus on what you need to get done. This is where an at-home art lessons download comes in to help!

So many parents have been thrown into the role of teacher without a choice. And that’s just leading to stress! You have to balance not just being a parent, but also teacher, caregiver, entertainer, and maybe even chef—all while trying to get your own work done at the same time.

Yes, you love the time you have with your family, but sometimes a little peace and quiet is necessary. Plus you want to help your child embrace their creativity and independence, and you don’t want to stick them in front of a screen the whole day.

Where to Start: Pull Out the Right Art Supplies

Handing a marker to your five-year-old and hoping for the best isn’t the way to go about this. You want to make sure whatever art supply you’re allowing your child to explore is appropriate for their age. Regardless of how old they are, all of your children’s art supplies should be kid-safe and non-toxic. (If you’re unsure about the safety of your art supplies, I’d recommend buying items you know will be okay for your kids; all the art materials on Nature of Art for Kids are vetted and tested, so they’re safe and appropriate for kids to use).

One Step Further: Download My Kids’ Art Language Cheat Sheet

Once you’ve gotten your kids to start creating art, the next step is to help them learn to describe their artistic process and finished project. That’s why I’ve made an art language cheat sheet as a FREE resource to help you start using art vocabulary. You might not realize it, but you’re probably already using some of the Elements and Principles of Design vocabulary words (such as “color,” “line,” and “texture”) already!

When you start by giving your kids the right supplies, you won’t have to worry about them making a mess or coming to you every five minutes asking for help.

Download my Art Language Cheat Sheet for a list of art language terms. I’ve included definitions for each term as well, so you’ll feel more confident using them, knowing you’re using them correctly.

A Short Cut Just for You: At-Home Art Lessons Download

Here’s some good news: YOU can teach your kids art at home—and you don’t need any experience to do so. I’ve created the Kids Art At Home Lessons Download so that you can start presenting easy and fun art lessons to your kids.

This limited-time bundle features art lessons from each of the visual arts domains (drawing, painting, clay modeling, crafting, and color theory), so you’re actually laying a solid foundation for your child’s art education. You’ll receive:

  • 1 Drawing Lesson
  • 1 Color Mixing Lesson
  • 1 Painting Lesson
  • 1 Clay Modeling Lesson
  • 1 Craft Lesson

PLUS, you’ll also get 50 art lesson ideas, a materials list, and video and blog resources so your kids can continue to do art every day while at home! All of this is delivered as a bundle; you’ll download each item separately, so you and your child can be introduced to and work through the activities one at a time so they don’t get overwhelmed.

You can purchase Kids Art At Home: A Bundle of Beginner Art Curriculum & Activities for Kids—which is available for just a limited time—by clicking here.

All rights reserved © 2024, Nature of Art®

No part of this blog may be used or be reproduced in any manner whatsoever including reproducing, publishing, performing, and making any adaptions of the work – including translation into another foreign language without written permission except in the case of brief quotations embodied in critical articles and reviews. Nature of Art® Publishing P.O. Box 443 Solana Beach, California 92075.
Virtual Montessori Lessons & Art Activities

Virtual Montessori Lessons & Art Activities

Supporting Virtual Lessons at Home During Coronavirus School Closures

There has been an unprecedented number of school closures across the globe right now, and many schools and teachers have found themselves unprepared to teach their students virtually. I don’t think anyone really anticipated things getting this bad; but now that we’re faced with this reality, it’s important that we continue our students’ education—while keeping their new learning environments in mind. For that reason, I’ve put together some virtual Montessori lessons and art activities you can give you students to work on while schools are closed.

It’s important for students to maintain some regularity even though their daily routines have been turned upside down because of school closures. A routine helps kids establish constructive habits, grow in their independence, and may even reduce stress during chaotic times. So while your students (and maybe even you) might initially think of school closures as a surprise vacation, it’s essential that they continue to work on lessons, projects, and activities during the week.

Virtual Montessori Lessons & Art Activities, kids

Where to Start: Provide Fun Virtual Montessori Lessons that Focus on Art

Art, in particular, is a great way for students to add schoolwork or lessons to their day without sacrificing any of the fun that comes from being out of school. It’s an exciting and engaging creative outlet that allows them to work independently. Art is also therapeutic; so it can help students work through some of the anxiety or confusion they’re feeling because of all the COVID-19 news coverage.

What’s great about art at home is that you don’t have to be an artist yourself to teach these simple virtual Montessori lessons—kids can do most of the exploration completely on their own. (You may have noticed, I spend a lot of time on these blogs trying to explain to you that kids don’t need detailed how-to lessons, art at this age is almost all discovery-based.) What they need from you—or in this case, their parents—is an area to work in, basic art supplies to work with, and a quick explanation of how these materials work and expectations of containing mess. 

(I posted a blog last week about supporting parents with virtual Montessori lessons and how to even start putting together a virtual lesson—in light of the quick turnaround of school closures because of the coronavirus—you can read that by clicking here.)

One way to keep students entertained while schooling from home is with virtual art museum tours! Many of the world’s most famous museums offer virtual tours. So students can explore art exhibits and see paintings and sculptures from legendary artists without ever having to leave their homes! These virtual tours also support the Coming of Humans area of Montessori philosophy.

So take a look at the lessons you had lined up for next month and pair those themes with a museum virtual tour. These tours are really fun and informative and usually geared toward educating—so it does all the heavy lifting for the parents! And they will really appreciate the opportunity to get their kids to sit down and quietly focus on something engaging for a bit. 

Here are my eight favorite virtual museum tours that are currently available online. (I’ve been to a couple of these museums in person, and I can tell you, the virtual tour lives up to the experience!)

  • Guggenheim Museum, New York – features artworks from the Impressionist, Post-Impressionist, Modern, and Contemporary eras
  • Musée d’Orsay, Paris – a collection of artworks by Monet, Cézanne, Gauguin, and many other French artists
  • Museu de Arte de São Paulo (MASP), São Paulo – Brazil’s first modern art museum
  • National Gallery of Art, Washington, D.C. – two different exhibits; one of which highlights American fashion from 1740-1895, and the other which features artworks from Dutch Baroque painter Johannes Vermeer
  • National Museum of Modern and Contemporary Art, Seoul – features contemporary and modern art from Korean artists, as well as artists from across the world
  • Rijksmuseum, Amsterdam – artworks from the Dutch Golden Age, including works from Vermeer and Rembrandt
  • Van Gogh Museum, Amsterdam – features 200+ paintings and 500+ drawings by the artist
  • The J. Paul Getty Museum, Los Angeles – offers a huge collection of paintings, drawings, sculptures, and photographs

One Step Further: Download My Easy Montessori Art Activities Cheat Sheet

Before I became a Montessori art teacher trainer, I was an artist and homeschool mom. I also taught other art students from around my community how to create art, and have led programs in museums and educational conferences from different pedagogies throughout the world. With all this experience (more than three decades!), I’ve been able to observe the activities that excite and engage students. I’ve also learned what prompts can be done virtually anywhere—from your classroom to your students’ homes!

These virtual Montessori lessons support independent learning—and I’m sure parents will thank you for them! While you can offer these prompts to students to do while schools are closed, I also encourage you to do them in your classroom as well once school starts up again. They’re easy for you and fun for your students!

You can download 10 FREE Easy Montessori Art Activities by clicking here.

Virtual Montessori Lessons & Art Activities, elementary

A Short Cut Just for You

The Montessori Art Activities cheat sheet is a way to inspire actual art lessons for your students. If you want a shortcut—a totally done-for-you lesson—that you can download and send out to students and their parents, then this Warm to Cool Butterfly Art Lesson is perfect! Simply purchase and download; then send the instructions and template to your students’ parents. It’s as easy as that. No extra work required! The only things students need at home are basic art supplies: crayons, color pencils, or any type of paint medium.

Virtual Montessori Lessons & Art Activities, spramani elaun curriculum

Buy Done-For-You Art Curriculum Now!

If you want a full year of simple, stress-free, exciting, and fun art lessons for your Montessori students, check out my Kids Color Theory, Kids Painting, and Clay Modeling curriculums! Each sequence within the curriculums is a step-by-step guide that includes Montessori direct and indirect aims, a materials list, and demonstration instructions. They can be combined to teach your students several different visual art domains, or you can stretch out a single curriculum throughout the year.

arts and craft book by Spramani Elaun

Spramani’s Books

Teach children visual arts

Curriculum For Children

Get step-by-step art curriculum to teach visual arts. Check out our 4 art curriculums:
Painting
Drawing
Color Theory
Clay Modeling

All rights reserved © 2024, Nature of Art®

No part of this blog may be used or be reproduced in any manner whatsoever including reproducing, publishing, performing, and making any adaptions of the work – including translation into another foreign language without written permission except in the case of brief quotations embodied in critical articles and reviews. Nature of Art® Publishing P.O. Box 443 Solana Beach, California 92075.

3 Teaching Tips for you to teach Virtual Montessori Art Lessons

By now, everyone knows about or has experienced virtual lessons at home. Whether you’re a school owner, teacher, or parent, school closures may quickly be affecting you in a number of ways. Mobilizing quickly by delivering school lessons and instructions online can make dealing with this unprecedented situation so much easier.

This might not be a smooth transition because many families have to figure out childcare and balance work routines. So, as an educator, you might have to support families remotely and start delivering weekly virtual lessons.

School Closures – Supporting Virtual Lessons for Home

virtual lessons

I homeschooled my own children over the span of 20 years and now support thousands of teachers and families across the world with virtual lessons. Based on my experience—both as a teacher and a parent, seeing both sides of things—here are some suggestions to hopefully make this transition a little smoother for everyone involved. 

Tip 1: Scheduling

The best way to support parents who are now faced with teaching their own kids at home is to give them simple virtual lessons that can be done in short chunks of time. This will make it easier for them to integrate their lessons as they deal with working from home on their own or trying to cook for and entertain potentially several different kids at once. Parents are not trained to manage a full day of virtual lessons, but if you can break subjects down into time blocks, they will really appreciate you. Help parents teach subjects in 20-40 minute patterns weaved throughout the week. Make scheduling easy to understand: 20-minute math lesson, 20 minutes of reading, 20-minute language arts lesson, 20-minute art lesson, 20 minutes of whatever other subject; and this can be given daily or weekly (just adjust the times as necessary.)

Tip 2: Virtual Support

Lesson instructions should be kept simple—with just two to three steps per lesson. They don’t have the extensive training you have and resources to instruct more difficult lessons. Make sure whatever virtual lessons you give are easy enough for students to follow on their own (that’s how simple they should be!). On top of providing simple lessons, make sure you’re able to support families either via phone (calls or text) or online. Parents will need reassurance that they are doing okay, and just knowing they have your support will be a big help. Create a schedule for you to regularly check in with your families or for them to get in touch with you if they have questions until school is back in. (Calendly is a great resource for appointment scheduling!) 

Tip 3: Include Art Lessons

Art lessons are perfect for stay-at-home days! I’d recommend including them in the lessons you send home—even if you haven’t started teaching them in your classroom yet. Art is a process-based and discovery-based activity, so kids don’t need very much guidance from their parents. That means parents can set out an art lesson and then walk away knowing their children are able to work and create quietly. And if you need some support or art lesson ideas, then I’m here to help! I’m in the best position to support you with my virtual art training services, and new art curriculums, including:

  • Kids Painting – 57 Master Key Brushstroke Lessons
  • Kids Color Theory – 37 Master Key Mixing Lessons
  • Clay Modeling – 27 Master Key Modeling Lessons

Bonus Tip for Parents

Here’s a tip you can pass along to your students’ parents:

Parents, you shouldn’t try to turn your kitchen into a full-time classroom. You’ll end up stressed, and your child will resist the work. Trust me, I went through years battling this out with my own son and daughter. Make it fun, just show your kids what needs to be done for the week and work out a schedule together. Make sure TV time, screen time, chores, outside play time, and any other fun activities are a part of their schedule. Ask them which hours or days they want to focus on a subject, because if they plan their day with you, it will be an agreement and commitment they will understand. Agreements are better than a demand, such as “You have to do it now,” which will add stress to anyone. This also helps kids build independence and accountability.

Have Questions? Need Help? Want More Support? Let’s Chat!

I offer free consultations throughout the year to help you figure out what will work best for your classroom, school, students, or own children. These next few days or weeks where schools are closed are the perfect time to reevaluate your teaching needs. So if this is something that interests you, just reach out to me with an email.

And on that note, I’ll be sending out another email in a few days with art resources and an invite to a free webinar on this topic. If you have questions you want answered or suggestions you’d like me to include, I would love to hear from you!

Sending you love and light during these hard times!

Dr. Seuss Day Crafts for Kids | Montessori Art

Dr. Seuss Day Crafts for Kids | Montessori Art

March 2nd is a very important date in classrooms all over the U.S.; not only is it National Read Across America Day, but it’s also widely considered “Dr. Seuss Day,” in honor of the children’s book author and illustrator. What better way to celebrate than with some fun Dr. Seuss crafts? Personally, I think art making is a wonderful way to pay tribute to the writer and artist. There are so many crafts that incorporate aspects of his wacky worlds while including the elements and principles of design and introducing art language to students—which, in turn, helps them grow in their art literacy!

One amazing thing about Dr. Seuss’ work is that it’s the perfect platform to easily introduce artist language to young students. You see, art has its own language—called the “elements and principles of design.” When you talk about art, it’s really just describing what you see in artworks, such as color, shape, form, line, etc. And Dr. Seuss books are loaded with bright colors, shapes, lines, and crazy images to use as a springboard for discussing and introducing art language!

Dr. Seuss Day Crafts for Kids | Montessori Art, spramani elaun

I know that teaching art language can be confusing and maybe even overwhelming, but I promise you, it’s not as hard as you think. In fact, it can be a fun experience for you and your students! Teaching art language is as simple as 1-2-3.

  1. Read a Dr. Seuss book
  2. Point out the elements and principles of design (using basic art language)
  3. Follow up with Dr. Seuss crafts or art activities

When you’re first introducing art language to your students, keep things basic and simple. Start by describing what you see when you’re looking at art or what’s going on as you make it. You don’t necessarily need to use exact terms, but words like “color,” “shape,” “texture,” and “line,” can be a great foundation for getting the conversation going.

Here are some examples of how to bring these ideas—while using Dr. Seuss’ books as inspiration—into your art talk.

  • “Do you see these green eggs?”
  • “Let’s cut out some shapes with scissors; how about we make a square to put our green eggs inside?”
  • “Hey, what about making some cool textures, just like the snow in The Grinch!” 
  • “Let’s make some curved lines and straight lines with paint like in Oh, the Places You’ll Go!
  • “How many different colored lines can we do?”
  • “Let me show you how to make a brand new color by mixing these two different paint colors. Look, yellow and blue can mix to make green eggs.”
  • “What dot colors do you see in Put Me in the Zoo?”
Dr. Seuss Day Crafts for Kids | Montessori Art

Where to Start: Turn to the Books for Dr. Seuss Crafts & Art Ideas!

Dr. Seuss is known for his surreal character drawings, humor, and imaginative tales. I’ve created some really awesome art projects and art activities, which I teach the kids at my annual summer art camps, that really honor his works. My students get great joy bringing their own version of the beloved books to life through art expression. Here are some Dr. Seuss crafts you can do with your own students!

Put Me in the Zoo Craft Ideas

While this book wasn’t technically written by Dr. Seuss, he did edit it and it is a part of his Beginner Book Collection (and has the same sense of illustrations). The book is all about a very unique leopard who can do amazing things with his spots. After reading the book to your students, invite kids to draw silly animals and then add beautiful, bright polka dots to their doodles using dot stampers (which are really easy to use, relatively mess-free, and come in so many different colors). As they work, you can talk about color and balance, covering the elements and principles of design. (Playing with dot-making alone can also be a great art activity for early childhood students.)

Dr. Seuss books

One Fish Two Fish Red Fish Blue Fish Craft Ideas

Use fish stamps or create your own by cutting out pieces of styrofoam in the shape of a fish and provide students with red and blue paint. Again, you can talk about color and balance with this art activity.

Oh, the Places You'll Go, Dr Seuss - Painting Art Project Kids, book ideas

The Lorax Craft Ideas

Give students sponges, foil, plastic wrap, race cars, and other non-traditional painting tools and have them create the truffula trees in the book. The different painting materials will create a ton of unique textures, which you can talk about and ask them to describe. 

green eggs and ham, dr. seuss

Green Eggs and Ham Craft Ideas

This book is a great way to start kids off with single color mixing. Give them green paint and let them explore all the different tones, shades, and hues that are a part of that single color.

Oh, the Places You’ll Go! Craft Ideas

I have so many art activity ideas for Oh, the Places You’ll Go!, I don’t have room to write them all here! (Luckily, if this is your favorite book, I’ve written a whole blog post with special crafts just for this book. You can read that here.) One project, which I think can be adapted to fit any age range, is the colorful plate mobile. Have students color or paint on both sides of a paper plate (you can take the opportunity to read the book to your students while the first side dries), and once they’re done, cut the plate out into a spiral and attach a ribbon at the top. Elementary students can cut their own plates, but you will likely need to do the cutting for early childhood students.

Dr. Seuss Crafts for Any Book

No matter what book you choose for your inspiration, Dr. Seuss’ books are so whimsical and creative. You can see how creative your students can be with a “community mural.” Lay a large piece of paper (such as butcher paper, or even a paper table cloth) on top of a table, and have kids paint, draw, or stamp designs that they think belong in a Dr. Seuss book.

One Step Further: Download My Kids’ Art Language Cheat Sheet

Dr. Seuss had a way with words, and your students can too—at least when it comes to describing their artwork. I’ve created an art language cheat sheet as a FREE resource to help you start using art vocabulary with your kids and in the classroom. You might not realize it, but you’re probably already using some of the Elements and Principles of Design vocabulary words (such as “color,” “line,” and “texture”) already!

Dr. Seuss Day Crafts for Kids | Montessori Art

Download my Art Language Cheat Sheet for a list of Montessori early childhood and elementary art language terms. I’ve included definitions for each term as well, so you’ll feel more confident using them, knowing you’re using them correctly. I’d even encourage your students to write Dr. Seuss-inspired poems or compositions to describe their artworks, using some of these terms!

To download the Art Language cheat sheet, click here.

A Short Cut Just for You

If you’d like to learn more about all the benefits art offers to children, read my book, Defining Visual Arts. It provides art literacy standards, giving you a guide to what you should be teaching your students. The book also includes more tips for using artistic language, as well as the best art mediums and art projects for kids.

books Crafts for Kids | Montessori Art

It’s truly a solid foundation to help you teach art in your classroom (in a way that’s stress-free for you, and exciting and fun for your students!). To purchase Defining Visual Arts, click here.

arts and craft book by Spramani Elaun

Spramani’s Books

Teach children visual arts

Curriculum For Children

Get step-by-step art curriculum to teach visual arts. Check out our 4 art curriculums:
Painting
Drawing
Color Theory
Clay Modeling

All rights reserved © 2024, Nature of Art®

No part of this blog may be used or be reproduced in any manner whatsoever including reproducing, publishing, performing, and making any adaptions of the work – including translation into another foreign language without written permission except in the case of brief quotations embodied in critical articles and reviews. Nature of Art® Publishing P.O. Box 443 Solana Beach, California 92075.

Ultimate Montessori Painting Guide

Ultimate Guide to Montessori Painting

Painting is one area of visual arts that is a lot of fun and can be messy at times. If you look at the most basic concept of painting, anyone can do it, from simple finger painting to multi-layered brushstrokes. Painting is great for all ages. In this blog, I want to share my ultimate guide, giving you ideas on where to start with simple painting activities. The resources listed in this ultimate guide should be beneficial to Montessori guides working with early childhood (ages 3-6), lower elementary, upper elementary students, and even Montessori-at-home parents.

Ultimate Guide to Montessori Painting, lesson

Montessori Painting

Painting can be a regular activity in the Montessori classroom with the right setup and key lessons staged properly on a shelf for independence. Children love playing with paint; it’s a very tactile medium. It’s a great idea for children to paint on a regular basis to improve their skill sets. However, it’s important to remember that children lack the ability to paint realistic images in the early years, but they can still enjoy the creative process and learn basic brushstrokes to build lines, shapes, and textures to eventually create great imagery. With painting materials staged properly, painting can be very joyous and fuel creative ideas.

Ultimate Guide to Montessori Painting, early childhood

What is painting?

Painting is the action of making brush strokes marks with a paintbrush, hands, sponges, paint rollers, or stampers. Brushstrokes are created with a liquid pigments – paint. Usually children paint on paper, canvas, cardboard and wood surfaces.

How Painting Benefits Children

Children can develop and strengthen their fine motor control by learning to make brush strokes with their hands and by holding a paintbrush. By showing young students how to use a paintbrush, you’re helping them reach critical milestones. Like using their hands for other subjects like writing, typing, crafting, and building.

Painting Builds Vocabulary

Montessori painting activities teach young students how to communicate what they see in their artworks and how to describe their process. They learn to identify the art elements and describe them to their peers using the language of an artist. Read more about art language here.

Start With Basic Brushstrokes

I recommend starting by introducing children to painting materials. Then follow up with basic brushstroke lessons. You can move on to using a paintbrush to create basic line and shape elements. If they’ve never painted before, let them explore and discover what paint can do through exploration. If you are uncomfortable giving them a potentially messy medium without any guidance, you can take the lead by mentoring basic paintbrush movements.

Stay nearby and demonstrate painting marks alongside them. Kids love to mimic the actions of adults! My painting curriculum can teach you how to teach basic brushstrokes and how to set up. My Painting Works art album can give you lots of ideas on teaching painting lessons for elementary grades. If you are working with early childhood, check out my Kids Painting Book with lots of information about choosing the right materials and setup for all painting activities.

Ultimate Guide to Montessori Painting, elementary lessons

Process-Based Painting For Beginners

Start painting projects by creating in process-based and open-ended lessons. This means your students do not have to follow directions to get a specific result. Process-based painting gives children the freedom to explore. Giving them the freedom to experiment with paint mediums any way they desire

Ultimate Guide to Montessori Painting, how to

Start With Few Colors

Give your students just a few color options at first—maybe even limit it to one color. Too many options can be overstimulating, causing them to lose focus (which could lead to messes). I typically start beginner lessons with just one color until my students get the hang of their materials and brush marks. Check out my painting key lesson training for guides and parents here.

Minimize Messes – My Signature Painting Hack

If you don’t want large messes, shrink down the paints and paintbrushes. Use the smallest available size of paintbrush and put paint into small containers (as opposed to giving students the entire bottle). This is one of the major tricks I share in my books and guides Kids Painting

Ultimate Guide to Montessori Painting, what materials should I buy

Learn Proper Brushstrokes

Once your students have a grasp on how paints work and can control their movements a bit, move your focus to teaching brushstrokes. Read this article for tips on teaching kids how to create brushstrokes. 

Painting & Color Theory

One great way to teach color theory concepts is through painting! Start by giving your students a single color to paint with, but create different tones and hues for them to use. For example, start with a dark green, then add drops of white paint to it to make lighter and lighter shades.

Ultimate Guide to Montessori Painting, how to teach kids
Choose the Right (Safe) Paints

Only use paints that are safe, non-toxic, and intended for young children. If products carry a non-toxic seal or claims the product “conforms to ASTM D 4236,” that means all of the potentially hazardous components of the art product are safe. Most adult fine artist supplies don’t have this seal, so be very careful when purchasing. 

What To Paint

The surface your students are using will determine the best paint for their project. For example, acrylic paint has the sticking power to help it adhere to canvas; watercolor paints need a thicker, more absorbent paper; finger paints and tempera paints will work on most regular paper. In my early childhood Kids Painting book and elementary Painting Works Album I give lots of great ideas of what to paint.

what paints do I use, Ultimate Guide to Montessori Painting

Paint Mediums Best For Kids

Visit Nature of Art for Kids for more non-toxic, eco-friendly, kid-safe painting supplies!

Tip: Use watercolor paints, which can be diluted to near transparency, making it easy to manage stains. Start with these until you and your class become more familiar with painting and its clean-up.

its clean-up.

Ultimate Guide to Montessori Painting
Dress for a Mess

Young children lack the fine motor skills to keep paint in the palettes and on their paper, so be prepared. It takes many years for kids to stop making frequent spills. Anytime kids are painting, make sure they’re wearing “paint clothes,” or old large t-shirts, a smock, or some other type of cover-up. Even if the bottle says the paint is washable, it can still soil clothing. Plus, there’s no real guarantee that the pigment won’t stain…trust me!

Set-Up Paint Environment

Before painting starts, designate a painting area for the kids to work in. Make sure they know where the paint will be set up and where painting activities will be allowed. Never let kids get lazy about this rule! Remind your students where they can paint to avoid stains. If necessary, put down tarps, rugs, or towels in this area to keep floors clean during any painting activities.

One Step Further: Download My Painting Materials Checklist

Ultimate Guide to Montessori Painting, checklist

Now you have a basic understanding of how to set up a painting area, what kind of painting activities your students can do, and an idea of what paints to use. Before you start teaching painting in your Montessori classroom, make sure you download this FREE Painting Materials Checklist; it has all the materials you need to be able to confidently and successfully teach your students! Click here to download the checklist.

Ultimate Guide to Montessori Painting, free art lesson

As a bonus, you can also check out this FREE Northern Lights painting lesson demonstration. This art project uses two paint techniques: wax resist and wet-on-wet. This project is best for elementary students, but can be adapted to be suitable for younger ages as well. Watch the video by clicking here!

A Short Cut Just for You

I’ve actually created an online training that delves deeper into teaching young students how to paint. Painting Key Lessons 101 gives you the foundation for demonstrating and presenting painting lessons in your Montessori classroom, even if you don’t feel like you have the skills or experience. In the 1.5-hour video training, I also cover the types of paints that are best for children, and how to set up lessons so they’re integrated with other subjects and allow kids work independently. It truly is a shortcut to becoming an expert in teaching your students how to paint; AND, even better, you can earn 1.5 CPD hours once you complete the training and complete a quick survey! To enroll and get started, click here. 

Ultimate Guide to Montessori Painting, online how to teach kids
Ultimate Guide to Montessori Painting, books to order

If you want more information, instruction, and tips for teaching kids how to paint, check out my book, Kids Painting. It includes everything you need to know about how young children learn how to paint, and gives you lists of kid-friendly paint supplies, art project/lesson ideas, and ways to set up your classroom to provide inspiration and avoid messes. To purchase Kids Painting, click here.

arts and craft book by Spramani Elaun

Spramani’s Books

Teach children visual arts

Curriculum For Children

Get step-by-step art curriculum to teach visual arts. Check out our 4 art curriculums:
Painting
Drawing
Color Theory
Clay Modeling

All rights reserved © 2024, Nature of Art®

No part of this blog may be used or be reproduced in any manner whatsoever including reproducing, publishing, performing, and making any adaptions of the work – including translation into another foreign language without written permission except in the case of brief quotations embodied in critical articles and reviews. Nature of Art® Publishing P.O. Box 443 Solana Beach, California 92075.

Valentine’s Day Crafts for Teaching Kids Empathy

Usually, when I’m gearing up for Valentine’s Day crafts to share with parents and teachers, I focus on sharing beautiful and fun cards and crafts for children to make for their loved ones and classmates. However, this year, I wanted to dig a little deeper, and share some expressive Valentine art projects that can help students strengthen their emotional intelligence, and open up classroom discussions to talk about and teach empathy.

In a world where school bullying, cyber bullying, verbal abuse, harassment, anger, and even suicide rates among teens, are on the rise, I think empathy is extremely important for children to learn. And I think teachers are the best mentors and examples to help students understand and practice emotional intelligence and empathy.

Because Valentine’s Day is dedicated to love, I figured it’s the perfect time to teach children how to love each other—in a way that’s not focused on romance, of course. And I think, in teaching kids to be empathetic, we can teach them to love themselves and identify their own feelings as they look to understand the feelings of others. These types of lessons can also bring light to how their actions impact other students’ emotions. Valentine’s Day crafts can be structured to take advantage of all the talk about love and feelings, which prepares them for more complex conversations about empathy. 

What is empathy?

Empathy is the ability to be aware of, understand, and/or imagine how someone else is feeling in a particular situation—and then respond with care. It’s actually a very complex skill to achieve, but again, it’s a very important one. 

When a child is empathetic, that means they can:

  • Understand that they are a unique individual, with their own thoughts and feelings,
  • Acknowledge that other people may have different thoughts and feelings that their own,
  • Notice facial cues and associate a relevant feeling or emotion to those expressions,
  • Look at a situation and imagine how both they, and someone, else might feel in that moment, and,
  • Think of and act on an appropriate response to that particular situation.

An example of empathy that you can share with students is:

If you notice that your friend is upset If you see your friend upset because they skinned their knee, and you understand they’re in pain, so you give them a hug and help them find a teacher who can help. Or… You see your friend get excited because they’re very proud of the way their art project came out, so you feel happy too, and give them a hug and a high five.

Importance of Empathy

The UN’s World Happiness report ranked Finland, Norway, Denmark, Iceland, and Switzerland as the world’s happiest countries; the United States came in at 18 on that list. In Denmark, emotional intelligence is a mandatory part of the national curriculum, and it’s taught from elementary to high school grades. Many teachers wholeheartedly believe that the reason they continuously rank so high for World Happiness is because of their mandatory empathy studies. 

Of course, there are extreme negative outcomes that can come from children raised without empathy—including traits like narcissism, impulsiveness, and even psychopathy. People without empathy can’t identify with other people’s feelings and are less likely to help in dire situations. For example, there was a story in the news back in 2017, about a group of Florida teens who used their phones to record a man who was drowning, rather than attempting to help him or even calling him help; this shows a serious, devastating lack of empathy.

In fact, I’m so passionate about teaching empathy and emotional intelligence—especially through art—that I’ll actually be co-hosting a workshop on the subject this coming March, at one of the largest educational conferences in North America. Below, you’ll read some of the ideas I’ll be teaching during my class—Using Art for Emotional Literacy.

Where to Start: Valentine’s Day Crafts That Teach Empathy

Neuroscientists today all agree that our left and right brain are both equipped to learn emotional cues, directly affecting our response of empathy towards others. As a teacher, you can start raising awareness of emotional intelligence and impact your classroom and students by introducing simple empathy art projects during the school year. While these crafts have a Valentine’s Day theme, you can adjust them a bit to work any time of year.

Valentine’s Day Empathy Projects

  • Personal Valentine’s Day Card – Have kids make themselves a crafted paper card and list reasons why they matter and what makes them unique and special. This can be a wonderful keepsake they can refer to when then need to be reminded that they are loved. (Check out this blog for a potato-stamp card craft.)
  • Art Reflective Journal – Students will start by creating their own art journal, which they can use to answer prompts each week. If you theme prompts to be about feelings and emotions, or give them specific situations to respond to (hopefully empathetically), you’ll be helping them develop their emotional intelligence. 
  • Valentine’s Cards for the Community – Ask your students to make Valentine’s Day cards which they can give out to a worthy cause within your community. You can then drop them off to nursing home residents, patients in hospitals, people living shelters, or first responders. 
  • Collaborative Mural –  Using the whole classroom’s creative input, create a mural with an empathetic or love-related theme. As a collaborative effort, have your students work together to paint or color the mural; then hang it in the classroom or somewhere in your school for them to admire and hopefully remind them of the beautiful things that can happen when they work together. 
Spramani Elaun – Birch Aquarium at Scripps Institution of Oceanography | aquarium.ucsd.edu

Article resources:

Montessori Early Childhood Art

One Step Further: Download My Art Language Cheat Sheet

Believe it or not, art is a fantastic way to introduce empathy to your students! It helps students view ideas and art mediums through different perspectives, which helps them practice seeing the different perspectives of their classmates and others. And using art terms is an important component of that; for example, you don’t use words like “good” or “bad” to describe art, instead, you use neutral terms, which helps to remind children that, again, there are different ways to look at things and one specific way isn’t always going to be correct.

Download my Beginner Art Language Cheat Sheet for a list of art language terms you can begin using in your classroom. It includes definitions for each term, so you’ll feel more confident knowing you’re using them correctly. 

To download the Art Language cheat sheet, click here.

A Short Cut Just for You

It’s truly a solid foundation to help you teach art in your classroom (in a way that’s stress-free for you, and exciting and fun for your students!). To purchase Defining Visual Arts, click here.

arts and craft book by Spramani Elaun

Spramani’s Books

Teach children visual arts

Curriculum For Children

Get step-by-step art curriculum to teach visual arts. Check out our 4 art curriculums:
Painting
Drawing
Color Theory
Clay Modeling

All rights reserved © 2024, Nature of Art®

No part of this blog may be used or be reproduced in any manner whatsoever including reproducing, publishing, performing, and making any adaptions of the work – including translation into another foreign language without written permission except in the case of brief quotations embodied in critical articles and reviews. Nature of Art® Publishing P.O. Box 443 Solana Beach, California 92075.

Montessori Early Childhood Art Collaging

Collaging gives students the ability to express their creativity and even helps them develop their fine-motor skills. That’s why Montessori early childhood art collaging activities are great to introduce to students! The activity involves the process of selecting, assembling, and pasting a variety of materials down into a unique arrangement. 

Montessori Early Childhood Art Collaging

It’s an ideal craft for early childhood students because collages are intuitive arrangements; they’re the perfect artful playground for kids to craft in.

This is part of a larger post, The Ultimate Montessori Art Collaging Guide, goes into further detail on the benefits and provides tips and resources for all Montessori levels.
You can read the blog by clicking here.

Montessori first plane students, 3-6 years, are ready for simple collage making crafts. This is an exciting age for art making, since they’re likely crafting and exploring different art mediums for the very first time!

Montessori Early Childhood Art Collaging, how to

Early childhood students are able to hold materials, practice scissor cutting, and explore the different collaging mediums tactilely. They can dip a paintbrush into glue, learn to paste, and make simple arrangements. It’s best to keep instructions simple—giving them just one- or two-step instructions. (For example, cut and paste; or paste and arrange.)

It’s best for early childhood students to work in process-based mode (or creative-mode), which means art making focuses on the process, not the outcome. Again, any copy-mode creating should be basic; with simple instructions meant to build implicit memory. You should allow students to try Montessori early childhood art collaging without any expected outcome. [You can learn more about process-based teaching by clicking here to read more about the method.]

Where to Start: Simple Montessori Early Childhood Art Collaging Activities

Children at 3-6 years are very curious about materials and how they can be used. At this age, they’re very quick learners! By introducing art collaging you can actually help refine their small motor muscles, since the activity involves making controlled movements through cutting, pasting, and manipulating the collaging mediums. 

Keep collage materials very basic at first. I’d suggest starting with light-weight paper and glue sticks. This gives students the opportunity to learn more about how adhesive works, and they’ll be able to build upon that skill as they create more and more. After they’ve had a few chances to explore this type of art activity, you’ll see that they’ll likely have a decent understanding of how collaging works, and will want to create with new types of materials.

Collaging can be done with any type of material: paper, fabric, natural elements, recycled objects (buttons, tiny beads, pieces of cardboard, etc.), sequins, foil, glass, wire, and burlap. However, since young children are still developing their fine-motor skills, make sure the objects are easy to grasp, pinch, or hold. 

They can also be a little impatient at this age, so you also want to make sure the objects they’re crafting with can be easily pasted onto their working surface. (You don’t want things falling off their canvas, and you don’t want to have to use a glue gun to make sure their designs stay in place!) Tape can also be used in place of adhesive glues and pastes; washi tape comes in a bunch of fun designs and can add to the art they’re creating!

Be sure to give children plenty of time to experiment with making different arrangements. It takes some time to understand how to paste, arrange, and press down or hold their design objects into place to create the look they desire.

 Montessori Early Childhood Art Collaging natural items

One Step Further: Register for My FREE Online Mini-Course

Introducing your lower elementary students to collaging concepts is just one Montessori art activity out of thousands. Lower elementary students are capable of so much when it comes to art! But if you want to keep your students interested in your demonstrations and keep the mess down to a minimum, you have to understand how they learn. That way you can find the perfect balance of teaching them without overwhelming or boring them. And I’ve developed a FREE digital mini-course—the Phases of Art Development—to help you do just that!

It’s an online course that explains how art making helps students develop their creativity, fine-motor skills, and focus. Not only will it help you teach your students, but I make it easier on you by giving you some examples of art projects lower elementary kids will enjoy creating.

Best of all—it’s free! To sign up for the course, click here.

A Short Cut Just for You: Early Childhood Art Guide

montessori early childhood

Art collaging is just one of the many art activities early childhood students are capable of doing. If you want more ideas, and more importantly, if you want to better understand how early childhood students actually learn art, check out my book, Early Childhood Art: Visual Arts Teaching Guide. It lays the groundwork for what your students need to know about art and provides tips and tricks for setting up an art environment, using proper art materials and mediums, and planning age-appropriate art lessons.  Click here to get your copy of my Early Childhood Art guide!

The Ultimate Guide for Creating Montessori Art Lessons

Ultimate Montessori Art Lesson Guide, elementary schools

The Ultimate Montessori Art Lesson Guide is the perfect resource for Montessori teachers who want to learn how to prepare art lessons that keep students engaged and that follow art literacy standards.

If you are new to Montessori art—or even just art in general—it may feel overwhelming to try and teach a room full of students anything about art. I get that… but in many ways, art lesson planning is no different than any of your lesson plans for other Montessori subjects.

My objective in this ultimate guide is to clear the confusion on preparing effective art lesson plans, and save you time and stress from worrying about creating art lessons that don’t support independent creative art making or art literacy.

Ultimate Montessori Art Lesson Guide

The resources included in this Ultimate Guide offer insights for Montessori teachers of early childhood (3-6), lower elementary, upper elementary students, and even Montessori-at-home parents. I created this guide to give you tips and ideas for creating art lessons—that are exciting, engaging, and promote independent working—for your Montessori students.

What is a Montessori art lesson?

Before we even start with tips, I think it’s important to understand exactly what comprises and defines a Montessori art lesson. It’s a sequence of visual-arts related instructions that are broken down into steps; they should be done using the proper art mediums and tools in a way that highlights an artist technique and supports art literacy standards. Art lessons can (and should) also be integrated into Montessori core subjects.

The truth is, preparing a Montessori art lesson is more about organizing the steps to giving students exploratory experiences related to their current learning. If you’re planning these properly, you really don’t have to worry about figuring out new ideas to teach for every single lesson. 

Ultimate Montessori Art Lesson Guide, early childhood

By reviewing the Ultimate Montessori Art Lesson Guide, it will become easier for you to understand art lesson planning ideas, and ensure the right key features are included in the lessons you present to your students.

You’ll be surprised at how quickly you can implement these ideas in your classroom!

Where to Start: Read Through These Montessori Art Lesson Resources

There’s a treasure trove of Montessori and art-teaching resources on the internet, but going through each of them and finding ones that quality, and actually relative to your classroom, can be overwhelming, confusing, and even exhausted. The pages below offer actionable, practical information, based on the cumulation of all my years of experience as an art teacher and Montessori art teacher trainer. 

Ultimate Montessori Art Lesson Guide, resources

Though you can jump around between the different links, I recommend you read through these seven resources in the order they’re numbered. Once you feel like you have the basic concepts of creating art lessons, I’d encourage you to continue your Montessori art journey by learning more about my proprietary art teaching method, creative techniques for each visual art domain, and building a Montessori art curriculum for the school year. I have several Montessori art and visual art books, plus, teacher workshops and trainings to help you gain a deeper understanding and confidence in teaching art to your students!

Ultimate Montessori Art Lesson Guide

Ultimate Montessori Art Lesson Guide

1. 5 Ways to Integrate Art Activities into Montessori Great Lessons

When you combine the concepts of art and the Great Lessons, you can seamlessly support your students learning without any disconnection!

2. Building a Montessori Art Lesson Calendar to Keep Students Busy Every Month

If you take some time to plan out your calendar, presenting art lessons will be so much easier for you during the school year. The best part of all this? There’s a simple, stress-free way to break it down, this blog shares how.

3. 5 NEW Ways to Tackle Montessori Art Projects

This article is a little inspiration for tackling art lessons, activities, and projects. Because, sometimes, you need a different way of looking at things to come up with fun, creative art lessons for your students. 

4. Montessori Art Lesson Planning How-To

Without the proper art training, it’s difficult to know what a great art lesson should actually cover and include. This post sets the foundation to help you choose lessons, set up for activities, and create a schedule for the year.

5. Montessori Art Activities | Big Bang Art Lessons

There are so many different art activities you can present to your students that incorporate the lessons about the Big Bang. Combining art activities with science is the perfect way for students to explore their imaginations and support traditional learning methods.

6. Montessori Art Lesson Planning: My Beautiful (Disastrous) Trip to Bali

Teaching art in Bali was, hands down, the most beautiful art trip I’ve taken this year, but that doesn’t mean everything went exactly as planned. Hopefully you will read about my experience and understand a few ways to work through difficult lessons—and maybe even learn from my mistakes! 

7. Montessori Art Lesson Plan Cheat Sheet

One of the most important factors when it comes to lesson planning is staying organized. Download this FREE, handy, three-step cheat sheet and refer to it when you start planning your next art lesson.

Ultimate Montessori Art Lesson Guide, teachers
montessori art guide

One Step Further: Register for My FREE Online Mini-Course

I’ll be honest, creating a Montessori art lesson is one of the most challenging parts about teaching art to your students. However, challenging does not mean impossible!

If you can understand how young children learn art—because it’s often slightly different than with other subjects—creating lessons becomes infinitely easier! It’s the key to keeping your students interested in and excited about your demonstrations and keep the mess down to a minimum. And I’ve developed a FREE digital mini-course—the Phases of Art Development—to help you do just that!

It’s an online course that explains how art making helps kids develop their creativity, fine-motor skills, and focus. Not only will it help you teach your students, but I make it easier on you by giving you a type of Montessori art lesson guide with examples of projects your students will enjoy creating.

Best of all—it’s free! To sign up for the course, click here.

A Short Cut Just for You – Montessori Art Teaching Book

arts and craft book by Spramani Elaun

Spramani’s Books

Teach children visual arts

Curriculum For Children

Get step-by-step art curriculum to teach visual arts. Check out our 4 art curriculums:
Painting
Drawing
Color Theory
Clay Modeling

All rights reserved © 2024, Nature of Art®

No part of this blog may be used or be reproduced in any manner whatsoever including reproducing, publishing, performing, and making any adaptions of the work – including translation into another foreign language without written permission except in the case of brief quotations embodied in critical articles and reviews. Nature of Art® Publishing P.O. Box 443 Solana Beach, California 92075.

Montessori Art Collaging: Lower Elementary

Montessori Art Collaging: Lower Elementary

Collaging offers many benefits to children of all ages; it gives them the opportunity to conjure up creative ideas, improve their fine-motor capabilities, and work on projects independently. In this blog, I’m going to focus on Montessori art collaging for lower elementary students, giving you some helpful hints and inspirational activity ideas to get them going with this type of crafting.

This is part of a larger post, The Ultimate Montessori Art Collaging Guide, goes into further detail on the benefits and provides tips and resources for all Montessori levels.
You can read the blog by clicking here.

Collaging is the process of selecting, assembling, and pasting materials into a unique arrangement or a beautiful work of art. Montessori art collaging is perfect for lower elementary students because they’re at a great age to start exploring textured materials and trying out different art-making techniques.

Lower L students are also capable of planning out their designs with intention and seeing out their creative ideas through realization and the completion of their activity. They can also follow simple, guided-art instructions and begin to work with more abstract themes and concepts.

Montessori Art Collaging: Lower Elementary, kids activities

Montessori Art Collaging, Lower Elementary Materials & Concepts

One of the best things about collaging is that it can be done with almost any kind of material, including: papers, fabrics, natural elements, recycled objects, buttons, tiny beads, sequins, and all other kinds of man-made embellishments. You can even use textured materials like foil, glass, wire, and burlap. There’s really nothing that can’t be collaged!

Since the types of collaging materials you can use are basically endless, the glue or paste you use is important. Some materials won’t stick with a simple glue stick, so you’ll have to decide what adhesive you want to set out so your students will actually be able to collage successfully. 

I’d suggest using glue sticks for tissue collaging and light-weight paper; white craft glue can be used for construction paper, fabric, and small embellishments; and a low-temperature glue gun (used with supervision!) works best for plastic, wood, and larger objects. 

Montessori Art Collaging: Lower Elementary, art ideas

Giving students the right materials will take care of most of the work for this Montessori art collaging activity. The process is easy for you to demonstrate and easy for lower L students to practice. Collaging really only consists of three steps:

  1. Cutting – students should begin with cutting interesting shapes out of varying raw materials
  2. Arranging – once students have the shapes and items they want to work with, they can arrange the elements into designs, patterns, or interesting layouts
  3. Glueing – after students have an idea of what they want to create, they will apply glue to the back of the materials, then place them back onto the arrangement

Make sure students have the freedom to explore and devise their own layouts. Have your students work in creative mode, with only very simple copy-mode steps. Children at this age level are developing better control of their fine-motor skills, such as scissor use, and will have fun cutting out different shapes out from the materials. And since they’re starting to be able to plan out their art works in their imagination ahead of time, it’s a fun age to see brilliant concepts and ideas come to fruition within their projects.

Where to Start: Montessori Art Collaging Lower Elementary Skills

If your students have never collaged before, start with simple materials, such as paper, before giving them more options. Then, you can even try introducing different patterns and themes, and even show students different artist samples for inspiration. Just make sure students are always allowed to work out their final designs on their own. 

5 Montessori Art Collage Ideas for Lower Elementary

Collages can be put together in many different ways, they can be sewn, glued or weaved. They can be abstract in nature or even resemble an image. Here’s five different ways to approach  collaging with lower elementary students.

How to Montessori Art Collaging: Lower Elementary

Paper + Tissue

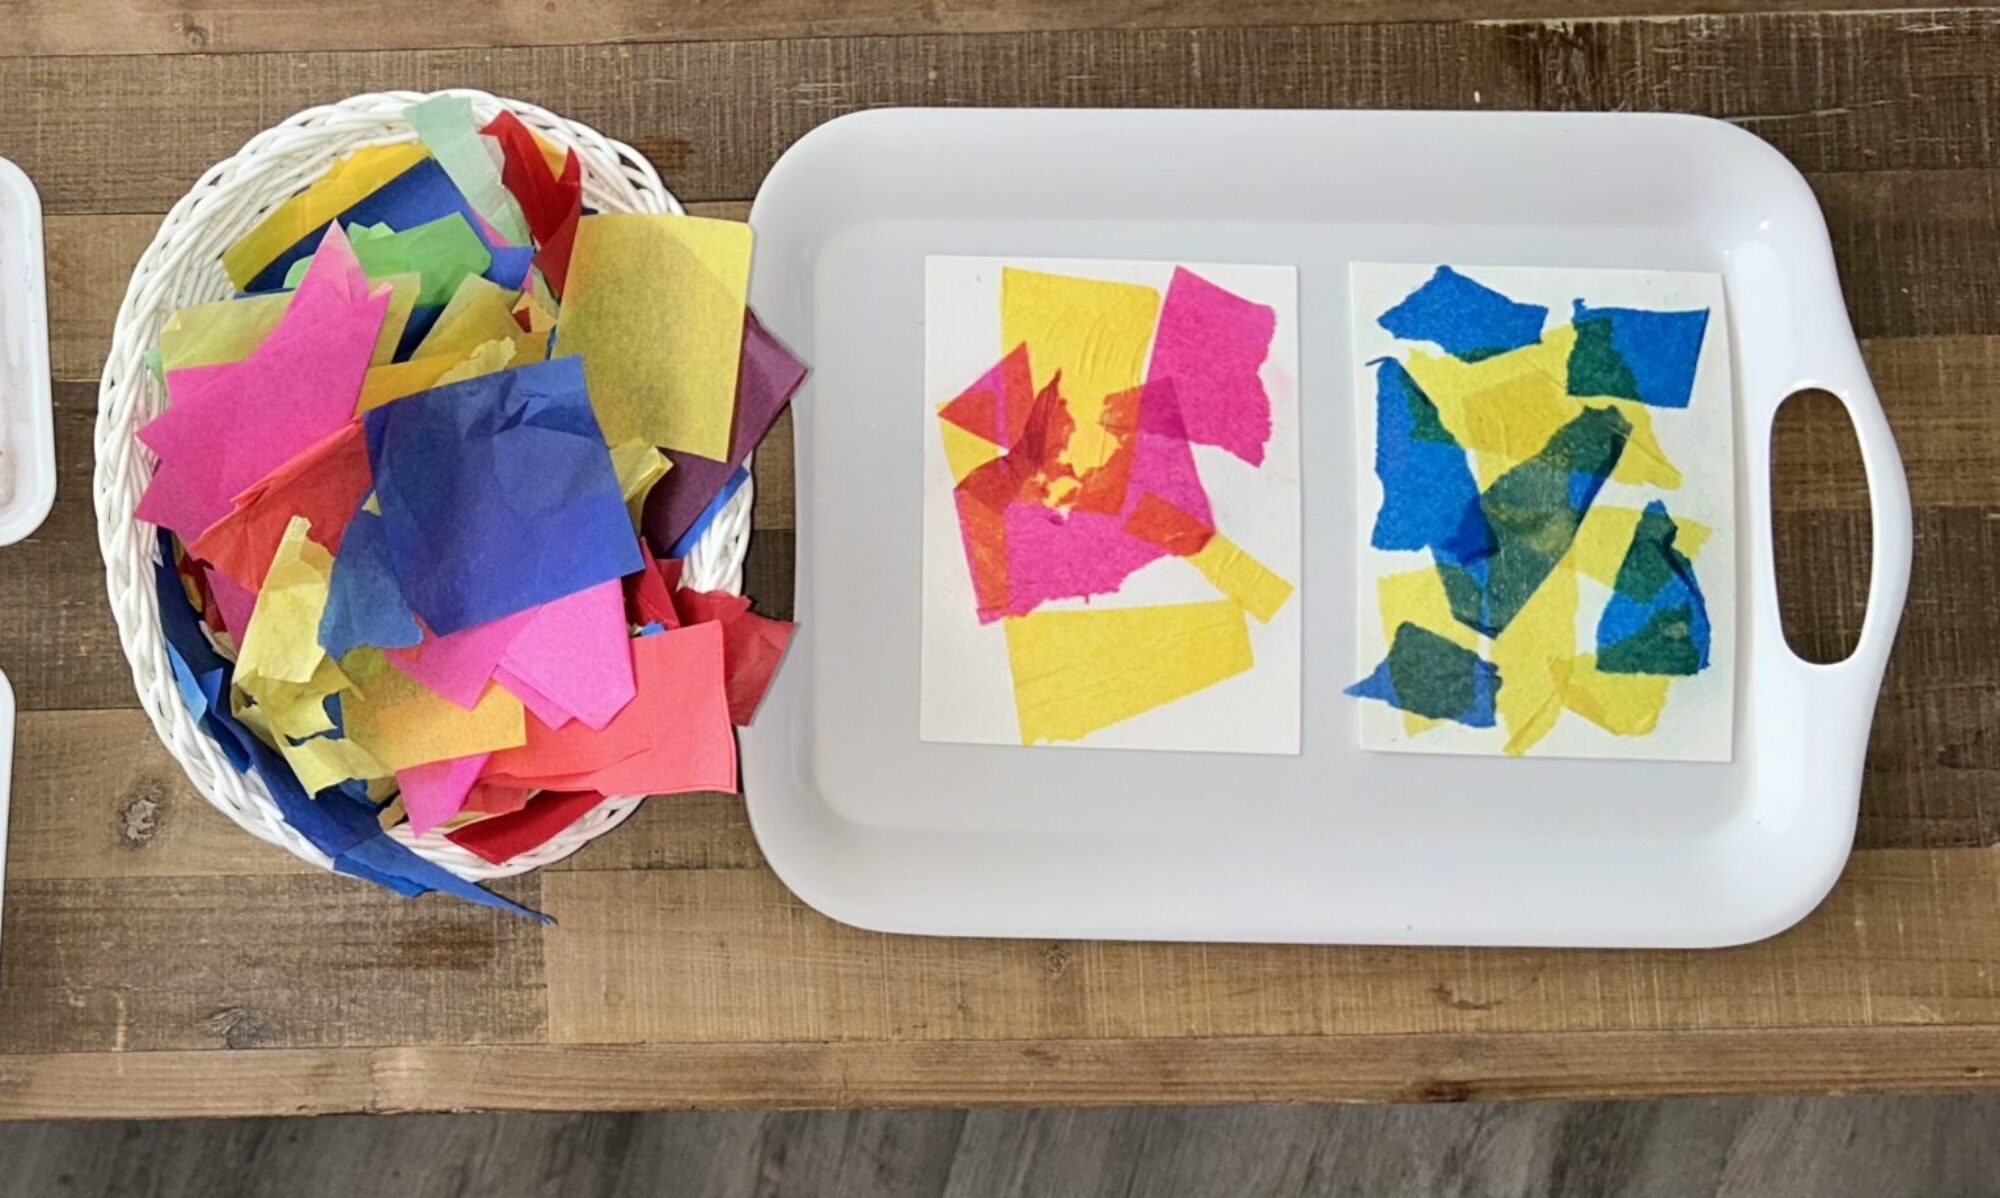
Tissue and paper are ideal to start out with because they’re easy to tear and cut. Their lighter weights mean most craft glues will be able to hold them down securely.

Up-cycled materials

A collage created with up-cycled materials can be made with almost anything, from old cardboard to broken toys. I’ve even used old wetsuits before (like in the photo below)! Using old materials is both an earth-friendly and cost-effective way to create art.

how to collage with kids art activities
how to collage with kids

Natural Elements

Collages can also be done using natural elements, such as flowers, leaves, seeds, and twigs. Natural materials can give collages diverse texture and interesting features. Some food items can also be collaged, like dried beans and pasta. The trick to collaging with natural elements is to use a hot glue gun (you may need to do this yourself, or supervise children while they use it), or weave and sew the materials onto the collage base, since craft glue isn’t usually strong enough to hold these objects.

how to teach collage art to montessori Lower Elementary

Styrofoam

Montessori Art Collaging: Lower Elementary, recycle

Styrofoam isn’t the most earth-friendly materials, so I suggest using only recycled pieces. The one reason I do like to use it is because the material is super easy for younger children to cut through. Painting the pieces before using them also introduces the painting domain to your students, and make their creation even more interesting. If you can start repurposing these materials instead of sending them to landfills, you can help the environment.

how to teach Montessori Art Collaging: Lower Elementary
Montessori Art Collaging: Lower Elementary, spramani
Montessori Art Collaging: Lower Elementary, activities for the classroom, art albums

Images & Design Prompts

Once you have given your students plenty of time to collage their own ideas and explore with different materials in a process-based way, you can then provide them even more inspiration using themed prompts based on subjects you might already be working on. For example, geometric shapes can help with math concepts, while a collage of a bird is a great way to instill zoology lessons. You can even challenge kids to bring color theory into their creations by asking them to create warm, cool, or contrasting color layouts.

One Step Further: Register for My FREE Online Mini-Course

Introducing your lower elementary students to collaging concepts is just one Montessori art activity out of thousands. Lower elementary students are capable of so much when it comes to art! But if you want to keep your students interested in your demonstrations and keep the mess down to a minimum, you have to understand how they learn. That way you can find the perfect balance of teaching them without overwhelming or boring them. And I’ve developed a FREE digital mini-course—the Phases of Art Development—to help you do just that!

It’s an online course that explains how art making helps students develop their creativity, fine-motor skills, and focus. Not only will it help you teach your students, but I make it easier on you by giving you some examples of art projects lower elementary kids will enjoy creating.

Best of all—it’s free! To sign up for the course, click here.

3 to 6 Art – Early Childhood Montessori Teaching Resources

Sign-up to receive video

The Phases of Art Development is a quick digital course that explains how art making can help students develop their creativity, fine-motor skills, and focus. More importantly, I share what types of projects students at every age are capable of completing safely, and without making a mess.

Best of all—it’s free! To sign up for the course, click here.

All rights reserved © 2024, Nature of Art®

No part of this blog may be used or be reproduced in any manner whatsoever including reproducing, publishing, performing, and making any adaptions of the work – including translation into another foreign language without written permission except in the case of brief quotations embodied in critical articles and reviews. Nature of Art® Publishing P.O. Box 443 Solana Beach, California 92075.

Montessori Color Mixing Activity: Exploring One Color at a Time

Color is one of the foundational components of art making. It helps children talk about their art, as well as explore more uniquely, since they can eventually learn to create any hue imaginable. That’s why I want to take the time to talk about the importance of giving students the opportunity to experiment with color—however, it’s important to start simply. When you’re doing a Montessori color mixing activity with your students, you should start off by giving them fewer color choices when they first begin to explore different color pigments.

One of the main reasons I like to isolate colors is because it gives children the opportunity to observe different color values, such as light, medium, and dark. In my experience when you give kids a full palette of color choices or introduce several colors at one time, their senses will pick up on all the different colors available to them and they’ll get so excited to use them all, that they won’t spend enough time observing each hue and their values separately.

Montessori Color Mixing Activity: Exploring One Color at a Time, art lessons for kids

I give more details about color play in my book, Kids Color Theory, and explain how color play is actually a form of scientific exploration that allows children to witness hands-on. That’s because color theory, in general, is all about exploration, observation, and experimentation. 

Working this way—through experimentation—is a great way to introduce the elements and principles of design to children.

Montessori Color Mixing Activity

When children have the chance to work with fewer colors, they have deeper reflective thoughts and are able to form an essential understanding of spatial awareness in art. By experiencing a single color at a time through specially set up Montessori color mixing activities, children will notice different degrees of hues with a sharper eye and even learn to appreciate and be more selective with colors as they progress in their art literacy. It helps them develop a more aesthetic eye for color choices in their designs and artworks. Children will naturally develop color harmony in their artworks.

 Color Mixing Activity, One Color at a Time

Where to Start: Set Up a Montessori Color Mixing Activity

Watercolor Play is a simple, natural, and exciting way for students to start exploring color. I’ve laid out the how-to and steps in a previous blog post, you can read that here. It teaches them how color behaves and mixes, which are things all artists need to learn, without getting too technical just yet.

Montessori Color Mixing Activity: Exploring One Color at a Time

Starting out with one color at a time, and give them the tools and materials (buckets, cups, bowls, paper, sponges, droppers, paintbrushes, etc.) to mix non-toxic, liquid paint. As they add more water to the paint, they’ll be able to see the value change from dark, deep, rich, to lighter and more transparent. This will help them learn valuable color theory concepts.

When I teach brushstrokes for the first time, I also isolate distraction by offering one color to work with at first. This helps students focus on the movements rather than all the color choices.

Once I feel my students have spent a good amount of time discovering primary colors, and cool and warm tones separately, I then offer palettes with more colors options.

One Step Further: Download My Montessori Color Set-up Video

Understanding the actual set up and purpose of color mixing—especially when you’re only using one color at a time—is relatively easy. As a Montessori teacher, I’m sure you’ve noticed that when more options are offered to students, the less focus they become. In this FREE Montessori color set-up activity video download, I show you how to set up a color mixing station for students to get hands-on experience in color tones and values. 

Montessori Color Mixing Activity: Exploring One Color at a Time

Bonus Activity

Here’s another fun tip: I love placing out different natural elements so students can see different color tones in nature. For example, slices of lemon show the different color value of yellow, and a handful of leaves will show how vibrant and varied the color green can be. Natural elements like flowers, leaves, seeds, berries, and fruits are perfect for children to understand where pigments, tones, and hues derive. 

A Short Cut Just for You

montessori art early childhood

I explore the importance and how-to of color theory in my book, Kids Color Theory. I share the reasons kids should be able to identify primary pigments and secondary color, as well as how to create art and color mixing Montessori environments to allow kids to thrive as little artists. Plus, I even give you 11 color-mixing lessons to make your life so much easier! You can purchase the book here.

Montessori Color Mixing Activity: Exploring One Color at a Time

Of course, understanding the principles of color theory is just the first part; to be able to share that knowledge with your students involves creating fun, exciting, and effective art activities. My book includes 11 art lessons, but I’ve created an entire curriculum that revolves around this essential art concept. Kids Color Theory Practice & Process Curriculum has more than three dozen color theory lessons for early childhood, lower elementary, and upper elementary Montessori students. And every lesson is laid out, step-by-step, so all you have to do is read up and follow the instructions! To purchase Color Theory Curriculum for your classroom, click here.

arts and craft book by Spramani Elaun

Spramani’s Books

Teach children visual arts

Curriculum For Children

Get step-by-step art curriculum to teach visual arts. Check out our 4 art curriculums:
Painting
Drawing
Color Theory
Clay Modeling

All rights reserved © 2024, Nature of Art®

No part of this blog may be used or be reproduced in any manner whatsoever including reproducing, publishing, performing, and making any adaptions of the work – including translation into another foreign language without written permission except in the case of brief quotations embodied in critical articles and reviews. Nature of Art® Publishing P.O. Box 443 Solana Beach, California 92075.