Benefits of Clay Play | Montessori Arts and Crafts

Montessori | Benefits of Clay Play, early childhood 3-6 years. Montessori Art and craft | Benefits of Clay Play

Montessori Clay Play has been found to have positive effects on emotional well-being. Playing with clay can help children regulate stress levels. Playing with clay provides a highly tactile and sensory experience. As children squeeze, press, and manipulate the clay, they are actively engaging their senses. Sending valuable sensory information to their brain.

However, the benefits of clay play extend far beyond the realm of sensory development. In fact, there are numerous cognitive advantages associated with this activity.  Montessori education highlights the importance of hands-on learning. Clay play aligns perfectly with the Montessori philosophy. In my early childhood art guide, I discuss this topic and provide more insights into clay play for emotional health. You can learn more by reading about the benefits of clay play in my early childhood book.

Montessori arts and crafts| Benefits of Clay Play, student playing clay tools

The important thing to understand about clay play is that it should be a process-based activity, providing children with ample time to freely play and explore clay. There are various ways to engage children in exploring clay.

Including the use of simple tools such as natural elements, beads, seeds, rolling pins, and cookie cutters. Emphasizing the play aspect of clay play is crucial. Allowing children to take the lead in their learning and discoveries. By letting the child guide the fun, experiments, and creations, you can enhance their clay experience.

Montessori Art and Craft | Benefits of Clay Play, little girl making clay sculptures, clay play session at school
Montessori Art and Craft | Benefits of Clay Play

Once children have had ample opportunities for clay play and have reached the age of 4 or 5. You can begin introducing clay modeling skill sets. This includes teaching them forms, attaching pieces, cutting, and carving. If you would like to learn more about my clay curriculum you can view the Clay Modeling Curriculum HERE. Order Clay Play Tools HERE

Clay Play Classes in San Diego with Spramani Elaun – Nature of Art® School

Unsure of where to begin with clay play? Perhaps you’ve struggled with determining the desired outcome of art activity? Allow me to shed some light on the importance of early childhood clay play sessions.

In fact, I refer to this approach as “Clay Play.” Engaging in type of play offers numerous benefits for a child’s overall development. When it comes to clay play, this process-based exploratory approach should always come first! Clay play should happen before getting into foundational clay modeling lessons.

Montessori Art and Craft | Benefits of Clay Play book
Montessori Art and Craft | Benefits of Clay Play

I recommend incorporating clay play for young children in early childhood education. Montessori schools and daycare centers can introduce clay modeling stations into their classrooms to provide children with the opportunity to explore.

Plus support creative and cognitive skills. To learn more about setting up clay modeling environments, please refer to this comprehensive guide Monessori Early Childhood Art Guide.

Montessori Clay Play

Clay comes in various forms, ranging from very messy to less messy options. Additionally, clays can be homemade. Earth clay, in particular, is a wonderful material to introduce to children, similar to making mud pies.

If you’re interested in setting up earth pottery clay play stations, I recommend checking out this book. It contains numerous photos and examples illustrating how to arrange clay play. How to choose suitable clay play materials for children aged 3-6 years old.

Montessori clay modeling curriculum for school art lessons, Montessori Art and Craft | Benefits of Clay Play

All rights reserved © 2024, Nature of Art®

No part of this blog may be used or be reproduced in any manner whatsoever including reproducing, publishing, performing, and making any adaptions of the work – including translation into another foreign language without written permission except in the case of brief quotations embodied in critical articles and reviews. Nature of Art® Publishing P.O. Box 443 Solana Beach, California 92075.
10 Fun Art Activities

By Spramani Elaun

Share With Your Montessori Students

As a Montessori teacher, you know it can be overwhelming to choose the right fun art activities. But, that is why I’m here with some guidance on which Montessori art activities for The Great Lessons are appropriate for your classroom and enjoyable! Art activities related to The Great Lessons are my favorite to teach. Because they allow children to explore their imaginations and get creative in a concrete, meaningful way. From drawing explosions to painting supernovas, students can visualize and understand such a big concept.

color pencil mandala fun art lesson idea

Integrating art with science helps children express ideas creatively, stimulates their senses, and provides tactile experiences. So when it comes to teaching the universe, there is no reason you can’t integrate art and science to have some fun. To get started, take a look at some of your classroom books for visual inspiration. One of my favorite books to use is “Born With a Bang: The Universe Tells Our Cosmic Story” by Jennifer Morgan. The illustrations are colorful and beautiful and can be used for many art activities.

art activities, blow paint

And for more fun art ideas, download my top 5 Montessori Big Bang Art Activities.

art download for Montessori children

Adjustable Activities

These activities can easily be adjusted to fit early childhood, lower elementary, or upper elementary classrooms. Older students will, of course, pay more attention to details, while the early childhood students will engage with these art activities in an open-ended fashion. Fun and fascinating science topics you can incorporate into art projects. Below are ten art projects that Montessori teachers can use to teach elementary students.

collage paper art activities

Art Ideas

1. Create a Cosmic Painting: Take your students on a journey through the universe with a cosmic painting activity. Discuss the Big Bang and the creation of the universe with your students, then have them create a painting depicting the birth of the universe.

2. Constellations: Give your students a chance to create their own constellations using paint or clay. Educate them on how the Big Bang gave birth to stars and how stars are the building blocks of constellations.

3. Paper Mache Planets: Introduce the concept of planets and solar systems by having your students make paper mache planets. You can use this opportunity to discuss the origins of planets and how they were formed following the Big Bang.

4. Galaxy in a Bottle: Encourage your students to learn about galaxies by creating a galaxy in a bottle. This can be a great way to explore the vastness of space and how galaxies form after the Big Bang.

5. Moon Phases Art: Discuss the moon phases and how they are caused by the changing position of the moon. Have your students create art that depicts the different phases of the moon using paint or chalk.

6. Starry Night Sky: Teach your students about stars by creating a starry night sky mural. This activity can help them learn about the different types of stars and how they are formed.

7. Cosmic Collage: Give your students an opportunity to create a cosmic collage by cutting out pictures of planets, stars, and galaxies from magazines and newspapers. Discuss the Big Bang and how all these celestial bodies came into existence.

 Science Art Montessori

8. Sun Catchers: Discuss the origins of our solar system’s star, the sun, and have your students create sun catchers using colorful tissue paper. This can be a great way to explore the different colors of the sun and how they are visible to us.

9. Universe Mobile: Make a universe mobile to showcase the Big Bang and the creation of our universe. Students can create planets, stars, and galaxies to hang from the mobile.

10. Astronaut Art: Discuss space travel and astronauts’ role in exploring space. Let your students create astronaut art that depicts them exploring the galaxies and space beyond, giving them a glimpse into the vast universe beyond our planet.

children making clay objects in a montessori classroom with spramani

By incorporating these art projects into your Montessori lessons, your students can learn the vastness of space in a fun and interactive way.

montessori art curriculum

Order my Montessori Art Books & Curriculum HERE

arts and craft book by Spramani Elaun

Spramani’s Books

Teach children visual arts

Curriculum For Children

Get step-by-step art curriculum to teach visual arts. Check out our 4 art curriculums:
Painting
Drawing
Color Theory
Clay Modeling

All rights reserved © 2024, Nature of Art®

No part of this blog may be used or be reproduced in any manner whatsoever including reproducing, publishing, performing, and making any adaptions of the work – including translation into another foreign language without written permission except in the case of brief quotations embodied in critical articles and reviews. Nature of Art® Publishing P.O. Box 443 Solana Beach, California 92075.

Montessori Practical Life Activity | Winter Wrapping Paper Collage: Cut, Tear & Glue

Wrapping paper collage

Get ready to save all your wrapping paper scraps for a winter wrapping paper collage!
Bring them into the classroom and recycle them to give students the opportunity to create unique pieces of art. Ask your parents and students to collect their home wrapping paper scraps for this Montessori art activity.
This is one of the simplest Montessori practical life activities to keep kids busy. And while I put this into the winter art projects category, you can really do this any time of year, with any type of recycled scrap paper. This art activity is great for all ages, early childhood, lower and upper elementary.
And you can actually teach scaffold tasks while building essential foundational skill sets.

  • Coordination
  • Independence
  • Scissor cutting or tearing
  • Gluing & Pasting
  • Composition
  • Problem Solving

For more Montessori activities related to this project, download my Ultimate Winter Arts & Crafts Idea Guide and check out page 9.

Need more Collage ideas? Read my Collage Ultimate Montessori Collage Guide

wrapping paper collage
Early Childhood Group Collage

Preparing the Environment for Wrapping Paper Collaging


Supplies

  • Wrapping paper scraps
  • Scissors
  • Glue
  • Paper
  • (Optional) pencil and eraser

How to:

There are so many reasons you want to give your students the opportunity to gather their own materials, one is truly allowing the child to work creatively. Gathering allows children to create their own individual creations. Second, this supports problem-solving skill sets. Children will go back and forth working out their design elements.

This project can be done two ways:
1. Let students choose the paper designs they want to work with.
Cut or rip pieces into different shapes.
Using these pieces, they can aim to create a specific object/design or keep it abstract.
Have them move the pieces around their paper and experiment with the design.
Once they’re happy with their image, have them glue the pieces onto their paper.
Or,
2. Have students decide on an image they want to create (fish, butterfly, face, mountains, etc.). Lightly draw an outline of the design onto their paper.
Cut the wrapping paper into shapes that will fit within their image.
Once they’ve put the pieces together to their liking, glue them onto their paper drawing.

winter collage kids arts and crafts

Toddler/Early Childhood Group Collage

Gluing and pasting are essential art practices for young students that lead to advanced craft skills. Here is a simpler setup for early childhood grades as a group activity. You can have a couple of students working at one time, or have one student walk up to this activity table.
For more information on setting up for early childhood children, be sure to read my Early Childhood Art Collage Guide https://montessori-art.com/montessori-early-childhood-art-collaging/

Basic table set up steps:

  • Tape down a large paper filling up a tabletop
  • Tape masking tape down on paper into interesting sections so children can collage inside the open spaces
  • Prepare materials like wrapping paper scraps, glue, scissors in a basket or tray for children to reach easily
  • Demonstrate the movements of tearing, cutting, and gluing onto the large paper
  • When it’s fully covered, slowly pull take off, hang in the classroom as art the children can look at and be excited they took part in

Have fun creating your Winter Wrapping Paper Collage Art!

arts and craft book by Spramani Elaun

Spramani’s Books

Teach children visual arts

Curriculum For Children

Get step-by-step art curriculum to teach visual arts. Check out our 4 art curriculums:
Painting
Drawing
Color Theory
Clay Modeling

All rights reserved © 2024, Nature of Art®

No part of this blog may be used or be reproduced in any manner whatsoever including reproducing, publishing, performing, and making any adaptions of the work – including translation into another foreign language without written permission except in the case of brief quotations embodied in critical articles and reviews. Nature of Art® Publishing P.O. Box 443 Solana Beach, California 92075.

Gingerbread Decorating with Kids | Montessori Art

The tradition of making gingerbread houses has been a favorite with my family and kids of all ages at my art workshops for many, many years. But did you know that the tradition of making decorated gingerbread houses dates back all the way to the 1800s? The tradition started in Germany and became popularized by the Brothers Grimm’s fairy tale, Hansel and Gretel, which was published in 1812. That means that whenever you’re doing gingerbread decorating with kids, you’re participating in a tradition that’s more than 200 years old!

Of course, you don’t have to be a kid to enjoy decorating gingerbread houses—adults really love it too! I started the tradition of decorating gingerbread houses with my kids when they were young teens, and I thought they would lose interest as they got older, but every year they get more excited to outdo their last creation with even more creativity and details! It’s something we all look forward to every December.

Gingerbread Decorating with Kids

The first few years we started decorating gingerbread houses, we actually started with plain graham crackers—not gingerbread!—and icing. They came out so darling! In years after that, we would go “treasure hunting” and local candy stores for new and pretty sweet treats to add to our houses. 

What I love about this holiday tradition is that it’s really an art activity kids can do at home! Art can be presented in so many ways to kids, and this one is always so much fun!

I would always show my kids pictures of other gingerbread creations to look at for ideas, but allowed them the freedom to make their house any way they wanted. It’s important to let your kids just have fun and be creative—there’s no right or wrong way to decorate a gingerbread house. After all, even if their house topples over, it’ll still be a delicious treat to eat!

What You Need:

  • A flat and sturdy surface, like cardboard – you can use boxes from holiday packages or recycle a pizza box; just trim them to size and line them with foil, parchment paper, or wax paper
  • Graham crackers or baked gingerbread (The Food Network has a great gingerbread recipe) or a gingerbread house kit
  • Icing
  • An assortment of candy
  • Wipes and paper towels

Where to Start: A Pre-Made Kit for Gingerbread Decorating with Kids

Of course, I believe making a gingerbread (or graham cracker) house from scratch is a fun challenge for kids, but there are some really great short cuts out there too. So many stores offer gingerbread house kits and they come in all different shapes and sizes—houses, castles, villages, even trains, and a camper! If you go this route and buy a pre-made kit or even a pre-made house, I strongly suggest you find extra treats to add to it. The kits are usually pretty standard, and offering your kids more types of candies and icings to decorate with will allow them to be more creative and have even more fun!

One Step Further: Download My Free Training, How to Theme Art Lessons with Story Books

Knowing that the tradition of gingerbread houses has ties to a fairy tale is proof that we can use stories to inspire our art. While the story of Hansel and Gretel may not be suitable for younger kids, there are many, many other story books that can serve as inspiration!

I created this free training, How to Theme Art Lessons with Story Books, to show you exactly how to use story books (plus science and history books too) to create art lessons for kids. It makes coming up with art themes and activities easy, and shows you how to bridge literature and text books with a creative outlet like art—which helps kids make connections, stay engaged, and retain valuable lessons and concepts. Get the training for free by clicking here!

A Short Cut Just for You

Even if you don’t consider yourself to be ‘artsy’ or do many art activities with your children, you’ll find that decorating gingerbread houses opens up a whole new world of art appreciation! Art doesn’t have to be stuffy still-life paintings or incredibly detailed statues—it’s simply fun! And to a young child, exploring art through play is a natural way to learn and appreciate it. 

If you want to learn more about how to give your children fun, meaningful, and educational art activities that stimulate their senses and little minds, check out my book Nurturing Children in the Visual Arts Naturally.

Many books have been written on the subject of teaching visual arts to children, but they use traditional fine art as examples and in lessons. My book, on the other hand, teaches you how to set up kids to explore and develop their own natural creative abilities. Art is a brilliant way to help your child strengthen their fine motor skills, better express their emotions, and tap into creative problem-solving and thinking—and Nurturing Children in the Visual Arts Naturally breaks it all down for you so it’s easy to understand and facilitate.

Download the e-book of Nurturing Children in the Visual Arts Naturally now, by clicking here!

arts and craft book by Spramani Elaun

Spramani’s Books

Teach children visual arts

Curriculum For Children

Get step-by-step art curriculum to teach visual arts. Check out our 4 art curriculums:
Painting
Drawing
Color Theory
Clay Modeling

All rights reserved © 2024, Nature of Art®

No part of this blog may be used or be reproduced in any manner whatsoever including reproducing, publishing, performing, and making any adaptions of the work – including translation into another foreign language without written permission except in the case of brief quotations embodied in critical articles and reviews. Nature of Art® Publishing P.O. Box 443 Solana Beach, California 92075.

Montessori Art in the Natural World: How to Teach Nature Journaling

This blog post is a part of a three-month series: Montessori Art in the Natural World: How to Teach Nature Journaling. This series is about growing kids’ knowledge about the natural world by taking them outside their home or classroom and challenging them to create focused art, based on the nature around them. Every aspect of nature—seasons, layers of the earth’s soil, energy, rocks and minerals, fossils, landforms, water, flora, fauna, the atmosphere—can all be represented and expressed through art lessons.

Nature Journaling Part II

Nature journaling is a tool scientists and explorers use to record important field notes and observations. It can also serve as a way to record history. Sometimes we can’t disturb nature, but we can record the experience by carefully observing and taking specific notes. Students can improve their critical-thinking skills through nature journaling.

How-to Teach Nature Journaling to Montessori Kids

Nature journals are unique to each individual owner; they’re composed of what inspires the artist, or in this case, student. Usually, nature journals are a variety of artistic expressions based on the natural objects students see outdoors, including:

  • Observation notes
  • Descriptions of experiences
  • Simple diagrams 
  • Simple sketches

Benefits of Nature Journaling

Keeping a nature journal strengthens students’ observational skills. For instance, when a child knows they’ll have to draw or record specific characteristics of the natural world, they’ll put care into taking a closer look at their subjects as well as noticing and memorizing details.

Nature art journaling is specifically suited for teaching Montessori students about biomes. It requires students to focus on, analyze, and record different parts of a biome. Each page can be dedicated to a different part of the biome. Montessori nature activities like art journaling can help students become naturalists who are more aware of and feel more responsible for their ecological footprints on earth.

[For more details on creating an art journal and its benefits, read: Montessori Art in the Natural World: Kids Art Journaling, Part I]

Montessori Art in the Natural World: Kids Art Journaling

Where to Start: Teaching Nature Journaling

You don’t need very many materials to start nature journaling; it requires the same basic items you’d need to start general art journaling. For more information on the benefits of art journaling, and how to create an art/nature journal with your students, read last week’s post by clicking here

Once your students have a journal to work with, the next step is going outside; they can head out to the schoolyard, their backyards, or even a park or nature trail, depending on when and where they’re completing this Montessori nature activity. Instead of letting them wander, ask them to focus on and sketch one object for 5 to 8 minutes (this helps sharpen their observation skills). Then direct them to move on to another object and time them again. Once they’ve observed and drawn a few different specimens, head back into the classroom.

Before I take my students outside, I always remind them that they may only get a few minutes or even seconds to observe a specimen (especially animals and insects), so it’s important to observe and record details quickly. This will help them look up the correct information and do more research later; knowing how to observe and take notes can help put the pieces of the puzzle together once they’re back inside the classroom and can clean up their drawings.

It’s important to teach your students that nature journaling is about recording details—not creating perfect drawings. The key is to collect enough information quickly in pencil, with detailed observational notes. After they’re done observing and doing additional research, they can update their field notes and finalize their drawings with more details, colors, and descriptions. 

Naturalists, botanists, and book illustrators (artists) use this same observation and drawing techniques; they go outdoors to observe, and collect and record information, then, at a later time, they finish their journal pages with detailed sketches in color pencil or watercolor paint. They also fill in the gaps by doing further reading and research.

Montessori Nature Activity Journal Prompts

While I encourage you to do a few “trial runs,” and give your students the freedom to observe and record whatever interests them, eventually you want them to complete and create more focused nature observations.

Every time students go out to fill in their nature journals, I ask them to record:

  • The date
  • The start and end time of their observations 
  • The location where they’re observing
  • The atmosphere (dry, humid, etc.) and temperature
  • A description of the outside landscape
  • How they were feeling that day

You can also ask them to make observations using their sensory system. Ask them to record the answers to these questions:

  • What do you smell?
  • What do you hear?
  • What do you see?
  • How do things feel to the touch?

Other prompt ideas:

  • Recording a species, include:
    • General name of species
    • Size
    • Color
    • Unique features
    • Describe their actions
    • Any noticeable patterns or textures
  • Observe the seasons 
  • Observe feelings and experiences
  • Observe interesting non-living objects
  • Observe plants
  • Observe states of matter
  • Observe local micro-biomes 
  • Observe things in the sky, things in the grass, and/or things in the water

One Step Further:

How-to Teach Nature Journaling to Montessori Kids

Now that your students are ready to head outside with their nature journals, I want you to be prepared too! While nature journaling is a pretty independent activity, there are ways—besides just sharing the above prompts—that you can help guide them. This Outdoor Journal Checklist will make sure you have everything you need to keep your students on track and ensure they’re implementing both scientific and artistic principles during their expedition.

How-to Teach Nature Journaling to Montessori Kids

You can print it out or save it on your phone so you have it with you the next time you lead your students outside to journal.

To download the checklist for FREE, click here.

A Short Cut Just for You

I think nature journaling is the perfect way to introduce art to Montessori students, since it relies so heavily on natural and scientific observations. It opens to the door for so many more interesting art projects!

If you know that you want to bring art into your classroom but aren’t sure how to do it, check out my Theming Art & The Natural World

arts and craft book by Spramani Elaun

Spramani’s Books

Teach children visual arts

Curriculum For Children

Get step-by-step art curriculum to teach visual arts. Check out our 4 art curriculums:
Painting
Drawing
Color Theory
Clay Modeling

All rights reserved © 2024, Nature of Art®

No part of this blog may be used or be reproduced in any manner whatsoever including reproducing, publishing, performing, and making any adaptions of the work – including translation into another foreign language without written permission except in the case of brief quotations embodied in critical articles and reviews. Nature of Art® Publishing P.O. Box 443 Solana Beach, California 92075.

Montessori Art in the Natural World: Kids Art Journaling

Montessori Art in the Natural World: Kids Art Journaling

In honor of the 50th anniversary of Earth Day, I’m excited to kick off a three-month blog series: Montessori Art in the Natural World! This blog post is a part of a three-month series: Montessori Art in the Natural World. This series is about growing kids’ knowledge about the natural world by taking them outside their home or classroom and challenging them to create focused art, based on the nature around them. Every aspect of nature—seasons, layers of the earth’s soil, energy, rocks and minerals, fossils, landforms, water, flora, fauna, the atmosphere—can all be represented and expressed through art lessons.

Montessori Art in the Natural World: Kids Art Journaling

The first part of this series—Kids Art Journaling, Part I—starts with explaining how one of the best ways to observe and record nature is through kids art journaling. Art journals can promote scientific exploration, support writing, allow for freedom of expression through creative artistic techniques. They also help students understand the elements and principles of design and the artistic process.

So let’s start with the basics.

Montessori Kids Art Journaling

What is art journaling?

Art journaling is a way of recording observations, ideas, learned topics, emotions, and self expression through illustrations, doodles, painted images, and collages, using a variety of art mediums. These artistic works are created and arranged in an art journal—a binded book of blank pages; art journals can vary in size and are similar to a self-reflective written diary.

For educators, art journaling can be an extension to other lessons you present. It can give students the chance to reflect on other subjects through an artistic lens, which can help them gain a deeper understanding of what they’ve learned.

It’s most important to note that art journaling can be done in any fashion, there’s no right or wrong way to create an art journal. The owner of the art journal is the curator of its life.

“If kids reflect on their days, they will become better problem-solvers of life.”
― Trevor Carss, author

What do my students need to start art journaling?

You really don’t need much for kids art journaling. The basic materials are simple: kids just need a blank paper, pencil, and eraser to start. You can then transition them into using more colorful mediums, such as crayons and colored pencils, and eventually paint and collage materials. The idea is to mix up the mediums students have access to; offering different materials to create with helps their brains make new connections to the concepts and subjects they’re learning.

If you want more information about how to create an art journal, read this post: The Value of Art Journaling for Kids, Montessori Activities

Montessori Art in the Natural World

How are art journals used for Montessori nature activities?

Integrating the study of the natural world into art journaling can give children their own unique learning experience. Art journaling provides a dynamic spatial intellectual understanding that is wired by their sensory inputs through critical observations, notations, writing skills, and storytelling.

Montessori Art, Natural World: Kids Art Journaling, activities

Where to Start: Head Outdoors for Montessori Nature Activities

Bounded art journals are really exciting for kids! They love having a special place where they can keep all their artwork, thoughts, and observations! BUT, you don’t have to have or do anything fancy to start with—truly, the first step to nature art journaling is to go outside!

Set aside some time for your students to head outdoors and just observe the natural world around them. It can be a backyard, school yard, garden, local park, local trail, or even a city street, so long as there are aspects of nature for them to see. Going outside is even more essential these days, since kids spend so much time in front of screens. Spending just a few minutes outside each day is so important for helping children connect with nature!

how to teach montessori art activities

One Step Further: Watch My FREE Mini Course

So many teachers want to teach their Montessori students art, but they don’t know where to start. They’re not sure what their students are capable of, how to present lessons, or even what items to make available. That’s why I love art journaling—it makes art open-ended and easily accessible (to students and teachers). 

Teaching students art doesn’t need to be intimidating though. Understanding how students learn art makes it easier for you to teach them and help them develop their skills. If you would like to learn more how to nurture children in the visual arts, now’s your chance! Register for my FREE mini digital course, Phases of Art Development. You’ll learn how art making can help students develop their creativity, fine-motor skills, and focus. More importantly, I share what types of projects students at every age are capable of completing safely, and without making a mess.

Best of all—it’s free! To sign up for the course, click here.

A Short Cut Just for You

early childhoood montessori art

I’ve created a ton of resources on how to bring both nature and art into your classroom; if you’re unsure of where to start and want a guide to help you introduce art to your Montessori students, I’d recommend my books: Early Childhood Art: Visual Arts Teaching Guide and Introducing Visual Arts to the Montessori Classroom.

Together, they provide everything you need to know to be able to teach your own Montessori students about art. They’re filled with tips and tricks for setting up an art environment, using proper art materials and mediums, and planning age-level-appropriate art lessons.

how to teach kids montessori art lessons

I know the value of art in the Montessori classroom, especially when it embraces and celebrates nature!

Click here to get your copy of my Early Childhood Art guide!

And click here to get Introducing Visual Arts to The Montessori Classrooms as a digital copy or paperback.

arts and craft book by Spramani Elaun

Spramani’s Books

Teach children visual arts

Curriculum For Children

Get step-by-step art curriculum to teach visual arts. Check out our 4 art curriculums:
Painting
Drawing
Color Theory
Clay Modeling

All rights reserved © 2024, Nature of Art®

No part of this blog may be used or be reproduced in any manner whatsoever including reproducing, publishing, performing, and making any adaptions of the work – including translation into another foreign language without written permission except in the case of brief quotations embodied in critical articles and reviews. Nature of Art® Publishing P.O. Box 443 Solana Beach, California 92075.

Montessori Art: Mandala Activity for Stress Relief

Montessori Art: Mandala Activity for Stress Relief

Mandalas are a geometric design pattern that offer several mental and emotional benefits. Mandala, which means “circle” in Sanskrit, is a sacred symbol that is used for meditation, prayer, healing, relaxation, and art therapy for both adults and children—especially when used in a Montessori art mandala activity.

In Hindu and Buddhist cultures, the circular design of mandalas represents the idea that everything in life is connected and the infiniteness of the universe.  Mandalas can also symbolize a personal spiritual journey for each individual viewer.

While there are several types of mandalas, the three most common are: the teaching, healing, and sand mandalas.

  • Each shape, line, and color in a teaching mandala represents different aspects of Buddhism. Monks learn to create these mandalas during their monastic education.
  • A healing mandala is an intuitive design made for the purposes of meditation, focus, and concentration.
  • Sand mandalas are unique in that both their creation and destruction have symbolic meanings. Multi-colored sand is placed in concentric circles, working from the outer part of the design to the center.
Montessori Art: Mandala Activity

Many clinical studies have shown that mandalas can be used to boost the immune system, reduce stress, ease depression, alleviate pain, lower blood pressure and promote healthy sleep.

Designing and coloring mandalas can help your students (or you) focus their attention. That’s why they’re a great exercise for helping kids calm down when they’re stressed. Here are some other benefits of mandalas:

  • They create a feeling of balance
  • They bring peace and tranquility
  • They strengthen fine-motor skills through repetitive movement
  • Looking at them produces a sense of calmness
  • They help with focus and concentration
  • They encourage mindfulness
  • They calm the nervous system
  • Working on them opens pathways to allow creativity to flow
  • The different color schemes in mandalas can be therapeutic
Montessori Art: Mandala Activity for Stress Relief

Mandalas have been recognized by psychology as a therapy tool. The Swiss psychologist Carl Jung believed that mandalas are representations of our minds and that we project our thoughts and feelings onto how we perceive and interpret mandals. And different branches of psychology recognize different benefits of mandalas; for example, transpersonal psychology uses mandalas as an exercise for connections and behavioral psychology uses them to improve memory, attention, and coordination.

The intricate design of mandalas can be intimidating, but children don’t need to be artists to reap the many benefits of mandalas.

Montessori Art: Mandala Activity using nature

Where to Start: Montessori Art Mandala Coloring Activity

Your students can use natural or found objects to make their own mandalas—which doesn’t require any drawing at all. Or, you can download a blank mandala (or purchase a mandala coloring book—there are plenty for sale online) and have your students color them. You can also use Montessori insets to create simple mandala designs to color. 

Making the conscious effort to embrace mandalas and to introduce Montessori art mandala activities in your classroom are the first steps to helping your students feel calmer, more mindful, and less stressed.

One Step Further: Watch My ‘Combating Stress with Art’ Webinar for FREE

Again, even just the action of coloring a mandala can offer your students tremendous mental and emotional health benefits. A few weeks ago, I co-hosted a webinar titled Combating Stress with Artwith Montessori teacher Kristen Richter, about using mandalas to combat stress, and encouraged the attendees—Montessori parents and teachers—to color mandalas as we went through the information.

The webinar teaches about the emotional literacy cycle and types of stress kids face, as well as a deeper dive into how simple art techniques like doodling or coloring mandalas can help alleviate stress.

Montessori Art: Mandala Activity for Stress Relief

You can download and watch the Combating Stress with Art replay, by clicking here!

arts and craft book by Spramani Elaun

Spramani’s Books

Teach children visual arts

Curriculum For Children

Get step-by-step art curriculum to teach visual arts. Check out our 4 art curriculums:
Painting
Drawing
Color Theory
Clay Modeling

All rights reserved © 2024, Nature of Art®

No part of this blog may be used or be reproduced in any manner whatsoever including reproducing, publishing, performing, and making any adaptions of the work – including translation into another foreign language without written permission except in the case of brief quotations embodied in critical articles and reviews. Nature of Art® Publishing P.O. Box 443 Solana Beach, California 92075.

Valentine’s Day Crafts for Teaching Kids Empathy

Usually, when I’m gearing up for Valentine’s Day crafts to share with parents and teachers, I focus on sharing beautiful and fun cards and crafts for children to make for their loved ones and classmates. However, this year, I wanted to dig a little deeper, and share some expressive Valentine art projects that can help students strengthen their emotional intelligence, and open up classroom discussions to talk about and teach empathy.

In a world where school bullying, cyber bullying, verbal abuse, harassment, anger, and even suicide rates among teens, are on the rise, I think empathy is extremely important for children to learn. And I think teachers are the best mentors and examples to help students understand and practice emotional intelligence and empathy.

Because Valentine’s Day is dedicated to love, I figured it’s the perfect time to teach children how to love each other—in a way that’s not focused on romance, of course. And I think, in teaching kids to be empathetic, we can teach them to love themselves and identify their own feelings as they look to understand the feelings of others. These types of lessons can also bring light to how their actions impact other students’ emotions. Valentine’s Day crafts can be structured to take advantage of all the talk about love and feelings, which prepares them for more complex conversations about empathy. 

What is empathy?

Empathy is the ability to be aware of, understand, and/or imagine how someone else is feeling in a particular situation—and then respond with care. It’s actually a very complex skill to achieve, but again, it’s a very important one. 

When a child is empathetic, that means they can:

  • Understand that they are a unique individual, with their own thoughts and feelings,
  • Acknowledge that other people may have different thoughts and feelings that their own,
  • Notice facial cues and associate a relevant feeling or emotion to those expressions,
  • Look at a situation and imagine how both they, and someone, else might feel in that moment, and,
  • Think of and act on an appropriate response to that particular situation.

An example of empathy that you can share with students is:

If you notice that your friend is upset If you see your friend upset because they skinned their knee, and you understand they’re in pain, so you give them a hug and help them find a teacher who can help. Or… You see your friend get excited because they’re very proud of the way their art project came out, so you feel happy too, and give them a hug and a high five.

Importance of Empathy

The UN’s World Happiness report ranked Finland, Norway, Denmark, Iceland, and Switzerland as the world’s happiest countries; the United States came in at 18 on that list. In Denmark, emotional intelligence is a mandatory part of the national curriculum, and it’s taught from elementary to high school grades. Many teachers wholeheartedly believe that the reason they continuously rank so high for World Happiness is because of their mandatory empathy studies. 

Of course, there are extreme negative outcomes that can come from children raised without empathy—including traits like narcissism, impulsiveness, and even psychopathy. People without empathy can’t identify with other people’s feelings and are less likely to help in dire situations. For example, there was a story in the news back in 2017, about a group of Florida teens who used their phones to record a man who was drowning, rather than attempting to help him or even calling him help; this shows a serious, devastating lack of empathy.

In fact, I’m so passionate about teaching empathy and emotional intelligence—especially through art—that I’ll actually be co-hosting a workshop on the subject this coming March, at one of the largest educational conferences in North America. Below, you’ll read some of the ideas I’ll be teaching during my class—Using Art for Emotional Literacy.

Where to Start: Valentine’s Day Crafts That Teach Empathy

Neuroscientists today all agree that our left and right brain are both equipped to learn emotional cues, directly affecting our response of empathy towards others. As a teacher, you can start raising awareness of emotional intelligence and impact your classroom and students by introducing simple empathy art projects during the school year. While these crafts have a Valentine’s Day theme, you can adjust them a bit to work any time of year.

Valentine’s Day Empathy Projects

  • Personal Valentine’s Day Card – Have kids make themselves a crafted paper card and list reasons why they matter and what makes them unique and special. This can be a wonderful keepsake they can refer to when then need to be reminded that they are loved. (Check out this blog for a potato-stamp card craft.)
  • Art Reflective Journal – Students will start by creating their own art journal, which they can use to answer prompts each week. If you theme prompts to be about feelings and emotions, or give them specific situations to respond to (hopefully empathetically), you’ll be helping them develop their emotional intelligence. 
  • Valentine’s Cards for the Community – Ask your students to make Valentine’s Day cards which they can give out to a worthy cause within your community. You can then drop them off to nursing home residents, patients in hospitals, people living shelters, or first responders. 
  • Collaborative Mural –  Using the whole classroom’s creative input, create a mural with an empathetic or love-related theme. As a collaborative effort, have your students work together to paint or color the mural; then hang it in the classroom or somewhere in your school for them to admire and hopefully remind them of the beautiful things that can happen when they work together. 
Spramani Elaun – Birch Aquarium at Scripps Institution of Oceanography | aquarium.ucsd.edu

Article resources:

Montessori Early Childhood Art

One Step Further: Download My Art Language Cheat Sheet

Believe it or not, art is a fantastic way to introduce empathy to your students! It helps students view ideas and art mediums through different perspectives, which helps them practice seeing the different perspectives of their classmates and others. And using art terms is an important component of that; for example, you don’t use words like “good” or “bad” to describe art, instead, you use neutral terms, which helps to remind children that, again, there are different ways to look at things and one specific way isn’t always going to be correct.

Download my Beginner Art Language Cheat Sheet for a list of art language terms you can begin using in your classroom. It includes definitions for each term, so you’ll feel more confident knowing you’re using them correctly. 

To download the Art Language cheat sheet, click here.

A Short Cut Just for You

It’s truly a solid foundation to help you teach art in your classroom (in a way that’s stress-free for you, and exciting and fun for your students!). To purchase Defining Visual Arts, click here.

arts and craft book by Spramani Elaun

Spramani’s Books

Teach children visual arts

Curriculum For Children

Get step-by-step art curriculum to teach visual arts. Check out our 4 art curriculums:
Painting
Drawing
Color Theory
Clay Modeling

All rights reserved © 2024, Nature of Art®

No part of this blog may be used or be reproduced in any manner whatsoever including reproducing, publishing, performing, and making any adaptions of the work – including translation into another foreign language without written permission except in the case of brief quotations embodied in critical articles and reviews. Nature of Art® Publishing P.O. Box 443 Solana Beach, California 92075.

Montessori Early Childhood Art Collaging

Collaging gives students the ability to express their creativity and even helps them develop their fine-motor skills. That’s why Montessori early childhood art collaging activities are great to introduce to students! The activity involves the process of selecting, assembling, and pasting a variety of materials down into a unique arrangement. 

Montessori Early Childhood Art Collaging

It’s an ideal craft for early childhood students because collages are intuitive arrangements; they’re the perfect artful playground for kids to craft in.

This is part of a larger post, The Ultimate Montessori Art Collaging Guide, goes into further detail on the benefits and provides tips and resources for all Montessori levels.
You can read the blog by clicking here.

Montessori first plane students, 3-6 years, are ready for simple collage making crafts. This is an exciting age for art making, since they’re likely crafting and exploring different art mediums for the very first time!

Montessori Early Childhood Art Collaging, how to

Early childhood students are able to hold materials, practice scissor cutting, and explore the different collaging mediums tactilely. They can dip a paintbrush into glue, learn to paste, and make simple arrangements. It’s best to keep instructions simple—giving them just one- or two-step instructions. (For example, cut and paste; or paste and arrange.)

It’s best for early childhood students to work in process-based mode (or creative-mode), which means art making focuses on the process, not the outcome. Again, any copy-mode creating should be basic; with simple instructions meant to build implicit memory. You should allow students to try Montessori early childhood art collaging without any expected outcome. [You can learn more about process-based teaching by clicking here to read more about the method.]

Where to Start: Simple Montessori Early Childhood Art Collaging Activities

Children at 3-6 years are very curious about materials and how they can be used. At this age, they’re very quick learners! By introducing art collaging you can actually help refine their small motor muscles, since the activity involves making controlled movements through cutting, pasting, and manipulating the collaging mediums. 

Keep collage materials very basic at first. I’d suggest starting with light-weight paper and glue sticks. This gives students the opportunity to learn more about how adhesive works, and they’ll be able to build upon that skill as they create more and more. After they’ve had a few chances to explore this type of art activity, you’ll see that they’ll likely have a decent understanding of how collaging works, and will want to create with new types of materials.

Collaging can be done with any type of material: paper, fabric, natural elements, recycled objects (buttons, tiny beads, pieces of cardboard, etc.), sequins, foil, glass, wire, and burlap. However, since young children are still developing their fine-motor skills, make sure the objects are easy to grasp, pinch, or hold. 

They can also be a little impatient at this age, so you also want to make sure the objects they’re crafting with can be easily pasted onto their working surface. (You don’t want things falling off their canvas, and you don’t want to have to use a glue gun to make sure their designs stay in place!) Tape can also be used in place of adhesive glues and pastes; washi tape comes in a bunch of fun designs and can add to the art they’re creating!

Be sure to give children plenty of time to experiment with making different arrangements. It takes some time to understand how to paste, arrange, and press down or hold their design objects into place to create the look they desire.

 Montessori Early Childhood Art Collaging natural items

One Step Further: Register for My FREE Online Mini-Course

Introducing your lower elementary students to collaging concepts is just one Montessori art activity out of thousands. Lower elementary students are capable of so much when it comes to art! But if you want to keep your students interested in your demonstrations and keep the mess down to a minimum, you have to understand how they learn. That way you can find the perfect balance of teaching them without overwhelming or boring them. And I’ve developed a FREE digital mini-course—the Phases of Art Development—to help you do just that!

It’s an online course that explains how art making helps students develop their creativity, fine-motor skills, and focus. Not only will it help you teach your students, but I make it easier on you by giving you some examples of art projects lower elementary kids will enjoy creating.

Best of all—it’s free! To sign up for the course, click here.

A Short Cut Just for You: Early Childhood Art Guide

montessori early childhood

Art collaging is just one of the many art activities early childhood students are capable of doing. If you want more ideas, and more importantly, if you want to better understand how early childhood students actually learn art, check out my book, Early Childhood Art: Visual Arts Teaching Guide. It lays the groundwork for what your students need to know about art and provides tips and tricks for setting up an art environment, using proper art materials and mediums, and planning age-appropriate art lessons.  Click here to get your copy of my Early Childhood Art guide!

Montessori Art Collaging: Lower Elementary

Montessori Art Collaging: Lower Elementary

Collaging offers many benefits to children of all ages; it gives them the opportunity to conjure up creative ideas, improve their fine-motor capabilities, and work on projects independently. In this blog, I’m going to focus on Montessori art collaging for lower elementary students, giving you some helpful hints and inspirational activity ideas to get them going with this type of crafting.

This is part of a larger post, The Ultimate Montessori Art Collaging Guide, goes into further detail on the benefits and provides tips and resources for all Montessori levels.
You can read the blog by clicking here.

Collaging is the process of selecting, assembling, and pasting materials into a unique arrangement or a beautiful work of art. Montessori art collaging is perfect for lower elementary students because they’re at a great age to start exploring textured materials and trying out different art-making techniques.

Lower L students are also capable of planning out their designs with intention and seeing out their creative ideas through realization and the completion of their activity. They can also follow simple, guided-art instructions and begin to work with more abstract themes and concepts.

Montessori Art Collaging: Lower Elementary, kids activities

Montessori Art Collaging, Lower Elementary Materials & Concepts

One of the best things about collaging is that it can be done with almost any kind of material, including: papers, fabrics, natural elements, recycled objects, buttons, tiny beads, sequins, and all other kinds of man-made embellishments. You can even use textured materials like foil, glass, wire, and burlap. There’s really nothing that can’t be collaged!

Since the types of collaging materials you can use are basically endless, the glue or paste you use is important. Some materials won’t stick with a simple glue stick, so you’ll have to decide what adhesive you want to set out so your students will actually be able to collage successfully. 

I’d suggest using glue sticks for tissue collaging and light-weight paper; white craft glue can be used for construction paper, fabric, and small embellishments; and a low-temperature glue gun (used with supervision!) works best for plastic, wood, and larger objects. 

Montessori Art Collaging: Lower Elementary, art ideas

Giving students the right materials will take care of most of the work for this Montessori art collaging activity. The process is easy for you to demonstrate and easy for lower L students to practice. Collaging really only consists of three steps:

  1. Cutting – students should begin with cutting interesting shapes out of varying raw materials
  2. Arranging – once students have the shapes and items they want to work with, they can arrange the elements into designs, patterns, or interesting layouts
  3. Glueing – after students have an idea of what they want to create, they will apply glue to the back of the materials, then place them back onto the arrangement

Make sure students have the freedom to explore and devise their own layouts. Have your students work in creative mode, with only very simple copy-mode steps. Children at this age level are developing better control of their fine-motor skills, such as scissor use, and will have fun cutting out different shapes out from the materials. And since they’re starting to be able to plan out their art works in their imagination ahead of time, it’s a fun age to see brilliant concepts and ideas come to fruition within their projects.

Where to Start: Montessori Art Collaging Lower Elementary Skills

If your students have never collaged before, start with simple materials, such as paper, before giving them more options. Then, you can even try introducing different patterns and themes, and even show students different artist samples for inspiration. Just make sure students are always allowed to work out their final designs on their own. 

5 Montessori Art Collage Ideas for Lower Elementary

Collages can be put together in many different ways, they can be sewn, glued or weaved. They can be abstract in nature or even resemble an image. Here’s five different ways to approach  collaging with lower elementary students.

How to Montessori Art Collaging: Lower Elementary

Paper + Tissue

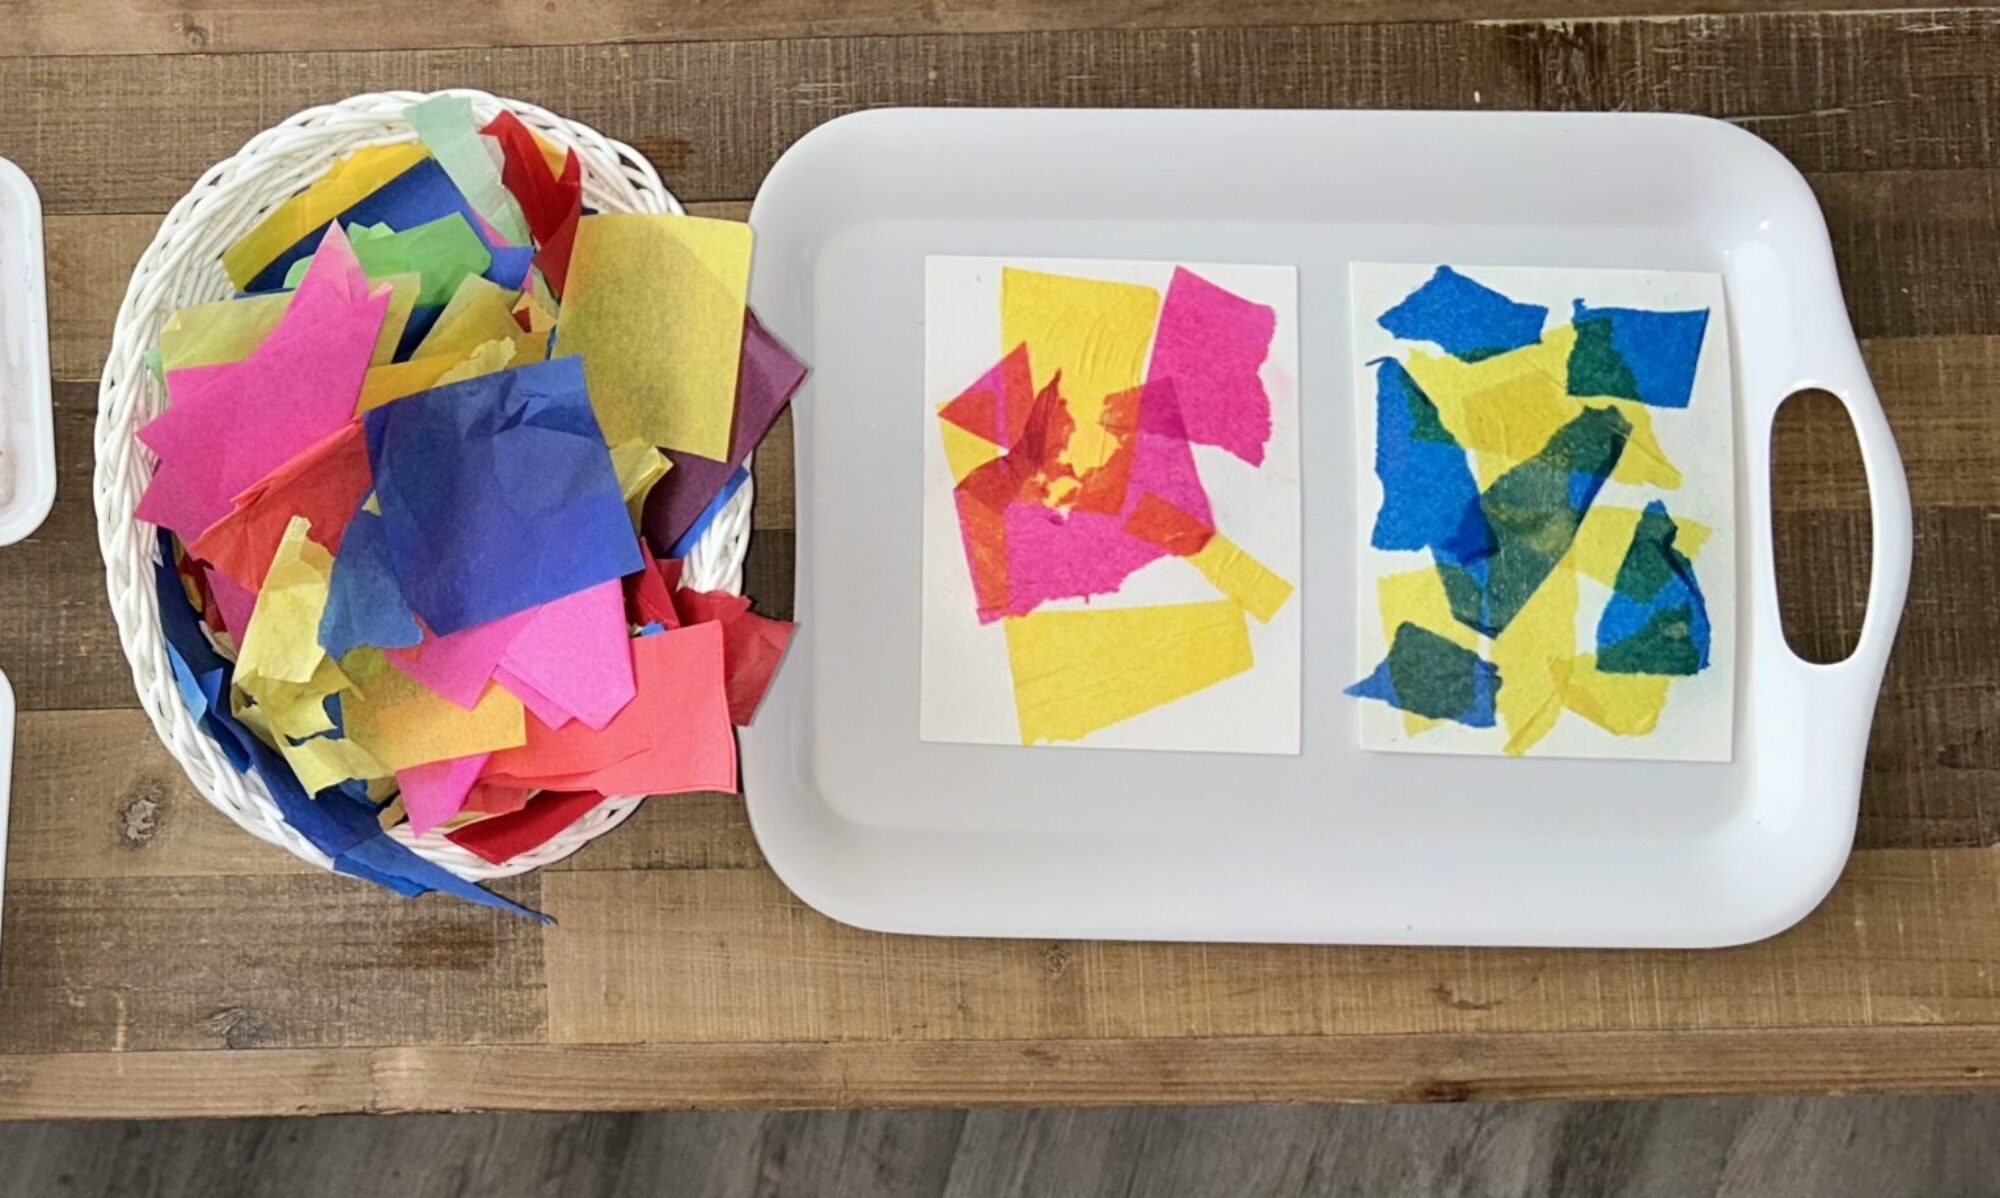
Tissue and paper are ideal to start out with because they’re easy to tear and cut. Their lighter weights mean most craft glues will be able to hold them down securely.

Up-cycled materials

A collage created with up-cycled materials can be made with almost anything, from old cardboard to broken toys. I’ve even used old wetsuits before (like in the photo below)! Using old materials is both an earth-friendly and cost-effective way to create art.

how to collage with kids art activities
how to collage with kids

Natural Elements

Collages can also be done using natural elements, such as flowers, leaves, seeds, and twigs. Natural materials can give collages diverse texture and interesting features. Some food items can also be collaged, like dried beans and pasta. The trick to collaging with natural elements is to use a hot glue gun (you may need to do this yourself, or supervise children while they use it), or weave and sew the materials onto the collage base, since craft glue isn’t usually strong enough to hold these objects.

how to teach collage art to montessori Lower Elementary

Styrofoam

Montessori Art Collaging: Lower Elementary, recycle

Styrofoam isn’t the most earth-friendly materials, so I suggest using only recycled pieces. The one reason I do like to use it is because the material is super easy for younger children to cut through. Painting the pieces before using them also introduces the painting domain to your students, and make their creation even more interesting. If you can start repurposing these materials instead of sending them to landfills, you can help the environment.

how to teach Montessori Art Collaging: Lower Elementary
Montessori Art Collaging: Lower Elementary, spramani
Montessori Art Collaging: Lower Elementary, activities for the classroom, art albums

Images & Design Prompts

Once you have given your students plenty of time to collage their own ideas and explore with different materials in a process-based way, you can then provide them even more inspiration using themed prompts based on subjects you might already be working on. For example, geometric shapes can help with math concepts, while a collage of a bird is a great way to instill zoology lessons. You can even challenge kids to bring color theory into their creations by asking them to create warm, cool, or contrasting color layouts.

One Step Further: Register for My FREE Online Mini-Course

Introducing your lower elementary students to collaging concepts is just one Montessori art activity out of thousands. Lower elementary students are capable of so much when it comes to art! But if you want to keep your students interested in your demonstrations and keep the mess down to a minimum, you have to understand how they learn. That way you can find the perfect balance of teaching them without overwhelming or boring them. And I’ve developed a FREE digital mini-course—the Phases of Art Development—to help you do just that!

It’s an online course that explains how art making helps students develop their creativity, fine-motor skills, and focus. Not only will it help you teach your students, but I make it easier on you by giving you some examples of art projects lower elementary kids will enjoy creating.

Best of all—it’s free! To sign up for the course, click here.

3 to 6 Art – Early Childhood Montessori Teaching Resources

Sign-up to receive video

The Phases of Art Development is a quick digital course that explains how art making can help students develop their creativity, fine-motor skills, and focus. More importantly, I share what types of projects students at every age are capable of completing safely, and without making a mess.

Best of all—it’s free! To sign up for the course, click here.

All rights reserved © 2024, Nature of Art®

No part of this blog may be used or be reproduced in any manner whatsoever including reproducing, publishing, performing, and making any adaptions of the work – including translation into another foreign language without written permission except in the case of brief quotations embodied in critical articles and reviews. Nature of Art® Publishing P.O. Box 443 Solana Beach, California 92075.