How to Teach Scissor Cutting Skills to Upper Elementary Kids

Scissor cutting opens up the doors to so many creative opportunities!

When you think of teaching art, what do you think of? Painting? Drawing? Maybe some sculpting? While those are all important parts of visual arts, a surprising component that also needs to be taught to Montessori upper elementary students is scissor cutting skills. This might seem like an obvious skill—especially for upper elementary kids, but you would be surprised at how many students still struggle at this age. They need scissor practice! That’s why I’ve put together this Montessori scissor cutting guide for upper elementary. To help you teach your students this essential art skill.

Being able to use safely and properly use scissors means students are able to do a wide variety of artful things. For example; cutting paper, following patterns, cutting strings and yarn, and cutting fabric. Scissor cutting opens up the doors to so many creative opportunities!

How to Teach Montessori Scissor Cutting to Upper Elementary Kids

Importance of Scissor Cutting for Upper Elementary Students

Cutting enhances eye-hand coordination (using vision, processing what is seen, and moving the hand simultaneously to accomplish a task). Other examples of eye-hand coordination are weaving, folding, creasing paper, catching/throwing a ball, scooping food with a spoon, and zipping a coat.

Cutting also encourages your child to use bilateral coordination (which means using both sides of the body at the same time, in a coordinated way, while each hand is performing its own task). For example, when cutting a circle, a child must hold the paper with one hand (and continuously turn it) while the other hand is opening and closing the scissors and moving forward to cut. Other examples of bilateral coordination include: zipping up a coat or pants, washing dishes, and opening an envelope.

Cutting helps stimulate the brain

Some research suggests that hand-eye and bilateral coordination exercises may stimulate the parts of the brain that are needed for thinking and focusing attention. In my experience, these types of motion and practice also give students keen observation skills, which allow them to notice details and follow patterns.

For upper elementary students, having greater fine motor skills means they can attempt intricate scissor cutting designs. For example, following detailed patterns and more complex instructions that might take four to five steps to follow. Students at this age will be able to make paper art like gift tags, ornaments, snowflakes, paper lanterns, paper chain dolls, thought-out collages, and stunning bookmarks and cards.

Scissor Cutting Leads To Creativity

Strong scissor-cutting skills lead to lots of independent creating at all levels of crafting and design. It’s important that students are given plenty of time to practice before they take on trickier, more detailed cutting patterns. When Montessori upper elementary children attempt to create such designs without scissor cutting practice, the art projects and activities will become too challenging to follow and they may lose self-confidence.

I recommend using design templates for Montessori upper elementary to practice their scissor cutting. There are some super fun paper 3-D art templates they can cut out, then construct the pieces with glue, to create objects like fruit, flowers, and fun characters. Mr. Printables is one of my favorite websites for simple cutting template practice. 

Where to Start: Give Your Montessori Upper Elementary Students Scissor Cutting Practice

Another fun practice can be to cut, and then gluing, 2D symmetrical designs. If you are not sure if your students have developed their scissor skills sufficiently, ask them to cut basic geometric shapes. You should be able to observe where their skill level is currently. I have met plenty of upper elementary students who need a bit more practice before jumping into complex projects. 

Always remember: practice is the best way to support kids’ artistic skills and literacy.

How to Teach Montessori Scissor Cutting to Upper Elementary Kids

I recommend testing your students’ abilities by practicing cutting out:

  • Straight lines
  • Corners
  • Curves
  • Geometric shapes
  • Symmetrical designs
  • 3D objects (like mini furniture or buildings)
  • Basic quilt patterns
  • Basic stencil patterns
  • Chinese paper lanterns
  • Magazine images (for collaging)
  • Papel Picado (Mexican paper flags)
  • Paper snowflakes
  • Tangram paper designs

Once upper elementary students are able to cut straight lines, corners, and simple curves, they may be able to move on to using an artist’s Exacto knife. But I recommend they only do this with proper supervision and parent consent. I’ve met many crafty students who want to work on very intricate designs, which calls for using an Exacto knife.

One Step Further: Sign Up for My FREE Digital Mini-Course

Knowing that your students are capable of safely using scissors opens up so many doors for all the amazing art projects and activities you’ll be able to do in your classroom! In order to keep them interested in the lessons you’re presenting—and able to handle and understand whatever it is you’re teaching—you have to first be able to know exactly how they learn art. I’ve developed a FREE online mini-course to help you do just that!

How to Teach Montessori Scissor Cutting to Upper Elementary Kids

The Phases of Art Development is a quick digital course that explains how art-making can help students develop their creativity, fine motor skills, and focus. More importantly, I share what types of projects students at every age are capable of completing safely, and without making a mess.

Best of all—it’s free! To sign up for the course, click here.

A Short Cut Just for You:

arts and craft book by Spramani Elaun

Spramani’s Books

Teach children visual arts

Curriculum For Children

Get step-by-step art curriculum to teach visual arts. Check out our 4 art curriculums:
Painting
Drawing
Color Theory
Clay Modeling

All rights reserved © 2024, Nature of Art®

No part of this blog may be used or be reproduced in any manner whatsoever including reproducing, publishing, performing, and making any adaptions of the work – including translation into another foreign language without written permission except in the case of brief quotations embodied in critical articles and reviews. Nature of Art® Publishing P.O. Box 443 Solana Beach, California 92075.
Ultimate Montessori Art Collaging Guide

Ultimate Montessori Art Collaging Guide

How to Create Montessori Art Collaging Lessons

Collaging is the process of selecting, assembling, and pasting materials down into a unique arrangement. It’s a way for artists to take many different ideas and art mediums and put them together into a beautiful work of art. It’s a great way for students to express their creativity too!

What Collage Means

The word collage actually derives from “la colle,” which means glue in French. The art of collage making goes all the way back to the 1800s; even famous artists like Pablo Picassco and Georges Braque incorporated it into their works. Today’s collage artists astound us with treasures like antiques, special handcrafted papers, and upcycled toys. It’s an art form that’s transformed into the most unimaginable spectacular of materials. 

Ultimate Montessori Art Collaging Guide, kids activities

Collaging can honestly be done with any type of material, from paper, natural elements, and fabrics, to recycled objects. Like buttons, tiny beads, sequins, and other kinds of man-made embellishments. Even materials like foil, glass, wire, and burlap can be used. There’s really nothing that can’t be collaged!

Collage With Any Thing!

Artists of the past and present have cleverly designed so many interesting collages using some of the most unusual materials and textures, so there’s no shortage of inspiration when it comes to this art form. It’s an ideal craft to introduce children to because collages are intuitive arrangements; they’re the perfect artful playground for kids to craft in.

I’m excited to write this blog because I know the importance of children working independently, building their fine-motor skills, and strengthening the small muscles in their hands, but I’m even more excited to give students a crafting experience that gives them the freedom to experiment, assemble objects, and design interesting textured artworks, with almost no effort or stress. Collaging gives children the opportunity to be creative, independent, and original.

Benefits of Teaching Collaging

Collage crafting can lead your students into creating more complex crafts and projects that require developed coordination. Four of the direct benefits of collaging are:

  1. Learning to cut with scissors, which builds finger and hand strength
  2. Building implied memory with the repeated movements of gluing the elements
  3. Introducing the Elements and Principles of Design, including line, shape, form, texture, color, and symmetrical balance ideas
  4. Conjuring up creative thoughts, ideas, and arrangements

Teaching children how to choose pieces of material to arrange into composition whether through a planned idea or simply through process-based learning is exciting for children. When they discover the power of glue—and all its possibilities—their imaginations and creations become endless.

Montessori Art Collaging ideas for kids art projects

Gluing and pasting are essential art practices that leads to more advanced craft skills. Crafting is a visual art domain that develops three-dimensional spatial awareness. By experimenting with arranging materials into multiple layouts (using different shapes, sizes, proportions, colors, values, textures, etc.) students learn the Elements and Principles of Design concepts. They can play with symmetrical balance, patterns, and create abstract designs or realistic imagery—collaging has no rules! Children can be as playful and experimental as they choose.

Ultimate Montessori Art Collaging Guide, activites children

Collaging is Sensorial & Tactile

Collaging is highly sensorial because it involves touching and feeling the textures of materials being used to create. So it’s a wonderful way for children to experience crafts; the different textures of materials can be both exciting and calming. Plus, when children work directly with their hands, it can have a calming effect, since they become focused on the feeling and application of each piece their working on. In fact, in many cases, children will select items solely based on the satisfaction of the tactile feeling rather than the visual aesthetics. This is why I consider collaging a very intuitive craft.

Another reason collaging is sensory focused is because it gives students the freedom to use their tactile sense (feeling) to select by their own art pieces. Plus chhildren love having the choice of selecting their own mediums. So by putting collaging objects in different baskets and containers keeps things organized while allowing children the enjoyment of feeling and selecting the items they want to use. If you are a fan of the idea of loose items arranged in the classroom, then you can use this concept to set-up an art collaging invitation for your Montessori students. 

Ultimate Montessori Art Collaging Guide

Where to Start Collaging Projects First

I know Montessori classrooms introduce a gluing station as a practical life activity. But, collaging is so much more than just practicing glue motions. It’s an art Montessori students at every level will love to explore.

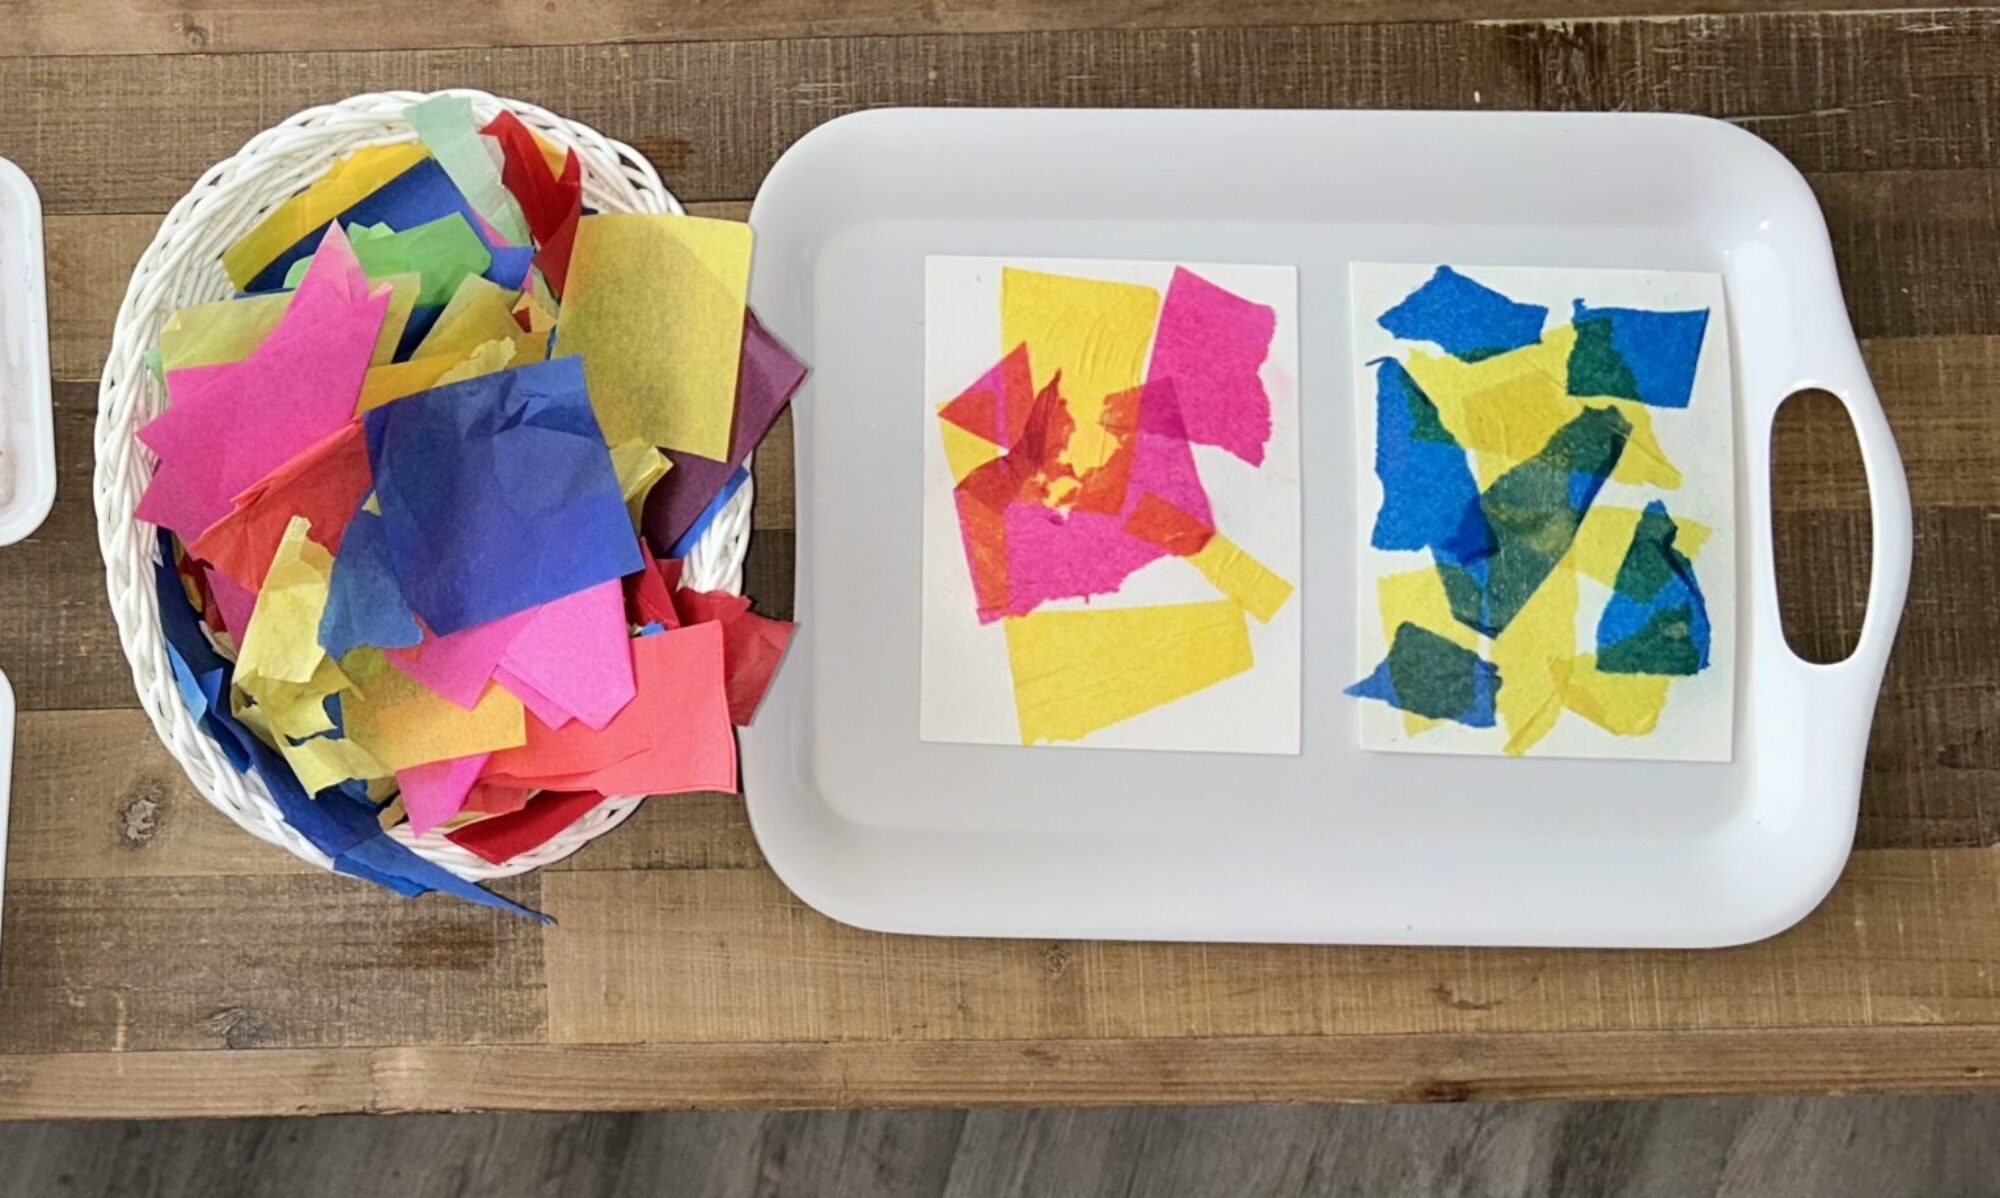
I recommend starting simple, using just one material with the goal of practicing the idea of gluing and pasting down. Start with a small, firm cardboard around 5” x 5”, and small pieces of paper with sides ranging from .5” to 1”; these sizes are easy to work with and paste for little hands. I also recommend starting with thin paper that’s easy to cut or tear, like tissue paper or magazine pages. The idea is to keep it lightweight so it’s easy to glue, cut, and arrange. You can have students paste the papers as they are or allow them to cut the papers into other shapes using scissors. 

When students first practice collaging, they shouldn’t focus on creating anything realistic; don’t have them try to copy a template or prompt, instead, let them work free form. Let kids feel and be intuitive in what they decide to arrange. Just make sure you walk through the process and have finished examples for them to see so they can understand the goal of activity. 

Work process-based first—especially with early childhood and lower elementary students—then move into themed ideas with specific examples once they have the chance to explore and experiment. You can provide inspiration and examples, but leave the layout and composition arrangement up to the student.

kids collage ideas and materials to use

Best Collaging Adhesive

There really is no right way to collage; it’s all up to the artist. Introduce multiple gluing methods—glue sticks, craft glue with a popsicle stick, decoupage, etc.—and allow students to use whatever they gravitate to and feel more comfortable working with. 

Keeping Parts and Pieces Organized

As a collage artist myself and working with a number of professional collage artists, I’ve learned the importance of keeping materials organized and easily accessible. It prevents the creative process from being interrupted and minimizes messes and clean up. I’ve seen Montessori gluing boxes on the market, and while they can keep materials tidy, they are not necessary; instead, use baskets, trays, caddies, drawer organizers, or small boxes to organize and display collaging materials, including scissors and glue.

For the most part, I don’t recommend children work inside trays. If you’re worried about glue messes, use newspaper or a plastic tarp to cover the table surface. You can even keep wipes and sponges nearby to help keep students’ hands clean from glue. However, kids love sticky hands—it’s all part of the tactile experience. I remember loving to play with the glue on my hands myself as young artist!

Interesting Collaging Materials

While you should start with very simple materials at first, slowly graduate your students to more interesting and diverse collaging items. Such as:

  • Bottle caps
  • Bubble wrap
  • Cardboard strips
  • Corrugated paper
  • Cotton balls
  • Crepe paper
  • Fabric
  • Feathers
  • Foil
  • Gift wrap
  • Magazines
  • Paper
  • Small emebishhemnts (sequins, string, buttons, seeds, etc)
  • Stickers
  • Tissue

My FREE Online Mini-Training

Collaging is just one example of an art activity Montessori students will love, but there’s an infinite amount of art projects they can create! If you want to give them limitless options, you have to first understand what they’re capable of learning. I’ve developed a FREE online mini-course to teach you exactly how children learn art—based on their plane of development. That way you can present and demonstrate really fun art projects to them without you stressing or them getting bored or making a mess!

3 to 6 Art – Early Childhood Montessori Teaching Resources

Sign-up to receive video

The Phases of Art Development is a quick digital course that explains how art making can help students develop their creativity, fine-motor skills, and focus. More importantly, I share what types of projects students at every age are capable of completing safely, and without making a mess.

Best of all—it’s free! To sign up for the course, click here.

arts and craft book by Spramani Elaun

Spramani’s Books

Teach children visual arts

Curriculum For Children

Get step-by-step art curriculum to teach visual arts. Check out our 4 art curriculums:
Painting
Drawing
Color Theory
Clay Modeling

All rights reserved © 2024, Nature of Art®

No part of this blog may be used or be reproduced in any manner whatsoever including reproducing, publishing, performing, and making any adaptions of the work – including translation into another foreign language without written permission except in the case of brief quotations embodied in critical articles and reviews. Nature of Art® Publishing P.O. Box 443 Solana Beach, California 92075.

Ultimate Montessori Scissor Cutting Lesson Guide

Ultimate Montessori Scissor Cutting Lesson Guide

How to Teach Important Scissor Development Skills

As adults, using scissors is something we take for granted. Whether it’s clipping coupons or slicing through wrapping paper, using scissors is often a part of our day-to-day activities. However, we forget that we had to actually learn how to use scissors at some point—and there is a surprising number of young students these days who can’t properly use scissors! And if they don’t know how to use scissors, there are many other things in the classroom they’ll be unable to do. That’s it’s so essential to spend some time to present a specific Montessori scissor cutting lesson to your students.

Learning to use scissors at a young age provides so many benefits! When students are able to develop their scissor-using skills, they’re able to do so many artful and creative things, such as cutting paper, following patterns, cutting strings and yarn, and cutting fabric.

Ultimate Montessori Scissor Cutting Lesson Guide, how to teach

Benefits of Scissor Cutting for Young Students

The constant dynamic motion that comes from using scissors helps young students develop spatial intelligence and fine-motor movements that relate to other important tasks inside the Montessori classroom. Introducing scissor skills to children—even as young as two or three years—can help them move through critical milestones directly related to other areas of childhood development. Cutting activities build muscle control, develop eye and hand coordination, and deepen their tactile spatial awareness. 

Ultimate Montessori Scissor Cutting Lesson Guide, art activities

A few years ago, I started to notice more and more teachers were sharing their frustrations about how the majority of young students coming through their classrooms were lacking in fine motor skills; they were too weak to apply pressure while writing or coloring and lacked the coordination to write their ABCs, tie their own shoes, or zip up their own jackets. Now, I’ve worked with thousands of students over the years, and I’ve also observed that students are lacking the developmental skills that would allow them to craft and create art. 

Both of my own two children had the freedom to use safety scissors at very young ages. And, as a result, they both learned how to tie their shoes, feed themselves, write, and even craft, at a very early age. Truth is, kids love using scissors! 

There’s a ton of research linking handwriting success to muscle coordination developed by scissor movements, and practical life skills like eating, dressing, and holding and carrying small objects. But most importantly, teachers agree when children have had the chance to develop these muscles and skills, teaching them writing becomes easier. A child that has scissor practice will be able to excel in complex steps to create and work independently. 

Ultimate Montessori Scissor Cutting Lesson Guide, art teacher spramani elaun

In one of my early years, I was working with a five-year-old boy in an art therapy session. I recall him eagerly asking to use scissors while we crafted. He was very awkward at first, but with some coaching he quickly got the hang of it. He spent an hour cutting soft yarn into tiny pieces over and over, until it became easy to grab the scissors, get them into position, and make the opening and closing motion of cutting. Within that hour, he strengthened the mobility with his thumb, hand, and wrist.

Ultimate Montessori Scissor Cutting Lesson Guide

The minute his mom returned to my art studio to pick him up, she ran toward him screaming, “You’re going to hurt yourself! Give me those!” It clicked. I realized that he was a late bloomer when it came to using scissors—a simple, practical life task—because his mom had it in her mind that he would end up running with scissors and hurting himself. She was shocked when she saw him using them safely to cut yarn. And not only that, but he was having a pretty good time doing it! She promised to buy scissors for home.

Ultimate Montessori Scissor Cutting Lesson Guide

Where to Start: Tips for Presenting a Montessori Scissor Cutting Lesson

In my experience, giving a child a Montessori scissor cutting lesson at age five is a little too late.

If a child can sit and focus for 15 minutes at a time (between the ages of 3 and 5), they can start practicing their scissor cutting. When I meet young students who cannot sit through my scissor demonstration or follow my basic movements, then I know they are too young and need more time before they’re able to safely and properly use scissors on their own. But if students can focus on the actions of a presentation and watch the outcome, then they can start practicing—with supervision, of course!

Don’t hand your students scissors and walk away expecting them to create, give them time to practice cutting motions. You can introduce students to using scissors through either copy-mode or process-based activities. Here are a few tips for bringing scissors safely into your classroom.

Ultimate Montessori Scissor Cutting Lesson Guide
  1. Don’t jump into challenging cutting projects until students have had practice with scissors first. So many teachers make the mistake of trying to present a multi-step lesson that includes using scissors, even though their students aren’t able to use them yet. It just leads to frustration! So, practice a simple, process-based Montessori scissor cutting lesson first, before you approach any copy-mode craft or activity.
  2. Begin by showing students the simple motion of using scissors. Have them start by holding the scissors, and opening and closing the arms using just their one hand (keeping their other hand safely away from the blades). Then you can progress to showing them how the blade can be angled to create a sharper cut.
  3. Think about the process rather than focusing on a project. Give them papers to cut, simply to practice the action of cutting. Don’t worry about how their project turns out; it’s all about the process and practice.
  4. Be patient. You have to understand, your students’ little brains and hands are wiring together and getting things to work together smoothly will take some time. Keep allowing them time to practice until you see they are able to cut without struggling.
  5. Plan activities based on your students’ capabilities. For example, early childhood students (aged 3 to 6) can do simpler cutting activities, like following simple lines and shapes. Lower elementary students should be able to begin collaging and upper elementary students will be able to cut out more intricate designs.

One Step Further: Sign Up for My FREE Digital Mini-Course

Knowing that your students are capable of safely using scissors opens up so many doors for all the amazing art projects and activities you’ll be able to do in your classroom! In order to keep them interested in the lessons you’re presenting—and able to handle and understand whatever it is you’re teaching—you have to first be able to know exactly how they learn art. I’ve developed a FREE online mini-course to help you do just that!

3 to 6 Art – Early Childhood Montessori Teaching Resources

Sign-up to receive video

The Phases of Art Development is a quick digital course that explains how art making can help students develop their creativity, fine-motor skills, and focus. More importantly, I share what types of projects students at every age are capable of completing safely, and without making a mess.

Best of all—it’s free! To sign up for the course, click here.

arts and craft book by Spramani Elaun

Spramani’s Books

Teach children visual arts

Curriculum For Children

Get step-by-step art curriculum to teach visual arts. Check out our 4 art curriculums:
Painting
Drawing
Color Theory
Clay Modeling

All rights reserved © 2024, Nature of Art®

No part of this blog may be used or be reproduced in any manner whatsoever including reproducing, publishing, performing, and making any adaptions of the work – including translation into another foreign language without written permission except in the case of brief quotations embodied in critical articles and reviews. Nature of Art® Publishing P.O. Box 443 Solana Beach, California 92075.

Montessori Early Childhood Scissor Cutting Guide

Montessori Early Childhood Scissor Cutting Guide

How to Teach Important Scissor Skills to Early Childhood Students

If I told you that I often lead students in Montessori early childhood scissor cutting, I’m sure you—and many other teachers—might be a little concerned (to say the least). Giving scissors to a young child might seem crazy, or dangerous, at the very least. But it’s an essential skill everyone needs, and if it’s taught correctly, early childhood students can master it too.

You see, using scissors is a great way for young students to develop their fine motor skills. So while it can be a little scary to hand a pair of (blunt-tip) scissors to a three-year-old, it’ll eventually help them perform many other activities around the classroom. 

Montessori Early Childhood Scissor Cutting Guide, spramani elauj

In fact, the earlier a child can learn to use scissors, the better. The activity provides so many benefits to early childhood students! Being able to properly use scissors opens the doors to many other important skills, such as writing their names or ABCs, tying shoes, zipping jackets, cleaning up, and feeding themselves.

So, how do you know when your early childhood students are actually ready to start using scissors?

Montessori Early Childhood Scissor Cutting Guide, activities

If your students can sit and focus on an activity for at least 15 minutes, they should be able to learn and start practicing their scissor cutting. You’ll need your students to be able to sit through a complete Montessori early childhood scissor cutting demonstration, where you present the basic movements and show how to safely handle the tool. So, if they can keep their attention on your presentation and understand the necessary outcome, then they can start practicing. Just make sure you’re supervising early childhood students any time they are using scissors.

Montessori Early Childhood Scissor Cutting Guide

Importance of Scissor Cutting to Early Childhood Development

By showing young students—even as young as two or three years—how to use scissors, you’re helping them reach critical milestones that directly related to other areas of childhood development. The dynamic motion that comes from cutting activities—specifically, opening and closing scissors along a distinct path—helps them build muscle control, develop eye and hand coordination, deepen their tactile spatial awareness, and hone their fine-motor movements. It also helps them develop the coordination needed for handwriting, eating, dressing, and holding and carrying small objects. 

A child that has scissor practice will be able to excel in complex steps to create and work independently. And they’ll be able to do so many artful and creative things in the classroom, such as cutting paper, following patterns, cutting strings and yarn, and cutting fabric.

Montessori Early Childhood

Where to Start: Montessori Early Childhood Scissor Cutting Lessons

You can’t hand your early childhood students a pair of scissors and then walk away expecting them to create, it’s an early childhood art material that needs to be taught how to use. It’s important to give them time to practice the simple movements of just using scissors. Once they have that down, then you can start introducing students to cutting for copy-mode or process-based activities. 

Materials:

  • Safety scissors (with a blunt tip)
  • Soft, thick yarn
  • Styrofoam sheets
  • Construction paper
  • Clay
Montessori Early Childhood Scissor Cutting Guide, arts and crafts

Early Childhood Scissor Cutting Lesson Ideas:

  • Have children cut small and large lengths of yarn
  • Students can cut large shapes from styrofoam, and then glue them onto paper
  • Show students how to roll out coils of clay, and then cut those into small pieces
  • Give students pieces of construction paper that have lines or shapes drawn onto them (or ask the kids to draw their own lines and shapes), and have them cut along the lines

Try incorporating some of these lesson ideas with other topics you’re already teaching in the classroom. For example, make some of the shapes organic, like leaves or simple animal silhouettes. 


One Step Further: Sign Up for My FREE Art Phases Mini-Course

Knowing that your early childhood students are capable of safely using scissors opens up so many doors for all the amazing art projects and activities you’ll be able to do in your classroom! In order to keep them interested in the lessons you’re presenting—and able to handle whatever it is you’re teaching—you have to first be able to understand exactly how they learn art. I’ve developed a FREE online mini-course to help you do just that!

3 to 6 Art – Early Childhood Montessori Teaching Resources

Sign-up to receive video

The Phases of Art Development is a quick digital course that explains how art making can help students develop their creativity, fine-motor skills, and focus. More importantly, I share what types of projects students at every age are capable of completing safely, and without making a mess.

Best of all—it’s free! To sign up for the course, click here.

The Phases of Art Development is a quick digital course that explains how art making can help young children develop their fine-motor skills. More importantly, I share what types of projects early childhood students are capable of completing safely, and without making a mess.

Best of all—it’s free! To sign up for the course, click here.


A Short Cut Just for You – Early Childhood Art Guide

And if you want an even fuller picture of how to really help your young students learn art, check out my new book, Early Childhood Art: Visual Arts Teaching Guide. It’ll help you understand the importance of art language for early childhood students and lay the groundwork for what your students need to know about art. I also provide tips and tricks for setting up an art environment, using proper art materials and mediums, and planning level-appropriate art lessons. Click here to get your copy of my Early Childhood Art guide!

arts and craft book by Spramani Elaun

Spramani’s Books

Teach children visual arts

Curriculum For Children

Get step-by-step art curriculum to teach visual arts. Check out our 4 art curriculums:
Painting
Drawing
Color Theory
Clay Modeling

All rights reserved © 2024, Nature of Art®

No part of this blog may be used or be reproduced in any manner whatsoever including reproducing, publishing, performing, and making any adaptions of the work – including translation into another foreign language without written permission except in the case of brief quotations embodied in critical articles and reviews. Nature of Art® Publishing P.O. Box 443 Solana Beach, California 92075.

Montessori Scissor Cutting for Lower Elementary

Teaching Lower Elementary Students How to Use Scissors

As adults, using scissors is something we take for granted. Whether it’s clipping coupons or slicing through wrapping paper, using scissors is often a part of our day-to-day activities. However, we forget that we had to actually learn how to use scissors at some point—and there is a surprising number of young students these days who can’t properly use scissors! And if they don’t know how to use scissors, there are many other things in the classroom they’ll be unable to do. That’s why I’ve put together this Montessori scissor cutting for lower elementary guide!

Montessori Scissor Cutting for Lower Elementary

Learning to use scissors at a young age provides so many benefits! It’s an important skill we, as teachers, should be nurturing through lots of practice. When students are able to develop their scissor-using skills, they’re able to do so many artful and creative things, such as cutting paper, following patterns, cutting strings and yarn, and cutting fabric. The more practice children have with scissors, the better and more capable they will be working independently on crafts and art activities. Trust me, Montessori scissor cutting for lower elementary students can be fun!

Benefits of Scissor Cutting Skills for Lower Elementary Students

Benefits of Scissor Cutting Skills for Lower Elementary Students

The constant dynamic motion that comes from using scissors helps young students develop spatial intelligence and fine-motor movements that relate to other important tasks inside the Montessori classroom. Introducing scissor skills to children—even as young as two or three years—can help them move through critical milestones directly related to other areas of childhood development. Cutting activities build muscle control, develop eye and hand coordination, and deepen their tactile spatial awareness. 

Montessori Scissor Cutting for Lower Elementary, art lessons

A few years ago, I started to notice more and more teachers were sharing their frustrations about how the majority of young students coming through their classrooms were lacking in fine motor skills; they were too weak to apply pressure while writing or coloring and lacked the coordination to write their ABCs, tie their own shoes, or zip up their own jackets. Now, I’ve worked with thousands of students over the years, and I’ve also observed that, on average, half of the students in lower elementary coming through my art classes are not capable of using scissors with precision. It’s pretty common that I have to pause the craft I’m teaching to help some kids catch up to the others.

Teaching Lower Elementary Students How to Use Scissors

I’m an artist at heart, of course, and back when I was a homeschool mom, I made sure art and crafting was a part of what I taught my own two children—and that meant using scissors! From a very young age—probably younger than lower elementary, even—my students knew how to safely cut with blunt-tipped scissors. And guess what. That means they were also able to accomplish other skills beyond creating art, such as writing, playing music, and making themselves simple breakfasts in the morning without making a mess.  

Montessori Scissor Cutting for Lower Elementary, spramani elaun

There’s also a ton of research showing that handwriting success is linked to muscle coordination, which can be developed through scissor movements. If you give your students the chance to develop these muscles—through scissor practice—teaching them to write becomes much easier. Demonstrating how scissors work and having them follow your instructions, will help them be able to later excel in projects with complex steps and work independently. 

Where to Start: Evaluate Lower Elementary Students’ Scissor Cutting Skills

If you’re planning an art project that requires using scissors in one of the steps, check in to see where your students’ abilities are first. It’s important—for safety and for your students’ self esteem—to evaluate what their skill levels are before starting any cutting projects. You don’t want them to get hurt or cut themselves, and you don’t want them to feel like they’re failing if they don’t know how to properly use the scissors and can’t move on to the next steps.

Montessori Scissor Cutting for Lower Elementary, spramani elaun

Start by doing simple scissor exercise like cutting straight lines and curved shapes. Be sure you demonstrate how the blades meet together to slice and how a specific angles are needed to make both blades cut together with precision. Having these opportunities to practice cutting will make art projects smoother and keep your students on track.

Once lower elementary students get comfortable using scissors and can make their desired cuts, then you can move them onto more complex projects. Here are some creative Montessori scissor cutting for lower elementary ideas to help give your students practice:

  • Book binding
  • Curved line cuts
  • Cutting geometric shapes
  • Mosaic art
  • Paper collaging
  • Paper doll chains
  • Pop-up cards
  • Snowflake cutting
  • Scrapbooking
  • Spiral cuts
  • Straight line cuts
  • Zig-zag cuts
Montessori Scissor Cutting for Lower Elementary, how to teach kids

One Step Further: Register for My FREE Online Mini-Course

Once your lower elementary students learn how to use scissors safely and properly, the number of different art activities your class can start doing becomes endless! Lower elementary students are capable of so much when it comes to art! But if you want to keep your students interested in your demonstrations and keep the mess down to a minimum, you have to understand how they learn. That way you can find the perfect balance of teaching them without overwhelming or boring them. And I’ve developed a FREE digital mini-course—the Phases of Art Development—to help you do just that!

3 to 6 Art – Early Childhood Montessori Teaching Resources

Sign-up to receive video

The Phases of Art Development is a quick digital course that explains how art making can help students develop their creativity, fine-motor skills, and focus. More importantly, I share what types of projects students at every age are capable of completing safely, and without making a mess.

Best of all—it’s free! To sign up for the course, click here.

It’s an online course that explains how art making helps students develop their creativity, fine-motor skills, and focus. Not only will it help you teach your students, but I make it easier on you by giving you some examples of art projects lower elementary kids will enjoy creating.

Best of all—it’s free! To sign up for the course, click here.

All rights reserved © 2024, Nature of Art®

No part of this blog may be used or be reproduced in any manner whatsoever including reproducing, publishing, performing, and making any adaptions of the work – including translation into another foreign language without written permission except in the case of brief quotations embodied in critical articles and reviews. Nature of Art® Publishing P.O. Box 443 Solana Beach, California 92075.

The Value of Art Journaling for Kids, Montessori Activities

I’ve shared with you the importance of stimulating positive art talk in your Montessori classroom. It’s one of the easiest ways to get students interested in art. Once they’ve been allowed to explore their creativity through visual art, chances are, they’re going to be hooked and want to learn so much more. I’ve see it happen so many times! One of the best ways to keep them captivated, allow them to explore even more, and track their progress is through art journaling.

What I love about art journaling is that there’s no minimum talent or skill required—students of any age can benefit. All you really need is a journal, some simple art materials, and the willingness to get creative and have some fun.

What is Art Journaling?

An art journal is a book kept by artists as a visual—sometimes verbal—log of their thoughts, ideas, and creations. Art journaling the same concept as a written journal, but it combines writing with art and visual aspects. It’s a way for children to record their ideas and observations or respond to information they’ve learned with simple drawings and basic written descriptions.

It also gives them a space to explore. With art journaling, anything goes! Every style, medium, and technique can be used.

Art making is also powerful and therapeutic. Journaling gives students a healthy outlet to express their feelings and work through their emotions. For example, communicating through doodles can be much easier for children than talking.

How Art Journals Works

There’s no right or wrong way to do art journaling because they are personal to each artist! Students can use it to try out new techniques, document what happened to them that day or week, or artistically express the different emotions or issues they’re experiencing.

Students can keep their art journals with them or you can store them in a specific place on your art shelf or in a cabinet where they can grab them when they’re feeling creative. They can use the art supplies you put out on your art shelf to fill in the pages of their journal.

For the most part, journaling is an independent project and doesn’t require any lessons to complete. However, if you want to, you can provide simple prompts to inspire them; some examples may be: elaborate doodling, depicting poems, illustrating specific emotions, and creating patterned pages.

Make & Decorate Your Own Art Journal

Making an art journal is simple, all you really need is the journal itself—preferably filled with blank, un-lined pages.

Composition notebooks—although lined—usually cost about $1 or $2 each, and bulk pasts can be even cheaper. But I know purchasing a journal for each child in your class can still add up…so I’m offering you two solutions to cut down on costs.

1. Ask parents to donate journals. You’ll be surprised at how many parents will be willing to donate a few notebooks for your classroom.

2. Create a mini art journal out of plain paper:

  1. Take 4 sheets of 8 1/2 x 11 plain white copy paper
  2. Cut sheets in half (8 1/2 x 5 1/2), then fold in half into a mini booklet
  3. Bind loose pages with a rubber band or stitch together (along the fold)
  4. Stitching Instructions: get a thumb tack and press to make 3 holes along the fold; bind pages using a simple string stitch (watch video below).

Once you have your journal figured out, give students the opportunity to decorate their notebooks. If they’ll be using their own individual books make sure they put their names on them. Then put out a few basic art supplies (markers, stickers, glue, scissors, colored paper, beads, ribbons, etc.) and let them have fun. These will more than likely be the same supplies they’ll use to decorate the inside of their journals as well.

If your students choose to share their art journals with you, make sure you offer them supportive and nurturing language.

You never know…creating and encouraging your students to keep art journals might inspire you to start one yourself!

Learn more about teaching kids art lessons

Want more information on the types of techniques your students can handle or ideas for art projects outside of journals? Sign up for my absolutely FREE mini course, Phases of Art Development Guides & Art Project Ideas. It’s a quick guide to what your students are capable of and what to teach them at each age. They’re bite-sized videos that have proven helpful to many other Montessori teachers and they’ll give you a solid foundation to begin teaching art in your classroom!

3 to 6 Art – Early Childhood Montessori Teaching Resources

Sign-up to receive video

The Phases of Art Development is a quick digital course that explains how art making can help students develop their creativity, fine-motor skills, and focus. More importantly, I share what types of projects students at every age are capable of completing safely, and without making a mess.

Best of all—it’s free! To sign up for the course, click here.

Of course, if you want to stay up-to-date on more teaching tips and art project ideas, make sure you sign up for my newsletter!

All rights reserved © 2024, Nature of Art®

No part of this blog may be used or be reproduced in any manner whatsoever including reproducing, publishing, performing, and making any adaptions of the work – including translation into another foreign language without written permission except in the case of brief quotations embodied in critical articles and reviews. Nature of Art® Publishing P.O. Box 443 Solana Beach, California 92075.