How-to PAINT PAPER like Eric Carle | Montessori Art

How-to PAINT PAPER like Eric Carle | Montessori Art

Paint paper like Eric Carle

Every summer, I host art camps in San Diego, and my students’ top favorite project to do with me is to paint papers! In this post, we will teach you how to paint paper and collage like artist and author Eric Carle. So I thought I would share this fun Montessori art activity you can introduce to your students.

I like to give my students unusual tools, bright paint colors, different colored papers, and crazy things to make interesting textures and patterns. This also prepares papers for future projects that can be cut and be collage into interesting shapes.

Teach the Elements

Painting papers is a great way to teach the Elements and Principles of Design. You can teach texture and patterns, a vital art standard topic children should learn in Montessori art lessons. The artist and author Eric Carle is famous for doing this fun and vibrant method in his book illustrations. Eric Carle is famous for PAINTED PAPERS and collaging them into beautiful creatures featured in all his books. 

Eric Carle, artist and children’s book author


Paint paper like Eric Carle
How-to PAINT PAPER like Eric Carle | Montessori Art

What is paint paper?

Painted paper is basically paint applied onto paper.  You can paint plain white paper or colored paper.  Paper painting can be created with different mediums like watercolor, gel paints, tempera, or acrylic paints (any paint). 

Children painting colors

What can you do with painted paper?

Like Eric Carle, the famous artist, paint the papers first, let them dry second, then third cut them up into new collage artworks. Eric Carle’s famous painting papers created The Very Hungry Caterpillar book with this unique painted technique.

Collaging with painted papers
ColColl
Montessori art painting supplies

What tools do you need to make painted papers?

  • Paint mediums
  • Paper
  • Paintbrushes
  • Interesting objects that make patterns and textures
  • Drying rack
  • Interesting tools
Painting supplies

Painted papers can be taught in a process-based manner

Process-based painting is more about the experience rather than following directions. When kids paint process-based, they are able to go in any direction they choose. They can explore any texture, use any color, and have any outcome happen, but have very cool painted paper; they can later cut turn into another art piece. Process-based art lessons and painted papers are a great way to start teaching Montessori art lessons.

Spramani Elaun

Check out my Kids Painting Book Here


Early Childhood Guide – Book

You’ll learn:

  • The importance of early Art Literacy
  • How to speak the ‘Artist Language’
  • The art subjects students need to know
  • The characteristics of child artists
  • Methods and approaches to teaching
  • How to create art activity environments
  • The best art materials for your classroom
  • How to plan level-appropriate activities

Buy Guide Now!

arts and craft book by Spramani Elaun

Spramani’s Books

Teach children visual arts

Curriculum For Children

Get step-by-step art curriculum to teach visual arts. Check out our 4 art curriculums:
Painting
Drawing
Color Theory
Clay Modeling

All rights reserved © 2024, Nature of Art®

No part of this blog may be used or be reproduced in any manner whatsoever including reproducing, publishing, performing, and making any adaptions of the work – including translation into another foreign language without written permission except in the case of brief quotations embodied in critical articles and reviews. Nature of Art® Publishing P.O. Box 443 Solana Beach, California 92075.
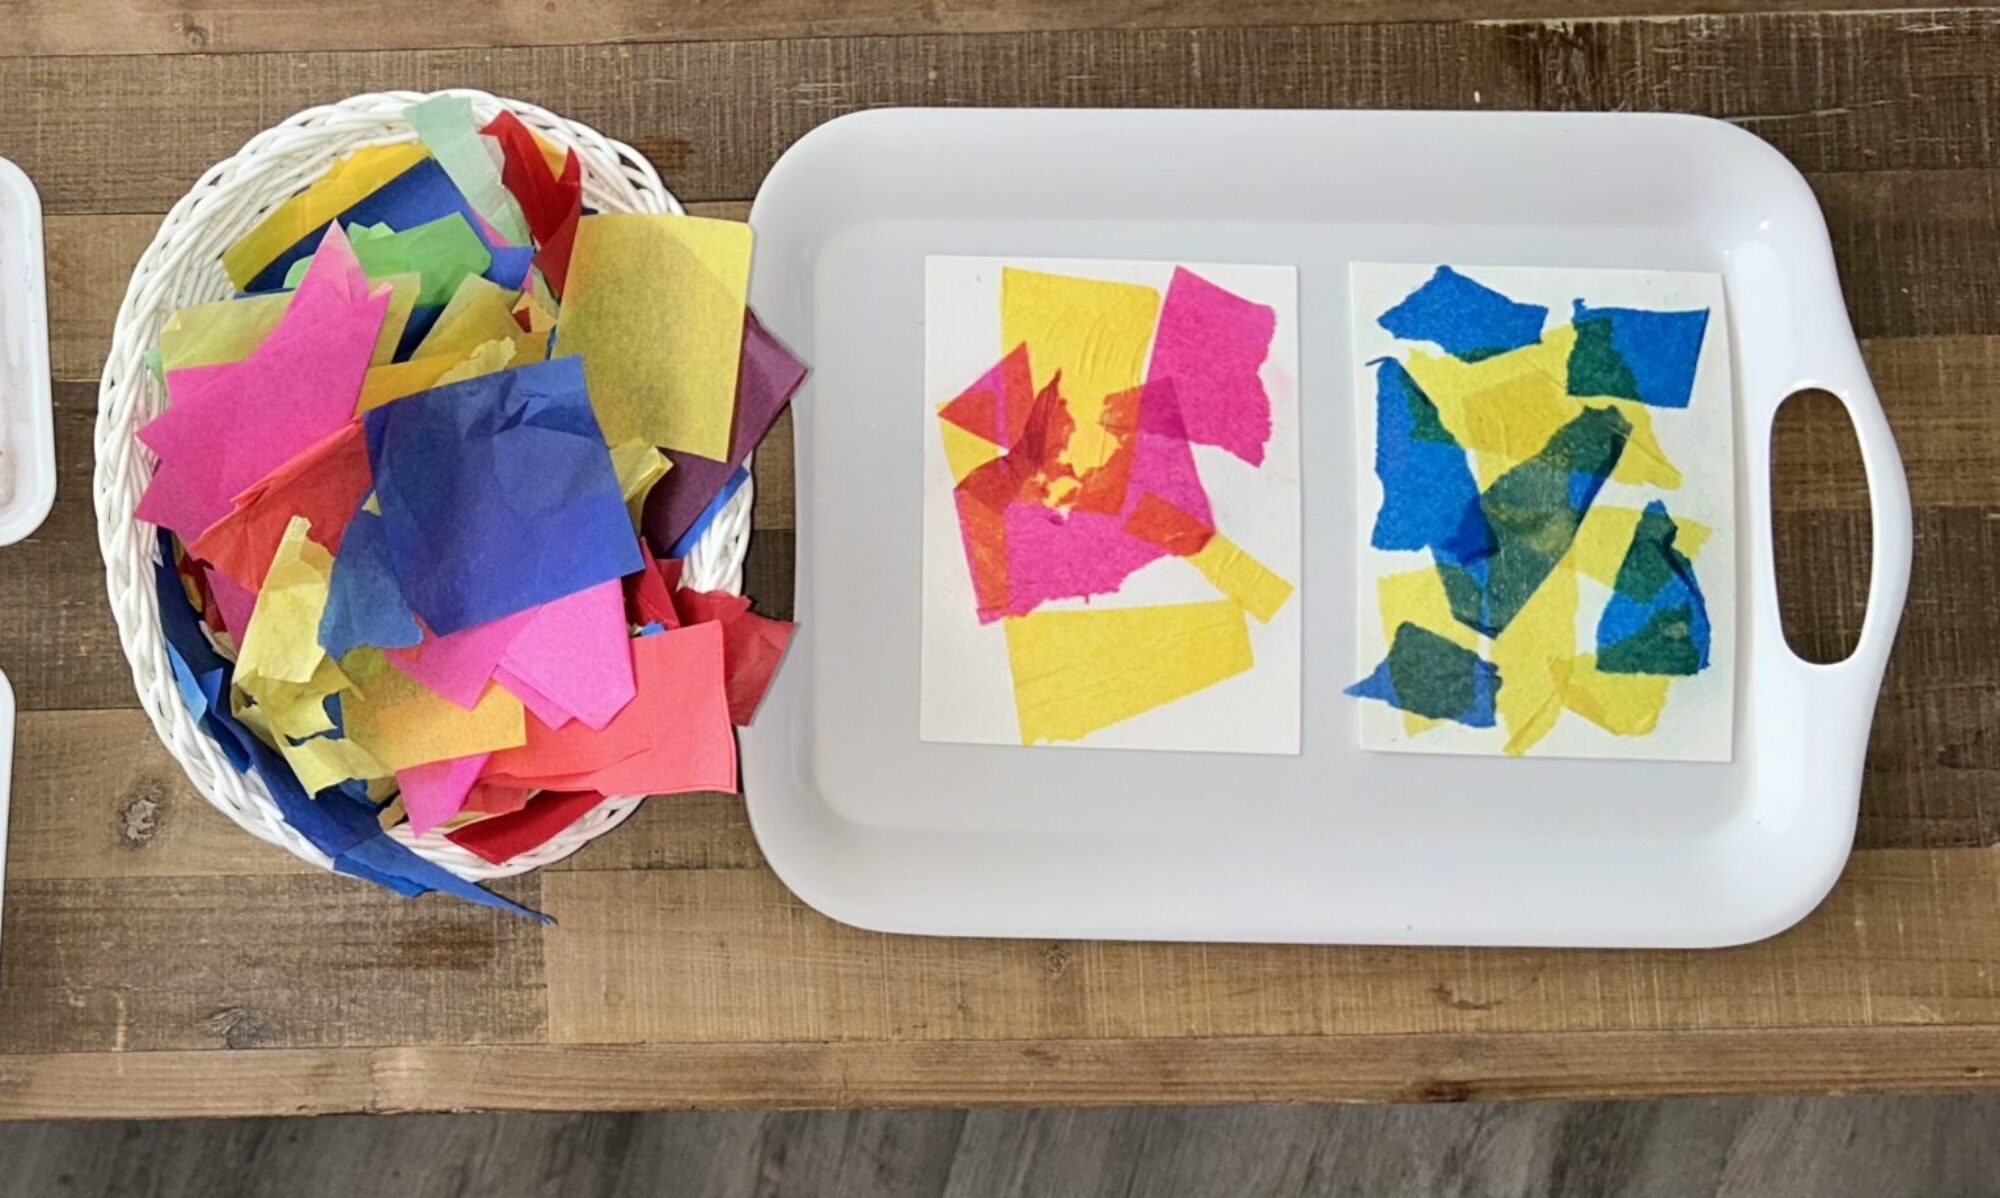
Montessori Art Collaging: Lower Elementary

Montessori Art Collaging: Lower Elementary

Collaging offers many benefits to children of all ages; it gives them the opportunity to conjure up creative ideas, improve their fine-motor capabilities, and work on projects independently. In this blog, I’m going to focus on Montessori art collaging for lower elementary students, giving you some helpful hints and inspirational activity ideas to get them going with this type of crafting.

This is part of a larger post, The Ultimate Montessori Art Collaging Guide, goes into further detail on the benefits and provides tips and resources for all Montessori levels.
You can read the blog by clicking here.

Collaging is the process of selecting, assembling, and pasting materials into a unique arrangement or a beautiful work of art. Montessori art collaging is perfect for lower elementary students because they’re at a great age to start exploring textured materials and trying out different art-making techniques.

Lower L students are also capable of planning out their designs with intention and seeing out their creative ideas through realization and the completion of their activity. They can also follow simple, guided-art instructions and begin to work with more abstract themes and concepts.

Montessori Art Collaging: Lower Elementary, kids activities

Montessori Art Collaging, Lower Elementary Materials & Concepts

One of the best things about collaging is that it can be done with almost any kind of material, including: papers, fabrics, natural elements, recycled objects, buttons, tiny beads, sequins, and all other kinds of man-made embellishments. You can even use textured materials like foil, glass, wire, and burlap. There’s really nothing that can’t be collaged!

Since the types of collaging materials you can use are basically endless, the glue or paste you use is important. Some materials won’t stick with a simple glue stick, so you’ll have to decide what adhesive you want to set out so your students will actually be able to collage successfully. 

I’d suggest using glue sticks for tissue collaging and light-weight paper; white craft glue can be used for construction paper, fabric, and small embellishments; and a low-temperature glue gun (used with supervision!) works best for plastic, wood, and larger objects. 

Montessori Art Collaging: Lower Elementary, art ideas

Giving students the right materials will take care of most of the work for this Montessori art collaging activity. The process is easy for you to demonstrate and easy for lower L students to practice. Collaging really only consists of three steps:

  1. Cutting – students should begin with cutting interesting shapes out of varying raw materials
  2. Arranging – once students have the shapes and items they want to work with, they can arrange the elements into designs, patterns, or interesting layouts
  3. Glueing – after students have an idea of what they want to create, they will apply glue to the back of the materials, then place them back onto the arrangement

Make sure students have the freedom to explore and devise their own layouts. Have your students work in creative mode, with only very simple copy-mode steps. Children at this age level are developing better control of their fine-motor skills, such as scissor use, and will have fun cutting out different shapes out from the materials. And since they’re starting to be able to plan out their art works in their imagination ahead of time, it’s a fun age to see brilliant concepts and ideas come to fruition within their projects.

Where to Start: Montessori Art Collaging Lower Elementary Skills

If your students have never collaged before, start with simple materials, such as paper, before giving them more options. Then, you can even try introducing different patterns and themes, and even show students different artist samples for inspiration. Just make sure students are always allowed to work out their final designs on their own. 

5 Montessori Art Collage Ideas for Lower Elementary

Collages can be put together in many different ways, they can be sewn, glued or weaved. They can be abstract in nature or even resemble an image. Here’s five different ways to approach  collaging with lower elementary students.

How to Montessori Art Collaging: Lower Elementary

Paper + Tissue

Tissue and paper are ideal to start out with because they’re easy to tear and cut. Their lighter weights mean most craft glues will be able to hold them down securely.

Up-cycled materials

A collage created with up-cycled materials can be made with almost anything, from old cardboard to broken toys. I’ve even used old wetsuits before (like in the photo below)! Using old materials is both an earth-friendly and cost-effective way to create art.

how to collage with kids art activities
how to collage with kids

Natural Elements

Collages can also be done using natural elements, such as flowers, leaves, seeds, and twigs. Natural materials can give collages diverse texture and interesting features. Some food items can also be collaged, like dried beans and pasta. The trick to collaging with natural elements is to use a hot glue gun (you may need to do this yourself, or supervise children while they use it), or weave and sew the materials onto the collage base, since craft glue isn’t usually strong enough to hold these objects.

how to teach collage art to montessori Lower Elementary

Styrofoam

Montessori Art Collaging: Lower Elementary, recycle

Styrofoam isn’t the most earth-friendly materials, so I suggest using only recycled pieces. The one reason I do like to use it is because the material is super easy for younger children to cut through. Painting the pieces before using them also introduces the painting domain to your students, and make their creation even more interesting. If you can start repurposing these materials instead of sending them to landfills, you can help the environment.

how to teach Montessori Art Collaging: Lower Elementary
Montessori Art Collaging: Lower Elementary, spramani
Montessori Art Collaging: Lower Elementary, activities for the classroom, art albums

Images & Design Prompts

Once you have given your students plenty of time to collage their own ideas and explore with different materials in a process-based way, you can then provide them even more inspiration using themed prompts based on subjects you might already be working on. For example, geometric shapes can help with math concepts, while a collage of a bird is a great way to instill zoology lessons. You can even challenge kids to bring color theory into their creations by asking them to create warm, cool, or contrasting color layouts.

One Step Further: Register for My FREE Online Mini-Course

Introducing your lower elementary students to collaging concepts is just one Montessori art activity out of thousands. Lower elementary students are capable of so much when it comes to art! But if you want to keep your students interested in your demonstrations and keep the mess down to a minimum, you have to understand how they learn. That way you can find the perfect balance of teaching them without overwhelming or boring them. And I’ve developed a FREE digital mini-course—the Phases of Art Development—to help you do just that!

It’s an online course that explains how art making helps students develop their creativity, fine-motor skills, and focus. Not only will it help you teach your students, but I make it easier on you by giving you some examples of art projects lower elementary kids will enjoy creating.

Best of all—it’s free! To sign up for the course, click here.

3 to 6 Art – Early Childhood Montessori Teaching Resources

Sign-up to receive video

The Phases of Art Development is a quick digital course that explains how art making can help students develop their creativity, fine-motor skills, and focus. More importantly, I share what types of projects students at every age are capable of completing safely, and without making a mess.

Best of all—it’s free! To sign up for the course, click here.

All rights reserved © 2024, Nature of Art®

No part of this blog may be used or be reproduced in any manner whatsoever including reproducing, publishing, performing, and making any adaptions of the work – including translation into another foreign language without written permission except in the case of brief quotations embodied in critical articles and reviews. Nature of Art® Publishing P.O. Box 443 Solana Beach, California 92075.

Montessori Scissor Cutting for Lower Elementary

Teaching Lower Elementary Students How to Use Scissors

As adults, using scissors is something we take for granted. Whether it’s clipping coupons or slicing through wrapping paper, using scissors is often a part of our day-to-day activities. However, we forget that we had to actually learn how to use scissors at some point—and there is a surprising number of young students these days who can’t properly use scissors! And if they don’t know how to use scissors, there are many other things in the classroom they’ll be unable to do. That’s why I’ve put together this Montessori scissor cutting for lower elementary guide!

Montessori Scissor Cutting for Lower Elementary

Learning to use scissors at a young age provides so many benefits! It’s an important skill we, as teachers, should be nurturing through lots of practice. When students are able to develop their scissor-using skills, they’re able to do so many artful and creative things, such as cutting paper, following patterns, cutting strings and yarn, and cutting fabric. The more practice children have with scissors, the better and more capable they will be working independently on crafts and art activities. Trust me, Montessori scissor cutting for lower elementary students can be fun!

Benefits of Scissor Cutting Skills for Lower Elementary Students

Benefits of Scissor Cutting Skills for Lower Elementary Students

The constant dynamic motion that comes from using scissors helps young students develop spatial intelligence and fine-motor movements that relate to other important tasks inside the Montessori classroom. Introducing scissor skills to children—even as young as two or three years—can help them move through critical milestones directly related to other areas of childhood development. Cutting activities build muscle control, develop eye and hand coordination, and deepen their tactile spatial awareness. 

Montessori Scissor Cutting for Lower Elementary, art lessons

A few years ago, I started to notice more and more teachers were sharing their frustrations about how the majority of young students coming through their classrooms were lacking in fine motor skills; they were too weak to apply pressure while writing or coloring and lacked the coordination to write their ABCs, tie their own shoes, or zip up their own jackets. Now, I’ve worked with thousands of students over the years, and I’ve also observed that, on average, half of the students in lower elementary coming through my art classes are not capable of using scissors with precision. It’s pretty common that I have to pause the craft I’m teaching to help some kids catch up to the others.

Teaching Lower Elementary Students How to Use Scissors

I’m an artist at heart, of course, and back when I was a homeschool mom, I made sure art and crafting was a part of what I taught my own two children—and that meant using scissors! From a very young age—probably younger than lower elementary, even—my students knew how to safely cut with blunt-tipped scissors. And guess what. That means they were also able to accomplish other skills beyond creating art, such as writing, playing music, and making themselves simple breakfasts in the morning without making a mess.  

Montessori Scissor Cutting for Lower Elementary, spramani elaun

There’s also a ton of research showing that handwriting success is linked to muscle coordination, which can be developed through scissor movements. If you give your students the chance to develop these muscles—through scissor practice—teaching them to write becomes much easier. Demonstrating how scissors work and having them follow your instructions, will help them be able to later excel in projects with complex steps and work independently. 

Where to Start: Evaluate Lower Elementary Students’ Scissor Cutting Skills

If you’re planning an art project that requires using scissors in one of the steps, check in to see where your students’ abilities are first. It’s important—for safety and for your students’ self esteem—to evaluate what their skill levels are before starting any cutting projects. You don’t want them to get hurt or cut themselves, and you don’t want them to feel like they’re failing if they don’t know how to properly use the scissors and can’t move on to the next steps.

Montessori Scissor Cutting for Lower Elementary, spramani elaun

Start by doing simple scissor exercise like cutting straight lines and curved shapes. Be sure you demonstrate how the blades meet together to slice and how a specific angles are needed to make both blades cut together with precision. Having these opportunities to practice cutting will make art projects smoother and keep your students on track.

Once lower elementary students get comfortable using scissors and can make their desired cuts, then you can move them onto more complex projects. Here are some creative Montessori scissor cutting for lower elementary ideas to help give your students practice:

  • Book binding
  • Curved line cuts
  • Cutting geometric shapes
  • Mosaic art
  • Paper collaging
  • Paper doll chains
  • Pop-up cards
  • Snowflake cutting
  • Scrapbooking
  • Spiral cuts
  • Straight line cuts
  • Zig-zag cuts
Montessori Scissor Cutting for Lower Elementary, how to teach kids

One Step Further: Register for My FREE Online Mini-Course

Once your lower elementary students learn how to use scissors safely and properly, the number of different art activities your class can start doing becomes endless! Lower elementary students are capable of so much when it comes to art! But if you want to keep your students interested in your demonstrations and keep the mess down to a minimum, you have to understand how they learn. That way you can find the perfect balance of teaching them without overwhelming or boring them. And I’ve developed a FREE digital mini-course—the Phases of Art Development—to help you do just that!

3 to 6 Art – Early Childhood Montessori Teaching Resources

Sign-up to receive video

The Phases of Art Development is a quick digital course that explains how art making can help students develop their creativity, fine-motor skills, and focus. More importantly, I share what types of projects students at every age are capable of completing safely, and without making a mess.

Best of all—it’s free! To sign up for the course, click here.

It’s an online course that explains how art making helps students develop their creativity, fine-motor skills, and focus. Not only will it help you teach your students, but I make it easier on you by giving you some examples of art projects lower elementary kids will enjoy creating.

Best of all—it’s free! To sign up for the course, click here.

All rights reserved © 2024, Nature of Art®

No part of this blog may be used or be reproduced in any manner whatsoever including reproducing, publishing, performing, and making any adaptions of the work – including translation into another foreign language without written permission except in the case of brief quotations embodied in critical articles and reviews. Nature of Art® Publishing P.O. Box 443 Solana Beach, California 92075.

30 Montessori Art Materials for Lower Elementary Classroom

We’re soon approaching the new school year! Have you already started all your back-to-school shopping for your classroom materials? While you’re out picking out the last few items to make your classroom truly spectacular, make sure you’re adding Montessori art materials for lower elementary to your list! There are so many awesome art products and wonderful things to work with, I’d encourage you to explore any materials that inspire you. 

montessori art materials

Choosing the Most Appropriate Art Materials for Lower Elementary

When you’re out shopping for art materials, you’ll probably be greeted with hundreds of options, but not everything will be appropriate for a lower elementary classroom. 

Students in lower elementary have great energy and curiosity; they’re wanting to understand how the world works and are learning to express their imaginative fantasy ideas through artwork. It’s also a time where they’re developing and practicing their fine motor movements, so practice and repetition is key at this age, and creating art with different mediums can help with that. 

Lower L students are able to learn quickly with guided lessons and then work independently. They love exploring different mediums and what they can achieve with them. That’s why it’s important to have all the essential materials ready and on hand—your students will have more choices to explore with. It also helps you to be able to quickly and easily give presentations and demonstration set-ups.

30 Montessori Art Materials for Lower Elementary Classroom

I’ve worked with teachers all over the world, and almost all of them had questions about how to start teaching art in their classroom. Where do I start? What material do I need? These were some of the most common questions I’d be asked by lower elementary Montessori teachers!

It’s taken me years to get my own art supply collection to the point it is now, and I didn’t purchase everything all at once—and I don’t expect you to either! The trick with buying art materials for Lower L—especially if you haven’t done this before—is starting slowly. You can get by with just a few basic materials to start the school year. 

I created a cheat sheet of the best Montessori art materials for lower elementary to make your back-to-school shopping easier on you. You don’t have to purchase everything all at once, but be strategic with what you do buy. Add to your materials as the year goes on, and you’ll constantly see your lower elementary students get excited with each new thing you bring out!

Montessori Art Materials for Lower Elementary Classroom

Where to Start: Which Montessori Art Materials for Lower Elementary to Purchase First

It’s taken me more than three decades as a professional artist and art instructor to understand what materials are appropriate for lower elementary Montessori grades. It all starts with the 5 Domains (which is how I categorize the different areas of visual art).  

All my experience and observations have led me to develop a list of the specific mediums, tools, and art materials that can be used to successfully teach lower L students and help develop their art literacy and fine motor skills. 

I’ve created this art materials list, to take the guesswork and trial and error out of what to purchase for your classroom. I know classroom budgets can be difficult to work with, so I recommend starting by purchasing items from one domain, then adding to your art materials from there. You can make dozens of different art lessons and presentations based on just a few art materials. (If you’re looking for other money-saving tips, read this blog.)

30 Montessori Art Materials for Lower Elementary Classroom

One Step Further (Download My Montessori Art Materials for Lower Elementary List!)

I made this art material list based on my years of experience teaching art to lower elementary students, ages 6 to 9. Every item listed here is suitable for their age group and will make introducing art concepts and lessons to them stress-free, and mess-free. Trust me, having the right art materials makes all the difference in making teaching art fun and easy (for you and your students)!

You can download 30 Montessori Art Materials to Have in Your Lower Elementary Classroom by clicking here.

30 Montessori Art Materials for Lower Elementary Classroom

A Short Cut Just for You

Having the right art material for your lower elementary classroom is just the first step. If you want more information on how to use each material, how to set up an art shelf with the materials, and how to teach lessons that actually help lower elementary students learn and appreciate art, then I have some good news for you!

I’m currently doing a special summer enrollment for my online course, Art Teaching Blueprint. It includes everything you need to know to successfully bring art lessons into your lower elementary classroom—without the stress. I go into more detail about art materials (such as how to use them and where to find them), give you step-by-step art presentations, and a ton of other valuable information that makes teaching art and setting up your shelf so much easier. And, right now, you can register at a discounted price, so don’t miss out!

Click here to learn more about Art Teaching Blueprint.

30 Montessori Art Materials for Lower Elementary Classroom

All rights reserved © 2024, Nature of Art®

No part of this blog may be used or be reproduced in any manner whatsoever including reproducing, publishing, performing, and making any adaptions of the work – including translation into another foreign language without written permission except in the case of brief quotations embodied in critical articles and reviews. Nature of Art® Publishing P.O. Box 443 Solana Beach, California 92075.

Lower Elementary Montessori Art Teach Method

Sensory Cognitive Child Art Method

I’ve spent years and years researching and observing how children learn art, and what I’ve found is that children are able to grasp different artistic skills at different planes. In this new blog series, I’ll be sharing my insight on the art teaching methods that work for each age group of Montessori students.

Children of all ages can be taught visual arts and be guided through the artistic process. Each developmental phase requires different teaching styles and approaches.

Below you’ll find a general arts literacy guide for Montessori Lower Elementary ages following the International Standards for the Arts Education & Sensory Visual Arts method that aligns with a child’s growth – Nature of Art®.

Montessori Lower Elementary Art Teaching Methods Resources

If you would like to understand more about which types of art projects children can work on, register for my free video course, Phases of Arts Development, which discusses teaching methods for Lower Elementary Montessori students (ages 7-9).

You can learn about Art Literacy Standards and the benefits of visual arts by reading Defining Visual Arts (paperback book).

Get more information on how to bring art lessons into the Montessori classroom by reading Introducing Visual Arts into the Montessori Classroom (paperback book).

montessori art how to

If you would like to understand more about the phases of art development, register for this free mini digital course.

Lower Elementary, Ages 7-9, Montessori Visual Arts Teaching Curriculum

Children at the lower L, age can do a number of different types of art projects. They can conjure up their own ideas and imaginative creations. Montessori lower elementary students can now plan with intention and think their ideas through to completion, going through the four steps of the artistic process.

At this age, students love to explore and discover what results different art mediums can produce. They encounter visual arts and Montessori art projects with lots of curiosity and a willingness to try different techniques.

Stretching Students’ Art Skills

Children can follow simple guided-art instructions and remain focused on their work for up to 1.5 hours. However, it’s still important to keep projects simple, with just a few un-complicated steps. Montessori art projects should start to introduce line, shape, form, texture, color, and symmetrical balance ideas.

You can also start introducing your lower elementary Montessori students to art language and the Elements & Principles of Design. For more information, reference Defining Visual Arts to better understand art language for young children.

Students’ fine-motor skills are becoming more controlled due to all the activities in their day-to-day Montessori curriculum and academic studies. Drawing and painting can be done with higher levels of control. The most important thing to focus on is giving children tasks that will continue to develop their fine-motor skills.

Children in lower elementary also need lots of exploratory sessions that allow them to experiment with varied mediums and techniques. Children are now drawing and painting with a 2D perspective and can be introduced to texture.

Art-Teaching Methods for Lower Elementary

Based on my proprietary sensory art method, I recommend teaching Montessori art through a combination of three methods: process-based art, creative-mode, and simple copy-mode.

  • Process-based art is about exploring and using their own imagination; it’s not necessarily focused on the child’s final piece of artwork.
  • Creative mode gives children the opportunity to explore mediums and conjure up creative images based on their own imaginations, thoughts, and ideas.
  • Copy mode refers to a systematic, step-by-step art instruction. Copy-mode should not be copy what you see in the image type lessons.

Lower Elementary Montessori Art Activities & Mediums

Here are some great Montessori Lower Elementary art projects for your students who are 7-9 years old, in the elementary grades. These types of art activities will help develop their fine motor control and small muscles in fingers and hands while teaching the Elements & Principles of Design. (You can find non-toxic, kid-friendly art supplies needed for these art activities at Nature of Art for Kids.)

  • Drawing: crayons, color pencils, graphite pencil, oil pastels, etc.
  • Painting: watercolor paints, tempera paints, acrylic paints, watercolor crayons, watercolor pencils etc.
  • Color Theory: primary color mixing, dropper color mixing, etc.
  • Clay Modeling: earth clay, non-harden plasticine clay, air-dry modeling clay, beeswax forming, etc.
  • Crafts: paper folding, nature and paper collage, mosaic arrangements, sewing basics, wool felting, string weaving, nature crafting, 3D constructing, etc.

Learn more about Montessori art teaching methods for lower elementary and get some Montessori art projects ideas by registering for my FREE mini digital course, Phases of Art Development Video.

3 to 6 Art – Early Childhood Montessori Teaching Resources

Sign-up to receive video

The Phases of Art Development is a quick digital course that explains how art making can help students develop their creativity, fine-motor skills, and focus. More importantly, I share what types of projects students at every age are capable of completing safely, and without making a mess.

Best of all—it’s free! To sign up for the course, click here.

All rights reserved © 2024, Nature of Art®

No part of this blog may be used or be reproduced in any manner whatsoever including reproducing, publishing, performing, and making any adaptions of the work – including translation into another foreign language without written permission except in the case of brief quotations embodied in critical articles and reviews. Nature of Art® Publishing P.O. Box 443 Solana Beach, California 92075.