Best Drawing & Painting Papers Size For Kids

Best Drawing & Painting Papers Size For Kids

Today day I want to share Best Drawing & Painting Papers Size For Kids, and why I Use Small Papers instead. My signature hack which you can learn by reading my books and curriculum, is to use always start with small quarter-size papers instead of large paper size.  It might seem too small, but there are many amazing reasons why I have been doing this for years. So let me share all my reason why you want to choose the best drawing & painting papers sizes for kids.

Best Drawing & Painting Papers Size For Kids, boy watercolor painting

Best Small Paper Sizes

First, after teaching thousands of children how to draw and paint, I realized a large piece of paper is really hard to fill up. The second thing is young children are not planning just quite yet, and they go through paper fast. Older kids plan more ideas out, but beginner artists are just exploring. So I like to slow them down by giving them small paper sizes to work with. This is why the Best Drawing & Painting Papers Size For Kids is to use smaller choices.

boy painting a small acrylic paper

Use Quality Paper

Another important thing is that I only use quality types paper for drawing and painting. Choose thick uncoated card stock or watercolor paper. This way you can give more quality paper to kids by taking one large size and getting four parts out of it! For drawing, you can use simple copy paper, the kind you use in your printer. 24# bond uncoated. I quarter these from an 8.5 x 11 sheet and get 4.25 x 5.5. You can also quarter doodling scrap paper to this size. Kids love rummaging through baskets of small papers. This is my signature hack! I have been sharing this tip for years.

Best Drawing & Painting Papers Size For Kids, download
texture small paper size, boy dipping in blue watercolor paint with string

Small Paper For All Grades

I even give elementary-grade children the same sizes of small paper. If children need or ask for a larger piece of paper, you can give them the size they need. I just like to encourage them to plan and have intention before they use a larger drawing or painting paper. The important thing is to give children quality materials without wasting. So the smaller papers are best for kids to start with.

Art Resources

toddler using tempera sticks on small drawing paper size

You can learn more about my art teaching method by reading my books, curriculum, and viewing my art training videos. Many parents and teachers internationally have adopted this idea and given me positive feedback! You can stage these papers on a tray, in a basket, or a card stand. Check out my Best curriculums for drawing and painting grades 6 – 12 years blog here.

Be Eco Friendly,

Spramani

girl outdoor sketching on small drawing paper with pencil.

Best Paper Size Blog Summary

Using small papers for drawing and painting in art classes has many benefits. Spramani suggests using small, quarter-size sheets to save resources and boost creativity. These smaller papers make it easier for young artists to focus, as they don’t have to fill large sheets, which can be overwhelming. High-quality materials like thick card stock or watercolor paper ensure good results without wasting paper, since one big sheet can be cut into several smaller ones. This method is good for any grade level and is eco-friendly. Spramani encourages planning before using bigger sheets to help students create intentional art. Many teachers and parents have adopted this approach and found it helpful. For more tips, Spramani provides resources in her books and art videos.

Best Drawing & Painting Papers Size For Kids, materials list download
Best Drawing & Painting Papers Size For Kids, elementary pdf download

arts and craft book by Spramani Elaun

Spramani’s Books

Teach children visual arts

Curriculum For Children

Get step-by-step art curriculum to teach visual arts. Check out our 4 art curriculums:
Painting
Drawing
Color Theory
Clay Modeling

All rights reserved © 2024, Nature of Art®

No part of this blog may be used or be reproduced in any manner whatsoever including reproducing, publishing, performing, and making any adaptions of the work – including translation into another foreign language without written permission except in the case of brief quotations embodied in critical articles and reviews. Nature of Art® Publishing P.O. Box 443 Solana Beach, California 92075.
What Are The Best Montessori Art Materials For Beginners?

Today, I want to share the best Montessori art materials I recommend for beginners. These are basic art materials you can find almost anywhere and order online at Montessori-art.com or Store.EcoKidsArt.com

The reason I recommend these materials is that they are safe non-toxic, and are good quality. I have used them for many art lessons, and they work great. You can find them at a low to mid cost.

To download my comprehensive list of art materials suitable for teaching all art subjects to students of all ages, especially ideal for beginner Montessori students, please click downloads here:

best Montessori art materials for beginners

Kids love doodling and drawing with these

Beginner’s Art Supplies List

Drawing Materials Beginning (BUY NOW)

  • Pencil, eraser, and pencil sharpener
  • Crayons in different sizes and shapes
  • Colored pencils (short or jumbo tips for small hands)
  • Oil pastels in a variety of colors
  • Tempera sticks
  • Markers
What are the best Montessori art materials for beginners?

Painting Materials for beginners (BUY NOW)

  • Tempera paint sticks (easy for beginners to glide)
  • Tempera liquid paint
  • Dot Stampers
  • Watercolor paints (start with primary red, yellow, blue for color mixing)
  • Watercolor dry cakes
  • Paintbrushes
  • Palette
  • Smock cover up
  • Simple surfaces to paint on (paper, cardboard, watercolor paper, rocks, sticks, canvas)
  • Glass droppers
  • Sponges
  • Wash Jar
What are the best Montessori art materials for beginners?

Beginning Clay Modeling Materials (BUY NOW)

  • Non-hardening clays
  • Air-dry clay
  • Pottery clay
  • Wood clay tools
  • Stamps
  • Rollers
  • Cookie cutters

MODELING CLAY

What are the best Montessori art materials for beginners?

Beginning Crafting Supplies (BUY NOW)

  • Scissors
  • Glue
  • Low-temp glue gun
  • Yarn
  • String
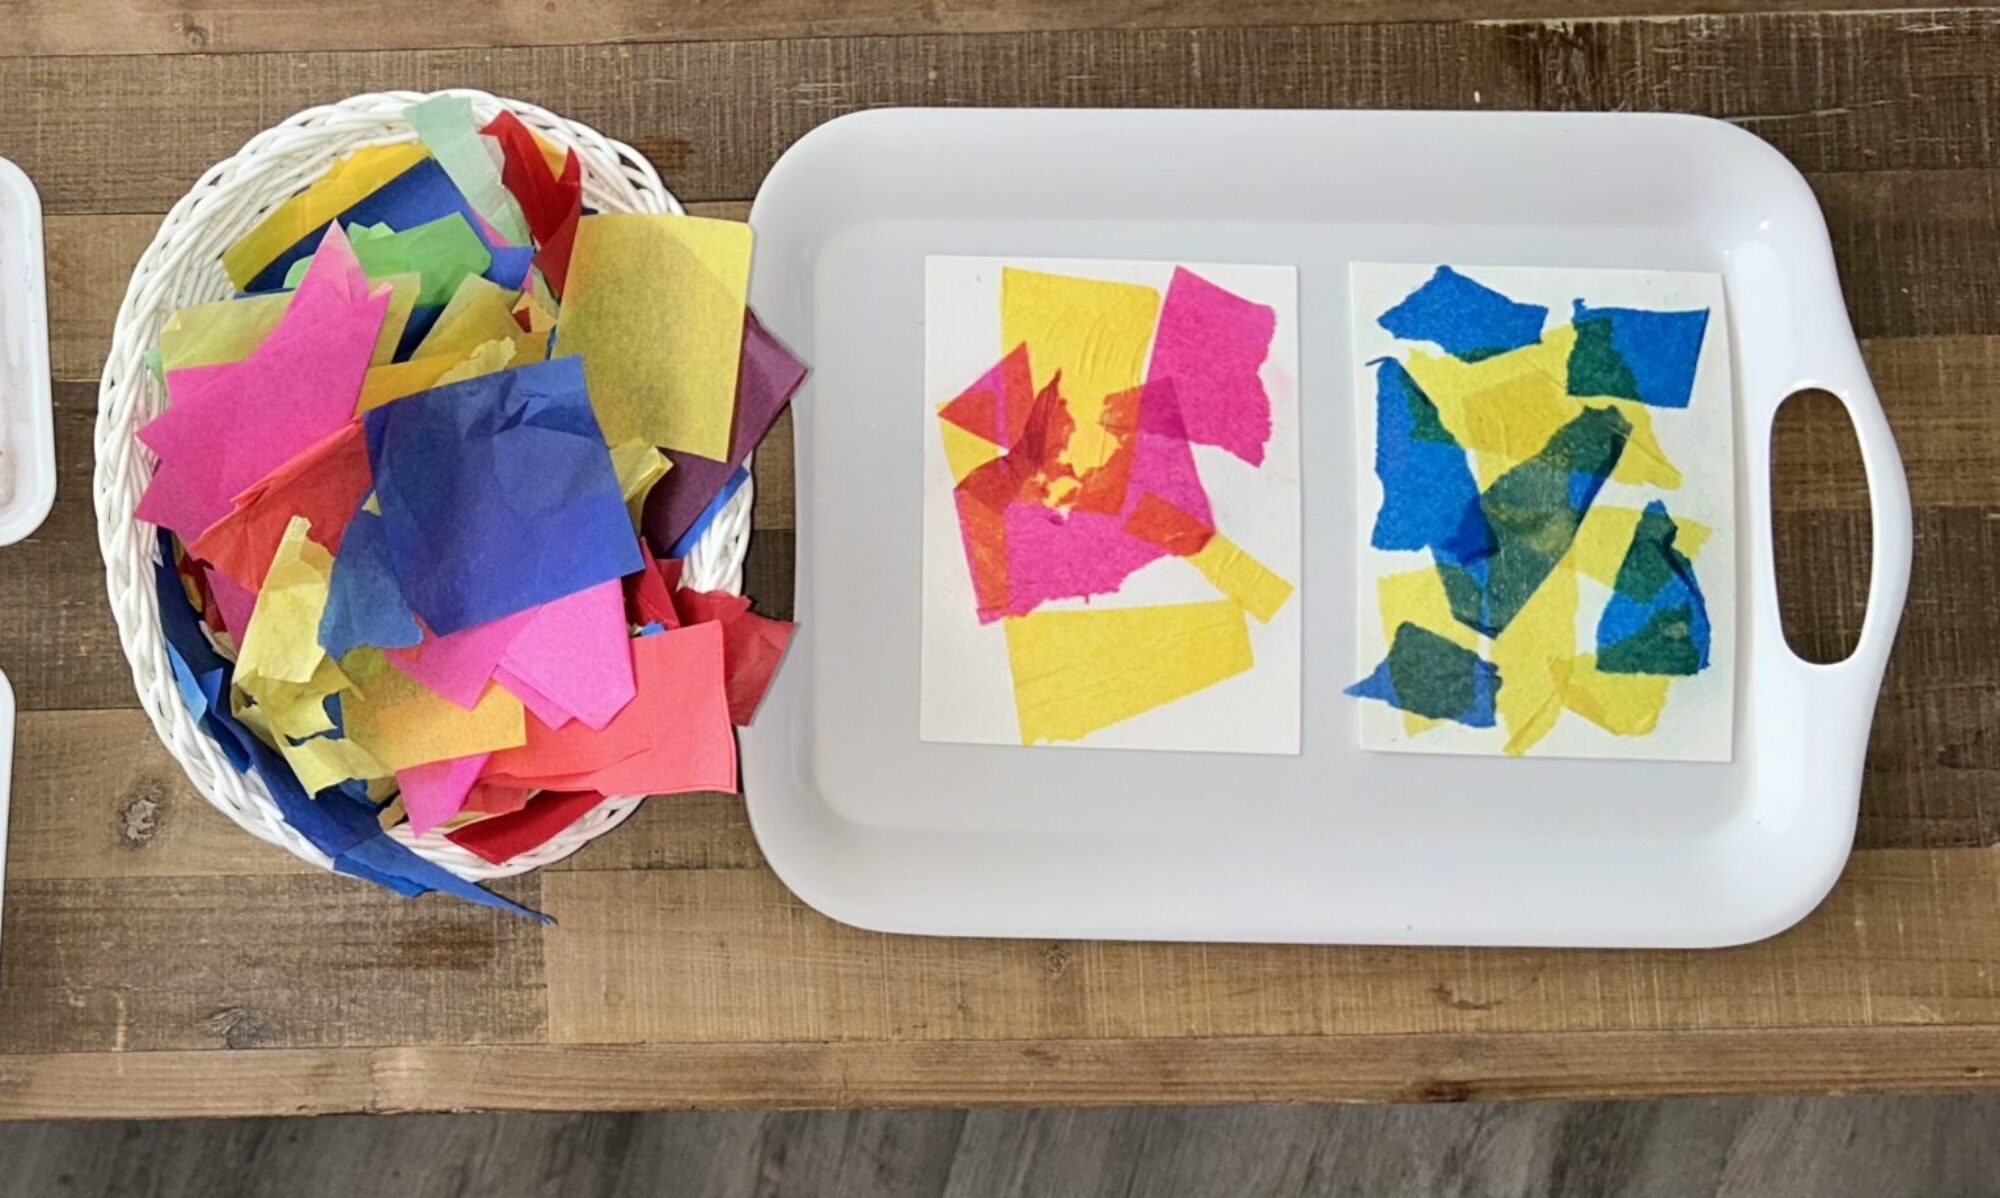
  • Tissue paper
  • Cardboard
  • Fabric
  • Sewing materials (needles, thread)
  • Pom poms
  • Googly eyes

This comprehensive list is curated from the 5 domains of art areas featured in all my books, curriculum, and art training. For further insights, you can explore more [here](link to additional resources).

Montessori art materials for

Art Essentials: Safe, Non-Toxic, and Process-Based

boy painting with Montessori

https://montessori-ami.org/resource-library/materials

https://montessoridigital.org

All rights reserved © 2024, Nature of Art®

No part of this blog may be used or be reproduced in any manner whatsoever including reproducing, publishing, performing, and making any adaptions of the work – including translation into another foreign language without written permission except in the case of brief quotations embodied in critical articles and reviews. Nature of Art® Publishing P.O. Box 443 Solana Beach, California 92075.

Montessori Books – For Elementary Guides, Teaching Art To 6 -12 Children

Montessori books for elementary students

Are you eager to teach your Montessori students art lessons, yet uncertain about where to begin? Ready to dive into the world of elementary art? With the world wide web and social media saturated with Montessori art projects, many guides find themselves at a loss. Which Montessori art lessons should take precedence? How do you select the right mediums? Do you need to be an artist yourself to lead art lessons effectively? I’ve created a Montessori book for teaching elementary children 6-12 for guides who need to understand art literacy and where to start teaching art lessons.

Book -Primer

This Montessori essential art guide offers clear, concise, and practical insights on establishing art programing. So Montessorians can get clear guidance, instructions, tips, and best practices.

Also, covering key visual art concepts, the optimal sequence of essential steps, and valuable insights. This book offers actionable advice aimed at supporting beginner guides and parents alike.

By simplifying ideas surrounding art lessons and subjects, addressing common questions, and tackling challenges head-on, this guide empowers Montessorians with the knowledge and resources necessary to excel as an art facilitator.

Spramani Elaun, an author, International Montessori Art Trainer, and art curriculum developer, is here to guide you. With her sensory art method and expertise as the founder of Nature of Art® art school , she has empowered tens of thousands of students to explore painting and drawing.

Books Topics

  • Cover the essential visual art standards
  • Identify foundational building blocks and key initial lessons
  • Show you how to select suitable art materials
  • How to set-up art environments
  • Set up a proper Montessori art shelf effectively
  • Learn what art elements should be taught in elementary grades
  • Master Effective Teacher Management
  • Implement optimal art routines
  • Create Engaging and Meaningful Art Projects
  • Understand the Benefits of Integrating Art into the Montessori Curriculum
  • Foster Positive Art Dialogue and Encouragement
  • Receive guidance on crafting comprehensive art lesson plans
Montessori art book table of contents

This book caters to Montessori guides, art instructors, and homeschooling parents. You will gain knowledge and tools needed to excel in teaching art. And by the end of this read, you’ll feel more confident and prepared to create a meaningful art program for elementary students.

Spramani shares foundational principles and practical examples drawn from her extensive 30 years of hands-on art teaching experience. And her systems and processes streamline the art instruction process, making teaching art to children a rewarding.

Color pictures, rich examples, and insightful stories woven throughout this book.

Montessori art book page example of how to stage an art shelf

Author

Spramani Elaun is an author and art curriculum developer from San Diego California. She is a homeschooling mom, art teacher with a science art methodology. Her success is led by observations and real-life practice of how children cognitively and sensorially process art over twenty years. She is the founder of Nature of Art® Art school & Art supply company, Art Teaching Blueprint Montessori Certification Training Program. Spramani holds degrees in Graphic Design, Digital Media Design, Visual Communications, Print Media, and Fine Arts.

All Rights Reserved, © Spramani Elaun 2024

Montessori book author, spramani elaun

Other Books by Spramani Elaun:

Montessori Art: Early Childhood Art Guide – Visual Arts Guide For Teaching 13 month olds – 6 years

Montessori Art – Essential Art Guide for Secondary 6-12 years

Early Childhood Art: Visual Arts Teaching Guide For 13 Months – 6 Years Old

Defining Visual Arts: Children’s standards for arts education, using the language of artist

Kids Color Theory: Contemparay color mixing guide with pigmented colorants for children.

Kids Painting: Teach young kids how to paint, materials & set-up guide

Clay Play: The natural art method that aligns with a child’s growth.

Nurturing Children in the Visual Arts Naturally

Introducing Visual Arts to The Montessori Classrooms: The natural art method that aligns with a child’s growth

arts and craft book by Spramani Elaun

Benefits of Clay Play | Montessori Arts and Crafts

Montessori | Benefits of Clay Play, early childhood 3-6 years. Montessori Art and craft | Benefits of Clay Play

Montessori Clay Play has been found to have positive effects on emotional well-being. Playing with clay can help children regulate stress levels. Playing with clay provides a highly tactile and sensory experience. As children squeeze, press, and manipulate the clay, they are actively engaging their senses. Sending valuable sensory information to their brain.

However, the benefits of clay play extend far beyond the realm of sensory development. In fact, there are numerous cognitive advantages associated with this activity.  Montessori education highlights the importance of hands-on learning. Clay play aligns perfectly with the Montessori philosophy. In my early childhood art guide, I discuss this topic and provide more insights into clay play for emotional health. You can learn more by reading about the benefits of clay play in my early childhood book.

Montessori arts and crafts| Benefits of Clay Play, student playing clay tools

The important thing to understand about clay play is that it should be a process-based activity, providing children with ample time to freely play and explore clay. There are various ways to engage children in exploring clay.

Including the use of simple tools such as natural elements, beads, seeds, rolling pins, and cookie cutters. Emphasizing the play aspect of clay play is crucial. Allowing children to take the lead in their learning and discoveries. By letting the child guide the fun, experiments, and creations, you can enhance their clay experience.

Montessori Art and Craft | Benefits of Clay Play, little girl making clay sculptures, clay play session at school
Montessori Art and Craft | Benefits of Clay Play

Once children have had ample opportunities for clay play and have reached the age of 4 or 5. You can begin introducing clay modeling skill sets. This includes teaching them forms, attaching pieces, cutting, and carving. If you would like to learn more about my clay curriculum you can view the Clay Modeling Curriculum HERE. Order Clay Play Tools HERE

Clay Play Classes in San Diego with Spramani Elaun – Nature of Art® School

Unsure of where to begin with clay play? Perhaps you’ve struggled with determining the desired outcome of art activity? Allow me to shed some light on the importance of early childhood clay play sessions.

In fact, I refer to this approach as “Clay Play.” Engaging in type of play offers numerous benefits for a child’s overall development. When it comes to clay play, this process-based exploratory approach should always come first! Clay play should happen before getting into foundational clay modeling lessons.

Montessori Art and Craft | Benefits of Clay Play book
Montessori Art and Craft | Benefits of Clay Play

I recommend incorporating clay play for young children in early childhood education. Montessori schools and daycare centers can introduce clay modeling stations into their classrooms to provide children with the opportunity to explore.

Plus support creative and cognitive skills. To learn more about setting up clay modeling environments, please refer to this comprehensive guide Monessori Early Childhood Art Guide.

Montessori Clay Play

Clay comes in various forms, ranging from very messy to less messy options. Additionally, clays can be homemade. Earth clay, in particular, is a wonderful material to introduce to children, similar to making mud pies.

If you’re interested in setting up earth pottery clay play stations, I recommend checking out this book. It contains numerous photos and examples illustrating how to arrange clay play. How to choose suitable clay play materials for children aged 3-6 years old.

Montessori clay modeling curriculum for school art lessons, Montessori Art and Craft | Benefits of Clay Play

All rights reserved © 2024, Nature of Art®

No part of this blog may be used or be reproduced in any manner whatsoever including reproducing, publishing, performing, and making any adaptions of the work – including translation into another foreign language without written permission except in the case of brief quotations embodied in critical articles and reviews. Nature of Art® Publishing P.O. Box 443 Solana Beach, California 92075.

Montessori Art Routines & Expectations– Part 1

I have been getting some good questions from parents and teachers about art routines. So I will be doing a 3 part series explaining my most successful Montessori art routines and expectations.

Montessori Art Routines & Expectations

Art routines can help you not worry about prepping daily, plus stop classroom chaos! When students understand routines they know how to encounter the art space. When you design art routines there’s less guess work for the student. Plus children actually thrive and succeed with routines in place. Outlining routines lays the foundation for actions and expectations from your students.

Montessori art routines can be simple and last only minutes. While others may be complex with students working up to an hour. Children already have routines that start the minute they get out of bed each morning. Like brushing their teeth, dressing, eating, and getting to school. In most cases you usually have your students in routines at the start of the day. So why not set them up for art.

Today I will share what some of these routines look like. I’ll share two key important routines to start with, and the others in part 2 and 3 in this series:

  • Art Smocks
  • Art Material Set-up
  • Art Language
  • Process-Based
  • Creative Flow

Montessori Art Routines & Expectations

These routines have worked with tens of thousands of children I’ve worked with. The first expectation is that art is messy and I have a system in place to ensure messes don’t spread around the room. This system keeps wet mediums from spreading around the room or on clothes. I have this conversation before children touch any mediums. Here’s how that might sound.

“Today I thought I would introduce you to the art space I’ve designed to work in, and how to manage the artist materials. The art space is available to those who agree to follow my simple rules.”

With that agreement, then you can move into the smock demonstration.

I explain how messes accrue from spills, hands and splatters. I further explain how the space is designed to manage that type of mess. The first thing I do is introduce the artist’s smock (apron). I explain how artists wear a smock when working on art projects. Then I explain the function of a smock is to keep their clothes and hands clean. I explain when their hands become spoiled, they will use their smock to wipe them, kind of like a big napkin. I explain that artists do not go back and forth cleaning their hands while working. This helps to keep mediums from spreading around. They stay in their work space and use their smock to manage that type of mess.

I don’t have rags or napkins nearby to wipe with. This eliminates paint, glue or pigmented mediums from smearing around the space. Cleaning hands happens after everything is put away, and they are ready to transition out of art. Then I show them what this action looks like by wiping my hands on my smock. I also show them where to find their smock, how to put it on, and where to return it.

I recommend you have your students always wear a smock or art tee-shirt when working in these spaces. If they are working like an artist, they should dress like an artist. It may take time to implement. But if you keep reminding them, everyone in the class starts to behave artfully.

Material Set-up Routines

Set-up presentations are key and can support your students in many ways. By introducing these routines children will be able to set-up independently. This helps with getting into creative flow states. They will be able to construct and use the materials in artful ways. And be able to clean-up the materials on their own. They will also take on the responsibility of leaving the materials ready for the next student to use.

So what type of material set-up routines should you introduce to your students:

  • How to gather art materials
  • The expectations of how they will work in the art space
  • How to use tools & mediums properly
  • Where to store artworks
  • How to clean up the materials
  • How to return them for the next student
  • How to transition out of the art space

Most art activities require students to get everything they need to construct. So beforehand you will need to decide which materials to stage for easy access. Group work is where you set-up stations for students to pick up their materials, or you pass them out. Independent work is when you stage the materials for students to collect on their own. Either way you will have to be sure everything is ready to access. For both you still want to explain the expectations and procedures and order of work flow.

Example: You will gather around the circle so I can discuss the art mediums, how they work, and show art technique. And even share some artist samples. Then direct when it’s their turn to get their materials. How long they work, and where to store completed artworks. How-to return the materials back to their station, how-to be dismissed to put their smock away and wash up.

After you have presented a few times, your students will understand these routines.

Diverse Learners

Chaos happens when students don’t understand their individual role. You might have diverse learners in your classroom. Some might be good at art, but not good at following the linear work flow. In this case you may need to group your diverse learners into a smaller group. To process the instructions slower giving them more time to go through the flow of the activity.

Some might get distracted or confused in larger group commotion. In this case I would recommend you set aside time to work with them in a slower smaller paced group.

You or an assistant can work throughout the work cycle showing them the steps. You may have to slow down every step. Showing them how each step looks like. Picking up the materials, working along side them, and how to store finished artworks. Even how-to gather and clean and return materials. Make time to answer their individual questions. You will eliminate the chaos and your studwents will fall into routines.

If you would like to know more about my art method, check out my books, curriculum and teacher professional development [PD] HERE.

Warmly,

Spramani Elaun – Art Instructor

arts and craft book by Spramani Elaun

Spramani’s Books

Teach children visual arts

Curriculum For Children

Get step-by-step art curriculum to teach visual arts. Check out our 4 art curriculums:
Painting
Drawing
Color Theory
Clay Modeling

All rights reserved © 2024, Nature of Art®

No part of this blog may be used or be reproduced in any manner whatsoever including reproducing, publishing, performing, and making any adaptions of the work – including translation into another foreign language without written permission except in the case of brief quotations embodied in critical articles and reviews. Nature of Art® Publishing P.O. Box 443 Solana Beach, California 92075.

How-to teach children age appropriate art activities

I get questions every day on how to teach age appropriate art activities.

I’m going to share some tips to get you on the right track.

I’ll also be sharing lots of resources.

There’s only four important things you should consider when teaching age appropriate art activities:

  1. Use only safe non-toxic children’s art supplies
  2. Focus on discovery exploratory type of activities
  3. Keep steps very minimal
  4. Focus on introducing the basic 7 elements

Early Childhood Art Activities

Very young children from toddler to six years can not plan art ideas out yet. So their art activities should be very exploration and discovery in style. They should only do process based style art activities. These lessons should generally introduce art mediums and art tools. You should only be introducing the very basic elements of art like line and colors etc. If you want to understand what art programs should consist of you can order:

Defining Visual Arts. This book explains what art literacy is for children and what you should be focusing on teaching. If you want to learn all about early childhood art programming you can order: Early Childhood Art Guide, this book shows you how to design an age appropriate art program.

Elementary Art Activities

Elementary age students can plan and create with intention. They are able to imagine an idea and plan it out. They can also follow one to six step instructions. These ages should also work in an exploratory discovery fashion. Allow children full freedom to express their own ideas. This means you should allow them to change the final outcome of their creation and not insist they follow an exact example.

Safe Non-Toxic Art Supplies

I recommend children under the age of 12 years old not use adult grade fine art supplies. Many artist grade supplies may contain hazards pigments like cadmium, lead, formaldehyde, solvents. Some paints may add additives, mildew resistance or other chemicals. Or also have special instructions for handling. These chemicals could be harmful to children not aware of special handling instructions. Pick non-toxic kids products that bare the ASTM D 4236 on them. This is a U.S. labeling law to protect children from dangerous chemicals.

If you start with these four suggestions you will be starting out on the right foot. If you need more guidance I have many training videos, books and professional development. 

Warmly,

SpramaniE laun


Sign up here to watch for free: Phases of Art Development Video


READ BLOG: 

Montessori Early Childhood Materials List

Montessori Upper Elementary Materials List


Order Art Teaching Books HERE


Virtual lessons

Get professional development by taking the ART TEACHING BLUEPRINT


Need to train your teachers?

Book a free zoom consult call, email Spramani @ info@Spramani.com

arts and craft book by Spramani Elaun

Spramani’s Books

Teach children visual arts

Curriculum For Children

Get step-by-step art curriculum to teach visual arts. Check out our 4 art curriculums:
Painting
Drawing
Color Theory
Clay Modeling

All rights reserved © 2024, Nature of Art®

No part of this blog may be used or be reproduced in any manner whatsoever including reproducing, publishing, performing, and making any adaptions of the work – including translation into another foreign language without written permission except in the case of brief quotations embodied in critical articles and reviews. Nature of Art® Publishing P.O. Box 443 Solana Beach, California 92075.

How Clay Modeling Can Reduce Stress

clay modeling

Tactile Art-Making Is Beneficial for Stress Relief

Over my twenty years of naturalistic art observations, I’ve witnessed tactile art projects like clay modeling lead kids into relaxed states of mind time and time again. I’ve seen stressed children come into my classroom and quickly be able to transition into a calm and relaxed state. As a result, allowing them to focus on their handiwork. Most art activities are multi-sensory engaging and can help children relax and work calmly.
Making art with your hands stimulates touch neural input, visual pathways communicate with both the left and right hemispheres of the brain. Therefore, auditory and smell sensory systems collect information all at once, entering an active multi-sensory learning state. In addition, making art modeling clay is high in visual-auditory connectivity in the brain. Strong connectivity occurs, and the child becomes intensely focused on their handiwork.


Children using their hands can be so engaged that other stress-related thoughts clear their minds, and they enter a state of flow. As a result, students can forget the stress-related emotions they were experiencing before entering a creative state of flow.
The electrical activity stimulated in the brain becomes a different type of action. Then, firing connections occur that allow children to focus only on their creative process.
Soon, a calming effect takes place because tactile cognitive processing is occurring as children form or manipulate objects with their hands. It’s good for children to develop good habits and activities during their sensitive periods so they can regulate their own relaxation early in life through creative handiwork. Consequently, I’ve coined the phrase “active multi-sensory learning” to explain this cognitive state.

Clay Modeling Activity Can Reduce Stress

Clay modeling can be a great way children can have active multi-sensory learning happen and reduce stress! I’ve been teaching these types of lessons for two decades with clay modeling activities and using a variety of clay mediums for multi-sensory learning. Also, the other important aspect of these types of lessons is that children love them and take to them well.
To illustrate, if you find a child fidgety, highly stressed, or exhibiting anxiety, I recommend you engage them in clay modeling activities. In addition, another tip I would recommend is dedicating a place to these art materials and making them easily available in your classroom, home, or school. Because of this, if you observe students with these persistent signals, follow your school protocols or seek professional therapists. Most importantly, do not try to treat children exhibiting trauma yourself unless you are a licensed therapist.

Basic Clay Modeling Steps:

  • Prepare a bowl with malleable clay in plastic baggies to keep moist.
  • Start with calming, kneading movements (a ceramic technique).
  • Encourage students to knead the clay for long period (5-10 minutes).
  • Allow students to transition into process-based exploration forms.
  • Do not give students complex instructions to follow.
  • Leave simple clay books or activity instructions nearby.

Recommended Clays to Buy:

  • Plasticine, non-hardening clay (Click to Buy)
  • Air-dry clay
  • Pottery earth clay
  • Pure beeswax modeling clay

Recommended Reading:

Clay Play – By Spramani Elaun (Click to Buy)

In this book, you’ll learn how to:

  • Support kids with simple fine-motor clay activities
  • Introduce kids to therapeutic play using clay modeling
  • Prepare clay-making environment kids to thrive in
  • Help kids overcome frustrations using modeling
  • Gather tools and supplies for clay play
  • Identify simple movements and forms best for early childhood

Recommended Curriculum to Follow:

Clay Modeling – Practice & Process Curriculum, 27 Sequential Lessons (Click to Buy)

Contact me if you’d like to learn more about teaching children art using Montessori methods.

Buy Clay Curriculum & Books Here

arts and craft book by Spramani Elaun

Spramani’s Books

Teach children visual arts

Curriculum For Children

Get step-by-step art curriculum to teach visual arts. Check out our 4 art curriculums:
Painting
Drawing
Color Theory
Clay Modeling

All rights reserved © 2024, Nature of Art®

No part of this blog may be used or be reproduced in any manner whatsoever including reproducing, publishing, performing, and making any adaptions of the work – including translation into another foreign language without written permission except in the case of brief quotations embodied in critical articles and reviews. Nature of Art® Publishing P.O. Box 443 Solana Beach, California 92075.

5 Reasons Making Art Boosts Children’s Brainpower

art boosts children's brainpower


Did you know that making art boosts children’s brainpower? You can help boost brainpower by supporting art activities at home or in the classroom. It’s true, and it’s supported by new science! There’s a lot of neural wiring happening in the brain when children make art. Other branches of scientists, like neuroscientists, science researchers, and art therapists, have also made connections to how early childhood art contributes to brainpower. Over my twenty years in the process, studio-based observations, I have observed these same connections to how children get to improve their brains by creating artwork!

5 brainpower areas:

  • Problem-solving
  • Fine motor development
  • Memory development
  • Spatial awareness
  • Stress regulation
fine motor development, art boosts children's brainpower

Let’s review these 5 areas of how early childhood art helps:

Problem-Solving

Art making is a great place for children to go through lots of problem-solving situations. They usually start with designing problems, deciding what materials and tools they need, how to construct their artworks, and what size to create their artworks. They then analyze their artworks to decide if they need to find a different way to get the results they desire. The artistic process is a great way for children to become problem-solvers. Creative activities are directly linked to problem-solving.

Fine Motor Development

Fine motor development is a physical attribute that advances a child’s growth. In addition, fine motor skills help with creating children’s art projects and in using art materials. By developing these muscles, children develop better dexterity with paintbrushes and crayons as well as constructing movements and putting together their crafts. (Science Art Method © 2021 Spramani Elaun)

Montessori art activities

Memory Development

When kids learn repeated movements, they’re reinforcing implicit memory; the actions are wired and become linked in their brain. Fortunately, that means they don’t have to consciously think about every minute action. They will see a paintbrush and instinctively know to pick it up, dip it into the palette or water, and start painting. The next time they engage in an art activity, their memory kicks in and their hand movements will come naturally. (Science Art Method © 2021 Spramani Elaun)

Regulate Stress

Most art activities offer multi-sensory engagement and can help kids relax and work calmly. Tactile art-making stimulates touch neural input, visual pathways communicate with both the left and right hemispheres of the brain. And, auditory and smell sensory systems also collect information all while entering an active multi-sensory learning state. (Science Art Method © 2021 Spramani Elaun).

Spatial Awareness

Visual arts are a significant way to improve spatial intelligence. Visual art creation relies on spatial understanding. Art-making teaches kids visualization. When children make art, they become aware of the spatial relationships among objects in the realm of their own experiences. As children learn through two-dimensional and three-dimensional art-making, their long-term memories create sight patterns stored in the mind known as “spatial memories.” (Science Art Method © 2021 Spramani Elaun).

Art Activities and Mediums to Start With

Now that you have a good idea of how art-making can boost brain power, here are the best types of art projects to start teaching. These types of art activities will help develop children’s fine motor control and the small muscles in their fingers and hands.

  • Drawing: crayons, color pencils, graphite pencil, oil pastels, etc.
  • Painting: watercolor paints, tempera paints, acrylic paints, watercolor crayons, watercolor pencils, etc.
  • Color Theory: primary color mixing, dropper color mixing, etc.
  • Clay Modeling: earth clay, non-harden plasticine clay, air-dry modeling clay, beeswax forming, etc.
  • Crafts: paper folding, nature and paper collage, mosaic arrangements, sewing basics, wool felting, string weaving, nature crafting, 3D constructing, etc.

All art supplies are available online in my Nature of Art for Kids online store.

To learn more about how art boosts children’s brainpower you can order my art teaching books here: BUY BOOKS

Get my free Materials Lists for Children’s Art Projects Below:

free download children's material lists for children's art activities

Early Childhood Materials List – PDF

Lower Elementary Materials List – PDF

Upper Elementary Materials List – PDF

Spramani ELaun
Spramani ELaun, Owner, Artist, Montessori-art & Nature of Art For Kids

arts and craft book by Spramani Elaun

Spramani’s Books

Teach children visual arts

Curriculum For Children

Get step-by-step art curriculum to teach visual arts. Check out our 4 art curriculums:
Painting
Drawing
Color Theory
Clay Modeling

All rights reserved © 2024, Nature of Art®

No part of this blog may be used or be reproduced in any manner whatsoever including reproducing, publishing, performing, and making any adaptions of the work – including translation into another foreign language without written permission except in the case of brief quotations embodied in critical articles and reviews. Nature of Art® Publishing P.O. Box 443 Solana Beach, California 92075.

Create a Fun & Organized Art Room Space of your dreams!

For so many people around the world—especially in the U.S.—schools have been looking a little different as of lately. Kids are spending more time at home, and parents are scrambling for ways to bring a full classroom experience into their homes. And unfortunately, art is an often overlooked aspect of Montessori education today. If you don’t quite know how to teach art or haven’t had much experience in the subject, setting up a space or lessons for your children can be overwhelming. It doesn’t have to be though! Here’s your guide to organizing and setting up a Montessori homeschool art room space for your kids this year.

The secret to a beautiful, functional art space is really about giving kids the space and permission to work and create uninterrupted. If you give your children a space to make art, they will do it! 

Before we go into my art room organizing tips, here’s a little perspective: If you don’t have a shelf filled with books, you won’t raise readers; if you don’t have pens, papers, or a dictionary handy, you won’t raise a writer either. So, guess what? When you don’t have an art space filled with art supplies, you won’t raise an artist!

And creating art has a ton of benefits that goes beyond a beautiful finished project; art helps improve kids’ focus, problem-solving skills, stress-management skills, emotional literacy, and hand-eye coordination. That’s why it’s so important to give children a space to create. 

As an art studio designer, children’s art teacher, and former homeschool mom, I’ve had the opportunity to design many stimulating creative spaces for kids of all ages. I will teach you what you need to know about creating a homeschool art room space for your Montessori students.

homeschool art room space

Montessori Homeschool Art Room Design

In reality, you can design your art space however you want, however, every Montessori homeschool art room needs to include these six components:

  • Table – all activities should take place on a flat surface
  • Chair – along with a sturdy table, children need a safe place to sit while working
  • Floor covering – this saves your floors from spills!
  • Light source – for children to work with color they need a good source of light
  • Storage – art storage comes in many shapes and sizes, including baskets, jars, plastic bins, shelves, or an art closet
  • Sink – the sink doesn’t need to be in the immediate art space, but should be close and easily accessible, like a bathroom or kitchen; it’s needed to wash materials and hands
 organizing an art room space

Montessori Homeschool Art Room Location 

Because an art space doesn’t need to be elaborate, you can set it up basically anywhere in your home. It can be a dedicated room, corner of your child’s bedroom or family living room, part of your yard or basement, and even in your kitchen.

One of my homeschool-mom friends set up a simple desk for her kids in her kitchen; I loved seeing what her daughter would create when I’d visit for tea! My own kids’ art spaces have transitioned throughout the years to be located in different spots around our home. Now, my daughter, who is 19, likes to draw and paint in her bedroom!

art paintbrushes

Montessori Homeschool Art Room Supplies

You can keep your art supplies very basic, such as paper, colored pencils, paints, paintbrushes, and clay. But, it’s very important to make sure any art supplies you give your children are non-toxic and kid-safe. For a list of the basic art materials I recommend for every Montessori classroom, click here.

I also created age-specific art materials lists. Click for:
Early Childhood
Lower Elementary
Upper Elementary

Where to Start: Keep Things Exciting—and Organized

The secret to keeping your art space and art supplies organized is only keeping out the materials your child is currently into. If you had every supply out all the time, things could get cluttered and untidy, and your child may actually get bored. 

If you see that your child is drawn to painting, keep those supplies out. They may seem content with whatever activity you put in front of them, but make sure you’re switching things up. Put out papers, pencils, and stencils for a week so your child can explore drawing; the next week put out clay and modeling tools; then put out paintbrushes, different types of paint, and paper.

One Step Further: Watch My Montessori Art Storage How-To Video!

Hopefully, this guide I have provided has given you the tips and information you need to set up your child’s at-home art room space. I know that storage can get a little tricky though—especially if your whole family is sharing a live/workspace. I originally created this art storage video for Montessori teachers, but all the principles apply to at-home art spaces and storage too.

In it, I walk you through how I set up my own Montessori art storage area. You’ll see how I organize things overall, but I’ll also show you how I categorize my tubs and storage containers. And then, as a bonus, I walk you through how I use the art materials I have in storage to set up an art lesson without much thought. Trust me, it’ll save you tons of time if you get this down. 

Click here to unlock and watch my video, How to Set Up Your Montessori Art Storage Stress and Mess Free.

arts and craft book by Spramani Elaun

Spramani’s Books

Teach children visual arts

Curriculum For Children

Get step-by-step art curriculum to teach visual arts. Check out our 4 art curriculums:
Painting
Drawing
Color Theory
Clay Modeling

All rights reserved © 2024, Nature of Art®

No part of this blog may be used or be reproduced in any manner whatsoever including reproducing, publishing, performing, and making any adaptions of the work – including translation into another foreign language without written permission except in the case of brief quotations embodied in critical articles and reviews. Nature of Art® Publishing P.O. Box 443 Solana Beach, California 92075.

Ultimate Montessori Painting Guide

Ultimate Guide to Montessori Painting

Painting is one area of visual arts that is a lot of fun and can be messy at times. If you look at the most basic concept of painting, anyone can do it, from simple finger painting to multi-layered brushstrokes. Painting is great for all ages. In this blog, I want to share my ultimate guide, giving you ideas on where to start with simple painting activities. The resources listed in this ultimate guide should be beneficial to Montessori guides working with early childhood (ages 3-6), lower elementary, upper elementary students, and even Montessori-at-home parents.

Ultimate Guide to Montessori Painting, lesson

Montessori Painting

Painting can be a regular activity in the Montessori classroom with the right setup and key lessons staged properly on a shelf for independence. Children love playing with paint; it’s a very tactile medium. It’s a great idea for children to paint on a regular basis to improve their skill sets. However, it’s important to remember that children lack the ability to paint realistic images in the early years, but they can still enjoy the creative process and learn basic brushstrokes to build lines, shapes, and textures to eventually create great imagery. With painting materials staged properly, painting can be very joyous and fuel creative ideas.

Ultimate Guide to Montessori Painting, early childhood

What is painting?

Painting is the action of making brush strokes marks with a paintbrush, hands, sponges, paint rollers, or stampers. Brushstrokes are created with a liquid pigments – paint. Usually children paint on paper, canvas, cardboard and wood surfaces.

How Painting Benefits Children

Children can develop and strengthen their fine motor control by learning to make brush strokes with their hands and by holding a paintbrush. By showing young students how to use a paintbrush, you’re helping them reach critical milestones. Like using their hands for other subjects like writing, typing, crafting, and building.

Painting Builds Vocabulary

Montessori painting activities teach young students how to communicate what they see in their artworks and how to describe their process. They learn to identify the art elements and describe them to their peers using the language of an artist. Read more about art language here.

Start With Basic Brushstrokes

I recommend starting by introducing children to painting materials. Then follow up with basic brushstroke lessons. You can move on to using a paintbrush to create basic line and shape elements. If they’ve never painted before, let them explore and discover what paint can do through exploration. If you are uncomfortable giving them a potentially messy medium without any guidance, you can take the lead by mentoring basic paintbrush movements.

Stay nearby and demonstrate painting marks alongside them. Kids love to mimic the actions of adults! My painting curriculum can teach you how to teach basic brushstrokes and how to set up. My Painting Works art album can give you lots of ideas on teaching painting lessons for elementary grades. If you are working with early childhood, check out my Kids Painting Book with lots of information about choosing the right materials and setup for all painting activities.

Ultimate Guide to Montessori Painting, elementary lessons

Process-Based Painting For Beginners

Start painting projects by creating in process-based and open-ended lessons. This means your students do not have to follow directions to get a specific result. Process-based painting gives children the freedom to explore. Giving them the freedom to experiment with paint mediums any way they desire

Ultimate Guide to Montessori Painting, how to

Start With Few Colors

Give your students just a few color options at first—maybe even limit it to one color. Too many options can be overstimulating, causing them to lose focus (which could lead to messes). I typically start beginner lessons with just one color until my students get the hang of their materials and brush marks. Check out my painting key lesson training for guides and parents here.

Minimize Messes – My Signature Painting Hack

If you don’t want large messes, shrink down the paints and paintbrushes. Use the smallest available size of paintbrush and put paint into small containers (as opposed to giving students the entire bottle). This is one of the major tricks I share in my books and guides Kids Painting

Ultimate Guide to Montessori Painting, what materials should I buy

Learn Proper Brushstrokes

Once your students have a grasp on how paints work and can control their movements a bit, move your focus to teaching brushstrokes. Read this article for tips on teaching kids how to create brushstrokes. 

Painting & Color Theory

One great way to teach color theory concepts is through painting! Start by giving your students a single color to paint with, but create different tones and hues for them to use. For example, start with a dark green, then add drops of white paint to it to make lighter and lighter shades.

Ultimate Guide to Montessori Painting, how to teach kids
Choose the Right (Safe) Paints

Only use paints that are safe, non-toxic, and intended for young children. If products carry a non-toxic seal or claims the product “conforms to ASTM D 4236,” that means all of the potentially hazardous components of the art product are safe. Most adult fine artist supplies don’t have this seal, so be very careful when purchasing. 

What To Paint

The surface your students are using will determine the best paint for their project. For example, acrylic paint has the sticking power to help it adhere to canvas; watercolor paints need a thicker, more absorbent paper; finger paints and tempera paints will work on most regular paper. In my early childhood Kids Painting book and elementary Painting Works Album I give lots of great ideas of what to paint.

what paints do I use, Ultimate Guide to Montessori Painting

Paint Mediums Best For Kids

Visit Nature of Art for Kids for more non-toxic, eco-friendly, kid-safe painting supplies!

Tip: Use watercolor paints, which can be diluted to near transparency, making it easy to manage stains. Start with these until you and your class become more familiar with painting and its clean-up.

its clean-up.

Ultimate Guide to Montessori Painting
Dress for a Mess

Young children lack the fine motor skills to keep paint in the palettes and on their paper, so be prepared. It takes many years for kids to stop making frequent spills. Anytime kids are painting, make sure they’re wearing “paint clothes,” or old large t-shirts, a smock, or some other type of cover-up. Even if the bottle says the paint is washable, it can still soil clothing. Plus, there’s no real guarantee that the pigment won’t stain…trust me!

Set-Up Paint Environment

Before painting starts, designate a painting area for the kids to work in. Make sure they know where the paint will be set up and where painting activities will be allowed. Never let kids get lazy about this rule! Remind your students where they can paint to avoid stains. If necessary, put down tarps, rugs, or towels in this area to keep floors clean during any painting activities.

One Step Further: Download My Painting Materials Checklist

Ultimate Guide to Montessori Painting, checklist

Now you have a basic understanding of how to set up a painting area, what kind of painting activities your students can do, and an idea of what paints to use. Before you start teaching painting in your Montessori classroom, make sure you download this FREE Painting Materials Checklist; it has all the materials you need to be able to confidently and successfully teach your students! Click here to download the checklist.

Ultimate Guide to Montessori Painting, free art lesson

As a bonus, you can also check out this FREE Northern Lights painting lesson demonstration. This art project uses two paint techniques: wax resist and wet-on-wet. This project is best for elementary students, but can be adapted to be suitable for younger ages as well. Watch the video by clicking here!

A Short Cut Just for You

I’ve actually created an online training that delves deeper into teaching young students how to paint. Painting Key Lessons 101 gives you the foundation for demonstrating and presenting painting lessons in your Montessori classroom, even if you don’t feel like you have the skills or experience. In the 1.5-hour video training, I also cover the types of paints that are best for children, and how to set up lessons so they’re integrated with other subjects and allow kids work independently. It truly is a shortcut to becoming an expert in teaching your students how to paint; AND, even better, you can earn 1.5 CPD hours once you complete the training and complete a quick survey! To enroll and get started, click here. 

Ultimate Guide to Montessori Painting, online how to teach kids

If you want more information, instruction, and tips for teaching kids how to paint, check out my book, Kids Painting. It includes everything you need to know about how young children learn how to paint, and gives you lists of kid-friendly paint supplies, art project/lesson ideas, and ways to set up your classroom to provide inspiration and avoid messes. To purchase Kids Painting, click here.

arts and craft book by Spramani Elaun

Spramani’s Books

Teach children visual arts

Curriculum For Children

Get step-by-step art curriculum to teach visual arts. Check out our 4 art curriculums:
Painting
Drawing
Color Theory
Clay Modeling

All rights reserved © 2024, Nature of Art®

No part of this blog may be used or be reproduced in any manner whatsoever including reproducing, publishing, performing, and making any adaptions of the work – including translation into another foreign language without written permission except in the case of brief quotations embodied in critical articles and reviews. Nature of Art® Publishing P.O. Box 443 Solana Beach, California 92075.