Montessori Books – For Elementary Guides, Teaching Art To 6 -12 Children

Montessori books for elementary students

Are you eager to teach your Montessori students art lessons, yet uncertain about where to begin? Ready to dive into the world of elementary art? With the world wide web and social media saturated with Montessori art projects, many guides find themselves at a loss. Which Montessori art lessons should take precedence? How do you select the right mediums? Do you need to be an artist yourself to lead art lessons effectively? I’ve created a Montessori book for teaching elementary children 6-12 for guides who need to understand art literacy and where to start teaching art lessons.

Book -Primer

This Montessori essential art guide offers clear, concise, and practical insights on establishing art programing. So Montessorians can get clear guidance, instructions, tips, and best practices.

Also, covering key visual art concepts, the optimal sequence of essential steps, and valuable insights. This book offers actionable advice aimed at supporting beginner guides and parents alike.

By simplifying ideas surrounding art lessons and subjects, addressing common questions, and tackling challenges head-on, this guide empowers Montessorians with the knowledge and resources necessary to excel as an art facilitator.

Spramani Elaun, an author, International Montessori Art Trainer, and art curriculum developer, is here to guide you. With her sensory art method and expertise as the founder of Nature of Art® art school , she has empowered tens of thousands of students to explore painting and drawing.

Books Topics

  • Cover the essential visual art standards
  • Identify foundational building blocks and key initial lessons
  • Show you how to select suitable art materials
  • How to set-up art environments
  • Set up a proper Montessori art shelf effectively
  • Learn what art elements should be taught in elementary grades
  • Master Effective Teacher Management
  • Implement optimal art routines
  • Create Engaging and Meaningful Art Projects
  • Understand the Benefits of Integrating Art into the Montessori Curriculum
  • Foster Positive Art Dialogue and Encouragement
  • Receive guidance on crafting comprehensive art lesson plans
Montessori art book table of contents

This book caters to Montessori guides, art instructors, and homeschooling parents. You will gain knowledge and tools needed to excel in teaching art. And by the end of this read, you’ll feel more confident and prepared to create a meaningful art program for elementary students.

Spramani shares foundational principles and practical examples drawn from her extensive 30 years of hands-on art teaching experience. And her systems and processes streamline the art instruction process, making teaching art to children a rewarding.

Color pictures, rich examples, and insightful stories woven throughout this book.

Montessori art book page example of how to stage an art shelf

Author

Spramani Elaun is an author and art curriculum developer from San Diego California. She is a homeschooling mom, art teacher with a science art methodology. Her success is led by observations and real-life practice of how children cognitively and sensorially process art over twenty years. She is the founder of Nature of Art® Art school & Art supply company, Art Teaching Blueprint Montessori Certification Training Program. Spramani holds degrees in Graphic Design, Digital Media Design, Visual Communications, Print Media, and Fine Arts.

All Rights Reserved, © Spramani Elaun 2024

Montessori book author, spramani elaun

Other Books by Spramani Elaun:

Montessori Art: Early Childhood Art Guide – Visual Arts Guide For Teaching 13 month olds – 6 years

Montessori Art – Essential Art Guide for Secondary 6-12 years

Early Childhood Art: Visual Arts Teaching Guide For 13 Months – 6 Years Old

Defining Visual Arts: Children’s standards for arts education, using the language of artist

Kids Color Theory: Contemparay color mixing guide with pigmented colorants for children.

Kids Painting: Teach young kids how to paint, materials & set-up guide

Clay Play: The natural art method that aligns with a child’s growth.

Nurturing Children in the Visual Arts Naturally

Introducing Visual Arts to The Montessori Classrooms: The natural art method that aligns with a child’s growth

arts and craft book by Spramani Elaun

Choice and Self-Pacing in Montessori Classrooms

early childhood montessori boy drawing, self pace activity

In a Montessori classroom, children have the freedom to explore their interests. Montessori children learn at their own pace. Montessori education has been transforming parents, educators and students over a century. In this blog I will focus on why the Montessori method emphasis c and self-pacing. And how it leads to more engaged and confident students.

The Montessori Philosophy: A Brief Overview

Developed by Dr. Maria Montessori, the Montessori method is a child-centered educational approach. Montessori education focuses on nurturing the whole child. This includes cognitive, emotions, physical and socially. By hands-on, experiential learning in a carefully prepared environment. Guides and facilitators rather than traditional teachers. One of the core principles of Montessori education is allowing children to choose. Students have the freedom to choose activities that interest them and work at their own pace.

montessori student working independently at table with clay

The Importance of Choice and Self-Pacing in Montessori Classrooms

1. Fostering Intrinsic Motivation

When children have the freedom to choose activities they develop a natural curiosity. This intrinsic motivation is a powerful driving force, leading to more engaged learning. The student takes ownership of their education. Intrinsic motivation also promotes love for lifelong learning. A Child will develop a genuine interest in acquiring knowledge and skills.

2. Encouraging Self-Confidence and Independence

As children make decisions about their learning, they build a sense of independence. They trust their instincts, and follow their passions. Taking responsibility for their own growth. This prepares them for future success by fostering resilience, adaptability, and problem-solving skills.

Choice and Self-Pacing in Montessori Classrooms

3. Catering to Individual Learning Styles and Needs

Each child is unique, with different learning styles, strengths, and needs. Montessori children work at their own pace. Montessori education acknowledges and embraces these differences. This ensures that every child has the opportunity to progress at a speed that suits them. It also enables teachers to provide personalized support, further enhancing the learning experience.

4. Cultivating a Collaborative Learning Environment

In a Montessori classroom, children often work in mixed-age groups. This encourages collaboration and peer learning. They can learn from one another, share ideas, and develop essential social skills. This collaborative environment fosters empathy, communication, and respect. Qualities that are vital for success in an interconneced communities.

Choice and Self-Pacing in Montessori Classrooms

The Lasting Impact of Choice and Self-Pacing on Learners

The Montessori approach’s emphasis on choice and self-pacing has many long-term benefits. Fostering intrinsic motivation, self-confidence, and independence, children develop strong foundations. This effects their lifelong learning and personal growth. They become adaptable, resourceful, and innovative thinkers. Montessori children grow to be able to take on challenges of today’s complex world.

The Montessori method’s focus on choice and self-pacing. Which sets it apart from traditional educational models. Creating an empowering and engaging learning environment. By embracing each child’s unique interests, learning styles, and needs. Montessori education cultivates confident, motivated, and well-rounded individuals. Preparing them to thrive in all aspects of life.

Want to learn more about Montessori Education:

Families & Montessori Education American Montessori Society

Association Montessori Internationale

Montessori Foundation Families

PREPARING A MONTESSORI ART ENVIRONMENT AT HOME

Montessori Art Guide – BUY NOW ONLINE

arts and craft book by Spramani Elaun

Spramani’s Books

Teach children visual arts

Curriculum For Children

Get step-by-step art curriculum to teach visual arts. Check out our 4 art curriculums:
Painting
Drawing
Color Theory
Clay Modeling

All rights reserved © 2024, Nature of Art®

No part of this blog may be used or be reproduced in any manner whatsoever including reproducing, publishing, performing, and making any adaptions of the work – including translation into another foreign language without written permission except in the case of brief quotations embodied in critical articles and reviews. Nature of Art® Publishing P.O. Box 443 Solana Beach, California 92075.

Harold And The Purple Crayon Story Book | Montessori Art Activities With Early Childhood Children

Montessori Art Activities | Color – Colour, Harold and The  Purple Crayon Story Book

In this blog, I want to share some fun ways to combine arts and crafts with beloved children’s storybooks! Sometimes, it can be challenging to envision how to teach art to children. However, I assure you that it’s much more enjoyable and straightforward than you might think. By incorporating a captivating storybook into your lesson, the experience becomes even more engaging. I am excited to share an inventive idea that originated in my art class. This concept has been well-received on Instagram and Facebook, with many parents, bloggers, and Montessori guides sharing their inspiring stories about how children enthusiastically embraced my art activity using the book “Harold and the Purple Crayon” to learn basic drawing elements.

Quotes About Art Activity

Some Montessori parents and guides have written to me to say…

“My son is obsessed with all his purple art supplies!”

“We read the book together, and I created a fun art space for drawing with various types of purple crayons. Thank you for such a great idea; my daughter loved it!”

“My son loves doodling, and this book was an instant hit. In fact, he started drawing parts of the story!”

“My child adores purple, and this was such a fun adventure for them.”

“I loved how easy it was to set up just by reading the book and selecting purple art supplies we had around the house.”

Montessori Art Activities | Color – Colour, Harold and The  Purple Crayon Story Book, spramani elaun
This is a classic book I’ve been using for years. The author of the book is Crocett Johnson. You can find this book in paperback and a thick board book. The children loved it so much in Vietnam that I left my copy and had to buy a new one!

Combine Art & Story Books

One of my favorite things to do is combine children’s story books with art activities. If you would like to learn more on how to do this check out this free training How To Theme Art Activities With Story Books. This Montessori video training will show you how simple this concept can be.

Recently I had a chance to to take this into an 3-6 classroom in Vietnam. Wow what fun we had after story time.

Montessori Art Activities | Color – Colour, Harold and The  Purple Crayon Story Book, spramani elaun, how we montessori

To set up this Montessori art activity, all you have to do is gather some purple drawing mediums such as:

  • Crayons
  • Oil Pastels
  • Dot Stampers
  • Markers
  • Color Pencils
  • Paint
  • Ink Stamp
  • Tempera Paint Sticks

This variety of supplies will offer a range of creative options for your child to explore and enjoy.

Any Color Or Purple Will Work

You can begin with a purple crayon, but feel free to use any color you prefer. Usually, when I introduce this activity, my young students may opt for different colors they enjoy. Allow your students to select any color they prefer, even if you initially provided only purple. The goal is to encourage doodling and drawing in whichever way they find most engaging.

Watch my mini video

drawing and doodling for montessori kids art activities with art teacher spramani elaun how to montessori

Introduce Purple Art Activity To Any Age

Setting up a Montessori toddler art shelf to introduce the color purple can be a fantastic educational experience. Whether you’re teaching colors to young students or engaging elementary kids, this versatile story appeals to various age groups. By reading the book repeatedly and introducing different colors like orange, red, or green, you can spark creativity and interest. Incorporating a range of easy-to-use mediums and focusing on one color can help emphasize key concepts. Providing guidance on creating lines, textures, patterns, and shapes with purple materials offers a fun and creative approach to introducing isolated colors in a playful learning environment.

You can find this cute book Harold and The Purple Crayon – Story Book in book stores, barnes and nobles, amazon, used online book stores.

Order purple crayons here!

Buy square block crayons here!

Online purple colour paint here!

Learn why I make square block crayons here!

Love to hear your feedback!

Montessori Art Activities | Color – Colour, Harold and The  Purple Crayon Story Book
Montessori Art Activities | Color – Colour, Harold and  The  Purple Crayon Story Book

Blowing purple with a straw creates so many fun shapes.

arts and craft book by Spramani Elaun

Spramani’s Books

Teach children visual arts

Curriculum For Children

Get step-by-step art curriculum to teach visual arts. Check out our 4 art curriculums:
Painting
Drawing
Color Theory
Clay Modeling

All rights reserved © 2024, Nature of Art®

No part of this blog may be used or be reproduced in any manner whatsoever including reproducing, publishing, performing, and making any adaptions of the work – including translation into another foreign language without written permission except in the case of brief quotations embodied in critical articles and reviews. Nature of Art® Publishing P.O. Box 443 Solana Beach, California 92075.

How To Talk To Montessori Toddlers About Art

How To talk about Art To Montessori Toddlers

It can feel a little overwhelming—maybe even silly—to try and introduce your toddler to Montessori art concepts. Some toddlers might still be learning how to talk and hold a spoon, so how are you supposed to have a full on art conversation? Here’s the good news: How-to talk to toddlers about art making is not something you need to worry about. You don’t have to use “art language,” proper terminology, or fancy words in order for your toddler to start appreciating and experiencing art making.

Art does have its own type of language, it’s called the ‘Elements and Principles of Design” but that’s way too advanced for toddlers to understand! If you start using this strange art terminology, you’re going to lose your child’s attention, and likely get frustrated yourself. When you talk to your toddler about Montessori art—”Art Talk”—it’s really just describing what you see in artworks, like color, shape, and form, etc. Before I get into how-to talk to Toddlers about montessori Art let me break that down an easy way your toddler will understand, I want you to have some basic knowledge.

How-to Talk to Toddlers About Montessori Art – By Spramani Elaun

Basic Art Words

For a young child, exploring through art play is something natural. Children gain a sense of their physical world by using each and all of their senses—seeing, smelling, tasting, touching, and hearing. This is how knowledge is first learned. The enthusiasm a child feels while dipping a paintbrush into a paint palette or creating brushstrokes across a blank paper is exciting! It’s a curious mix of senses.

Learning Montessori art is about discovery and exploration. By allowing toddlers to explore art (without any expectations), it is a natural way for you to introduce toddlers to art concepts. Playing and experimenting can help them build confidence to start expressing art terms. This type of art exploration can manifest in various activities like doodling, painting, color mixing, and clay modeling.

(For more detailed information on how to teach toddlers art, read this post.)

How-to Talk to Toddlers About Montessori Art – By Spramani Elaun
Birch Aquarium at Scripps Institution of Oceanography | aquarium.ucsd.edu

Okay, let’s get started on how easy it is to talk to toddlers about art! When you first introduce art talk to your toddler, keep things basic and simple. Start by describing what you see or what’s happening as you create art. As your toddler begins to explore, art talk will become easier and easier.

Most likely, their inquisitive little brains will start making cognitive connections (like, “if I use this purple paint with this paintbrush, it’ll come out like this”), and they’ll probably start asking questions (such as, “what color is this?” or “why did this happen?”). You don’t necessarily need to use these exact terms, but let me show you how simple this conversation can be with toddlers. Describe basic aspects of art:

  • Color
  • Shape
  • Texture
  • Line
toddler

How-to toddler art talk sounds:

Here are some examples of how to start talking and describing what you see in Montessori art activities: While reading storybooks, you can point out colors like this:

  • “The bear is all brown. Do you want to color something brown today?”
  • “Let’s cut out some shapes, like circles and squares, with scissors.”
  • “Hey, what about making some fun textures in our clay? Watch me!”
  • “Let’s make squiggly and straight lines with crayons.”
  • “How many different colored lines can we draw together?”
  • “Let’s mix yellow and blue. What color did you make?”

Why Is It Important Toddlers Do Art Activities?

  • Toddler art talk supports confidence.
  • Toddler art talk supports experimental curiosity.
  • Toddler art talk can boost brainpower.

Art talk—especially when it’s positive and encouraging—can be the foundation for building up your toddler’s creative confidence. Remember that most artworks made by toddlers are simply led by their curiosity and art play. For them, the purpose of art is to have fun, and their finished pieces won’t necessarily resemble anything realistic.

By encouraging them and addressing their questions, they will become more adventurous in their exploration and ultimately develop the self-confidence to continue learning—even beyond art. Art talk stimulates your child’s imagination.

Art talk can boosts brainpower!

There is significant neural activity occurring in the brain when children engage in art. Studies by neuroscientists, science researchers, and art therapists have shown how early childhood art contributes to brain development. Over my twenty years of studio-based observations, I have seen these connections firsthand, illustrating how creating artwork helps children enhance their brains.

(For more detailed information on how art boost brain power, read this post.)

If you have any questions or need help answering their art-related inquiries, please feel free to email me at info@Spramani.com. For more ideas and tips on integrating art into your toddler’s life, sign up for my Montessori Art newsletter. With practice, you will become good at talking to toddlers about art.


arts and craft book by Spramani Elaun

Spramani’s Books

Teach children visual arts

Curriculum For Children

Get step-by-step art curriculum to teach visual arts. Check out our 4 art curriculums:
Painting
Drawing
Color Theory
Clay Modeling

All rights reserved © 2024, Nature of Art®

No part of this blog may be used or be reproduced in any manner whatsoever including reproducing, publishing, performing, and making any adaptions of the work – including translation into another foreign language without written permission except in the case of brief quotations embodied in critical articles and reviews. Nature of Art® Publishing P.O. Box 443 Solana Beach, California 92075.

How-to teach children age appropriate art activities

I get questions every day on how to teach age appropriate art activities.

I’m going to share some tips to get you on the right track.

I’ll also be sharing lots of resources.

There’s only four important things you should consider when teaching age appropriate art activities:

  1. Use only safe non-toxic children’s art supplies
  2. Focus on discovery exploratory type of activities
  3. Keep steps very minimal
  4. Focus on introducing the basic 7 elements

Early Childhood Art Activities

Very young children from toddler to six years can not plan art ideas out yet. So their art activities should be very exploration and discovery in style. They should only do process based style art activities. These lessons should generally introduce art mediums and art tools. You should only be introducing the very basic elements of art like line and colors etc. If you want to understand what art programs should consist of you can order:

Defining Visual Arts. This book explains what art literacy is for children and what you should be focusing on teaching. If you want to learn all about early childhood art programming you can order: Early Childhood Art Guide, this book shows you how to design an age appropriate art program.

Elementary Art Activities

Elementary age students can plan and create with intention. They are able to imagine an idea and plan it out. They can also follow one to six step instructions. These ages should also work in an exploratory discovery fashion. Allow children full freedom to express their own ideas. This means you should allow them to change the final outcome of their creation and not insist they follow an exact example.

Safe Non-Toxic Art Supplies

I recommend children under the age of 12 years old not use adult grade fine art supplies. Many artist grade supplies may contain hazards pigments like cadmium, lead, formaldehyde, solvents. Some paints may add additives, mildew resistance or other chemicals. Or also have special instructions for handling. These chemicals could be harmful to children not aware of special handling instructions. Pick non-toxic kids products that bare the ASTM D 4236 on them. This is a U.S. labeling law to protect children from dangerous chemicals.

If you start with these four suggestions you will be starting out on the right foot. If you need more guidance I have many training videos, books and professional development. 

Warmly,

SpramaniE laun


Sign up here to watch for free: Phases of Art Development Video


READ BLOG: 

Montessori Early Childhood Materials List

Montessori Upper Elementary Materials List


Order Art Teaching Books HERE


Virtual lessons

Get professional development by taking the ART TEACHING BLUEPRINT


Need to train your teachers?

Book a free zoom consult call, email Spramani @ info@Spramani.com

arts and craft book by Spramani Elaun

Spramani’s Books

Teach children visual arts

Curriculum For Children

Get step-by-step art curriculum to teach visual arts. Check out our 4 art curriculums:
Painting
Drawing
Color Theory
Clay Modeling

All rights reserved © 2024, Nature of Art®

No part of this blog may be used or be reproduced in any manner whatsoever including reproducing, publishing, performing, and making any adaptions of the work – including translation into another foreign language without written permission except in the case of brief quotations embodied in critical articles and reviews. Nature of Art® Publishing P.O. Box 443 Solana Beach, California 92075.

Art for Mental Health | Montessori Art

Art therapy—a quickly-growing field that combines psychotherapy with visual art—is a brilliant way to help children (and adults) hone their self expression, develop their self esteem, and create healthy coping mechanisms. As you can imagine, the benefits of art for mental health are great and far reaching.

The American Art Therapy Association defines ‘art therapy’ as creative expression that can overcome the limitations of language. This makes it a huge advantage for young children in particular, who have yet to develop the language skills and understanding to really be able to articulate how they’re feeling emotionally and mentally. 

Art for Mental Health | Montessori Art

In other words, if it’s too difficult or confusing for a child to say aloud or write down, then drawing, painting, sculpting, or crafting can be an outlet for communicating feelings. Many times, emotions that are difficult to say are easier to express through images.

“Artwork can speak volumes for a child, beyond communicating through speech.”

– Spramani Elaun, Nurturing Children in the Visual Arts Naturally

I do want to note that ‘art therapy,’ in its true form, can only be provided by a trained and licensed professional. In this post, my goal is not to give out medical or psychotherapeutic advice, instead, I want to share the ways I’ve seen art—based on my own experience and observations—help children work through their emotional feelings and mental health challenges. Remember, it’s best to follow your schools safety procedures, and report sensitive information to a qualified professional or your admin.

Mental Health Benefits of Art

There are several very general mental health benefits of art. First and foremost, it gives children the chance to process and express their feelings and get into creative flow states. It also allows them to communicate on multiple levels—visually, tactilely, and kinesthetically. Here are a few other ways art can lead to positive mental health experiences.

Opportunities for self-discovery

Creating art in any form can open the floodgates to a child’s emotions and subconscious feelings. As they go through the art making process, they might encounter thoughts, beliefs, or assumptions about themselves or their world, they weren’t aware of before.

Increased self esteem

One reason positive art talk is so important in the classroom and beyond is because it helps build up a child’s self esteem. When a child creates something, they get a feeling of self accomplishment. Being encouraged through the artistic process can help them build up their confidence.

Emotional release

Making art is a healthy outlet for expressing feelings like happiness, sadness, and fear. When a child is unable to express these emotions or thoughts that are swirling in their minds, art can be their release. Without them even realizing, they may work out complex feelings and leave them in their artwork. An emotional release can also bring kids a sense of calm. 

Stress relief

Mental health challenges, like anxiety and depression, can take a physical toll on little ones. It creates acute stress which often has physical repercussions. Using art as a form of stress relief is a healthy way for children to relax—both their minds and bodies. 

Improved mood 

Art making can be an effective way to improve children’s moods. The sensory aspect of creating art is not only calming, but it also stimulates the release of dopamine, which can make a child feel happier. Regular art making can also be used as a coping strategy. 

Where to Start: 3 Art Activities to Boost Mental Health

Art Journaling

Journaling gives students a healthy outlet to express their feelings and work through their emotions. Students can use art journals to document what happened to them that day or week, or artistically express the different feelings or issues they’re experiencing.

[To learn more about how art journals work and for a how-to for making an art journal, read: Montessori Art in the Natural World: Kids Art Journaling, How to Teach Nature Journaling, and Kids Nature Journal Color Lessons.] 

Collaging

Collaging can often be centering and provide a calm space for self-discovery. Encourage children to explore their feelings, thoughts, dreams, and goals and express them using magazines. Have them glue the images that they’re drawn to to pieces of paper. You can also give them colored pencils or soft pastels to further personalize their works. 

Tactile Clay Modeling

Clay modeling can relieve stress because touching clay induces stimulating neural inputs from many of our sensory systems. When children start touching and forming, the actions are considered active learning. The electrical activity stimulated in their brain becomes a different type of action, firing connections and allowing children to focus on their handiwork only. Start with simple clay modeling exercises, and experiment with the many types of clay available for children, such as non-harden, air dry, and pottery clay.

One Step Further: Register for the FREE Combating Stress with Mandalas Workshop

It’s no secret that children are facing more stress than usual in today’s world, so learning to manage stress is even more important; it’s essential to their mental health. Doodling and coloring can have a huge positive impact on children’s stress levels—and creating and coloring mandalas, in particular, can be incredibly helpful.

If you want more artistic tools to help support your students through stressful situations and circumstances, sign up for my free workshop, Combating Stress with Art. I’m partnering with Montessori teacher, Kristen Richter, to talk about the emotional literacy cycle and share therapeutic art activities you can use in your classroom.

To sign up and save your spot for Combating Stress with Art, click here.

A Short Cut Just for You

If you’d like to learn more about all the benefits art offers to children, read my book, Defining Visual Arts. It provides art literacy standards and gives you a guide to what you should be teaching your students. The book also includes tips for using artistic language, choosing the best art mediums, and putting together art projects for kids of different ages.

It’s truly a solid foundation to help you teach art in your classroom (in a way that’s stress-free for you, and exciting and fun for your students!). To purchaseA Defining Visual Arts, click here.

arts and craft book by Spramani Elaun

Spramani’s Books

Teach children visual arts

Curriculum For Children

Get step-by-step art curriculum to teach visual arts. Check out our 4 art curriculums:
Painting
Drawing
Color Theory
Clay Modeling

All rights reserved © 2024, Nature of Art®

No part of this blog may be used or be reproduced in any manner whatsoever including reproducing, publishing, performing, and making any adaptions of the work – including translation into another foreign language without written permission except in the case of brief quotations embodied in critical articles and reviews. Nature of Art® Publishing P.O. Box 443 Solana Beach, California 92075.

Montessori Early Childhood Art Collaging

Collaging gives students the ability to express their creativity and even helps them develop their fine-motor skills. That’s why Montessori early childhood art collaging activities are great to introduce to students! The activity involves the process of selecting, assembling, and pasting a variety of materials down into a unique arrangement. 

Montessori Early Childhood Art Collaging

It’s an ideal craft for early childhood students because collages are intuitive arrangements; they’re the perfect artful playground for kids to craft in.

This is part of a larger post, The Ultimate Montessori Art Collaging Guide, goes into further detail on the benefits and provides tips and resources for all Montessori levels.
You can read the blog by clicking here.

Montessori first plane students, 3-6 years, are ready for simple collage making crafts. This is an exciting age for art making, since they’re likely crafting and exploring different art mediums for the very first time!

Montessori Early Childhood Art Collaging, how to

Early childhood students are able to hold materials, practice scissor cutting, and explore the different collaging mediums tactilely. They can dip a paintbrush into glue, learn to paste, and make simple arrangements. It’s best to keep instructions simple—giving them just one- or two-step instructions. (For example, cut and paste; or paste and arrange.)

It’s best for early childhood students to work in process-based mode (or creative-mode), which means art making focuses on the process, not the outcome. Again, any copy-mode creating should be basic; with simple instructions meant to build implicit memory. You should allow students to try Montessori early childhood art collaging without any expected outcome. [You can learn more about process-based teaching by clicking here to read more about the method.]

Where to Start: Simple Montessori Early Childhood Art Collaging Activities

Children at 3-6 years are very curious about materials and how they can be used. At this age, they’re very quick learners! By introducing art collaging you can actually help refine their small motor muscles, since the activity involves making controlled movements through cutting, pasting, and manipulating the collaging mediums. 

Keep collage materials very basic at first. I’d suggest starting with light-weight paper and glue sticks. This gives students the opportunity to learn more about how adhesive works, and they’ll be able to build upon that skill as they create more and more. After they’ve had a few chances to explore this type of art activity, you’ll see that they’ll likely have a decent understanding of how collaging works, and will want to create with new types of materials.

Collaging can be done with any type of material: paper, fabric, natural elements, recycled objects (buttons, tiny beads, pieces of cardboard, etc.), sequins, foil, glass, wire, and burlap. However, since young children are still developing their fine-motor skills, make sure the objects are easy to grasp, pinch, or hold. 

They can also be a little impatient at this age, so you also want to make sure the objects they’re crafting with can be easily pasted onto their working surface. (You don’t want things falling off their canvas, and you don’t want to have to use a glue gun to make sure their designs stay in place!) Tape can also be used in place of adhesive glues and pastes; washi tape comes in a bunch of fun designs and can add to the art they’re creating!

Be sure to give children plenty of time to experiment with making different arrangements. It takes some time to understand how to paste, arrange, and press down or hold their design objects into place to create the look they desire.

 Montessori Early Childhood Art Collaging natural items

One Step Further: Register for My FREE Online Mini-Course

Introducing your lower elementary students to collaging concepts is just one Montessori art activity out of thousands. Lower elementary students are capable of so much when it comes to art! But if you want to keep your students interested in your demonstrations and keep the mess down to a minimum, you have to understand how they learn. That way you can find the perfect balance of teaching them without overwhelming or boring them. And I’ve developed a FREE digital mini-course—the Phases of Art Development—to help you do just that!

It’s an online course that explains how art making helps students develop their creativity, fine-motor skills, and focus. Not only will it help you teach your students, but I make it easier on you by giving you some examples of art projects lower elementary kids will enjoy creating.

Best of all—it’s free! To sign up for the course, click here.

A Short Cut Just for You: Early Childhood Art Guide

montessori early childhood

Art collaging is just one of the many art activities early childhood students are capable of doing. If you want more ideas, and more importantly, if you want to better understand how early childhood students actually learn art, check out my book, Early Childhood Art: Visual Arts Teaching Guide. It lays the groundwork for what your students need to know about art and provides tips and tricks for setting up an art environment, using proper art materials and mediums, and planning age-appropriate art lessons.  Click here to get your copy of my Early Childhood Art guide!

Montessori Art Collaging: Lower Elementary

Montessori Art Collaging: Lower Elementary

Collaging offers many benefits to children of all ages; it gives them the opportunity to conjure up creative ideas, improve their fine-motor capabilities, and work on projects independently. In this blog, I’m going to focus on Montessori art collaging for lower elementary students, giving you some helpful hints and inspirational activity ideas to get them going with this type of crafting.

This is part of a larger post, The Ultimate Montessori Art Collaging Guide, goes into further detail on the benefits and provides tips and resources for all Montessori levels.
You can read the blog by clicking here.

Collaging is the process of selecting, assembling, and pasting materials into a unique arrangement or a beautiful work of art. Montessori art collaging is perfect for lower elementary students because they’re at a great age to start exploring textured materials and trying out different art-making techniques.

Lower L students are also capable of planning out their designs with intention and seeing out their creative ideas through realization and the completion of their activity. They can also follow simple, guided-art instructions and begin to work with more abstract themes and concepts.

Montessori Art Collaging: Lower Elementary, kids activities

Montessori Art Collaging, Lower Elementary Materials & Concepts

One of the best things about collaging is that it can be done with almost any kind of material, including: papers, fabrics, natural elements, recycled objects, buttons, tiny beads, sequins, and all other kinds of man-made embellishments. You can even use textured materials like foil, glass, wire, and burlap. There’s really nothing that can’t be collaged!

Since the types of collaging materials you can use are basically endless, the glue or paste you use is important. Some materials won’t stick with a simple glue stick, so you’ll have to decide what adhesive you want to set out so your students will actually be able to collage successfully. 

I’d suggest using glue sticks for tissue collaging and light-weight paper; white craft glue can be used for construction paper, fabric, and small embellishments; and a low-temperature glue gun (used with supervision!) works best for plastic, wood, and larger objects. 

Montessori Art Collaging: Lower Elementary, art ideas

Giving students the right materials will take care of most of the work for this Montessori art collaging activity. The process is easy for you to demonstrate and easy for lower L students to practice. Collaging really only consists of three steps:

  1. Cutting – students should begin with cutting interesting shapes out of varying raw materials
  2. Arranging – once students have the shapes and items they want to work with, they can arrange the elements into designs, patterns, or interesting layouts
  3. Glueing – after students have an idea of what they want to create, they will apply glue to the back of the materials, then place them back onto the arrangement

Make sure students have the freedom to explore and devise their own layouts. Have your students work in creative mode, with only very simple copy-mode steps. Children at this age level are developing better control of their fine-motor skills, such as scissor use, and will have fun cutting out different shapes out from the materials. And since they’re starting to be able to plan out their art works in their imagination ahead of time, it’s a fun age to see brilliant concepts and ideas come to fruition within their projects.

Where to Start: Montessori Art Collaging Lower Elementary Skills

If your students have never collaged before, start with simple materials, such as paper, before giving them more options. Then, you can even try introducing different patterns and themes, and even show students different artist samples for inspiration. Just make sure students are always allowed to work out their final designs on their own. 

5 Montessori Art Collage Ideas for Lower Elementary

Collages can be put together in many different ways, they can be sewn, glued or weaved. They can be abstract in nature or even resemble an image. Here’s five different ways to approach  collaging with lower elementary students.

How to Montessori Art Collaging: Lower Elementary

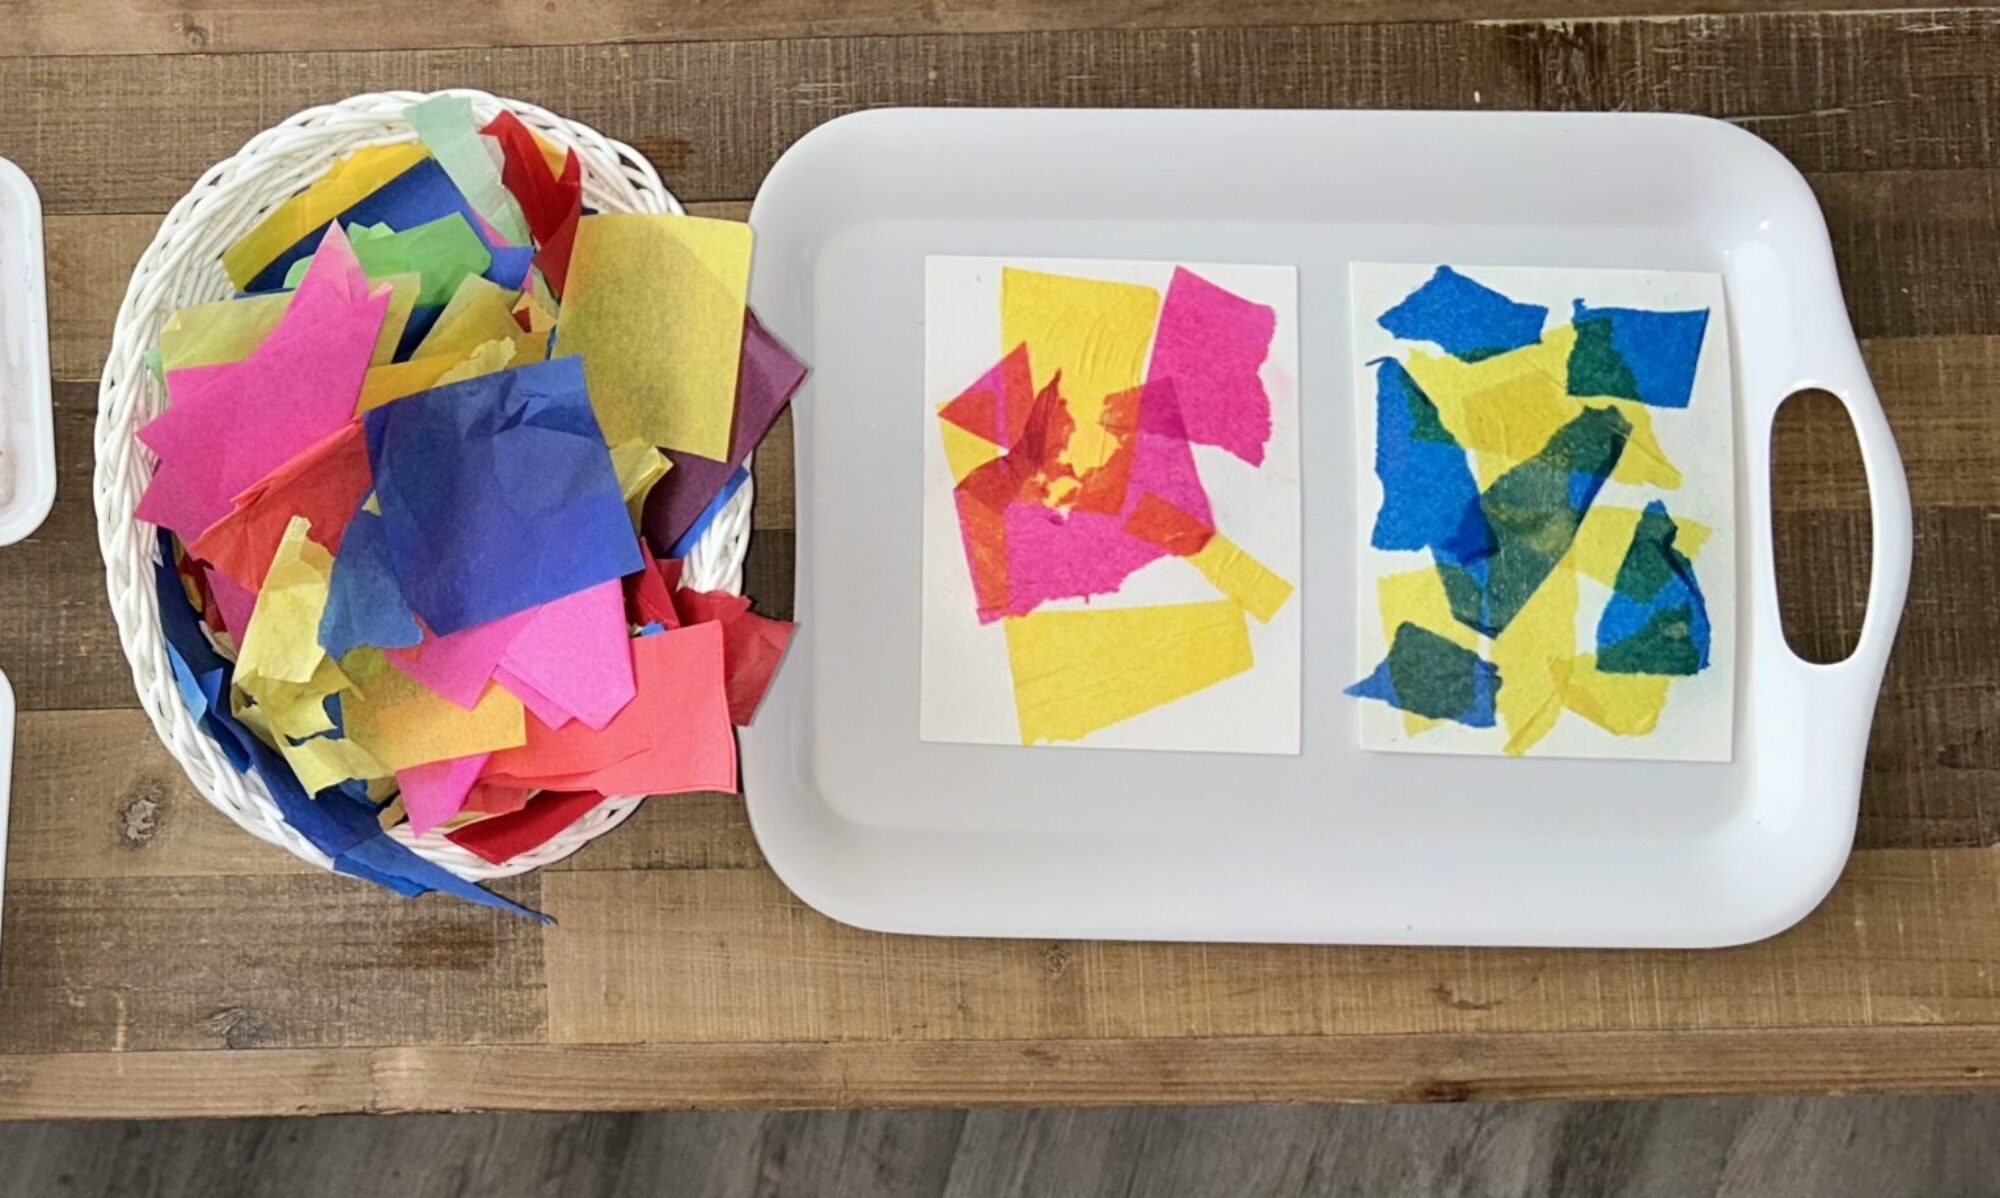
Paper + Tissue

Tissue and paper are ideal to start out with because they’re easy to tear and cut. Their lighter weights mean most craft glues will be able to hold them down securely.

Up-cycled materials

A collage created with up-cycled materials can be made with almost anything, from old cardboard to broken toys. I’ve even used old wetsuits before (like in the photo below)! Using old materials is both an earth-friendly and cost-effective way to create art.

how to collage with kids art activities
how to collage with kids

Natural Elements

Collages can also be done using natural elements, such as flowers, leaves, seeds, and twigs. Natural materials can give collages diverse texture and interesting features. Some food items can also be collaged, like dried beans and pasta. The trick to collaging with natural elements is to use a hot glue gun (you may need to do this yourself, or supervise children while they use it), or weave and sew the materials onto the collage base, since craft glue isn’t usually strong enough to hold these objects.

how to teach collage art to montessori Lower Elementary

Styrofoam

Montessori Art Collaging: Lower Elementary, recycle

Styrofoam isn’t the most earth-friendly materials, so I suggest using only recycled pieces. The one reason I do like to use it is because the material is super easy for younger children to cut through. Painting the pieces before using them also introduces the painting domain to your students, and make their creation even more interesting. If you can start repurposing these materials instead of sending them to landfills, you can help the environment.

how to teach Montessori Art Collaging: Lower Elementary
Montessori Art Collaging: Lower Elementary, spramani
Montessori Art Collaging: Lower Elementary, activities for the classroom, art albums

Images & Design Prompts

Once you have given your students plenty of time to collage their own ideas and explore with different materials in a process-based way, you can then provide them even more inspiration using themed prompts based on subjects you might already be working on. For example, geometric shapes can help with math concepts, while a collage of a bird is a great way to instill zoology lessons. You can even challenge kids to bring color theory into their creations by asking them to create warm, cool, or contrasting color layouts.

One Step Further: Register for My FREE Online Mini-Course

Introducing your lower elementary students to collaging concepts is just one Montessori art activity out of thousands. Lower elementary students are capable of so much when it comes to art! But if you want to keep your students interested in your demonstrations and keep the mess down to a minimum, you have to understand how they learn. That way you can find the perfect balance of teaching them without overwhelming or boring them. And I’ve developed a FREE digital mini-course—the Phases of Art Development—to help you do just that!

It’s an online course that explains how art making helps students develop their creativity, fine-motor skills, and focus. Not only will it help you teach your students, but I make it easier on you by giving you some examples of art projects lower elementary kids will enjoy creating.

Best of all—it’s free! To sign up for the course, click here.

3 to 6 Art – Early Childhood Montessori Teaching Resources

Sign-up to receive video

The Phases of Art Development is a quick digital course that explains how art making can help students develop their creativity, fine-motor skills, and focus. More importantly, I share what types of projects students at every age are capable of completing safely, and without making a mess.

Best of all—it’s free! To sign up for the course, click here.

All rights reserved © 2024, Nature of Art®

No part of this blog may be used or be reproduced in any manner whatsoever including reproducing, publishing, performing, and making any adaptions of the work – including translation into another foreign language without written permission except in the case of brief quotations embodied in critical articles and reviews. Nature of Art® Publishing P.O. Box 443 Solana Beach, California 92075.

How to Teach Scissor Cutting Skills to Upper Elementary Kids

Scissor cutting opens up the doors to so many creative opportunities!

When you think of teaching art, what do you think of? Painting? Drawing? Maybe some sculpting? While those are all important parts of visual arts, a surprising component that also needs to be taught to Montessori upper elementary students is scissor cutting skills. This might seem like an obvious skill—especially for upper elementary kids, but you would be surprised at how many students still struggle at this age. They need scissor practice! That’s why I’ve put together this Montessori scissor cutting guide for upper elementary. To help you teach your students this essential art skill.

Being able to use safely and properly use scissors means students are able to do a wide variety of artful things. For example; cutting paper, following patterns, cutting strings and yarn, and cutting fabric. Scissor cutting opens up the doors to so many creative opportunities!

How to Teach Montessori Scissor Cutting to Upper Elementary Kids

Importance of Scissor Cutting for Upper Elementary Students

Cutting enhances eye-hand coordination (using vision, processing what is seen, and moving the hand simultaneously to accomplish a task). Other examples of eye-hand coordination are weaving, folding, creasing paper, catching/throwing a ball, scooping food with a spoon, and zipping a coat.

Cutting also encourages your child to use bilateral coordination (which means using both sides of the body at the same time, in a coordinated way, while each hand is performing its own task). For example, when cutting a circle, a child must hold the paper with one hand (and continuously turn it) while the other hand is opening and closing the scissors and moving forward to cut. Other examples of bilateral coordination include: zipping up a coat or pants, washing dishes, and opening an envelope.

Cutting helps stimulate the brain

Some research suggests that hand-eye and bilateral coordination exercises may stimulate the parts of the brain that are needed for thinking and focusing attention. In my experience, these types of motion and practice also give students keen observation skills, which allow them to notice details and follow patterns.

For upper elementary students, having greater fine motor skills means they can attempt intricate scissor cutting designs. For example, following detailed patterns and more complex instructions that might take four to five steps to follow. Students at this age will be able to make paper art like gift tags, ornaments, snowflakes, paper lanterns, paper chain dolls, thought-out collages, and stunning bookmarks and cards.

Scissor Cutting Leads To Creativity

Strong scissor-cutting skills lead to lots of independent creating at all levels of crafting and design. It’s important that students are given plenty of time to practice before they take on trickier, more detailed cutting patterns. When Montessori upper elementary children attempt to create such designs without scissor cutting practice, the art projects and activities will become too challenging to follow and they may lose self-confidence.

I recommend using design templates for Montessori upper elementary to practice their scissor cutting. There are some super fun paper 3-D art templates they can cut out, then construct the pieces with glue, to create objects like fruit, flowers, and fun characters. Mr. Printables is one of my favorite websites for simple cutting template practice. 

Where to Start: Give Your Montessori Upper Elementary Students Scissor Cutting Practice

Another fun practice can be to cut, and then gluing, 2D symmetrical designs. If you are not sure if your students have developed their scissor skills sufficiently, ask them to cut basic geometric shapes. You should be able to observe where their skill level is currently. I have met plenty of upper elementary students who need a bit more practice before jumping into complex projects. 

Always remember: practice is the best way to support kids’ artistic skills and literacy.

How to Teach Montessori Scissor Cutting to Upper Elementary Kids

I recommend testing your students’ abilities by practicing cutting out:

  • Straight lines
  • Corners
  • Curves
  • Geometric shapes
  • Symmetrical designs
  • 3D objects (like mini furniture or buildings)
  • Basic quilt patterns
  • Basic stencil patterns
  • Chinese paper lanterns
  • Magazine images (for collaging)
  • Papel Picado (Mexican paper flags)
  • Paper snowflakes
  • Tangram paper designs

Once upper elementary students are able to cut straight lines, corners, and simple curves, they may be able to move on to using an artist’s Exacto knife. But I recommend they only do this with proper supervision and parent consent. I’ve met many crafty students who want to work on very intricate designs, which calls for using an Exacto knife.

One Step Further: Sign Up for My FREE Digital Mini-Course

Knowing that your students are capable of safely using scissors opens up so many doors for all the amazing art projects and activities you’ll be able to do in your classroom! In order to keep them interested in the lessons you’re presenting—and able to handle and understand whatever it is you’re teaching—you have to first be able to know exactly how they learn art. I’ve developed a FREE online mini-course to help you do just that!

How to Teach Montessori Scissor Cutting to Upper Elementary Kids

The Phases of Art Development is a quick digital course that explains how art-making can help students develop their creativity, fine motor skills, and focus. More importantly, I share what types of projects students at every age are capable of completing safely, and without making a mess.

Best of all—it’s free! To sign up for the course, click here.

A Short Cut Just for You:

arts and craft book by Spramani Elaun

Spramani’s Books

Teach children visual arts

Curriculum For Children

Get step-by-step art curriculum to teach visual arts. Check out our 4 art curriculums:
Painting
Drawing
Color Theory
Clay Modeling

All rights reserved © 2024, Nature of Art®

No part of this blog may be used or be reproduced in any manner whatsoever including reproducing, publishing, performing, and making any adaptions of the work – including translation into another foreign language without written permission except in the case of brief quotations embodied in critical articles and reviews. Nature of Art® Publishing P.O. Box 443 Solana Beach, California 92075.

Montessori Early Childhood Scissor Cutting Guide

Montessori Early Childhood Scissor Cutting Guide

How to Teach Important Scissor Skills to Early Childhood Students

If I told you that I often lead students in Montessori early childhood scissor cutting, I’m sure you—and many other teachers—might be a little concerned (to say the least). Giving scissors to a young child might seem crazy, or dangerous, at the very least. But it’s an essential skill everyone needs, and if it’s taught correctly, early childhood students can master it too.

You see, using scissors is a great way for young students to develop their fine motor skills. So while it can be a little scary to hand a pair of (blunt-tip) scissors to a three-year-old, it’ll eventually help them perform many other activities around the classroom. 

Montessori Early Childhood Scissor Cutting Guide, spramani elauj

In fact, the earlier a child can learn to use scissors, the better. The activity provides so many benefits to early childhood students! Being able to properly use scissors opens the doors to many other important skills, such as writing their names or ABCs, tying shoes, zipping jackets, cleaning up, and feeding themselves.

So, how do you know when your early childhood students are actually ready to start using scissors?

Montessori Early Childhood Scissor Cutting Guide, activities

If your students can sit and focus on an activity for at least 15 minutes, they should be able to learn and start practicing their scissor cutting. You’ll need your students to be able to sit through a complete Montessori early childhood scissor cutting demonstration, where you present the basic movements and show how to safely handle the tool. So, if they can keep their attention on your presentation and understand the necessary outcome, then they can start practicing. Just make sure you’re supervising early childhood students any time they are using scissors.

Montessori Early Childhood Scissor Cutting Guide

Importance of Scissor Cutting to Early Childhood Development

By showing young students—even as young as two or three years—how to use scissors, you’re helping them reach critical milestones that directly related to other areas of childhood development. The dynamic motion that comes from cutting activities—specifically, opening and closing scissors along a distinct path—helps them build muscle control, develop eye and hand coordination, deepen their tactile spatial awareness, and hone their fine-motor movements. It also helps them develop the coordination needed for handwriting, eating, dressing, and holding and carrying small objects. 

A child that has scissor practice will be able to excel in complex steps to create and work independently. And they’ll be able to do so many artful and creative things in the classroom, such as cutting paper, following patterns, cutting strings and yarn, and cutting fabric.

Montessori Early Childhood

Where to Start: Montessori Early Childhood Scissor Cutting Lessons

You can’t hand your early childhood students a pair of scissors and then walk away expecting them to create, it’s an early childhood art material that needs to be taught how to use. It’s important to give them time to practice the simple movements of just using scissors. Once they have that down, then you can start introducing students to cutting for copy-mode or process-based activities. 

Materials:

  • Safety scissors (with a blunt tip)
  • Soft, thick yarn
  • Styrofoam sheets
  • Construction paper
  • Clay
Montessori Early Childhood Scissor Cutting Guide, arts and crafts

Early Childhood Scissor Cutting Lesson Ideas:

  • Have children cut small and large lengths of yarn
  • Students can cut large shapes from styrofoam, and then glue them onto paper
  • Show students how to roll out coils of clay, and then cut those into small pieces
  • Give students pieces of construction paper that have lines or shapes drawn onto them (or ask the kids to draw their own lines and shapes), and have them cut along the lines

Try incorporating some of these lesson ideas with other topics you’re already teaching in the classroom. For example, make some of the shapes organic, like leaves or simple animal silhouettes. 


One Step Further: Sign Up for My FREE Art Phases Mini-Course

Knowing that your early childhood students are capable of safely using scissors opens up so many doors for all the amazing art projects and activities you’ll be able to do in your classroom! In order to keep them interested in the lessons you’re presenting—and able to handle whatever it is you’re teaching—you have to first be able to understand exactly how they learn art. I’ve developed a FREE online mini-course to help you do just that!

3 to 6 Art – Early Childhood Montessori Teaching Resources

Sign-up to receive video

The Phases of Art Development is a quick digital course that explains how art making can help students develop their creativity, fine-motor skills, and focus. More importantly, I share what types of projects students at every age are capable of completing safely, and without making a mess.

Best of all—it’s free! To sign up for the course, click here.

The Phases of Art Development is a quick digital course that explains how art making can help young children develop their fine-motor skills. More importantly, I share what types of projects early childhood students are capable of completing safely, and without making a mess.

Best of all—it’s free! To sign up for the course, click here.


A Short Cut Just for You – Early Childhood Art Guide

And if you want an even fuller picture of how to really help your young students learn art, check out my new book, Early Childhood Art: Visual Arts Teaching Guide. It’ll help you understand the importance of art language for early childhood students and lay the groundwork for what your students need to know about art. I also provide tips and tricks for setting up an art environment, using proper art materials and mediums, and planning level-appropriate art lessons. Click here to get your copy of my Early Childhood Art guide!

arts and craft book by Spramani Elaun

Spramani’s Books

Teach children visual arts

Curriculum For Children

Get step-by-step art curriculum to teach visual arts. Check out our 4 art curriculums:
Painting
Drawing
Color Theory
Clay Modeling

All rights reserved © 2024, Nature of Art®

No part of this blog may be used or be reproduced in any manner whatsoever including reproducing, publishing, performing, and making any adaptions of the work – including translation into another foreign language without written permission except in the case of brief quotations embodied in critical articles and reviews. Nature of Art® Publishing P.O. Box 443 Solana Beach, California 92075.