5 Ways to Become an Art-Trained Montessori Teacher Over Winter Break

Usually when I tell Montessori teachers they can start teaching art in their classroom, they look at me like I’m crazy! So many of them tell me they have no training, they’re not creative, or they struggle with just drawing stick figures! Trust me though, you CAN become an art-trained Montessori teacher!

In fact, winter break is one of the best times to get started. Think about how excited your students will be to come back to school and find out you’ll be introducing art lessons to them. They’ll love it! Not only will it help develop their creativity and art literacy, but it helps them make connections between all the other subjects they’re learning—such as the Great Lessons.

So, now I’m sure you’re thinking, “Look, Spramani, I definitely want to become a better Montessori teacher, and it would be really cool to start providing visual arts in my classroom, but how can I become art trained in a matter of weeks? Winter break is only so long.

I’ve done the hard work for you. After 20 years of observing the way kids learn art, I’ve created a simple way to teach art that works perfectly in the Montessori classroom. It really doesn’t require much leg work from you, and students get to explore the entire artistic process. Of course, you’ll have to sign up for my Art Teaching Blueprint and get all the info you need (I’ll touch on what the course is and why it’s so awesome further below), but here are five things to do to get you started to becoming art trained over winter break.

1. Buy Some Supplies

The first step to becoming art trained is setting yourself—as well as your classroom and students—up with the right tools and supplies. (I’ve broken down the essential art supplies every Montessori classroom needs in this blog post.) Starting with a stocked classroom gives you the foundation to explore the visual arts.

2. Set Up an Art Shelf

As you know, subject-based shelves are the basis of a successful Montessori classroom, so it only makes sense that you should set up an art shelf. You can read how to set up an art shelf in your classroom here. A proper art shelf supports art literacy and helps keep all your supplies organized in one easy-to-reach place for your students to access.

3. Build an Inspiration Gallery

Another way to get your classroom set up for teaching art is to create an inspiration gallery. It can give students a place to observe and talk about artwork, which can increase their art literacy, language, and self-esteem. While an inspiration gallery is a simple concept, there are some tricks to it. For instance, you don’t want to solely include fine art examples; it’s important to incorporate students’ own work too. (If you want to learn more about how inspiration galleries work, read this blog post.)

4. Pick Up a Book

Once you’re all set with supplies, an art shelf, and an inspiration gallery, it’s time to start your training. You can give yourself a great base by doing some quick reading. I’ve written two visual art books that create a framework for learning the subject. Defining Visual Arts focuses on the latest standards and the most important projects, mediums, and techniques to teach. Introducing Visual Arts to The Montessori Classrooms gets a little more specific in providing solid guidance for teaching art in a Montessori environment. Either one—but of course, both—of these books are helpful in giving you the context for how children learn art and are a great option in kicking off your art training.

5. Register for my FREE teacher course: Phases of Art Development Guides & Art Project Ideas!

I created a free video course to teach Montessori teachers like you the phases of art development—or what art skills your students are capable of learning in each age range. The course also includes three bonus videos of art lessons, projects, and techniques to use in your classroom, no matter what grade you’re teaching. Best of all, you can go through this mini training in the comfort of your own home (while on winter break!).

You can do it, YOU can become an art-trained Montessori teacher. I believe in you and your students will thank you for taking the time to learn how to teach art in your classroom. If you have any questions or want to connect with other Montessori teachers who are going through my course, make sure you go like my Facebook page.

All rights reserved © 2024, Nature of Art®

No part of this blog may be used or be reproduced in any manner whatsoever including reproducing, publishing, performing, and making any adaptions of the work – including translation into another foreign language without written permission except in the case of brief quotations embodied in critical articles and reviews. Nature of Art® Publishing P.O. Box 443 Solana Beach, California 92075.
Teaching Montessori Art, Creative Making vs. Copy Making

By Spramani Elaun

In my twenty years of observing and teaching children of all ages to draw and paint, I’ve discovered the best ways for teaching art without stifling their creative spirit. My unique teaching method breaks down instruction into two balanced approaches: creative-mode and copy-mode.

When art instruction is balanced using these two methods, a child can develop skilled fine art motor movements, plus conceptualize original imaginative ideas. Understanding how to teach creative making and copy making is simple. I cover it in more detail in my book, Introducing Visual Arts to Montessori Classrooms, but here’s a quick guide to give you a foundation.

Creative Making

Creative mode is how children first learn to create art. In creative mode, you can introduce projects and demonstrate a medium, but refrain from giving students a point of reference or image to copy. The child creates art by exploring the medium and conjuring up their own creative images from their own imaginations, thoughts, and ideas.

Introducing Creative Making to Students

Creative making is all about giving students the freedom to explore. You can show kids examples of projects using similar mediums and technique but give them space to come up with their own ideas of images, colors, and even different techniques to finishing their artworks.

Young children should start their art experience in creative mode, then move on to copy mode learning and observations in the upper grades.

Teaching Art Montessori, Creative Making vs. Copy Making

Copy Making

Copy mode refers to a systematic, step-by-step art instruction. When students are older they are able to learn to make art by mimicking or copying a visual image by following a series of steps, resulting in a similar finished project. In fine art adult classes, students learn to draw or paint by copying what they see an in image and studying its perspective renderings of line, form, light, value and composition.

Introducing Copy Making to Students

Start out by having kids copy a design step-by-step. For example, you can teach kids how to draw a butterfly in just three to four simple, systematic steps and most students will create similar butterfly shapes. You can then transition children into creative-mode thinking, by allowing them to color or paint their designs however they choose—tapping into their own individual creativity they harnessed at a younger age. The goal is to give kids the foundation to draw an outline of a basic butterfly shape (in copy mode) and the freedom to think creatively (in creative mode).

Teaching Art Montessori, Creative Making vs. Copy Making

The Benefits of Creative Making & Copy Making

Copy-mode drawing can help develop muscles in students’ eyes, hands, and memories. Copying geometric or organic shapes can help students achieve similar shapes they might desire in their own creative drawings or designs. Limited copy-mode and step-by-step drawing lessons should be introduced to children in elementary grades.

Creative-mode supports children in developing ideas from their own imaginations. It gives kids free range to conjure up their own ideas; this also supports the artistic process. When children learn to create from their own ideas, they conceptualize original artworks through imagination, planning, and finally, constructing. These are the qualities of a creative innovator. Because young children have great imaginations, it’s ideal for children to being making art this way.

Teaching Art Montessori, Creative Making vs. Copy Making

Teach by Balancing Both Methods of Instruction

For students to benefit the most, you should be balancing fun projects that utilize creative-making opportunities with occasional skill-building, copy-making techniques. Using both methods of instruction will support art literacy by guiding students through the artistic process. Children have the opportunity to create and imagine their own ideas and design, then explore and construct their art projects, and finally express what they create with words or written descriptions about their process.

If you require kids to follow too many step-by-step instructions and do not allow for any creative freedom, it can stifle their creativity or love for making art. Additionally, a child’s visual perception and fine-motor development develops slowly over childhood. Some children may not be developmentally or cognitively ready to copy at an early age and this can negatively affect their self-esteem and ability to think creatively on their own. Some copy-mode instruction can be introduced in early elementary, but should be directed more towards upper elementary grades.

All kids need artistic inspiration to serve as a springboard for drawing and painting ideas to get them started. You should always give kids some point of reference to copy initially, then allow their own ideas or designs to flourish. It’s really difficult for many kids to sit down and think of something to create off the top of their head without any guidance at all, especially if they do not have much practice in visual arts just yet. This is why it’s so essential for copy and creative making to work hand in hand! Simple copy-mode lessons can be used as inspiration. Just remember, copy making and step-by-step instructions should be options, not requirements.

Teaching Art Montessori, Creative Making vs. Copy Making

If you would like to learn more about teaching art in your Montessori classroom, register for my next Art Teaching Blueprint training. I break down these concepts in simple, easily digestible lessons (that you can go through at your own pace) and help you start using these methods in your classroom. Trust me, so many Montessori teachers like you have been able to implement visual arts in their lessons and always come back to tell me how much their students love it and are benefiting from it. I want this for you and your students too! So, click here to register today.

arts and craft book by Spramani Elaun

Spramani’s Books

Teach children visual arts

Curriculum For Children

Get step-by-step art curriculum to teach visual arts. Check out our 4 art curriculums:
Painting
Drawing
Color Theory
Clay Modeling

All rights reserved © 2024, Nature of Art®

No part of this blog may be used or be reproduced in any manner whatsoever including reproducing, publishing, performing, and making any adaptions of the work – including translation into another foreign language without written permission except in the case of brief quotations embodied in critical articles and reviews. Nature of Art® Publishing P.O. Box 443 Solana Beach, California 92075.

Building a Montessori Art Calendar to Keep Students Busy Every Month

Building Out an Art Calendar to Keep Your Students Busy with Something New Every Month

By Spramani Elaun

“Teaching” art can seem overwhelming, and creating an art calendar to keep your students busy with art all year long can seem impossible. The beginning of a new school year is both exciting but stressful for that very reason. While you’re mapping out all your projects and lessons for the year, art can sometimes take a backseat.

But I don’t want that to be the case for you or for your students! All it takes is some simple planning to get you going. I promise you, if you take some time to plan out your calendar, art lessons will flow better and be so much easier for you during the school year.

The best part of all this? There’s a simple, stress-free way to break it down.

In my course, Art Teaching Blueprint, I go over in detail how to create an art schedule (and the specific resources and materials you may need!) but here’s the basic idea to it.

Building Your Calendar

You’re going to start by counting up the number of teachable weeks in the school year. That may mean excluding the first two weeks of the year (when you’re still getting your class situated), weeks where you’re off for the holidays, and the last couple weeks of school (when you’re likely busy with testing). This number can vary depending on your schedule.

Now, you’re going to follow this formula:

# of teachable weeks / 5 domains = # of lessons per domain

  • You might be asking, what’s a domain? The way I’ve developed my art training is by breaking down visual art into five different categories, or domains. Here is an example of two:
    • Drawing
    • Painting
  •  

Let’s say you’ve counted 30 teachable weeks for the year, that would mean:

30 / 5 = 6 lessons for each domain

Knowing you only have to teach six lessons on drawing, six on painting, and so on already makes your calendar seem a bit more manageable, right?

Don’t worry, I won’t leave you here. This formula is just the basis for your calendar, you now need to fill it out with more specific lessons, or themes.

Inspiration for Your Calendar

What you decide to teach for your lessons is completely up to you, but here are some tips and monthly theme inspiration to help you finish filling in your calendar.

I’d suggest trying to integrate art projects with the lessons you’re already planning on teaching, like the Great Lessons, astronomy, physical science, etc. With this information, decide which domain makes sense for each topic. For example, if you’re learning about dinosaurs, put clay on your art shelf for students to create their own tyrannosaurus; or let them experiment with watercolors as they learn about the cosmos.

You might also want to think about holidays or special events as you map out your lessons. For instance, Earth Day is in April, so your lessons that month can focus on nature and the earth.

Here are a few other themes for each month to get you started.


Monthly Theme Ideas:

September

  • The Big Bang
  • Cosmic Education
    If you haven’t already, make sure you sign up for my FREE mini-course—I share a lesson on cosmic rock painting

October

  • World Peace
  • Fall Leaves

November

  • Outdoor Nature Crafts (leaves, rocks, sticks, natural paints)

December

  • Cultural Geography
    Think about crafts from different cultures around the world, like Japanese origami, skull paintings from Mexico, etc.

January

  • Winter Snowflakes
    Students can cut out snowflakes from pieces of paper, or paint a sheet full of them—each with its unique shape and design.

February

  • Zoology (like dinosaurs, birds, insects, etc.)

March

  • Geography
    Students can create maps of places they’re learning about in other lessons this week.)

April

  • Botany (seeds, plants, trees, etc.)

May

  • Astronomy

Summer

  • Beach or Ocean

Hopefully this is enough to get you started!

There are SO many ways to organize your lessons, and that’s the fun part of all this!

You can teach each lesson in succession (six straight weeks of drawing, followed by six straight weeks of painting, etc.) or rotate each lesson throughout the year.

I cover a few specific ways in Art Teaching Blueprint, and even give you a few sample calendars to follow.

So if this still feels overwhelming, make sure you check out my art certification, to enroll or email me directly at info@Spramani.com with any questions.

I’ll also be sharing a specific art project each month on the blog, so make sure you’re signed up for my newsletter for even more ideas throughout the year.

3 to 6 Art – Early Childhood Montessori Teaching Resources

Sign-up to receive video

The Phases of Art Development is a quick digital course that explains how art making can help students develop their creativity, fine-motor skills, and focus. More importantly, I share what types of projects students at every age are capable of completing safely, and without making a mess.

Best of all—it’s free! To sign up for the course, click here.

arts and craft book by Spramani Elaun

Spramani’s Books

Teach children visual arts

Curriculum For Children

Get step-by-step art curriculum to teach visual arts. Check out our 4 art curriculums:
Painting
Drawing
Color Theory
Clay Modeling

All rights reserved © 2024, Nature of Art®

No part of this blog may be used or be reproduced in any manner whatsoever including reproducing, publishing, performing, and making any adaptions of the work – including translation into another foreign language without written permission except in the case of brief quotations embodied in critical articles and reviews. Nature of Art® Publishing P.O. Box 443 Solana Beach, California 92075.

5 NEW Ways to Tackle Montessori Art Projects

Montessori art calendar project ideas

5 NEW Ways to Tackle Montessori Art Projects This School Year

By Spramani Elaun

The funny thing about art is that it should be creative—spontaneous even—but as Montessori teachers we can sometimes get stuck in a rut and begin to teach the same art lessons over and over again. I don’t want that to happen to you! Not this school year at least!

It’s back-to-school season, and I know you are gearing up for another awesome year, so I wanted to give you a little push and a little inspiration on tackling art this year. There are so many ways to teach art to your students, and I’d love to help find your creativity in any way I can (so feel free to reach out if every you feel like you’re in a slump!).

I know how busy you are with planning your school year and putting the finishing touches on your classroom, so for now, here are five ideas for new ways to bring art into your classroom.

5 NEW Ways to Tackle Montessori Art This School Year

1. New medium

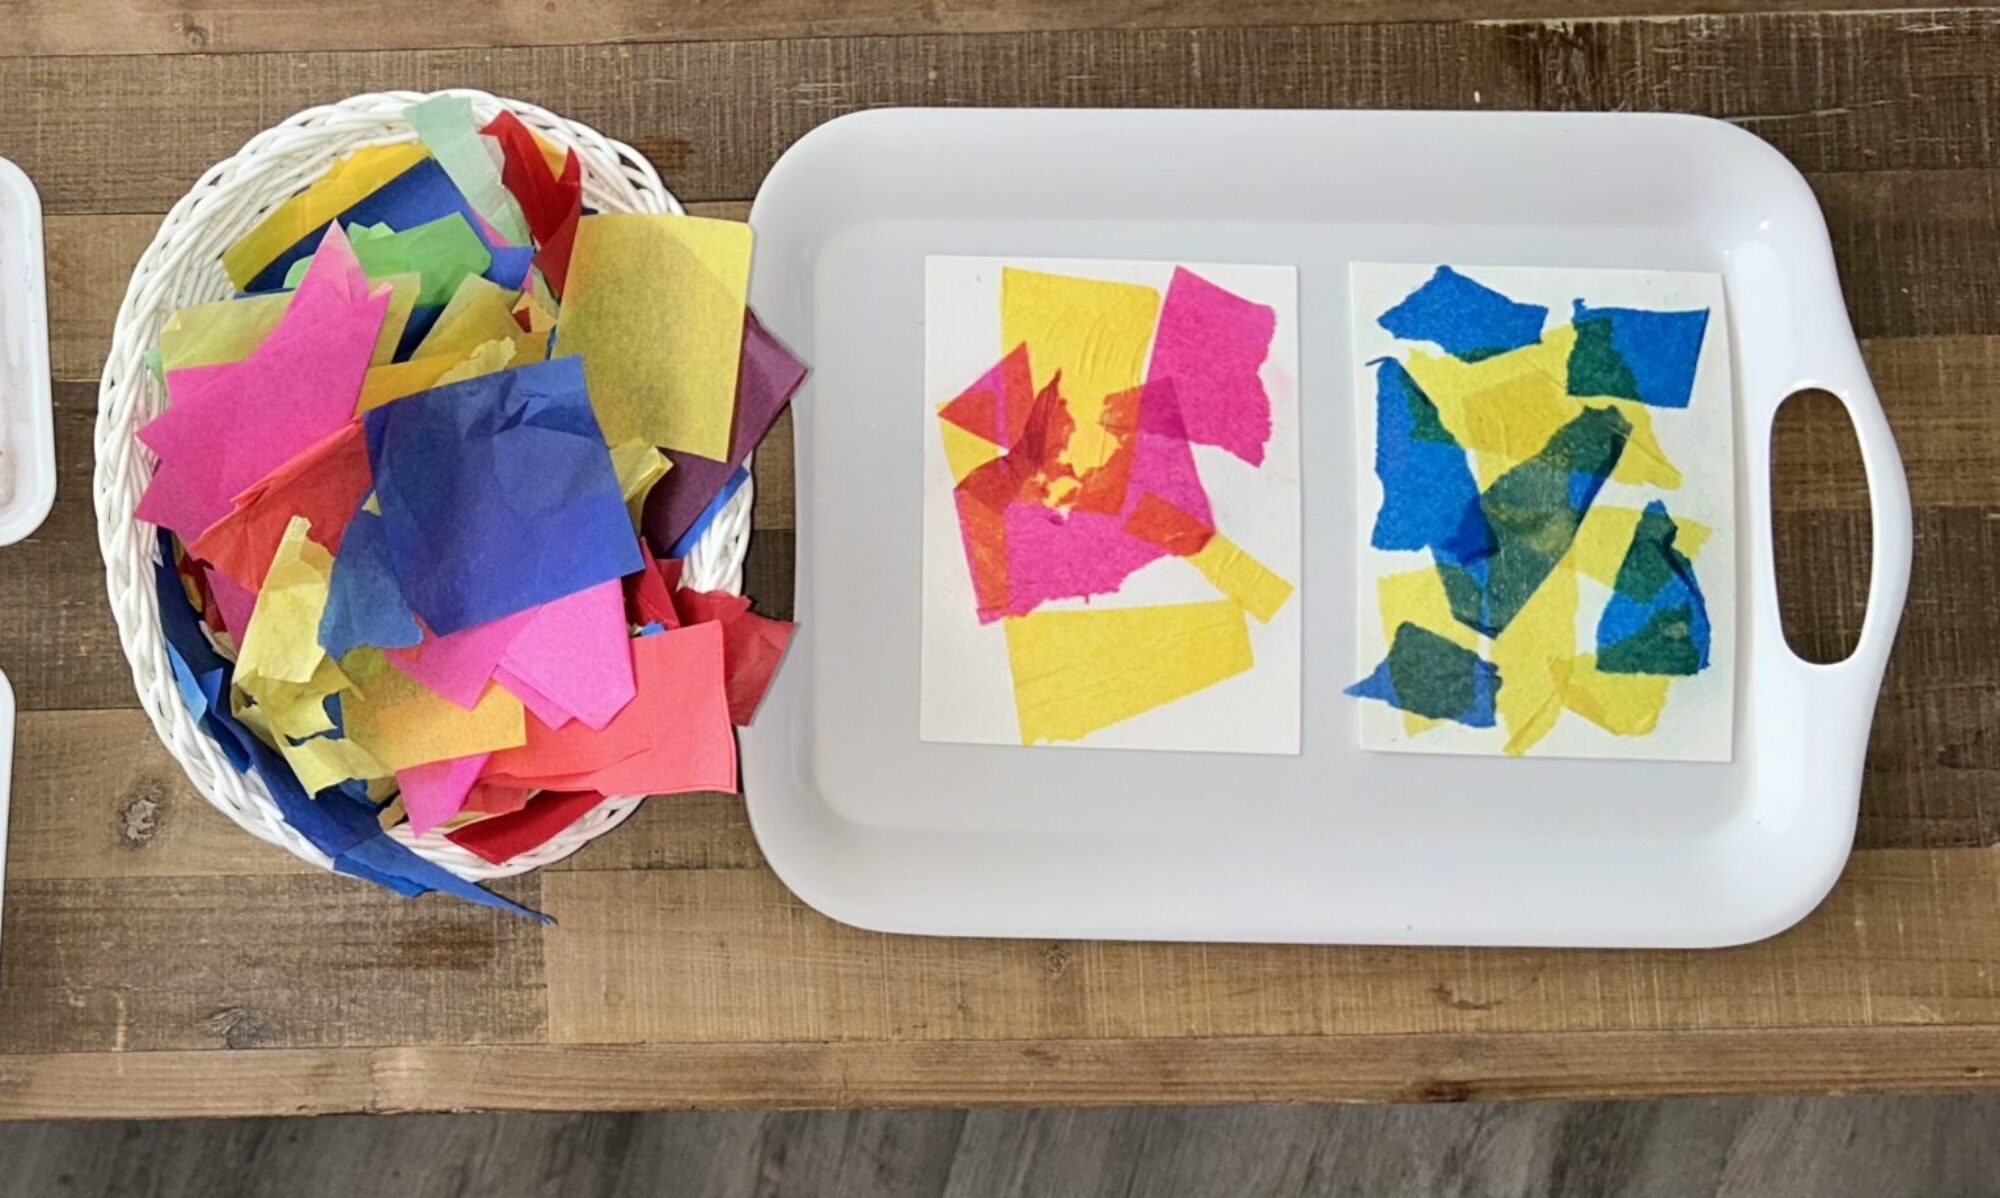
Is there a medium that you didn’t get the chance to use last year, but you’ve really been wanting to give it a go? Now’s your chance! Cross off a bucket-list lesson and spring for a new medium. Or pop into your local art store and browse the aisles until something strikes your fancy. The possibilities are endless! Think about the brilliant colors of oil pastels, modeling clay, seeds, beans, paint swatches (from the local hardware store), and even “found” items like recycled cardboard, magazines, or plastics.

montessori art ideas, jelly fish art project

2. New Art Projects

More than likely, you’re going to start the year by teaching the Great Lessons. And, chances are, you’re going to have a stack of story books that you’ll use and share with your students. So why not look to those books for inspiration? You can highlight the artist’s illustrations or just pull ideas or scenes from the book and make that into an art project. Try extending this idea and move past the story books and into different subjects. For example, if you’re studying the cosmos, create an art project based on that topic.

5 NEW Ways to Tackle Montessori Art This School Year

Over the summer I shared the the book “Hole in the Bottom of the Sea” with kids in my art camp. It shows sealife like jellyfish, crabs, sharks, and seaweed, in a really fun, colorful way. Once we were done reading the book, we made fun painted crafts and created sharks out of up-cycled paper rolls. We also did fish sponge stamps, paper plate jellyfish, crab stamps, and fish-shaped water paintings complete with googly eyes. This one book provided so much inspiration, and it was easy for the kids to make connections to what they had learned about the ocean.

montessori art projects

If you’re ever stuck for ideas, Pinterest can be a huge life saver. Just log on, type in the theme or topic you have in mind, add “art project” or “craft” to your search, and you’ll instantly have hundreds of options to choose from! Likewise, your peers and fellow teachers can be a great resource in helping you come up with new art projects this school year. (Follow my Pinterest Boards here)

3. Ask Parents to Help Out

There are two ways parents can really help with art in your classroom, the first is by providing a few of the supplies. At the beginning of the school year, send out a supply list request and ask parents to contribute or donate what they can. You can create a specific wish list or let parents give the supplies they find the most interesting. Most parents understand that art supplies can be expensive and will be willing to help out.

The other way parents can inspire your art lessons is by through volunteering and teaching an art project themselves. So many teachers have shared with me that they’ve invited parents to teach an art project based on their heritage or culture, and it’s always a big hit with students. For instance, I saw one parent come into a classroom and show the kids how to create tinfoil art; the parent presented the entire lesson and the teacher and aides helped the students put it into action.

4. Start Off with an Inspiration Gallery

I’d encourage you to find a spot in your classroom to specifically highlight visual art. You can post students’ artwork or pull together items and pieces that inspire you. A focal point like this not only supports art literacy, but having a place where students can see other artwork will actually inspire them to come up with some really amazing ideas of their own. It might even lead to some inspiration for a few projects for you!

montessori art shelf, how to set up

5. Let the Art Shelf Do Its Job

If you haven’t already set up an art shelf in your classroom, this year is the year to do it! I just posted a blog on art shelf essentials. When your art shelf is stocked and all the art supplies are visible and within reach, students can have at it whenever inspiration strikes.

There you have it! I just wanted to give you a few quick tips to help you approach art with a fresh perspective this year. If you’re still stumped for ideas, check out my book “Introducing Visual Arts to the Montessori Classroom;” in it, I list out tons of ideas (organized by theme and subject), so that can serve as inspiration when you need it as well. And if you haven’t already, sign up for my newsletter—every month I’ll be sharing an awesome, really-detailed art lesson specific to the Montessori classroom.


3 to 6 Art – Early Childhood Montessori Teaching Resources

Sign-up to receive video

The Phases of Art Development is a quick digital course that explains how art making can help students develop their creativity, fine-motor skills, and focus. More importantly, I share what types of projects students at every age are capable of completing safely, and without making a mess.

Best of all—it’s free! To sign up for the course, click here.

All rights reserved © 2024, Nature of Art®

No part of this blog may be used or be reproduced in any manner whatsoever including reproducing, publishing, performing, and making any adaptions of the work – including translation into another foreign language without written permission except in the case of brief quotations embodied in critical articles and reviews. Nature of Art® Publishing P.O. Box 443 Solana Beach, California 92075.