Best Drawing & Painting Papers Size For Kids

Best Drawing & Painting Papers Size For Kids

Today day I want to share Best Drawing & Painting Papers Size For Kids, and why I Use Small Papers instead. My signature hack which you can learn by reading my books and curriculum, is to use always start with small quarter-size papers instead of large paper size.  It might seem too small, but there are many amazing reasons why I have been doing this for years. So let me share all my reason why you want to choose the best drawing & painting papers sizes for kids.

Best Drawing & Painting Papers Size For Kids, boy watercolor painting

Best Small Paper Sizes

First, after teaching thousands of children how to draw and paint, I realized a large piece of paper is really hard to fill up. The second thing is young children are not planning just quite yet, and they go through paper fast. Older kids plan more ideas out, but beginner artists are just exploring. So I like to slow them down by giving them small paper sizes to work with. This is why the Best Drawing & Painting Papers Size For Kids is to use smaller choices.

boy painting a small acrylic paper

Use Quality Paper

Another important thing is that I only use quality types paper for drawing and painting. Choose thick uncoated card stock or watercolor paper. This way you can give more quality paper to kids by taking one large size and getting four parts out of it! For drawing, you can use simple copy paper, the kind you use in your printer. 24# bond uncoated. I quarter these from an 8.5 x 11 sheet and get 4.25 x 5.5. You can also quarter doodling scrap paper to this size. Kids love rummaging through baskets of small papers. This is my signature hack! I have been sharing this tip for years.

Best Drawing & Painting Papers Size For Kids, download
texture small paper size, boy dipping in blue watercolor paint with string

Small Paper For All Grades

I even give elementary-grade children the same sizes of small paper. If children need or ask for a larger piece of paper, you can give them the size they need. I just like to encourage them to plan and have intention before they use a larger drawing or painting paper. The important thing is to give children quality materials without wasting. So the smaller papers are best for kids to start with.

Art Resources

toddler using tempera sticks on small drawing paper size

You can learn more about my art teaching method by reading my books, curriculum, and viewing my art training videos. Many parents and teachers internationally have adopted this idea and given me positive feedback! You can stage these papers on a tray, in a basket, or a card stand. Check out my Best curriculums for drawing and painting grades 6 – 12 years blog here.

Be Eco Friendly,

Spramani

girl outdoor sketching on small drawing paper with pencil.

Best Paper Size Blog Summary

Using small papers for drawing and painting in art classes has many benefits. Spramani suggests using small, quarter-size sheets to save resources and boost creativity. These smaller papers make it easier for young artists to focus, as they don’t have to fill large sheets, which can be overwhelming. High-quality materials like thick card stock or watercolor paper ensure good results without wasting paper, since one big sheet can be cut into several smaller ones. This method is good for any grade level and is eco-friendly. Spramani encourages planning before using bigger sheets to help students create intentional art. Many teachers and parents have adopted this approach and found it helpful. For more tips, Spramani provides resources in her books and art videos.

Best Drawing & Painting Papers Size For Kids, materials list download
Best Drawing & Painting Papers Size For Kids, elementary pdf download

arts and craft book by Spramani Elaun

Spramani’s Books

Teach children visual arts

Curriculum For Children

Get step-by-step art curriculum to teach visual arts. Check out our 4 art curriculums:
Painting
Drawing
Color Theory
Clay Modeling

All rights reserved © 2024, Nature of Art®

No part of this blog may be used or be reproduced in any manner whatsoever including reproducing, publishing, performing, and making any adaptions of the work – including translation into another foreign language without written permission except in the case of brief quotations embodied in critical articles and reviews. Nature of Art® Publishing P.O. Box 443 Solana Beach, California 92075.
Montessori Books – For Elementary Guides, Teaching Art To 6 -12 Children

Montessori books for elementary students

Are you eager to teach your Montessori students art lessons, yet uncertain about where to begin? Ready to dive into the world of elementary art? With the world wide web and social media saturated with Montessori art projects, many guides find themselves at a loss. Which Montessori art lessons should take precedence? How do you select the right mediums? Do you need to be an artist yourself to lead art lessons effectively? I’ve created a Montessori book for teaching elementary children 6-12 for guides who need to understand art literacy and where to start teaching art lessons.

Book -Primer

This Montessori essential art guide offers clear, concise, and practical insights on establishing art programing. So Montessorians can get clear guidance, instructions, tips, and best practices.

Also, covering key visual art concepts, the optimal sequence of essential steps, and valuable insights. This book offers actionable advice aimed at supporting beginner guides and parents alike.

By simplifying ideas surrounding art lessons and subjects, addressing common questions, and tackling challenges head-on, this guide empowers Montessorians with the knowledge and resources necessary to excel as an art facilitator.

Spramani Elaun, an author, International Montessori Art Trainer, and art curriculum developer, is here to guide you. With her sensory art method and expertise as the founder of Nature of Art® art school , she has empowered tens of thousands of students to explore painting and drawing.

Books Topics

  • Cover the essential visual art standards
  • Identify foundational building blocks and key initial lessons
  • Show you how to select suitable art materials
  • How to set-up art environments
  • Set up a proper Montessori art shelf effectively
  • Learn what art elements should be taught in elementary grades
  • Master Effective Teacher Management
  • Implement optimal art routines
  • Create Engaging and Meaningful Art Projects
  • Understand the Benefits of Integrating Art into the Montessori Curriculum
  • Foster Positive Art Dialogue and Encouragement
  • Receive guidance on crafting comprehensive art lesson plans
Montessori art book table of contents

This book caters to Montessori guides, art instructors, and homeschooling parents. You will gain knowledge and tools needed to excel in teaching art. And by the end of this read, you’ll feel more confident and prepared to create a meaningful art program for elementary students.

Spramani shares foundational principles and practical examples drawn from her extensive 30 years of hands-on art teaching experience. And her systems and processes streamline the art instruction process, making teaching art to children a rewarding.

Color pictures, rich examples, and insightful stories woven throughout this book.

Montessori art book page example of how to stage an art shelf

Author

Spramani Elaun is an author and art curriculum developer from San Diego California. She is a homeschooling mom, art teacher with a science art methodology. Her success is led by observations and real-life practice of how children cognitively and sensorially process art over twenty years. She is the founder of Nature of Art® Art school & Art supply company, Art Teaching Blueprint Montessori Certification Training Program. Spramani holds degrees in Graphic Design, Digital Media Design, Visual Communications, Print Media, and Fine Arts.

All Rights Reserved, © Spramani Elaun 2024

Montessori book author, spramani elaun

Other Books by Spramani Elaun:

Montessori Art: Early Childhood Art Guide – Visual Arts Guide For Teaching 13 month olds – 6 years

Montessori Art – Essential Art Guide for Secondary 6-12 years

Early Childhood Art: Visual Arts Teaching Guide For 13 Months – 6 Years Old

Defining Visual Arts: Children’s standards for arts education, using the language of artist

Kids Color Theory: Contemparay color mixing guide with pigmented colorants for children.

Kids Painting: Teach young kids how to paint, materials & set-up guide

Clay Play: The natural art method that aligns with a child’s growth.

Nurturing Children in the Visual Arts Naturally

Introducing Visual Arts to The Montessori Classrooms: The natural art method that aligns with a child’s growth

arts and craft book by Spramani Elaun

The Power of Anticipatory Sets: Energize Your Classroom with Art

The Power of Anticipatory Sets: Energize Your Classroom with Art

I’m excited to share a little secret with you about having an engaging art lesson opener. However, at times, we tend to overlook its significance, and that’s something we need to change. As educators, it’s imperative that our lesson openers not only pique interest but also align with our students’ existing knowledge. If the opener fails to captivate or doesn’t resonate with the students, its impact dwindles. My art method is firmly grounded in this principle; I love connecting art lessons with what my students are already familiar with or studying in the classroom! In some educational approaches, anticipatory sets are used in a similar manner. So I’m excited to dive into the power of anticipatory sets and how they can energize your classroom.

The Power of Anticipatory Sets: Energize Your Classroom with Art

What Exactly Are Anticipatory Sets?

In simple terms, anticipatory sets function like a warm-up or introduction to prepare you for something exciting. Just like stretching before exercising or watching a movie trailer before the main film, anticipatory sets serve to prime your mind, ignite curiosity, and generate excitement about what’s in store for your learning journey. In the realm of education, anticipatory sets are activities or prompts that teachers employ at the start of a lesson to activate your prior knowledge, stimulate curiosity, and get you enthusiastic about what you’re going to learn. It’s like setting the stage for a fantastic learning experience!

Sadly, in some lessons, anticipatory sets are absence, which can lead to boredom or disengagement among students. Anticipatory sets effectively convey what students will be learning that day, which can fuel their engagement. We need to infuse creativity and engagement into our openers. For instance, we can kick things off with a short video highlighting a artist, delve into an intriguing news article, or foster interactive discussions. Technology, such as an appealing slideshow, can peek interest!

Engaging Art In The Classroom

Now, let’s delve into the process of creating engaging art starters (Anticipatory Sets). Before crafting one, it’s a fantastic idea to gauge your students’ existing knowledge. You can accomplish this by asking them questions or conducting surveys. Simply inquire about their familiarity and interests related to the topic.

Furthermore, strive to establish a connection between the opener and your students’ lives. What’s currently capturing their interest or fascination? You can unearth ideas by exploring online resources or staying updated with the latest news.

Here’s where the fun begins – let your creativity soar! Think outside the box and devise unique ways to present your opener. When developing it, consider drawing comparisons between the new material you’re introducing and concepts your students are already acquainted with. This helps them forge connections and deepen their comprehension. 

The Power of Anticipatory Sets: Energize Your Classroom with Art, samples to draw

Easy Anticipatory Ideas

Here are some fun easy to use an anticipatory set to introduce an art project:

Artifacts and Props: Begin by gathering intriguing artifacts or props relevant to the upcoming art project. For instance, if your project involves clay sculpting, display small clay sculptures or pottery pieces in the classroom.

Mystery Box

Mystery Box: Introduce a mystery box adorned with colorful wrapping paper, placing it at the center of the classroom. Share with the students that it holds a special surprise connected to their art project.

Sensory Exploration

Sensory Exploration: Launch the anticipatory set by allowing students to explore the displayed artifacts and props. Encourage them to touch, smell, observe, and interact with these objects. Pose open-ended questions like, “What do you notice about these sculptures? How do they feel? What do they remind you of?”

Predictions and Discussion

Predictions and Discussion: Following the sensory exploration, facilitate a class discussion where students can share their observations and make predictions regarding the art project based on the artifacts and props. Encourage them to employ their imaginations and make educated guesses about the upcoming activity.

Unveiling the Surprise

Unveiling the Surprise: This is my favorite!, unveil the mystery box to reveal the materials or tools required for the art project. Explain the connection between the artifacts and props and the project, detailing how students will have the opportunity to create their own artworks inspired by these items. 

By using an anticipatory set, you’ve sparked curiosity, engaged their senses, and generated excitement for the forthcoming art project. In my art teaching method, I use inspiration to set up an art shelf, creating the same type of student curiosity. If you want to learn more about this topic, order my books and curriculum HERE.

I hope these suggestions and tips will inspire you to approach openers with creativity!

And remember, integrating art lessons with other academic subjects can create a comprehensive learning experience.

Warm regards,

Spramani

HOW TO STAGE A MONTESSORI ART SHELF TRAINING


arts and craft book by Spramani Elaun

Spramani’s Books

Teach children visual arts

Curriculum For Children

Get step-by-step art curriculum to teach visual arts. Check out our 4 art curriculums:
Painting
Drawing
Color Theory
Clay Modeling

All rights reserved © 2024, Nature of Art®

No part of this blog may be used or be reproduced in any manner whatsoever including reproducing, publishing, performing, and making any adaptions of the work – including translation into another foreign language without written permission except in the case of brief quotations embodied in critical articles and reviews. Nature of Art® Publishing P.O. Box 443 Solana Beach, California 92075.

10 Fun Art Activities

By Spramani Elaun

Share With Your Montessori Students

As a Montessori teacher, you know it can be overwhelming to choose the right fun art activities. But, that is why I’m here with some guidance on which Montessori art activities for The Great Lessons are appropriate for your classroom and enjoyable! Art activities related to The Great Lessons are my favorite to teach. Because they allow children to explore their imaginations and get creative in a concrete, meaningful way. From drawing explosions to painting supernovas, students can visualize and understand such a big concept.

color pencil mandala fun art lesson idea

Integrating art with science helps children express ideas creatively, stimulates their senses, and provides tactile experiences. So when it comes to teaching the universe, there is no reason you can’t integrate art and science to have some fun. To get started, take a look at some of your classroom books for visual inspiration. One of my favorite books to use is “Born With a Bang: The Universe Tells Our Cosmic Story” by Jennifer Morgan. The illustrations are colorful and beautiful and can be used for many art activities.

art activities, blow paint

And for more fun art ideas, download my top 5 Montessori Big Bang Art Activities.

art download for Montessori children

Adjustable Activities

These activities can easily be adjusted to fit early childhood, lower elementary, or upper elementary classrooms. Older students will, of course, pay more attention to details, while the early childhood students will engage with these art activities in an open-ended fashion. Fun and fascinating science topics you can incorporate into art projects. Below are ten art projects that Montessori teachers can use to teach elementary students.

collage paper art activities

Art Ideas

1. Create a Cosmic Painting: Take your students on a journey through the universe with a cosmic painting activity. Discuss the Big Bang and the creation of the universe with your students, then have them create a painting depicting the birth of the universe.

2. Constellations: Give your students a chance to create their own constellations using paint or clay. Educate them on how the Big Bang gave birth to stars and how stars are the building blocks of constellations.

3. Paper Mache Planets: Introduce the concept of planets and solar systems by having your students make paper mache planets. You can use this opportunity to discuss the origins of planets and how they were formed following the Big Bang.

4. Galaxy in a Bottle: Encourage your students to learn about galaxies by creating a galaxy in a bottle. This can be a great way to explore the vastness of space and how galaxies form after the Big Bang.

5. Moon Phases Art: Discuss the moon phases and how they are caused by the changing position of the moon. Have your students create art that depicts the different phases of the moon using paint or chalk.

6. Starry Night Sky: Teach your students about stars by creating a starry night sky mural. This activity can help them learn about the different types of stars and how they are formed.

7. Cosmic Collage: Give your students an opportunity to create a cosmic collage by cutting out pictures of planets, stars, and galaxies from magazines and newspapers. Discuss the Big Bang and how all these celestial bodies came into existence.

 Science Art Montessori

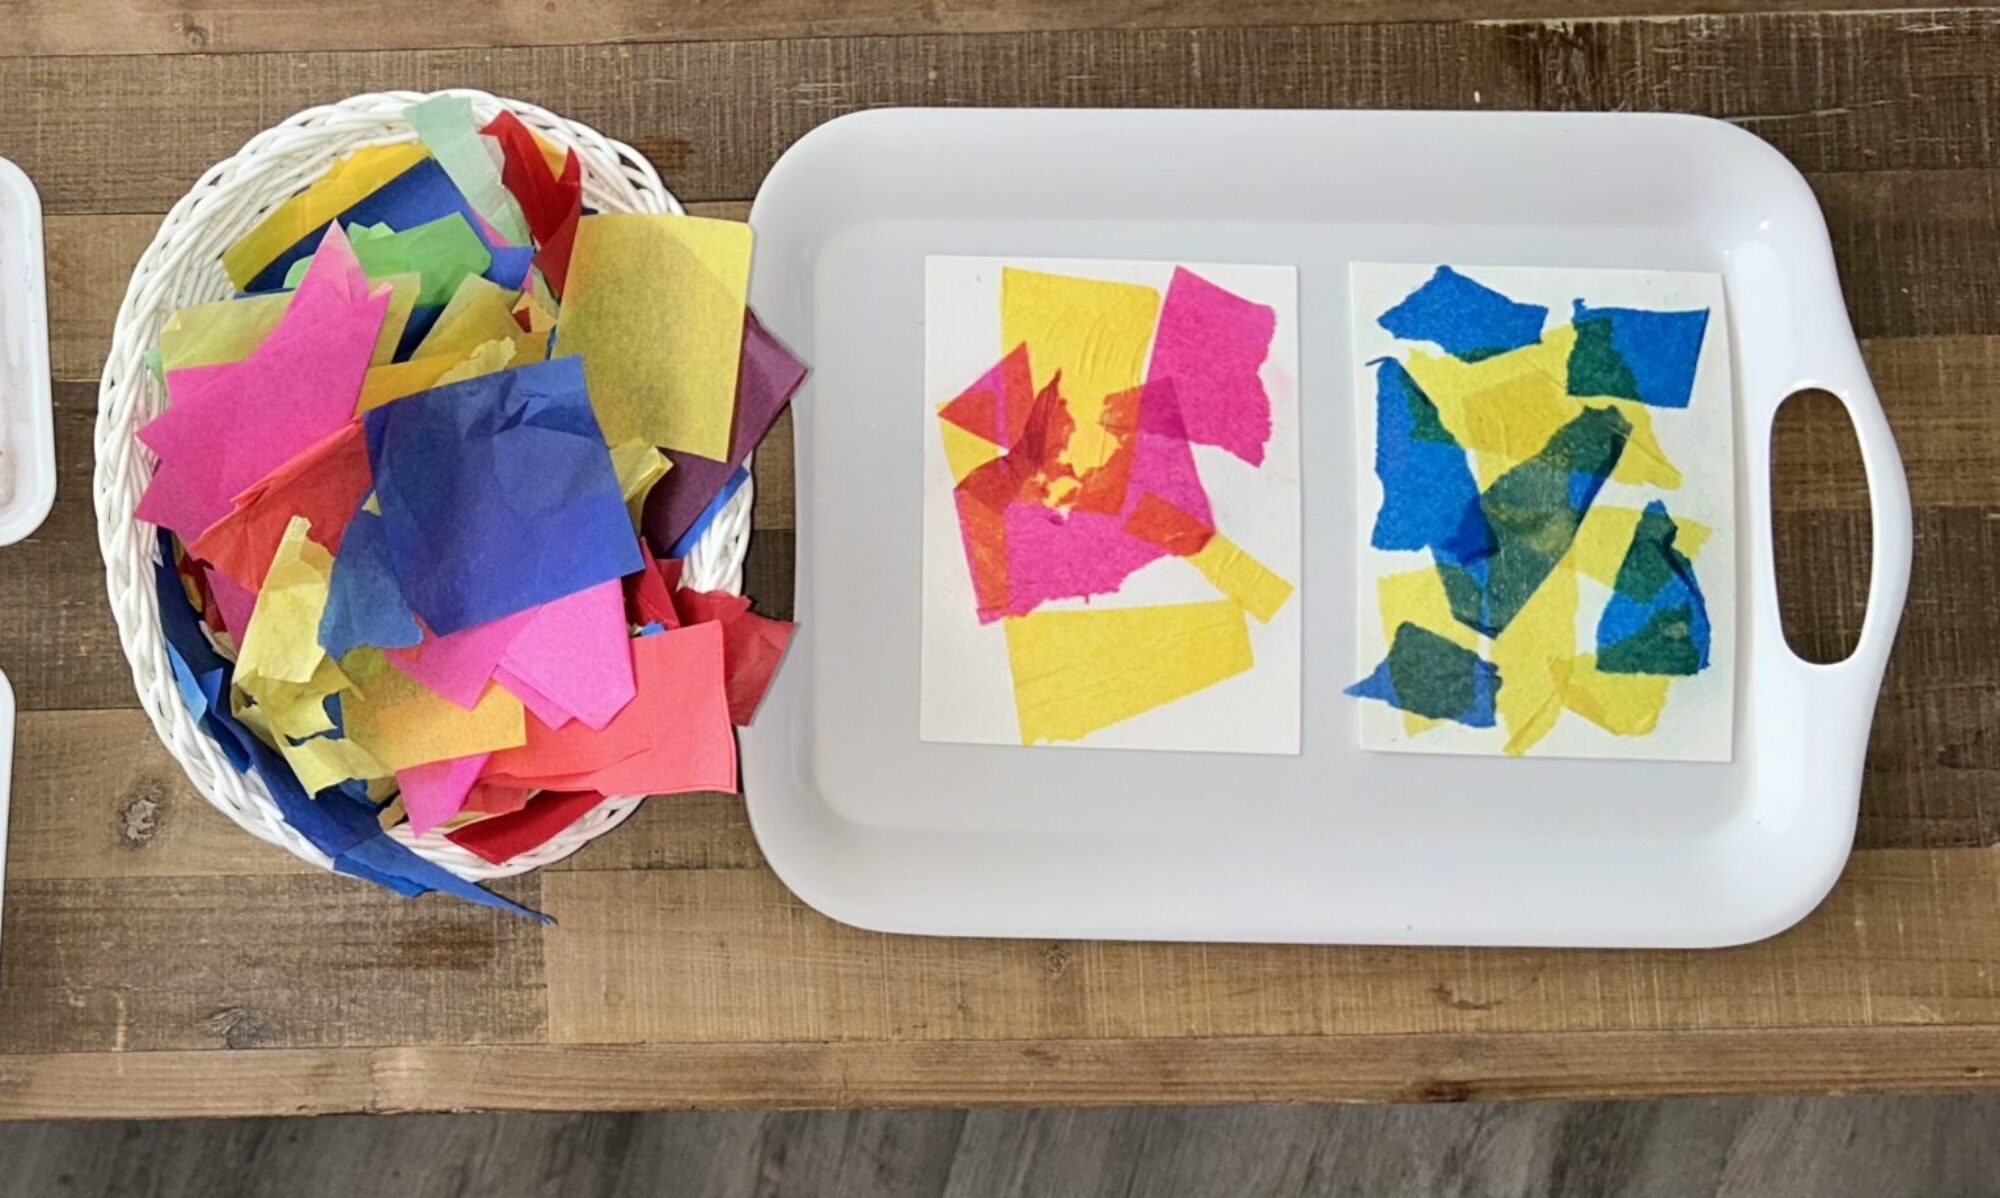
8. Sun Catchers: Discuss the origins of our solar system’s star, the sun, and have your students create sun catchers using colorful tissue paper. This can be a great way to explore the different colors of the sun and how they are visible to us.

9. Universe Mobile: Make a universe mobile to showcase the Big Bang and the creation of our universe. Students can create planets, stars, and galaxies to hang from the mobile.

10. Astronaut Art: Discuss space travel and astronauts’ role in exploring space. Let your students create astronaut art that depicts them exploring the galaxies and space beyond, giving them a glimpse into the vast universe beyond our planet.

children making clay objects in a montessori classroom with spramani

By incorporating these art projects into your Montessori lessons, your students can learn the vastness of space in a fun and interactive way.

montessori art curriculum

Order my Montessori Art Books & Curriculum HERE

arts and craft book by Spramani Elaun

Spramani’s Books

Teach children visual arts

Curriculum For Children

Get step-by-step art curriculum to teach visual arts. Check out our 4 art curriculums:
Painting
Drawing
Color Theory
Clay Modeling

All rights reserved © 2024, Nature of Art®

No part of this blog may be used or be reproduced in any manner whatsoever including reproducing, publishing, performing, and making any adaptions of the work – including translation into another foreign language without written permission except in the case of brief quotations embodied in critical articles and reviews. Nature of Art® Publishing P.O. Box 443 Solana Beach, California 92075.

Routines & Using Art Language Stops Chaos

Last week I started a series on the topic of art routines Part 1. By having routines in place you can stop chaos during art sessions. Having these routines in place has helped me in art classroom management.

  • Art Smocks
  • Art Material Set-up
  • Art Language

Continuing on this topic I’m sharing my insights on art talk & the artist language we teach. If you are not familiar with what art language means, it’s how we describe artworks and our process. It’s art’s own language. You can learn more by reading these books Defining Visual Arts, or Early Childhood Art Guide.

Montessori Art Routines

Art literacy is not only about making art, but also teaching students how to communicate. Keep in mind I’ve been teaching children for over 30 years. These routines and expectations came together over a long period of time. So it will take time for you to practice.

Over the years I’ve had my share of students disrupting my art classes. At some point I reflected on the times I spent in fine art studios working with other artists. I wanted my teaching sessions with kids to have that same feeling of expressive openness. So I came to the conclusion that my role was not just to show them how to make art, but also how to behave and talk like an artist. I created fine art studio behavior models (art expectations).

  • Only communicate in art language
  • No negative peer critiquing
  • Observe like an Artist
  • Reading Instead of Disturbing

As a now roaming art specials visiting classrooms across the county, I use these with all ages from 3 – 12 years.

Communicate in art language

This means you are talking about your art, your art process, or helping someone with their art. Not what you are eating for lunch, or what happened at recess. This is also how I can hear when my students are getting off track.

No negative peer critiquing

Unnecessary comments could affect a students confidence to express openly in the classroom. I make time to explain how acceptable critiquing is using art language. I explain that I will make time for open refection time. And any student can volunteer to share with the classroom their art. I describe what positive critiquing sounds like.

Example

Negative – “Why does that nose look like that, it looks weird!”

Vs.

Artful talk – “I noticed he used thick wavy green lines to create the nose. That’s not something I expected to see in his drawing.”

or ,

“I wonder why he put purple leaf shapes in his nature drawing, rather than making green shapes”.

You can model this type of art language with practice. If you would like to learn how to talk to children artfully, check out this mini art training course.

Observe like an artist

I explain that if they want to look at someone’s art, to walk quietly around them, and observe with eyes only. So not to interrupt a working artist. In fact I show my young students how to observe by putting their hand behind their back. The action is like they are viewing art in a museum, to not disturb the art. I explain it’s OK to be curious and look at everyone’s work, but observe like an artist.

Reading Instead of Disturbing

When a student is disturbing the classroom, I give them a choice. Join us in art, or dismiss yourself into reading quietly until we are done with art. This usually works because the student feels left out when everyone is enjoying art. Generally students usually ask to return back to art. I will ask if they agree to participate artfully, leaving it up to them.

Love to hear your feedback!

arts and craft book by Spramani Elaun

Spramani’s Books

Teach children visual arts

Curriculum For Children

Get step-by-step art curriculum to teach visual arts. Check out our 4 art curriculums:
Painting
Drawing
Color Theory
Clay Modeling

All rights reserved © 2024, Nature of Art®

No part of this blog may be used or be reproduced in any manner whatsoever including reproducing, publishing, performing, and making any adaptions of the work – including translation into another foreign language without written permission except in the case of brief quotations embodied in critical articles and reviews. Nature of Art® Publishing P.O. Box 443 Solana Beach, California 92075.

Montessori Art Routines & Expectations– Part 1

I have been getting some good questions from parents and teachers about art routines. So I will be doing a 3 part series explaining my most successful Montessori art routines and expectations.

Montessori Art Routines & Expectations

Art routines can help you not worry about prepping daily, plus stop classroom chaos! When students understand routines they know how to encounter the art space. When you design art routines there’s less guess work for the student. Plus children actually thrive and succeed with routines in place. Outlining routines lays the foundation for actions and expectations from your students.

Montessori art routines can be simple and last only minutes. While others may be complex with students working up to an hour. Children already have routines that start the minute they get out of bed each morning. Like brushing their teeth, dressing, eating, and getting to school. In most cases you usually have your students in routines at the start of the day. So why not set them up for art.

Today I will share what some of these routines look like. I’ll share two key important routines to start with, and the others in part 2 and 3 in this series:

  • Art Smocks
  • Art Material Set-up
  • Art Language
  • Process-Based
  • Creative Flow

Montessori Art Routines & Expectations

These routines have worked with tens of thousands of children I’ve worked with. The first expectation is that art is messy and I have a system in place to ensure messes don’t spread around the room. This system keeps wet mediums from spreading around the room or on clothes. I have this conversation before children touch any mediums. Here’s how that might sound.

“Today I thought I would introduce you to the art space I’ve designed to work in, and how to manage the artist materials. The art space is available to those who agree to follow my simple rules.”

With that agreement, then you can move into the smock demonstration.

I explain how messes accrue from spills, hands and splatters. I further explain how the space is designed to manage that type of mess. The first thing I do is introduce the artist’s smock (apron). I explain how artists wear a smock when working on art projects. Then I explain the function of a smock is to keep their clothes and hands clean. I explain when their hands become spoiled, they will use their smock to wipe them, kind of like a big napkin. I explain that artists do not go back and forth cleaning their hands while working. This helps to keep mediums from spreading around. They stay in their work space and use their smock to manage that type of mess.

I don’t have rags or napkins nearby to wipe with. This eliminates paint, glue or pigmented mediums from smearing around the space. Cleaning hands happens after everything is put away, and they are ready to transition out of art. Then I show them what this action looks like by wiping my hands on my smock. I also show them where to find their smock, how to put it on, and where to return it.

I recommend you have your students always wear a smock or art tee-shirt when working in these spaces. If they are working like an artist, they should dress like an artist. It may take time to implement. But if you keep reminding them, everyone in the class starts to behave artfully.

Material Set-up Routines

Set-up presentations are key and can support your students in many ways. By introducing these routines children will be able to set-up independently. This helps with getting into creative flow states. They will be able to construct and use the materials in artful ways. And be able to clean-up the materials on their own. They will also take on the responsibility of leaving the materials ready for the next student to use.

So what type of material set-up routines should you introduce to your students:

  • How to gather art materials
  • The expectations of how they will work in the art space
  • How to use tools & mediums properly
  • Where to store artworks
  • How to clean up the materials
  • How to return them for the next student
  • How to transition out of the art space

Most art activities require students to get everything they need to construct. So beforehand you will need to decide which materials to stage for easy access. Group work is where you set-up stations for students to pick up their materials, or you pass them out. Independent work is when you stage the materials for students to collect on their own. Either way you will have to be sure everything is ready to access. For both you still want to explain the expectations and procedures and order of work flow.

Example: You will gather around the circle so I can discuss the art mediums, how they work, and show art technique. And even share some artist samples. Then direct when it’s their turn to get their materials. How long they work, and where to store completed artworks. How-to return the materials back to their station, how-to be dismissed to put their smock away and wash up.

After you have presented a few times, your students will understand these routines.

Diverse Learners

Chaos happens when students don’t understand their individual role. You might have diverse learners in your classroom. Some might be good at art, but not good at following the linear work flow. In this case you may need to group your diverse learners into a smaller group. To process the instructions slower giving them more time to go through the flow of the activity.

Some might get distracted or confused in larger group commotion. In this case I would recommend you set aside time to work with them in a slower smaller paced group.

You or an assistant can work throughout the work cycle showing them the steps. You may have to slow down every step. Showing them how each step looks like. Picking up the materials, working along side them, and how to store finished artworks. Even how-to gather and clean and return materials. Make time to answer their individual questions. You will eliminate the chaos and your studwents will fall into routines.

If you would like to know more about my art method, check out my books, curriculum and teacher professional development [PD] HERE.

Warmly,

Spramani Elaun – Art Instructor

arts and craft book by Spramani Elaun

Spramani’s Books

Teach children visual arts

Curriculum For Children

Get step-by-step art curriculum to teach visual arts. Check out our 4 art curriculums:
Painting
Drawing
Color Theory
Clay Modeling

All rights reserved © 2024, Nature of Art®

No part of this blog may be used or be reproduced in any manner whatsoever including reproducing, publishing, performing, and making any adaptions of the work – including translation into another foreign language without written permission except in the case of brief quotations embodied in critical articles and reviews. Nature of Art® Publishing P.O. Box 443 Solana Beach, California 92075.

How To Bring Art Into The Classroom – Elementary

How To Bring Art In To The Classroom – Elementary
Elementary Montessori

By Spramani Elaun

Every Montessori school should have an art environment. Whether an art shelf inside the classroom, dedicated classroom, or specials visiting. Elementary students should be engaging in some type of art lessons regularly. Allowing children to express creativity plus building basic skill sets. One of the reasons art programs exist is to expose children to different kinds of mediums. In this blog I want to share some ideas on How To Bring Art Into The Classroom

When children are exposed to different art activities they are likely to find the right art domain they enjoy. As children find the right art experiences they enjoy, they become independent as they practice these skill-sets. When elementary students work independently they can also self regulate their own stress with hand work in the classroom. Independent working students can also reach creative flow states! So where should you start with to bring art into the classroom?

6 Art Areas To Focus On

  • Schedule Art
  • Choose Art Subjects
  • Teach Art Elements
  • Choose Art Mediums
  • Choose An Artist Technique
  • Teach Skill Building Foundations
  • Focus On Art Direct Aims

Schedule Art Lessons

Start with scheduling regular interactions with art making in the classroom. Schedule daily, weekly or even bi weekly art lessons. Even bi monthly if your teaching schedule is super busy. I did this as a visiting Montessori art specials and I heard from Montessori guides how the children learned so much from just 4 visits! Once you have chosen the day, move to creating time segments. Be sure your timeline is specific to lower or upper elementary attention spans.

Art Subjects To Teach

Then move into deciding which visual art subjects you want to explore. I recommend choosing from my five art domains. Subjects like painting or color theory. Learn more about the 5 domains by buying: Defining Visual Arts Book HERE. Once you decide the area you want to focus on then you can decide on the lesson plans.

How To Bring Art In To The Classroom – Elementary, students crafting

Art Elements To Teach

To meet the national art standards it’s important to teach children the Art Elements. The Art Elements cover things like line, color, shape – etc. Each one of your art lessons should always focus on a key art element. I can’t stress enough how important this is to a solid art program. I meet many Montessori guides not even aware of art literacy standards. Even how to teach the artistic process, how-to scaffold art lessons, or what art sequences should come next. Learn more about the Art Elements by buying: Defining Visual Arts Book HERE

Art Mediums & Technique

Then the fun stuff starts by deciding on which mediums to experiment with first. This also includes what presentations and demonstrations to schedule. For example you could teach the subject of painting and focus on the watercolor medium. Then show children a crayon technique – wax resist marks. Or let’s say you decide to integrate a sensory craft with zoology. Like cutting sea life shapes from paper with a collage – technique.

Montessori Elementary Art | How To Bring Art In To The Classroom

Building Art Skill-Sets

The best advice I have for you is to teach how to set-up, clean-up, and prepare the environment for their next classmate, learning to complete the cycle in the Montessori way first is important. This supports independent work through the school year. Then foucs on building skill-sets and don’t waste time on the wrong type of art lessons. Like focusing on the Masters, copying images, or too much process- based art. Try not to focus lessons on copying the Masters artworks. These lessons can be lacking in developing independent art skill-sets or their own creativity. Montessori elementary students need the right order of skill-set lesson first.

Focus on Art Direct Aims

The other important thing I want to share is even if you can’t draw or paint you can still teach proper art lessons. Your own refined skill-sets are not the focus. What’s important is knowing your direct aims. Direct aims like preparing the environment, and presenting the right order of demonstrations. Scheduling and choosing age appropriate art lessons. Indirect Aims will happen like – your students brainstorming or conjuring up original ideas. Even exploration that leads to the most optimal state of creative flow!

Teaching art can be intimidating without any basic knowledge or experience. But I’m here to tell you I’ve taught thousands of parents and teachers. I have lots of preparatory teaching methods easy for you to follow. But here’s a secret… you will learn right beside your students, I promise!

Montessori Elementary Art | How To Bring Art In To The Classroom

Art Professional Development

I invite you… 

No matter what capacity of training you desire, I’ve built art teaching resources you can have access to!

Choose:

Blog Articles

Free Checklist

Teaching Books

Video Training

Art Lesson plans

Sequential Art Curriculum

Professional Development

Montessori In-service Training (email info@Spramani.com)

Art Certification

Custom Art Programing (email info@Spramani.com)

arts and craft book by Spramani Elaun

Spramani’s Books

Teach children visual arts

Curriculum For Children

Get step-by-step art curriculum to teach visual arts. Check out our 4 art curriculums:
Painting
Drawing
Color Theory
Clay Modeling

All rights reserved © 2024, Nature of Art®

No part of this blog may be used or be reproduced in any manner whatsoever including reproducing, publishing, performing, and making any adaptions of the work – including translation into another foreign language without written permission except in the case of brief quotations embodied in critical articles and reviews. Nature of Art® Publishing P.O. Box 443 Solana Beach, California 92075.

How-to teach children age appropriate art activities

I get questions every day on how to teach age appropriate art activities.

I’m going to share some tips to get you on the right track.

I’ll also be sharing lots of resources.

There’s only four important things you should consider when teaching age appropriate art activities:

  1. Use only safe non-toxic children’s art supplies
  2. Focus on discovery exploratory type of activities
  3. Keep steps very minimal
  4. Focus on introducing the basic 7 elements

Early Childhood Art Activities

Very young children from toddler to six years can not plan art ideas out yet. So their art activities should be very exploration and discovery in style. They should only do process based style art activities. These lessons should generally introduce art mediums and art tools. You should only be introducing the very basic elements of art like line and colors etc. If you want to understand what art programs should consist of you can order:

Defining Visual Arts. This book explains what art literacy is for children and what you should be focusing on teaching. If you want to learn all about early childhood art programming you can order: Early Childhood Art Guide, this book shows you how to design an age appropriate art program.

Elementary Art Activities

Elementary age students can plan and create with intention. They are able to imagine an idea and plan it out. They can also follow one to six step instructions. These ages should also work in an exploratory discovery fashion. Allow children full freedom to express their own ideas. This means you should allow them to change the final outcome of their creation and not insist they follow an exact example.

Safe Non-Toxic Art Supplies

I recommend children under the age of 12 years old not use adult grade fine art supplies. Many artist grade supplies may contain hazards pigments like cadmium, lead, formaldehyde, solvents. Some paints may add additives, mildew resistance or other chemicals. Or also have special instructions for handling. These chemicals could be harmful to children not aware of special handling instructions. Pick non-toxic kids products that bare the ASTM D 4236 on them. This is a U.S. labeling law to protect children from dangerous chemicals.

If you start with these four suggestions you will be starting out on the right foot. If you need more guidance I have many training videos, books and professional development. 

Warmly,

SpramaniE laun


Sign up here to watch for free: Phases of Art Development Video


READ BLOG: 

Montessori Early Childhood Materials List

Montessori Upper Elementary Materials List


Order Art Teaching Books HERE


Virtual lessons

Get professional development by taking the ART TEACHING BLUEPRINT


Need to train your teachers?

Book a free zoom consult call, email Spramani @ info@Spramani.com

arts and craft book by Spramani Elaun

Spramani’s Books

Teach children visual arts

Curriculum For Children

Get step-by-step art curriculum to teach visual arts. Check out our 4 art curriculums:
Painting
Drawing
Color Theory
Clay Modeling

All rights reserved © 2024, Nature of Art®

No part of this blog may be used or be reproduced in any manner whatsoever including reproducing, publishing, performing, and making any adaptions of the work – including translation into another foreign language without written permission except in the case of brief quotations embodied in critical articles and reviews. Nature of Art® Publishing P.O. Box 443 Solana Beach, California 92075.

Montessori Practical Life Activity | Winter Wrapping Paper Collage: Cut, Tear & Glue

Wrapping paper collage

Get ready to save all your wrapping paper scraps for a winter wrapping paper collage!
Bring them into the classroom and recycle them to give students the opportunity to create unique pieces of art. Ask your parents and students to collect their home wrapping paper scraps for this Montessori art activity.
This is one of the simplest Montessori practical life activities to keep kids busy. And while I put this into the winter art projects category, you can really do this any time of year, with any type of recycled scrap paper. This art activity is great for all ages, early childhood, lower and upper elementary.
And you can actually teach scaffold tasks while building essential foundational skill sets.

  • Coordination
  • Independence
  • Scissor cutting or tearing
  • Gluing & Pasting
  • Composition
  • Problem Solving

For more Montessori activities related to this project, download my Ultimate Winter Arts & Crafts Idea Guide and check out page 9.

Need more Collage ideas? Read my Collage Ultimate Montessori Collage Guide

wrapping paper collage
Early Childhood Group Collage

Preparing the Environment for Wrapping Paper Collaging


Supplies

  • Wrapping paper scraps
  • Scissors
  • Glue
  • Paper
  • (Optional) pencil and eraser

How to:

There are so many reasons you want to give your students the opportunity to gather their own materials, one is truly allowing the child to work creatively. Gathering allows children to create their own individual creations. Second, this supports problem-solving skill sets. Children will go back and forth working out their design elements.

This project can be done two ways:
1. Let students choose the paper designs they want to work with.
Cut or rip pieces into different shapes.
Using these pieces, they can aim to create a specific object/design or keep it abstract.
Have them move the pieces around their paper and experiment with the design.
Once they’re happy with their image, have them glue the pieces onto their paper.
Or,
2. Have students decide on an image they want to create (fish, butterfly, face, mountains, etc.). Lightly draw an outline of the design onto their paper.
Cut the wrapping paper into shapes that will fit within their image.
Once they’ve put the pieces together to their liking, glue them onto their paper drawing.

winter collage kids arts and crafts

Toddler/Early Childhood Group Collage

Gluing and pasting are essential art practices for young students that lead to advanced craft skills. Here is a simpler setup for early childhood grades as a group activity. You can have a couple of students working at one time, or have one student walk up to this activity table.
For more information on setting up for early childhood children, be sure to read my Early Childhood Art Collage Guide https://montessori-art.com/montessori-early-childhood-art-collaging/

Basic table set up steps:

  • Tape down a large paper filling up a tabletop
  • Tape masking tape down on paper into interesting sections so children can collage inside the open spaces
  • Prepare materials like wrapping paper scraps, glue, scissors in a basket or tray for children to reach easily
  • Demonstrate the movements of tearing, cutting, and gluing onto the large paper
  • When it’s fully covered, slowly pull take off, hang in the classroom as art the children can look at and be excited they took part in

Have fun creating your Winter Wrapping Paper Collage Art!

arts and craft book by Spramani Elaun

Spramani’s Books

Teach children visual arts

Curriculum For Children

Get step-by-step art curriculum to teach visual arts. Check out our 4 art curriculums:
Painting
Drawing
Color Theory
Clay Modeling

All rights reserved © 2024, Nature of Art®

No part of this blog may be used or be reproduced in any manner whatsoever including reproducing, publishing, performing, and making any adaptions of the work – including translation into another foreign language without written permission except in the case of brief quotations embodied in critical articles and reviews. Nature of Art® Publishing P.O. Box 443 Solana Beach, California 92075.

How-to PAINT PAPER like Eric Carle | Montessori Art

How-to PAINT PAPER like Eric Carle | Montessori Art

Paint paper like Eric Carle

Every summer, I host art camps in San Diego, and my students’ top favorite project to do with me is to paint papers! In this post, we will teach you how to paint paper and collage like artist and author Eric Carle. So I thought I would share this fun Montessori art activity you can introduce to your students.

I like to give my students unusual tools, bright paint colors, different colored papers, and crazy things to make interesting textures and patterns. This also prepares papers for future projects that can be cut and be collage into interesting shapes.

Teach the Elements

Painting papers is a great way to teach the Elements and Principles of Design. You can teach texture and patterns, a vital art standard topic children should learn in Montessori art lessons. The artist and author Eric Carle is famous for doing this fun and vibrant method in his book illustrations. Eric Carle is famous for PAINTED PAPERS and collaging them into beautiful creatures featured in all his books. 

Eric Carle, artist and children’s book author


Paint paper like Eric Carle
How-to PAINT PAPER like Eric Carle | Montessori Art

What is paint paper?

Painted paper is basically paint applied onto paper.  You can paint plain white paper or colored paper.  Paper painting can be created with different mediums like watercolor, gel paints, tempera, or acrylic paints (any paint). 

Children painting colors

What can you do with painted paper?

Like Eric Carle, the famous artist, paint the papers first, let them dry second, then third cut them up into new collage artworks. Eric Carle’s famous painting papers created The Very Hungry Caterpillar book with this unique painted technique.

Collaging with painted papers
ColColl
Montessori art painting supplies

What tools do you need to make painted papers?

  • Paint mediums
  • Paper
  • Paintbrushes
  • Interesting objects that make patterns and textures
  • Drying rack
  • Interesting tools
Painting supplies

Painted papers can be taught in a process-based manner

Process-based painting is more about the experience rather than following directions. When kids paint process-based, they are able to go in any direction they choose. They can explore any texture, use any color, and have any outcome happen, but have very cool painted paper; they can later cut turn into another art piece. Process-based art lessons and painted papers are a great way to start teaching Montessori art lessons.

Spramani Elaun

Check out my Kids Painting Book Here


Early Childhood Guide – Book

You’ll learn:

  • The importance of early Art Literacy
  • How to speak the ‘Artist Language’
  • The art subjects students need to know
  • The characteristics of child artists
  • Methods and approaches to teaching
  • How to create art activity environments
  • The best art materials for your classroom
  • How to plan level-appropriate activities

Buy Guide Now!

arts and craft book by Spramani Elaun

Spramani’s Books

Teach children visual arts

Curriculum For Children

Get step-by-step art curriculum to teach visual arts. Check out our 4 art curriculums:
Painting
Drawing
Color Theory
Clay Modeling

All rights reserved © 2024, Nature of Art®

No part of this blog may be used or be reproduced in any manner whatsoever including reproducing, publishing, performing, and making any adaptions of the work – including translation into another foreign language without written permission except in the case of brief quotations embodied in critical articles and reviews. Nature of Art® Publishing P.O. Box 443 Solana Beach, California 92075.