The Ultimate Guide for Creating Montessori Art Lessons

Ultimate Montessori Art Lesson Guide, elementary schools

The Ultimate Montessori Art Lesson Guide is the perfect resource for Montessori teachers who want to learn how to prepare art lessons that keep students engaged and that follow art literacy standards.

If you are new to Montessori art—or even just art in general—it may feel overwhelming to try and teach a room full of students anything about art. I get that… but in many ways, art lesson planning is no different than any of your lesson plans for other Montessori subjects.

My objective in this ultimate guide is to clear the confusion on preparing effective art lesson plans, and save you time and stress from worrying about creating art lessons that don’t support independent creative art making or art literacy.

Ultimate Montessori Art Lesson Guide

The resources included in this Ultimate Guide offer insights for Montessori teachers of early childhood (3-6), lower elementary, upper elementary students, and even Montessori-at-home parents. I created this guide to give you tips and ideas for creating art lessons—that are exciting, engaging, and promote independent working—for your Montessori students.

What is a Montessori art lesson?

Before we even start with tips, I think it’s important to understand exactly what comprises and defines a Montessori art lesson. It’s a sequence of visual-arts related instructions that are broken down into steps; they should be done using the proper art mediums and tools in a way that highlights an artist technique and supports art literacy standards. Art lessons can (and should) also be integrated into Montessori core subjects.

The truth is, preparing a Montessori art lesson is more about organizing the steps to giving students exploratory experiences related to their current learning. If you’re planning these properly, you really don’t have to worry about figuring out new ideas to teach for every single lesson. 

Ultimate Montessori Art Lesson Guide, early childhood

By reviewing the Ultimate Montessori Art Lesson Guide, it will become easier for you to understand art lesson planning ideas, and ensure the right key features are included in the lessons you present to your students.

You’ll be surprised at how quickly you can implement these ideas in your classroom!

Where to Start: Read Through These Montessori Art Lesson Resources

There’s a treasure trove of Montessori and art-teaching resources on the internet, but going through each of them and finding ones that quality, and actually relative to your classroom, can be overwhelming, confusing, and even exhausted. The pages below offer actionable, practical information, based on the cumulation of all my years of experience as an art teacher and Montessori art teacher trainer. 

Ultimate Montessori Art Lesson Guide, resources

Though you can jump around between the different links, I recommend you read through these seven resources in the order they’re numbered. Once you feel like you have the basic concepts of creating art lessons, I’d encourage you to continue your Montessori art journey by learning more about my proprietary art teaching method, creative techniques for each visual art domain, and building a Montessori art curriculum for the school year. I have several Montessori art and visual art books, plus, teacher workshops and trainings to help you gain a deeper understanding and confidence in teaching art to your students!

Ultimate Montessori Art Lesson Guide

Ultimate Montessori Art Lesson Guide

1. 5 Ways to Integrate Art Activities into Montessori Great Lessons

When you combine the concepts of art and the Great Lessons, you can seamlessly support your students learning without any disconnection!

2. Building a Montessori Art Lesson Calendar to Keep Students Busy Every Month

If you take some time to plan out your calendar, presenting art lessons will be so much easier for you during the school year. The best part of all this? There’s a simple, stress-free way to break it down, this blog shares how.

3. 5 NEW Ways to Tackle Montessori Art Projects

This article is a little inspiration for tackling art lessons, activities, and projects. Because, sometimes, you need a different way of looking at things to come up with fun, creative art lessons for your students. 

4. Montessori Art Lesson Planning How-To

Without the proper art training, it’s difficult to know what a great art lesson should actually cover and include. This post sets the foundation to help you choose lessons, set up for activities, and create a schedule for the year.

5. Montessori Art Activities | Big Bang Art Lessons

There are so many different art activities you can present to your students that incorporate the lessons about the Big Bang. Combining art activities with science is the perfect way for students to explore their imaginations and support traditional learning methods.

6. Montessori Art Lesson Planning: My Beautiful (Disastrous) Trip to Bali

Teaching art in Bali was, hands down, the most beautiful art trip I’ve taken this year, but that doesn’t mean everything went exactly as planned. Hopefully you will read about my experience and understand a few ways to work through difficult lessons—and maybe even learn from my mistakes! 

7. Montessori Art Lesson Plan Cheat Sheet

One of the most important factors when it comes to lesson planning is staying organized. Download this FREE, handy, three-step cheat sheet and refer to it when you start planning your next art lesson.

Ultimate Montessori Art Lesson Guide, teachers
montessori art guide

One Step Further: Register for My FREE Online Mini-Course

I’ll be honest, creating a Montessori art lesson is one of the most challenging parts about teaching art to your students. However, challenging does not mean impossible!

If you can understand how young children learn art—because it’s often slightly different than with other subjects—creating lessons becomes infinitely easier! It’s the key to keeping your students interested in and excited about your demonstrations and keep the mess down to a minimum. And I’ve developed a FREE digital mini-course—the Phases of Art Development—to help you do just that!

It’s an online course that explains how art making helps kids develop their creativity, fine-motor skills, and focus. Not only will it help you teach your students, but I make it easier on you by giving you a type of Montessori art lesson guide with examples of projects your students will enjoy creating.

Best of all—it’s free! To sign up for the course, click here.

A Short Cut Just for You – Montessori Art Teaching Book

arts and craft book by Spramani Elaun

Spramani’s Books

Teach children visual arts

Curriculum For Children

Get step-by-step art curriculum to teach visual arts. Check out our 4 art curriculums:
Painting
Drawing
Color Theory
Clay Modeling

All rights reserved © 2024, Nature of Art®

No part of this blog may be used or be reproduced in any manner whatsoever including reproducing, publishing, performing, and making any adaptions of the work – including translation into another foreign language without written permission except in the case of brief quotations embodied in critical articles and reviews. Nature of Art® Publishing P.O. Box 443 Solana Beach, California 92075.
Montessori Art Collaging: Lower Elementary

Montessori Art Collaging: Lower Elementary

Collaging offers many benefits to children of all ages; it gives them the opportunity to conjure up creative ideas, improve their fine-motor capabilities, and work on projects independently. In this blog, I’m going to focus on Montessori art collaging for lower elementary students, giving you some helpful hints and inspirational activity ideas to get them going with this type of crafting.

This is part of a larger post, The Ultimate Montessori Art Collaging Guide, goes into further detail on the benefits and provides tips and resources for all Montessori levels.
You can read the blog by clicking here.

Collaging is the process of selecting, assembling, and pasting materials into a unique arrangement or a beautiful work of art. Montessori art collaging is perfect for lower elementary students because they’re at a great age to start exploring textured materials and trying out different art-making techniques.

Lower L students are also capable of planning out their designs with intention and seeing out their creative ideas through realization and the completion of their activity. They can also follow simple, guided-art instructions and begin to work with more abstract themes and concepts.

Montessori Art Collaging: Lower Elementary, kids activities

Montessori Art Collaging, Lower Elementary Materials & Concepts

One of the best things about collaging is that it can be done with almost any kind of material, including: papers, fabrics, natural elements, recycled objects, buttons, tiny beads, sequins, and all other kinds of man-made embellishments. You can even use textured materials like foil, glass, wire, and burlap. There’s really nothing that can’t be collaged!

Since the types of collaging materials you can use are basically endless, the glue or paste you use is important. Some materials won’t stick with a simple glue stick, so you’ll have to decide what adhesive you want to set out so your students will actually be able to collage successfully. 

I’d suggest using glue sticks for tissue collaging and light-weight paper; white craft glue can be used for construction paper, fabric, and small embellishments; and a low-temperature glue gun (used with supervision!) works best for plastic, wood, and larger objects. 

Montessori Art Collaging: Lower Elementary, art ideas

Giving students the right materials will take care of most of the work for this Montessori art collaging activity. The process is easy for you to demonstrate and easy for lower L students to practice. Collaging really only consists of three steps:

  1. Cutting – students should begin with cutting interesting shapes out of varying raw materials
  2. Arranging – once students have the shapes and items they want to work with, they can arrange the elements into designs, patterns, or interesting layouts
  3. Glueing – after students have an idea of what they want to create, they will apply glue to the back of the materials, then place them back onto the arrangement

Make sure students have the freedom to explore and devise their own layouts. Have your students work in creative mode, with only very simple copy-mode steps. Children at this age level are developing better control of their fine-motor skills, such as scissor use, and will have fun cutting out different shapes out from the materials. And since they’re starting to be able to plan out their art works in their imagination ahead of time, it’s a fun age to see brilliant concepts and ideas come to fruition within their projects.

Where to Start: Montessori Art Collaging Lower Elementary Skills

If your students have never collaged before, start with simple materials, such as paper, before giving them more options. Then, you can even try introducing different patterns and themes, and even show students different artist samples for inspiration. Just make sure students are always allowed to work out their final designs on their own. 

5 Montessori Art Collage Ideas for Lower Elementary

Collages can be put together in many different ways, they can be sewn, glued or weaved. They can be abstract in nature or even resemble an image. Here’s five different ways to approach  collaging with lower elementary students.

How to Montessori Art Collaging: Lower Elementary

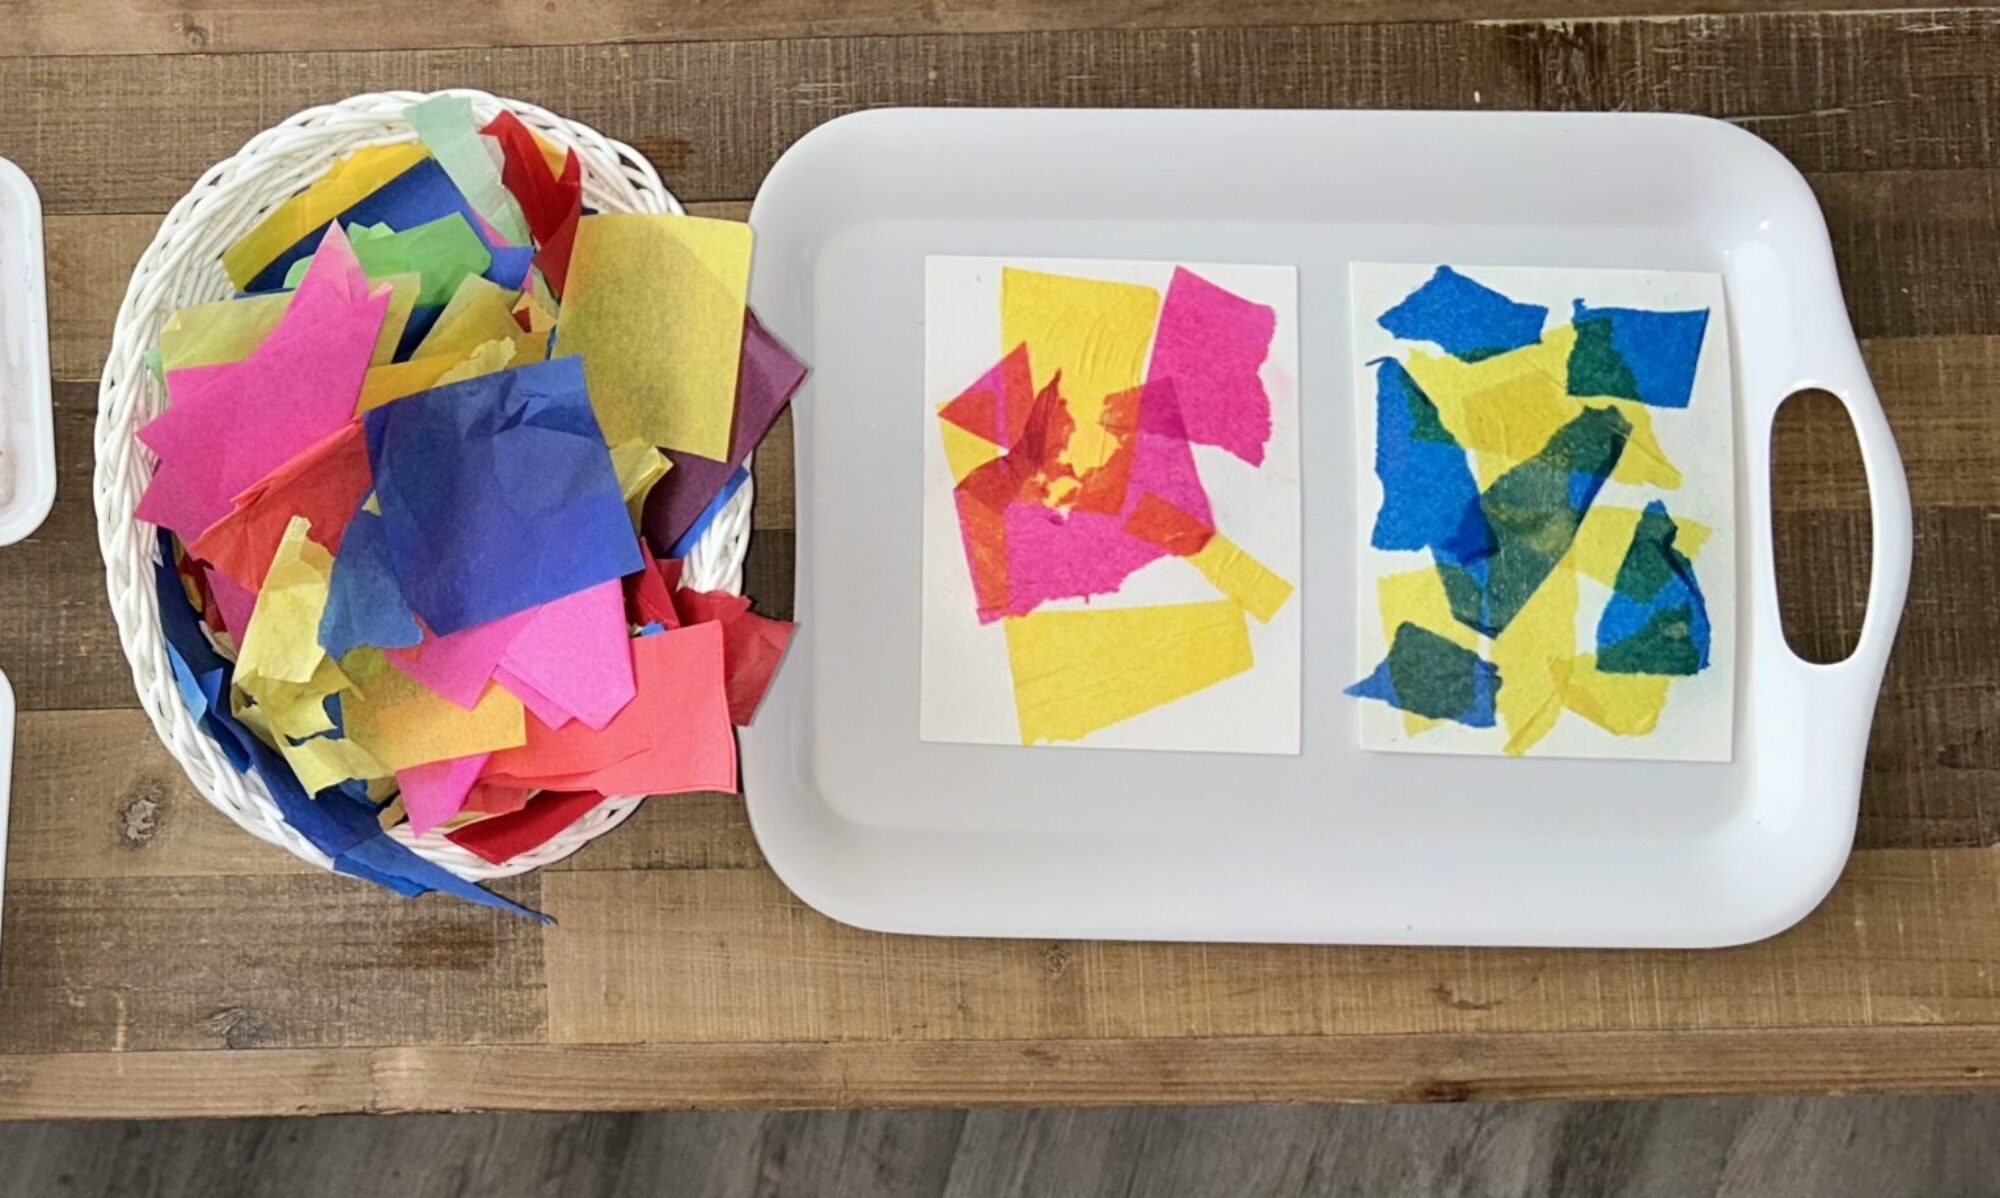
Paper + Tissue

Tissue and paper are ideal to start out with because they’re easy to tear and cut. Their lighter weights mean most craft glues will be able to hold them down securely.

Up-cycled materials

A collage created with up-cycled materials can be made with almost anything, from old cardboard to broken toys. I’ve even used old wetsuits before (like in the photo below)! Using old materials is both an earth-friendly and cost-effective way to create art.

how to collage with kids art activities
how to collage with kids

Natural Elements

Collages can also be done using natural elements, such as flowers, leaves, seeds, and twigs. Natural materials can give collages diverse texture and interesting features. Some food items can also be collaged, like dried beans and pasta. The trick to collaging with natural elements is to use a hot glue gun (you may need to do this yourself, or supervise children while they use it), or weave and sew the materials onto the collage base, since craft glue isn’t usually strong enough to hold these objects.

how to teach collage art to montessori Lower Elementary

Styrofoam

Montessori Art Collaging: Lower Elementary, recycle

Styrofoam isn’t the most earth-friendly materials, so I suggest using only recycled pieces. The one reason I do like to use it is because the material is super easy for younger children to cut through. Painting the pieces before using them also introduces the painting domain to your students, and make their creation even more interesting. If you can start repurposing these materials instead of sending them to landfills, you can help the environment.

how to teach Montessori Art Collaging: Lower Elementary
Montessori Art Collaging: Lower Elementary, spramani
Montessori Art Collaging: Lower Elementary, activities for the classroom, art albums

Images & Design Prompts

Once you have given your students plenty of time to collage their own ideas and explore with different materials in a process-based way, you can then provide them even more inspiration using themed prompts based on subjects you might already be working on. For example, geometric shapes can help with math concepts, while a collage of a bird is a great way to instill zoology lessons. You can even challenge kids to bring color theory into their creations by asking them to create warm, cool, or contrasting color layouts.

One Step Further: Register for My FREE Online Mini-Course

Introducing your lower elementary students to collaging concepts is just one Montessori art activity out of thousands. Lower elementary students are capable of so much when it comes to art! But if you want to keep your students interested in your demonstrations and keep the mess down to a minimum, you have to understand how they learn. That way you can find the perfect balance of teaching them without overwhelming or boring them. And I’ve developed a FREE digital mini-course—the Phases of Art Development—to help you do just that!

It’s an online course that explains how art making helps students develop their creativity, fine-motor skills, and focus. Not only will it help you teach your students, but I make it easier on you by giving you some examples of art projects lower elementary kids will enjoy creating.

Best of all—it’s free! To sign up for the course, click here.

3 to 6 Art – Early Childhood Montessori Teaching Resources

Sign-up to receive video

The Phases of Art Development is a quick digital course that explains how art making can help students develop their creativity, fine-motor skills, and focus. More importantly, I share what types of projects students at every age are capable of completing safely, and without making a mess.

Best of all—it’s free! To sign up for the course, click here.

All rights reserved © 2024, Nature of Art®

No part of this blog may be used or be reproduced in any manner whatsoever including reproducing, publishing, performing, and making any adaptions of the work – including translation into another foreign language without written permission except in the case of brief quotations embodied in critical articles and reviews. Nature of Art® Publishing P.O. Box 443 Solana Beach, California 92075.

Montessori Color Mixing Activity: Exploring One Color at a Time

Color is one of the foundational components of art making. It helps children talk about their art, as well as explore more uniquely, since they can eventually learn to create any hue imaginable. That’s why I want to take the time to talk about the importance of giving students the opportunity to experiment with color—however, it’s important to start simply. When you’re doing a Montessori color mixing activity with your students, you should start off by giving them fewer color choices when they first begin to explore different color pigments.

One of the main reasons I like to isolate colors is because it gives children the opportunity to observe different color values, such as light, medium, and dark. In my experience when you give kids a full palette of color choices or introduce several colors at one time, their senses will pick up on all the different colors available to them and they’ll get so excited to use them all, that they won’t spend enough time observing each hue and their values separately.

Montessori Color Mixing Activity: Exploring One Color at a Time, art lessons for kids

I give more details about color play in my book, Kids Color Theory, and explain how color play is actually a form of scientific exploration that allows children to witness hands-on. That’s because color theory, in general, is all about exploration, observation, and experimentation. 

Working this way—through experimentation—is a great way to introduce the elements and principles of design to children.

Montessori Color Mixing Activity

When children have the chance to work with fewer colors, they have deeper reflective thoughts and are able to form an essential understanding of spatial awareness in art. By experiencing a single color at a time through specially set up Montessori color mixing activities, children will notice different degrees of hues with a sharper eye and even learn to appreciate and be more selective with colors as they progress in their art literacy. It helps them develop a more aesthetic eye for color choices in their designs and artworks. Children will naturally develop color harmony in their artworks.

 Color Mixing Activity, One Color at a Time

Where to Start: Set Up a Montessori Color Mixing Activity

Watercolor Play is a simple, natural, and exciting way for students to start exploring color. I’ve laid out the how-to and steps in a previous blog post, you can read that here. It teaches them how color behaves and mixes, which are things all artists need to learn, without getting too technical just yet.

Montessori Color Mixing Activity: Exploring One Color at a Time

Starting out with one color at a time, and give them the tools and materials (buckets, cups, bowls, paper, sponges, droppers, paintbrushes, etc.) to mix non-toxic, liquid paint. As they add more water to the paint, they’ll be able to see the value change from dark, deep, rich, to lighter and more transparent. This will help them learn valuable color theory concepts.

When I teach brushstrokes for the first time, I also isolate distraction by offering one color to work with at first. This helps students focus on the movements rather than all the color choices.

Once I feel my students have spent a good amount of time discovering primary colors, and cool and warm tones separately, I then offer palettes with more colors options.

One Step Further: Download My Montessori Color Set-up Video

Understanding the actual set up and purpose of color mixing—especially when you’re only using one color at a time—is relatively easy. As a Montessori teacher, I’m sure you’ve noticed that when more options are offered to students, the less focus they become. In this FREE Montessori color set-up activity video download, I show you how to set up a color mixing station for students to get hands-on experience in color tones and values. 

Montessori Color Mixing Activity: Exploring One Color at a Time

Bonus Activity

Here’s another fun tip: I love placing out different natural elements so students can see different color tones in nature. For example, slices of lemon show the different color value of yellow, and a handful of leaves will show how vibrant and varied the color green can be. Natural elements like flowers, leaves, seeds, berries, and fruits are perfect for children to understand where pigments, tones, and hues derive. 

A Short Cut Just for You

montessori art early childhood

I explore the importance and how-to of color theory in my book, Kids Color Theory. I share the reasons kids should be able to identify primary pigments and secondary color, as well as how to create art and color mixing Montessori environments to allow kids to thrive as little artists. Plus, I even give you 11 color-mixing lessons to make your life so much easier! You can purchase the book here.

Montessori Color Mixing Activity: Exploring One Color at a Time

Of course, understanding the principles of color theory is just the first part; to be able to share that knowledge with your students involves creating fun, exciting, and effective art activities. My book includes 11 art lessons, but I’ve created an entire curriculum that revolves around this essential art concept. Kids Color Theory Practice & Process Curriculum has more than three dozen color theory lessons for early childhood, lower elementary, and upper elementary Montessori students. And every lesson is laid out, step-by-step, so all you have to do is read up and follow the instructions! To purchase Color Theory Curriculum for your classroom, click here.

arts and craft book by Spramani Elaun

Spramani’s Books

Teach children visual arts

Curriculum For Children

Get step-by-step art curriculum to teach visual arts. Check out our 4 art curriculums:
Painting
Drawing
Color Theory
Clay Modeling

All rights reserved © 2024, Nature of Art®

No part of this blog may be used or be reproduced in any manner whatsoever including reproducing, publishing, performing, and making any adaptions of the work – including translation into another foreign language without written permission except in the case of brief quotations embodied in critical articles and reviews. Nature of Art® Publishing P.O. Box 443 Solana Beach, California 92075.

Ultimate Guide to Staging A Montessori Art Shelf

As a Montessori teacher, you are well aware of the significance of staging shelves for your students’ independence and learning. To assist you in this endeavor, I have created the “Ultimate Guide for Staging a Montessori Art Shelf.” This comprehensive guide provides valuable tips, advice, and resources to help you set up a properly staged art shelf that promotes art literacy in your classroom. It includes links to relevant articles and blogs, making it your go-to resource for all things related to staging an art shelf.

The resources included in this Ultimate Guide offer insights for Montessori teachers of early childhood (ages three to six), lower elementary, and upper elementary students. Montessori-at-home parents will also find it helpful. My goal with this guide is to help you understand why every classroom needs an art shelf, as well as give you staging ideas to create a shelf that excites and engages students.

Ultimate Guide to Staging A Montessori Art Shelf

A proper art shelf should provide Montessori students with the art materials and mediums to work independently and inspire creative thinking. A Montessori art shelf is more about giving students the opportunity for exploration and discovery, without you needing to lead or teach lessons.

I understand that setting up the “perfect” art shelf can be overwhelming; but here’s the good news—a Montessori art shelf doesn’t need to be perfect! And in fact, staging an art shelf is no different than any of the other shelves in your classroom. If done correctly, it’ll save you the time and stress of worrying about creating art lessons that might not support independent art making and art literacy—the art shelf will do all the work for you.

Ultimate Guide to Staging A Montessori Art Shelf, art shelf materials

Where to Start: Read Through These Montessori Art Shelf Resources

There are a ton of Montessori resources all over the internet, but these are the cumulation of my years of experience as an art teacher and Montessori art teaching trainer. I recommend you read through these five articles in the order they’re numbered. Once you have your art shelf set up, I’d highly encourage you to continue your Montessori art journey by learning more about my own proprietary art teaching method, preparing art lessons, effective ways to introduce art lessons. If you want to read futher in my books about this topic, check out my art teaching books here.

Ultimate Resource Links for Staging A Montessori Art Shelf

1. 10 Items to Include on Your Montessori Art Shelf

A Montessori art shelf doesn’t need to be complicated. If I’m being honest, an art shelf really only needs 10 items to be effective. With a few basic art supplies you can encourage your students to be creative in a way that reinforces Montessori philosophy and principles. You can take these 10 items, and turn them into unlimited inspiration by restocking and refreshing them throughout the year.

2. Setting Up Your Montessori Classroom Art Space

This article tackles the key features needed to set up a functional art space in your Montessori classroom. Kids need a space to doodle, draw, write, paint, craft, sew, knit, cut, glue, build, construct, and play with clay. In order for kids to make these types of art projects successfully (and without a mess), they need the proper art space.

3. Why Every Montessori Classroom Needs an Inspiration Gallery

An inspiration gallery goes hand-in-hand with a Montessori art shelf. They inspire students by providing them with ideas but giving them the freedom to create as they please (as opposed to needing to follow step-by-step instructions). You’ll find that some students may need a little extra push to create art, especially during the weeks you don’t give them a specific project to work on, and a fun inspiration gallery—plus a well-stocked art shelf—will help them find their creative spark.

4. How to Set Up Montessori Art Storage for Easy Presentations

If you want to keep your students excited about art making all year long, you’ll need to rotate and refresh the art materials on your shelf. Being able to store your art supplies when you’re not using them is important if you want to remain stress-free. This article provides tips and tricks for organizing your art material storage, so that you can easily access the supplies you need and pull them out for your art shelf or for art presentations. 

5. 25 Art Supplies Every Montessori Classroom Needs

While a Montessori art shelf really only needs 10 items to inspire your students, this article is a detailed list of everything you could add to your art shelf (and classroom). Once your art shelf is set up and your students begin to create, you can expand the materials they get to interact with.

One Step Further: Take this 1 hour Training, How-to Stage A Montessori Art Shelf

How to Stage A Montessori Art Shelf
In this 1-hour pre-recorded video, Spramani shares her: – Proprietary staging system for Montessori classrooms – How to stage to meet the arts standards – What types of materials to stage – How to support group and independent work, and much more!

arts and craft book by Spramani Elaun

Spramani’s Books

Teach children visual arts

Curriculum For Children

Get step-by-step art curriculum to teach visual arts. Check out our 4 art curriculums:
Painting
Drawing
Color Theory
Clay Modeling

All rights reserved © 2024, Nature of Art®

No part of this blog may be used or be reproduced in any manner whatsoever including reproducing, publishing, performing, and making any adaptions of the work – including translation into another foreign language without written permission except in the case of brief quotations embodied in critical articles and reviews. Nature of Art® Publishing P.O. Box 443 Solana Beach, California 92075.

How to Teach Scissor Cutting Skills to Upper Elementary Kids

Scissor cutting opens up the doors to so many creative opportunities!

When you think of teaching art, what do you think of? Painting? Drawing? Maybe some sculpting? While those are all important parts of visual arts, a surprising component that also needs to be taught to Montessori upper elementary students is scissor cutting skills. This might seem like an obvious skill—especially for upper elementary kids, but you would be surprised at how many students still struggle at this age. They need scissor practice! That’s why I’ve put together this Montessori scissor cutting guide for upper elementary. To help you teach your students this essential art skill.

Being able to use safely and properly use scissors means students are able to do a wide variety of artful things. For example; cutting paper, following patterns, cutting strings and yarn, and cutting fabric. Scissor cutting opens up the doors to so many creative opportunities!

How to Teach Montessori Scissor Cutting to Upper Elementary Kids

Importance of Scissor Cutting for Upper Elementary Students

Cutting enhances eye-hand coordination (using vision, processing what is seen, and moving the hand simultaneously to accomplish a task). Other examples of eye-hand coordination are weaving, folding, creasing paper, catching/throwing a ball, scooping food with a spoon, and zipping a coat.

Cutting also encourages your child to use bilateral coordination (which means using both sides of the body at the same time, in a coordinated way, while each hand is performing its own task). For example, when cutting a circle, a child must hold the paper with one hand (and continuously turn it) while the other hand is opening and closing the scissors and moving forward to cut. Other examples of bilateral coordination include: zipping up a coat or pants, washing dishes, and opening an envelope.

Cutting helps stimulate the brain

Some research suggests that hand-eye and bilateral coordination exercises may stimulate the parts of the brain that are needed for thinking and focusing attention. In my experience, these types of motion and practice also give students keen observation skills, which allow them to notice details and follow patterns.

For upper elementary students, having greater fine motor skills means they can attempt intricate scissor cutting designs. For example, following detailed patterns and more complex instructions that might take four to five steps to follow. Students at this age will be able to make paper art like gift tags, ornaments, snowflakes, paper lanterns, paper chain dolls, thought-out collages, and stunning bookmarks and cards.

Scissor Cutting Leads To Creativity

Strong scissor-cutting skills lead to lots of independent creating at all levels of crafting and design. It’s important that students are given plenty of time to practice before they take on trickier, more detailed cutting patterns. When Montessori upper elementary children attempt to create such designs without scissor cutting practice, the art projects and activities will become too challenging to follow and they may lose self-confidence.

I recommend using design templates for Montessori upper elementary to practice their scissor cutting. There are some super fun paper 3-D art templates they can cut out, then construct the pieces with glue, to create objects like fruit, flowers, and fun characters. Mr. Printables is one of my favorite websites for simple cutting template practice. 

Where to Start: Give Your Montessori Upper Elementary Students Scissor Cutting Practice

Another fun practice can be to cut, and then gluing, 2D symmetrical designs. If you are not sure if your students have developed their scissor skills sufficiently, ask them to cut basic geometric shapes. You should be able to observe where their skill level is currently. I have met plenty of upper elementary students who need a bit more practice before jumping into complex projects. 

Always remember: practice is the best way to support kids’ artistic skills and literacy.

How to Teach Montessori Scissor Cutting to Upper Elementary Kids

I recommend testing your students’ abilities by practicing cutting out:

  • Straight lines
  • Corners
  • Curves
  • Geometric shapes
  • Symmetrical designs
  • 3D objects (like mini furniture or buildings)
  • Basic quilt patterns
  • Basic stencil patterns
  • Chinese paper lanterns
  • Magazine images (for collaging)
  • Papel Picado (Mexican paper flags)
  • Paper snowflakes
  • Tangram paper designs

Once upper elementary students are able to cut straight lines, corners, and simple curves, they may be able to move on to using an artist’s Exacto knife. But I recommend they only do this with proper supervision and parent consent. I’ve met many crafty students who want to work on very intricate designs, which calls for using an Exacto knife.

One Step Further: Sign Up for My FREE Digital Mini-Course

Knowing that your students are capable of safely using scissors opens up so many doors for all the amazing art projects and activities you’ll be able to do in your classroom! In order to keep them interested in the lessons you’re presenting—and able to handle and understand whatever it is you’re teaching—you have to first be able to know exactly how they learn art. I’ve developed a FREE online mini-course to help you do just that!

How to Teach Montessori Scissor Cutting to Upper Elementary Kids

The Phases of Art Development is a quick digital course that explains how art-making can help students develop their creativity, fine motor skills, and focus. More importantly, I share what types of projects students at every age are capable of completing safely, and without making a mess.

Best of all—it’s free! To sign up for the course, click here.

A Short Cut Just for You:

arts and craft book by Spramani Elaun

Spramani’s Books

Teach children visual arts

Curriculum For Children

Get step-by-step art curriculum to teach visual arts. Check out our 4 art curriculums:
Painting
Drawing
Color Theory
Clay Modeling

All rights reserved © 2024, Nature of Art®

No part of this blog may be used or be reproduced in any manner whatsoever including reproducing, publishing, performing, and making any adaptions of the work – including translation into another foreign language without written permission except in the case of brief quotations embodied in critical articles and reviews. Nature of Art® Publishing P.O. Box 443 Solana Beach, California 92075.

Montessori Professional Development: My Trip to Vietnam

Last month I flew to Vietnam for the very first time to lead early childhood and elementary teachers in a Montessori professional development workshop. It was such an incredible trip! From the beautiful sights, to the buzzing of holiday cheer in the city, to all the warm, welcoming people I met, I feel so blessed to have been given this opportunity to share my passion for the arts.

I worked and traveled for 16 intense days. My trip included stays and workshops in two of the biggest cities of the country—Ho Chi Minh City and Hanoi, with populations of nearly 9 million and 8 million, respectively. This was the first official certified Montessori art training to be held in Vietnam and everyone was so eager to learn everything I had to share. I conducted two five-day training sessions, plus two parent lectures; in total, I spoke to well over 400 attendees during the time I was there.

Throughout the course of my trip, I had many deep, beautiful conversations about culture and art, with several thought-provoking ideas exchanged between Montessori administrators, teachers, parents, and myself. I truly learned so much from their community!

The hospitality in Vietnam was amazing! The food was incredible and colorful. I had the chance to try so many fruits that I had never even heard of or tasted before! Of course I’ve had phở before, and I was looking forward to eating an authentic bowl while on my trip, but I also had so many other dishes I wasn’t expecting. I can’t wait to return and try the cuisine again!

Visiting Vietnam was an exhilarating experience that I’ll never forget. I got to spend Christmas in the country, and while I was sad to be spending the holiday away from my children, I was pleasantly surprised by how cheerful and festive everything was! The stores and downtown areas were decorated with lights, and I got to spend Christmas Eve singing carols in the city square with thousands of other people! On top of that, the country was preparing for the even larger holiday—Tết, or the Vietnamese New Year—which will be celebrated later this month. I loved hearing about their traditions and getting to experience something new. 

The Montessori Professional Development Workshops

My Montessori professional development workshop was sponsored by VietNam Montessori Centre (VMC). I was excited to celebrate with the two groups who completed the workshop, because they were the first Vietnamese teachers to become certified in my Nature of Art® visual art training!

I was inspired by how motivated and dedicated the teachers were to learn the missing component to the way they taught Montessori principles. During our sessions, they really opened up and expressed how art education has always been something they wanted to bring to their own children and students, but were unable to because they had never had a proper introduction to the subject. What I learned was that most of the country has been in such a “survival” mode; they’ve focused on more compulsory and disciplined subjects, and have never been taught or encouraged to embrace art.

The teachers really enjoyed the free-flow techniques of process-based, learning about art literacy and artistic techniques, and creating their own art works during the intense (but fun) training sessions. 

The main focus of the Montessori professional development training was to educate teachers on four main points:

  1. The importance of art literacy
  2. How to create dynamic art programing for children at different skill levels and capabilities
  3. The framework for understanding the artistic process
  4. The elements needed for teachers to write their own art curriculum and create art programming for their classrooms

The overarching theme of the weeks I was in Vietnam was teaching how different societies, cultures, and ideologies can interfere with raising creative, independent-thinking children. This training was a huge success with the hundreds of attendees sharing revelations and heartfelt testimonials. Many teachers had never worked with fine-art mediums before and were very excited to see how fun and relaxing art making could be. This gave them the enthusiasm to get their art programing into place.

I am very excited to be working with many of these teachers in the future and developing even more trainings in the region.

One Step Further: Bring Montessori Art Programming Into Your Classroom!

If you are interested in bringing this type of Montessori programming to your training center, school, or classroom, you’re in the right place. I want to help you make 2020 your most organized school year, while giving you the confidence to introduce art lessons and Montessori art activities to your students. 

Imagine finishing off the school year feeling full of clarity, direction, and confidence. Imagine not needing to worry about looking up art activities or wasting time crafting lessons that flop or lead to huge messes. Sounds great, right!?

You just need a simple roadmap and resources to design your own art programing the right way. I’d love to start you off with a FREE online mini-course, Phases of Art Development. It’s a quick, stress-free way to set a foundation for understanding how young children learn art. I also share a few Montessori art lessons and activities you can teach your students.

A Shortcut Just for You, Order Book!

Montessori Early Childhood Art Guide

The only way to get a full picture of how to really help your young students learn art, is through my new book, Early Childhood Art: Visual Arts Teaching Guide. It compiles all my experience in teaching young students art in a way that lays the groundwork for you to be able to teach your own Montessori students everything they need to know about art. I also provide tips and tricks for setting up an art environment, using proper art materials and mediums, and planning level-appropriate art lessons.

If know the value of art in the Montessori classroom, especially for young students, and you want to be able to introduce art to your early childhood students, then this book is for you! Click here to get your copy of my Early Childhood Art guide!

All rights reserved © 2019, Nature of Art®

No part of this blog may be used or reproduced in any manner whatsoever without written permission except in the case of brief quotations embodied in critical articles and reviews.

Ultimate Montessori Art Collaging Guide

Ultimate Montessori Art Collaging Guide

How to Create Montessori Art Collaging Lessons

Collaging is the process of selecting, assembling, and pasting materials down into a unique arrangement. It’s a way for artists to take many different ideas and art mediums and put them together into a beautiful work of art. It’s a great way for students to express their creativity too!

What Collage Means

The word collage actually derives from “la colle,” which means glue in French. The art of collage making goes all the way back to the 1800s; even famous artists like Pablo Picassco and Georges Braque incorporated it into their works. Today’s collage artists astound us with treasures like antiques, special handcrafted papers, and upcycled toys. It’s an art form that’s transformed into the most unimaginable spectacular of materials. 

Ultimate Montessori Art Collaging Guide, kids activities

Collaging can honestly be done with any type of material, from paper, natural elements, and fabrics, to recycled objects. Like buttons, tiny beads, sequins, and other kinds of man-made embellishments. Even materials like foil, glass, wire, and burlap can be used. There’s really nothing that can’t be collaged!

Collage With Any Thing!

Artists of the past and present have cleverly designed so many interesting collages using some of the most unusual materials and textures, so there’s no shortage of inspiration when it comes to this art form. It’s an ideal craft to introduce children to because collages are intuitive arrangements; they’re the perfect artful playground for kids to craft in.

I’m excited to write this blog because I know the importance of children working independently, building their fine-motor skills, and strengthening the small muscles in their hands, but I’m even more excited to give students a crafting experience that gives them the freedom to experiment, assemble objects, and design interesting textured artworks, with almost no effort or stress. Collaging gives children the opportunity to be creative, independent, and original.

Benefits of Teaching Collaging

Collage crafting can lead your students into creating more complex crafts and projects that require developed coordination. Four of the direct benefits of collaging are:

  1. Learning to cut with scissors, which builds finger and hand strength
  2. Building implied memory with the repeated movements of gluing the elements
  3. Introducing the Elements and Principles of Design, including line, shape, form, texture, color, and symmetrical balance ideas
  4. Conjuring up creative thoughts, ideas, and arrangements

Teaching children how to choose pieces of material to arrange into composition whether through a planned idea or simply through process-based learning is exciting for children. When they discover the power of glue—and all its possibilities—their imaginations and creations become endless.

Montessori Art Collaging ideas for kids art projects

Gluing and pasting are essential art practices that leads to more advanced craft skills. Crafting is a visual art domain that develops three-dimensional spatial awareness. By experimenting with arranging materials into multiple layouts (using different shapes, sizes, proportions, colors, values, textures, etc.) students learn the Elements and Principles of Design concepts. They can play with symmetrical balance, patterns, and create abstract designs or realistic imagery—collaging has no rules! Children can be as playful and experimental as they choose.

Ultimate Montessori Art Collaging Guide, activites children

Collaging is Sensorial & Tactile

Collaging is highly sensorial because it involves touching and feeling the textures of materials being used to create. So it’s a wonderful way for children to experience crafts; the different textures of materials can be both exciting and calming. Plus, when children work directly with their hands, it can have a calming effect, since they become focused on the feeling and application of each piece their working on. In fact, in many cases, children will select items solely based on the satisfaction of the tactile feeling rather than the visual aesthetics. This is why I consider collaging a very intuitive craft.

Another reason collaging is sensory focused is because it gives students the freedom to use their tactile sense (feeling) to select by their own art pieces. Plus chhildren love having the choice of selecting their own mediums. So by putting collaging objects in different baskets and containers keeps things organized while allowing children the enjoyment of feeling and selecting the items they want to use. If you are a fan of the idea of loose items arranged in the classroom, then you can use this concept to set-up an art collaging invitation for your Montessori students. 

Ultimate Montessori Art Collaging Guide

Where to Start Collaging Projects First

I know Montessori classrooms introduce a gluing station as a practical life activity. But, collaging is so much more than just practicing glue motions. It’s an art Montessori students at every level will love to explore.

I recommend starting simple, using just one material with the goal of practicing the idea of gluing and pasting down. Start with a small, firm cardboard around 5” x 5”, and small pieces of paper with sides ranging from .5” to 1”; these sizes are easy to work with and paste for little hands. I also recommend starting with thin paper that’s easy to cut or tear, like tissue paper or magazine pages. The idea is to keep it lightweight so it’s easy to glue, cut, and arrange. You can have students paste the papers as they are or allow them to cut the papers into other shapes using scissors. 

When students first practice collaging, they shouldn’t focus on creating anything realistic; don’t have them try to copy a template or prompt, instead, let them work free form. Let kids feel and be intuitive in what they decide to arrange. Just make sure you walk through the process and have finished examples for them to see so they can understand the goal of activity. 

Work process-based first—especially with early childhood and lower elementary students—then move into themed ideas with specific examples once they have the chance to explore and experiment. You can provide inspiration and examples, but leave the layout and composition arrangement up to the student.

kids collage ideas and materials to use

Best Collaging Adhesive

There really is no right way to collage; it’s all up to the artist. Introduce multiple gluing methods—glue sticks, craft glue with a popsicle stick, decoupage, etc.—and allow students to use whatever they gravitate to and feel more comfortable working with. 

Keeping Parts and Pieces Organized

As a collage artist myself and working with a number of professional collage artists, I’ve learned the importance of keeping materials organized and easily accessible. It prevents the creative process from being interrupted and minimizes messes and clean up. I’ve seen Montessori gluing boxes on the market, and while they can keep materials tidy, they are not necessary; instead, use baskets, trays, caddies, drawer organizers, or small boxes to organize and display collaging materials, including scissors and glue.

For the most part, I don’t recommend children work inside trays. If you’re worried about glue messes, use newspaper or a plastic tarp to cover the table surface. You can even keep wipes and sponges nearby to help keep students’ hands clean from glue. However, kids love sticky hands—it’s all part of the tactile experience. I remember loving to play with the glue on my hands myself as young artist!

Interesting Collaging Materials

While you should start with very simple materials at first, slowly graduate your students to more interesting and diverse collaging items. Such as:

  • Bottle caps
  • Bubble wrap
  • Cardboard strips
  • Corrugated paper
  • Cotton balls
  • Crepe paper
  • Fabric
  • Feathers
  • Foil
  • Gift wrap
  • Magazines
  • Paper
  • Small emebishhemnts (sequins, string, buttons, seeds, etc)
  • Stickers
  • Tissue

My FREE Online Mini-Training

Collaging is just one example of an art activity Montessori students will love, but there’s an infinite amount of art projects they can create! If you want to give them limitless options, you have to first understand what they’re capable of learning. I’ve developed a FREE online mini-course to teach you exactly how children learn art—based on their plane of development. That way you can present and demonstrate really fun art projects to them without you stressing or them getting bored or making a mess!

3 to 6 Art – Early Childhood Montessori Teaching Resources

Sign-up to receive video

The Phases of Art Development is a quick digital course that explains how art making can help students develop their creativity, fine-motor skills, and focus. More importantly, I share what types of projects students at every age are capable of completing safely, and without making a mess.

Best of all—it’s free! To sign up for the course, click here.

arts and craft book by Spramani Elaun

Spramani’s Books

Teach children visual arts

Curriculum For Children

Get step-by-step art curriculum to teach visual arts. Check out our 4 art curriculums:
Painting
Drawing
Color Theory
Clay Modeling

All rights reserved © 2024, Nature of Art®

No part of this blog may be used or be reproduced in any manner whatsoever including reproducing, publishing, performing, and making any adaptions of the work – including translation into another foreign language without written permission except in the case of brief quotations embodied in critical articles and reviews. Nature of Art® Publishing P.O. Box 443 Solana Beach, California 92075.

Ultimate Montessori Scissor Cutting Lesson Guide

Ultimate Montessori Scissor Cutting Lesson Guide

How to Teach Important Scissor Development Skills

As adults, using scissors is something we take for granted. Whether it’s clipping coupons or slicing through wrapping paper, using scissors is often a part of our day-to-day activities. However, we forget that we had to actually learn how to use scissors at some point—and there is a surprising number of young students these days who can’t properly use scissors! And if they don’t know how to use scissors, there are many other things in the classroom they’ll be unable to do. That’s it’s so essential to spend some time to present a specific Montessori scissor cutting lesson to your students.

Learning to use scissors at a young age provides so many benefits! When students are able to develop their scissor-using skills, they’re able to do so many artful and creative things, such as cutting paper, following patterns, cutting strings and yarn, and cutting fabric.

Ultimate Montessori Scissor Cutting Lesson Guide, how to teach

Benefits of Scissor Cutting for Young Students

The constant dynamic motion that comes from using scissors helps young students develop spatial intelligence and fine-motor movements that relate to other important tasks inside the Montessori classroom. Introducing scissor skills to children—even as young as two or three years—can help them move through critical milestones directly related to other areas of childhood development. Cutting activities build muscle control, develop eye and hand coordination, and deepen their tactile spatial awareness. 

Ultimate Montessori Scissor Cutting Lesson Guide, art activities

A few years ago, I started to notice more and more teachers were sharing their frustrations about how the majority of young students coming through their classrooms were lacking in fine motor skills; they were too weak to apply pressure while writing or coloring and lacked the coordination to write their ABCs, tie their own shoes, or zip up their own jackets. Now, I’ve worked with thousands of students over the years, and I’ve also observed that students are lacking the developmental skills that would allow them to craft and create art. 

Both of my own two children had the freedom to use safety scissors at very young ages. And, as a result, they both learned how to tie their shoes, feed themselves, write, and even craft, at a very early age. Truth is, kids love using scissors! 

There’s a ton of research linking handwriting success to muscle coordination developed by scissor movements, and practical life skills like eating, dressing, and holding and carrying small objects. But most importantly, teachers agree when children have had the chance to develop these muscles and skills, teaching them writing becomes easier. A child that has scissor practice will be able to excel in complex steps to create and work independently. 

Ultimate Montessori Scissor Cutting Lesson Guide, art teacher spramani elaun

In one of my early years, I was working with a five-year-old boy in an art therapy session. I recall him eagerly asking to use scissors while we crafted. He was very awkward at first, but with some coaching he quickly got the hang of it. He spent an hour cutting soft yarn into tiny pieces over and over, until it became easy to grab the scissors, get them into position, and make the opening and closing motion of cutting. Within that hour, he strengthened the mobility with his thumb, hand, and wrist.

Ultimate Montessori Scissor Cutting Lesson Guide

The minute his mom returned to my art studio to pick him up, she ran toward him screaming, “You’re going to hurt yourself! Give me those!” It clicked. I realized that he was a late bloomer when it came to using scissors—a simple, practical life task—because his mom had it in her mind that he would end up running with scissors and hurting himself. She was shocked when she saw him using them safely to cut yarn. And not only that, but he was having a pretty good time doing it! She promised to buy scissors for home.

Ultimate Montessori Scissor Cutting Lesson Guide

Where to Start: Tips for Presenting a Montessori Scissor Cutting Lesson

In my experience, giving a child a Montessori scissor cutting lesson at age five is a little too late.

If a child can sit and focus for 15 minutes at a time (between the ages of 3 and 5), they can start practicing their scissor cutting. When I meet young students who cannot sit through my scissor demonstration or follow my basic movements, then I know they are too young and need more time before they’re able to safely and properly use scissors on their own. But if students can focus on the actions of a presentation and watch the outcome, then they can start practicing—with supervision, of course!

Don’t hand your students scissors and walk away expecting them to create, give them time to practice cutting motions. You can introduce students to using scissors through either copy-mode or process-based activities. Here are a few tips for bringing scissors safely into your classroom.

Ultimate Montessori Scissor Cutting Lesson Guide
  1. Don’t jump into challenging cutting projects until students have had practice with scissors first. So many teachers make the mistake of trying to present a multi-step lesson that includes using scissors, even though their students aren’t able to use them yet. It just leads to frustration! So, practice a simple, process-based Montessori scissor cutting lesson first, before you approach any copy-mode craft or activity.
  2. Begin by showing students the simple motion of using scissors. Have them start by holding the scissors, and opening and closing the arms using just their one hand (keeping their other hand safely away from the blades). Then you can progress to showing them how the blade can be angled to create a sharper cut.
  3. Think about the process rather than focusing on a project. Give them papers to cut, simply to practice the action of cutting. Don’t worry about how their project turns out; it’s all about the process and practice.
  4. Be patient. You have to understand, your students’ little brains and hands are wiring together and getting things to work together smoothly will take some time. Keep allowing them time to practice until you see they are able to cut without struggling.
  5. Plan activities based on your students’ capabilities. For example, early childhood students (aged 3 to 6) can do simpler cutting activities, like following simple lines and shapes. Lower elementary students should be able to begin collaging and upper elementary students will be able to cut out more intricate designs.

One Step Further: Sign Up for My FREE Digital Mini-Course

Knowing that your students are capable of safely using scissors opens up so many doors for all the amazing art projects and activities you’ll be able to do in your classroom! In order to keep them interested in the lessons you’re presenting—and able to handle and understand whatever it is you’re teaching—you have to first be able to know exactly how they learn art. I’ve developed a FREE online mini-course to help you do just that!

3 to 6 Art – Early Childhood Montessori Teaching Resources

Sign-up to receive video

The Phases of Art Development is a quick digital course that explains how art making can help students develop their creativity, fine-motor skills, and focus. More importantly, I share what types of projects students at every age are capable of completing safely, and without making a mess.

Best of all—it’s free! To sign up for the course, click here.

arts and craft book by Spramani Elaun

Spramani’s Books

Teach children visual arts

Curriculum For Children

Get step-by-step art curriculum to teach visual arts. Check out our 4 art curriculums:
Painting
Drawing
Color Theory
Clay Modeling

All rights reserved © 2024, Nature of Art®

No part of this blog may be used or be reproduced in any manner whatsoever including reproducing, publishing, performing, and making any adaptions of the work – including translation into another foreign language without written permission except in the case of brief quotations embodied in critical articles and reviews. Nature of Art® Publishing P.O. Box 443 Solana Beach, California 92075.

Montessori Early Childhood Scissor Cutting Guide

Montessori Early Childhood Scissor Cutting Guide

How to Teach Important Scissor Skills to Early Childhood Students

If I told you that I often lead students in Montessori early childhood scissor cutting, I’m sure you—and many other teachers—might be a little concerned (to say the least). Giving scissors to a young child might seem crazy, or dangerous, at the very least. But it’s an essential skill everyone needs, and if it’s taught correctly, early childhood students can master it too.

You see, using scissors is a great way for young students to develop their fine motor skills. So while it can be a little scary to hand a pair of (blunt-tip) scissors to a three-year-old, it’ll eventually help them perform many other activities around the classroom. 

Montessori Early Childhood Scissor Cutting Guide, spramani elauj

In fact, the earlier a child can learn to use scissors, the better. The activity provides so many benefits to early childhood students! Being able to properly use scissors opens the doors to many other important skills, such as writing their names or ABCs, tying shoes, zipping jackets, cleaning up, and feeding themselves.

So, how do you know when your early childhood students are actually ready to start using scissors?

Montessori Early Childhood Scissor Cutting Guide, activities

If your students can sit and focus on an activity for at least 15 minutes, they should be able to learn and start practicing their scissor cutting. You’ll need your students to be able to sit through a complete Montessori early childhood scissor cutting demonstration, where you present the basic movements and show how to safely handle the tool. So, if they can keep their attention on your presentation and understand the necessary outcome, then they can start practicing. Just make sure you’re supervising early childhood students any time they are using scissors.

Montessori Early Childhood Scissor Cutting Guide

Importance of Scissor Cutting to Early Childhood Development

By showing young students—even as young as two or three years—how to use scissors, you’re helping them reach critical milestones that directly related to other areas of childhood development. The dynamic motion that comes from cutting activities—specifically, opening and closing scissors along a distinct path—helps them build muscle control, develop eye and hand coordination, deepen their tactile spatial awareness, and hone their fine-motor movements. It also helps them develop the coordination needed for handwriting, eating, dressing, and holding and carrying small objects. 

A child that has scissor practice will be able to excel in complex steps to create and work independently. And they’ll be able to do so many artful and creative things in the classroom, such as cutting paper, following patterns, cutting strings and yarn, and cutting fabric.

Montessori Early Childhood

Where to Start: Montessori Early Childhood Scissor Cutting Lessons

You can’t hand your early childhood students a pair of scissors and then walk away expecting them to create, it’s an early childhood art material that needs to be taught how to use. It’s important to give them time to practice the simple movements of just using scissors. Once they have that down, then you can start introducing students to cutting for copy-mode or process-based activities. 

Materials:

  • Safety scissors (with a blunt tip)
  • Soft, thick yarn
  • Styrofoam sheets
  • Construction paper
  • Clay
Montessori Early Childhood Scissor Cutting Guide, arts and crafts

Early Childhood Scissor Cutting Lesson Ideas:

  • Have children cut small and large lengths of yarn
  • Students can cut large shapes from styrofoam, and then glue them onto paper
  • Show students how to roll out coils of clay, and then cut those into small pieces
  • Give students pieces of construction paper that have lines or shapes drawn onto them (or ask the kids to draw their own lines and shapes), and have them cut along the lines

Try incorporating some of these lesson ideas with other topics you’re already teaching in the classroom. For example, make some of the shapes organic, like leaves or simple animal silhouettes. 


One Step Further: Sign Up for My FREE Art Phases Mini-Course

Knowing that your early childhood students are capable of safely using scissors opens up so many doors for all the amazing art projects and activities you’ll be able to do in your classroom! In order to keep them interested in the lessons you’re presenting—and able to handle whatever it is you’re teaching—you have to first be able to understand exactly how they learn art. I’ve developed a FREE online mini-course to help you do just that!

3 to 6 Art – Early Childhood Montessori Teaching Resources

Sign-up to receive video

The Phases of Art Development is a quick digital course that explains how art making can help students develop their creativity, fine-motor skills, and focus. More importantly, I share what types of projects students at every age are capable of completing safely, and without making a mess.

Best of all—it’s free! To sign up for the course, click here.

The Phases of Art Development is a quick digital course that explains how art making can help young children develop their fine-motor skills. More importantly, I share what types of projects early childhood students are capable of completing safely, and without making a mess.

Best of all—it’s free! To sign up for the course, click here.


A Short Cut Just for You – Early Childhood Art Guide

And if you want an even fuller picture of how to really help your young students learn art, check out my new book, Early Childhood Art: Visual Arts Teaching Guide. It’ll help you understand the importance of art language for early childhood students and lay the groundwork for what your students need to know about art. I also provide tips and tricks for setting up an art environment, using proper art materials and mediums, and planning level-appropriate art lessons. Click here to get your copy of my Early Childhood Art guide!

arts and craft book by Spramani Elaun

Spramani’s Books

Teach children visual arts

Curriculum For Children

Get step-by-step art curriculum to teach visual arts. Check out our 4 art curriculums:
Painting
Drawing
Color Theory
Clay Modeling

All rights reserved © 2024, Nature of Art®

No part of this blog may be used or be reproduced in any manner whatsoever including reproducing, publishing, performing, and making any adaptions of the work – including translation into another foreign language without written permission except in the case of brief quotations embodied in critical articles and reviews. Nature of Art® Publishing P.O. Box 443 Solana Beach, California 92075.

Montessori Scissor Cutting for Lower Elementary

Teaching Lower Elementary Students How to Use Scissors

As adults, using scissors is something we take for granted. Whether it’s clipping coupons or slicing through wrapping paper, using scissors is often a part of our day-to-day activities. However, we forget that we had to actually learn how to use scissors at some point—and there is a surprising number of young students these days who can’t properly use scissors! And if they don’t know how to use scissors, there are many other things in the classroom they’ll be unable to do. That’s why I’ve put together this Montessori scissor cutting for lower elementary guide!

Montessori Scissor Cutting for Lower Elementary

Learning to use scissors at a young age provides so many benefits! It’s an important skill we, as teachers, should be nurturing through lots of practice. When students are able to develop their scissor-using skills, they’re able to do so many artful and creative things, such as cutting paper, following patterns, cutting strings and yarn, and cutting fabric. The more practice children have with scissors, the better and more capable they will be working independently on crafts and art activities. Trust me, Montessori scissor cutting for lower elementary students can be fun!

Benefits of Scissor Cutting Skills for Lower Elementary Students

Benefits of Scissor Cutting Skills for Lower Elementary Students

The constant dynamic motion that comes from using scissors helps young students develop spatial intelligence and fine-motor movements that relate to other important tasks inside the Montessori classroom. Introducing scissor skills to children—even as young as two or three years—can help them move through critical milestones directly related to other areas of childhood development. Cutting activities build muscle control, develop eye and hand coordination, and deepen their tactile spatial awareness. 

Montessori Scissor Cutting for Lower Elementary, art lessons

A few years ago, I started to notice more and more teachers were sharing their frustrations about how the majority of young students coming through their classrooms were lacking in fine motor skills; they were too weak to apply pressure while writing or coloring and lacked the coordination to write their ABCs, tie their own shoes, or zip up their own jackets. Now, I’ve worked with thousands of students over the years, and I’ve also observed that, on average, half of the students in lower elementary coming through my art classes are not capable of using scissors with precision. It’s pretty common that I have to pause the craft I’m teaching to help some kids catch up to the others.

Teaching Lower Elementary Students How to Use Scissors

I’m an artist at heart, of course, and back when I was a homeschool mom, I made sure art and crafting was a part of what I taught my own two children—and that meant using scissors! From a very young age—probably younger than lower elementary, even—my students knew how to safely cut with blunt-tipped scissors. And guess what. That means they were also able to accomplish other skills beyond creating art, such as writing, playing music, and making themselves simple breakfasts in the morning without making a mess.  

Montessori Scissor Cutting for Lower Elementary, spramani elaun

There’s also a ton of research showing that handwriting success is linked to muscle coordination, which can be developed through scissor movements. If you give your students the chance to develop these muscles—through scissor practice—teaching them to write becomes much easier. Demonstrating how scissors work and having them follow your instructions, will help them be able to later excel in projects with complex steps and work independently. 

Where to Start: Evaluate Lower Elementary Students’ Scissor Cutting Skills

If you’re planning an art project that requires using scissors in one of the steps, check in to see where your students’ abilities are first. It’s important—for safety and for your students’ self esteem—to evaluate what their skill levels are before starting any cutting projects. You don’t want them to get hurt or cut themselves, and you don’t want them to feel like they’re failing if they don’t know how to properly use the scissors and can’t move on to the next steps.

Montessori Scissor Cutting for Lower Elementary, spramani elaun

Start by doing simple scissor exercise like cutting straight lines and curved shapes. Be sure you demonstrate how the blades meet together to slice and how a specific angles are needed to make both blades cut together with precision. Having these opportunities to practice cutting will make art projects smoother and keep your students on track.

Once lower elementary students get comfortable using scissors and can make their desired cuts, then you can move them onto more complex projects. Here are some creative Montessori scissor cutting for lower elementary ideas to help give your students practice:

  • Book binding
  • Curved line cuts
  • Cutting geometric shapes
  • Mosaic art
  • Paper collaging
  • Paper doll chains
  • Pop-up cards
  • Snowflake cutting
  • Scrapbooking
  • Spiral cuts
  • Straight line cuts
  • Zig-zag cuts
Montessori Scissor Cutting for Lower Elementary, how to teach kids

One Step Further: Register for My FREE Online Mini-Course

Once your lower elementary students learn how to use scissors safely and properly, the number of different art activities your class can start doing becomes endless! Lower elementary students are capable of so much when it comes to art! But if you want to keep your students interested in your demonstrations and keep the mess down to a minimum, you have to understand how they learn. That way you can find the perfect balance of teaching them without overwhelming or boring them. And I’ve developed a FREE digital mini-course—the Phases of Art Development—to help you do just that!

3 to 6 Art – Early Childhood Montessori Teaching Resources

Sign-up to receive video

The Phases of Art Development is a quick digital course that explains how art making can help students develop their creativity, fine-motor skills, and focus. More importantly, I share what types of projects students at every age are capable of completing safely, and without making a mess.

Best of all—it’s free! To sign up for the course, click here.

It’s an online course that explains how art making helps students develop their creativity, fine-motor skills, and focus. Not only will it help you teach your students, but I make it easier on you by giving you some examples of art projects lower elementary kids will enjoy creating.

Best of all—it’s free! To sign up for the course, click here.

All rights reserved © 2024, Nature of Art®

No part of this blog may be used or be reproduced in any manner whatsoever including reproducing, publishing, performing, and making any adaptions of the work – including translation into another foreign language without written permission except in the case of brief quotations embodied in critical articles and reviews. Nature of Art® Publishing P.O. Box 443 Solana Beach, California 92075.