Professional Development in Montessori Arts Education | Video Trainings

Professional Development in Montessori Visual Arts Education | 6 Video Trainings, yellow logo
Earn 7 hours of professional development in visual arts education. Gain proper art literacy training to set up your classroom. Watch all 6 videos this summer. No more guessing on what art lessons you should be teaching!

There’s a lot of art advice out there that is not tailored to teach YOU proper art literacy for children. I’ve spent years designing curriculum and training courses to assist Montessori guides in effectively teaching art lessons to children.
I have designed this summer art video bonus  to help you get on the right track!

When you purchase this 6-video set, you will also receive an invitation to a special Q&A session with me. This session aims to address all your questions and demonstrate the correct art materials to incorporate into your classroom. The live session is scheduled for mid-August (date TBA), allowing you ample time to watch and absorb the videos beforehand.


BUY 6 VIDEO BUNDLE NOW for instant access!
These summer 6-video trainings is on sale.
image

In this pre-recorded 20-minute training, Spramani explains the essential areas young children should learn in visual arts and discusses why it is important to teach these skills in the 21st century.


image

In this pre-recorded 1-hour training, Spramani delves into what Montessori art guides should prioritize teaching first. She outlines the key areas to focus on, provides examples of art lessons, and offers insights on what to present and demonstrate to children who are new to learning art. Gain access to a wealth of professional art teaching advice in this comprehensive session.
image
Embark on a journey of discovery with Spramani in this enlightening 3-part video series spanning 2 hours. Discover how to engage your child outdoors, fostering scientific and artistic observation skills. Uncover the power of using art in conjunction with Montessori subjects to ignite a curiosity for the natural world and enhance knowledge. Learn how art lessons can intricately represent diverse aspects of Montessori topics found in nature, including seasons, soil layers, energy, rocks and minerals, fossils, landforms, water, flora, fauna, and the atmosphere.
image
How to Stage A Montessori Art Shelf
In this 1-hour pre-recorded video, Spramani shares her: – Proprietary staging system for Montessori classrooms – How to stage to meet the arts standards – What types of materials to stage – How to support group and independent work, and much more!
image
She shares examples of how these conversations should sound, drawing upon her 30 years of experience in positively and supportively engaging with students to encourage creative expression as an art facilitator.

image

In this 1-hour video, Spramani shows you which watercolor paints to use for teaching children. She provides you with all the tips on what to buy, how to set up, and how to prepare for watercolor process-based activities. Great if you are curious.
Limited Time Art Sale!
Buy Art Training Now
Start Your Art Learning Today!

Get instant access to all 6 videos. Enjoy a 3-year viewing window, giving you ample time to delve into the pre-recorded live sessions led by the esteemed art teacher, Spramani Elaun.

Whether you choose to watch on your phone, tablet, or desktop, these videos are available for your convenience anytime, anywhere. Get the necessary training to start art programming in your classroom.

All rights reserved © 2024, Nature of Art®

No part of this blog may be used or be reproduced in any manner whatsoever including reproducing, publishing, performing, and making any adaptions of the work – including translation into another foreign language without written permission except in the case of brief quotations embodied in critical articles and reviews. Nature of Art® Publishing P.O. Box 443 Solana Beach, California 92075.
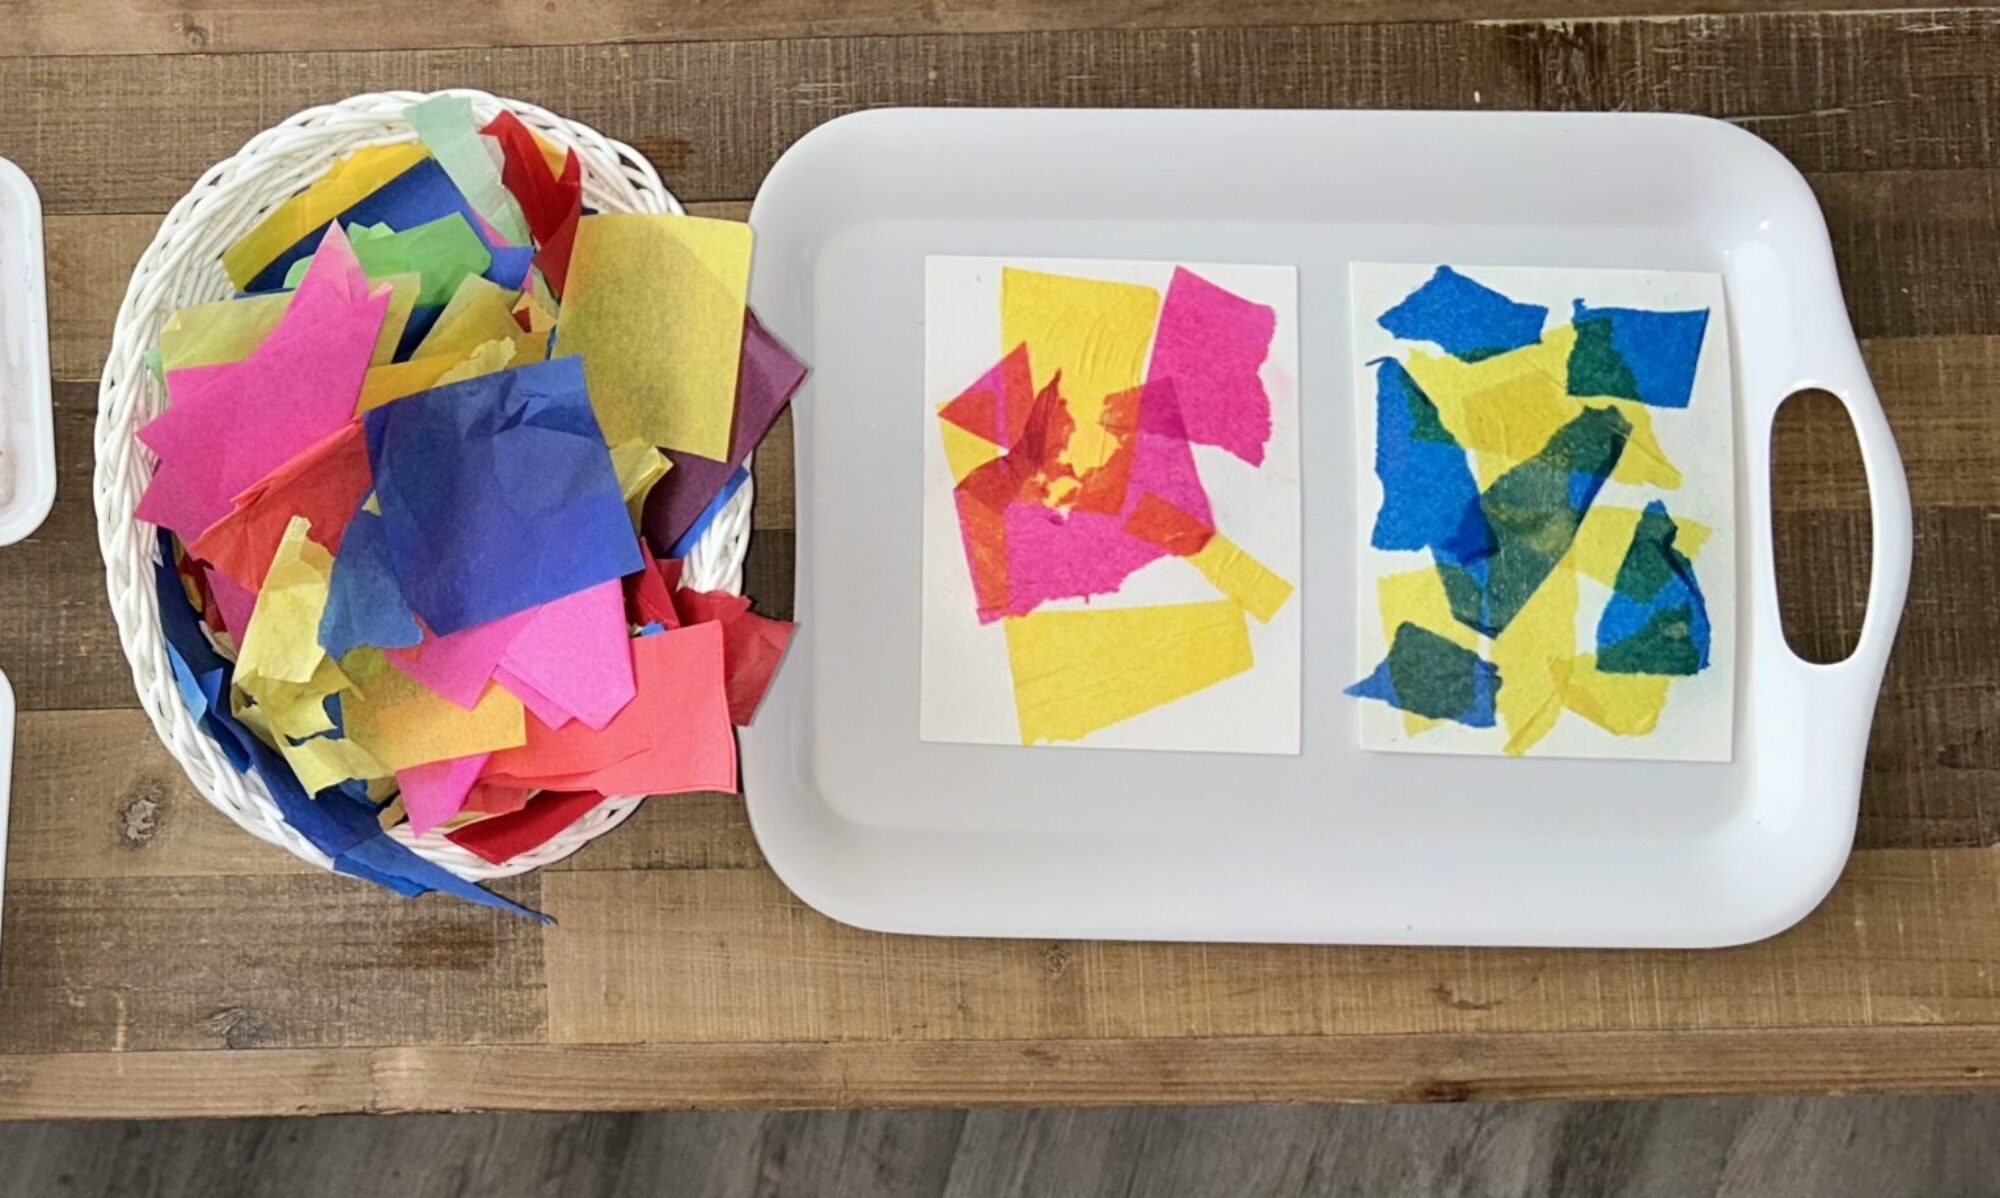
Montessori Art Routines & Expectations– Part 1

I have been getting some good questions from parents and teachers about art routines. So I will be doing a 3 part series explaining my most successful Montessori art routines and expectations.

Montessori Art Routines & Expectations

Art routines can help you not worry about prepping daily, plus stop classroom chaos! When students understand routines they know how to encounter the art space. When you design art routines there’s less guess work for the student. Plus children actually thrive and succeed with routines in place. Outlining routines lays the foundation for actions and expectations from your students.

Montessori art routines can be simple and last only minutes. While others may be complex with students working up to an hour. Children already have routines that start the minute they get out of bed each morning. Like brushing their teeth, dressing, eating, and getting to school. In most cases you usually have your students in routines at the start of the day. So why not set them up for art.

Today I will share what some of these routines look like. I’ll share two key important routines to start with, and the others in part 2 and 3 in this series:

  • Art Smocks
  • Art Material Set-up
  • Art Language
  • Process-Based
  • Creative Flow

Montessori Art Routines & Expectations

These routines have worked with tens of thousands of children I’ve worked with. The first expectation is that art is messy and I have a system in place to ensure messes don’t spread around the room. This system keeps wet mediums from spreading around the room or on clothes. I have this conversation before children touch any mediums. Here’s how that might sound.

“Today I thought I would introduce you to the art space I’ve designed to work in, and how to manage the artist materials. The art space is available to those who agree to follow my simple rules.”

With that agreement, then you can move into the smock demonstration.

I explain how messes accrue from spills, hands and splatters. I further explain how the space is designed to manage that type of mess. The first thing I do is introduce the artist’s smock (apron). I explain how artists wear a smock when working on art projects. Then I explain the function of a smock is to keep their clothes and hands clean. I explain when their hands become spoiled, they will use their smock to wipe them, kind of like a big napkin. I explain that artists do not go back and forth cleaning their hands while working. This helps to keep mediums from spreading around. They stay in their work space and use their smock to manage that type of mess.

I don’t have rags or napkins nearby to wipe with. This eliminates paint, glue or pigmented mediums from smearing around the space. Cleaning hands happens after everything is put away, and they are ready to transition out of art. Then I show them what this action looks like by wiping my hands on my smock. I also show them where to find their smock, how to put it on, and where to return it.

I recommend you have your students always wear a smock or art tee-shirt when working in these spaces. If they are working like an artist, they should dress like an artist. It may take time to implement. But if you keep reminding them, everyone in the class starts to behave artfully.

Material Set-up Routines

Set-up presentations are key and can support your students in many ways. By introducing these routines children will be able to set-up independently. This helps with getting into creative flow states. They will be able to construct and use the materials in artful ways. And be able to clean-up the materials on their own. They will also take on the responsibility of leaving the materials ready for the next student to use.

So what type of material set-up routines should you introduce to your students:

  • How to gather art materials
  • The expectations of how they will work in the art space
  • How to use tools & mediums properly
  • Where to store artworks
  • How to clean up the materials
  • How to return them for the next student
  • How to transition out of the art space

Most art activities require students to get everything they need to construct. So beforehand you will need to decide which materials to stage for easy access. Group work is where you set-up stations for students to pick up their materials, or you pass them out. Independent work is when you stage the materials for students to collect on their own. Either way you will have to be sure everything is ready to access. For both you still want to explain the expectations and procedures and order of work flow.

Example: You will gather around the circle so I can discuss the art mediums, how they work, and show art technique. And even share some artist samples. Then direct when it’s their turn to get their materials. How long they work, and where to store completed artworks. How-to return the materials back to their station, how-to be dismissed to put their smock away and wash up.

After you have presented a few times, your students will understand these routines.

Diverse Learners

Chaos happens when students don’t understand their individual role. You might have diverse learners in your classroom. Some might be good at art, but not good at following the linear work flow. In this case you may need to group your diverse learners into a smaller group. To process the instructions slower giving them more time to go through the flow of the activity.

Some might get distracted or confused in larger group commotion. In this case I would recommend you set aside time to work with them in a slower smaller paced group.

You or an assistant can work throughout the work cycle showing them the steps. You may have to slow down every step. Showing them how each step looks like. Picking up the materials, working along side them, and how to store finished artworks. Even how-to gather and clean and return materials. Make time to answer their individual questions. You will eliminate the chaos and your studwents will fall into routines.

If you would like to know more about my art method, check out my books, curriculum and teacher professional development [PD] HERE.

Warmly,

Spramani Elaun – Art Instructor

All rights reserved © 2024, Nature of Art®

No part of this blog may be used or be reproduced in any manner whatsoever including reproducing, publishing, performing, and making any adaptions of the work – including translation into another foreign language without written permission except in the case of brief quotations embodied in critical articles and reviews. Nature of Art® Publishing P.O. Box 443 Solana Beach, California 92075.

How To Bring Art Into The Classroom – Elementary

How To Bring Art In To The Classroom – Elementary
Elementary Montessori

By Spramani Elaun

Every Montessori school should have an art environment. Whether an art shelf inside the classroom, dedicated classroom, or specials visiting. Elementary students should be engaging in some type of art lessons regularly. Allowing children to express creativity plus building basic skill sets. One of the reasons art programs exist is to expose children to different kinds of mediums. In this blog I want to share some ideas on How To Bring Art Into The Classroom

When children are exposed to different art activities they are likely to find the right art domain they enjoy. As children find the right art experiences they enjoy, they become independent as they practice these skill-sets. When elementary students work independently they can also self regulate their own stress with hand work in the classroom. Independent working students can also reach creative flow states! So where should you start with to bring art into the classroom?

6 Art Areas To Focus On

  • Schedule Art
  • Choose Art Subjects
  • Teach Art Elements
  • Choose Art Mediums
  • Choose An Artist Technique
  • Teach Skill Building Foundations
  • Focus On Art Direct Aims

Schedule Art Lessons

Start with scheduling regular interactions with art making in the classroom. Schedule daily, weekly or even bi weekly art lessons. Even bi monthly if your teaching schedule is super busy. I did this as a visiting Montessori art specials and I heard from Montessori guides how the children learned so much from just 4 visits! Once you have chosen the day, move to creating time segments. Be sure your timeline is specific to lower or upper elementary attention spans.

Art Subjects To Teach

Then move into deciding which visual art subjects you want to explore. I recommend choosing from my five art domains. Subjects like painting or color theory. Learn more about the 5 domains by buying: Defining Visual Arts Book HERE. Once you decide the area you want to focus on then you can decide on the lesson plans.

How To Bring Art In To The Classroom – Elementary, students crafting

Art Elements To Teach

To meet the national art standards it’s important to teach children the Art Elements. The Art Elements cover things like line, color, shape – etc. Each one of your art lessons should always focus on a key art element. I can’t stress enough how important this is to a solid art program. I meet many Montessori guides not even aware of art literacy standards. Even how to teach the artistic process, how-to scaffold art lessons, or what art sequences should come next. Learn more about the Art Elements by buying: Defining Visual Arts Book HERE

Art Mediums & Technique

Then the fun stuff starts by deciding on which mediums to experiment with first. This also includes what presentations and demonstrations to schedule. For example you could teach the subject of painting and focus on the watercolor medium. Then show children a crayon technique – wax resist marks. Or let’s say you decide to integrate a sensory craft with zoology. Like cutting sea life shapes from paper with a collage – technique.

Montessori Elementary Art | How To Bring Art In To The Classroom

Building Art Skill-Sets

The best advice I have for you is to teach how to set-up, clean-up, and prepare the environment for their next classmate, learning to complete the cycle in the Montessori way first is important. This supports independent work through the school year. Then foucs on building skill-sets and don’t waste time on the wrong type of art lessons. Like focusing on the Masters, copying images, or too much process- based art. Try not to focus lessons on copying the Masters artworks. These lessons can be lacking in developing independent art skill-sets or their own creativity. Montessori elementary students need the right order of skill-set lesson first.

Focus on Art Direct Aims

The other important thing I want to share is even if you can’t draw or paint you can still teach proper art lessons. Your own refined skill-sets are not the focus. What’s important is knowing your direct aims. Direct aims like preparing the environment, and presenting the right order of demonstrations. Scheduling and choosing age appropriate art lessons. Indirect Aims will happen like – your students brainstorming or conjuring up original ideas. Even exploration that leads to the most optimal state of creative flow!

Teaching art can be intimidating without any basic knowledge or experience. But I’m here to tell you I’ve taught thousands of parents and teachers. I have lots of preparatory teaching methods easy for you to follow. But here’s a secret… you will learn right beside your students, I promise!

Montessori Elementary Art | How To Bring Art In To The Classroom

Art Professional Development

I invite you… 

No matter what capacity of training you desire, I’ve built art teaching resources you can have access to!

Choose:

Blog Articles

Free Checklist

Teaching Books

Video Training

Art Lesson plans

Sequential Art Curriculum

Professional Development

Montessori In-service Training (email info@Spramani.com)

Art Certification

Custom Art Programing (email info@Spramani.com)

All rights reserved © 2024, Nature of Art®

No part of this blog may be used or be reproduced in any manner whatsoever including reproducing, publishing, performing, and making any adaptions of the work – including translation into another foreign language without written permission except in the case of brief quotations embodied in critical articles and reviews. Nature of Art® Publishing P.O. Box 443 Solana Beach, California 92075.

How to Stage an Art Environment with Art Materials for Montessori Toddler Environment

Montessori Toddler Art Activities | Staging Environment

Montessori Toddler Art Activities

For the longest time, teachers of early childhood students have been told, “toddlers can’t learn art.” And based on that misinformation, as well as out-of-date art teaching practices, you might be thinking that’s true too. I’m here to tell you that’s not the case!  Toddlers CAN start to learn art!  It all comes down to how you teach them. After years of observing art, I’ve developed my very own teaching method that engages and excites young children; it introduces them to art in a way that makes sense to their little developing brains. I want to share some quick ideas on teaching art to toddlers.

Montessori Toddler Art Activities | Staging Environment

Process-Based

Montessori toddler art activities should be process-based only. Discovery and experimentation are key to process art activities for toddlers. Their learning and development of problem solving skills come from spending time making process art. Want to learn more about what Montessori toddler process-based art means? Visit Teaching Process-Based Art in the Montessori Classroom

Montessori Toddler Art Activities | Staging Environment

Montessori toddler art is tactile 

Art for toddlers is a very sensorial experience. Visual art learning can happen from direct sensory touching by hands. Tactile art making stimulates learning in different ways than visual or audio learning. For a developing child, tactile exploring can also lead to better fine-motor function and control. 

Art Develops Early Motor Movement

In recent years science researchers have established that early motor movement develops better cognitive academic performance in the later grades. Children that practice motor movement early even starting in infancy can directly effect cognitive development and their readiness for learning. 

montessori art curriculum
Birch Aquarium at Scripps Institution of Oceanography | aquarium.ucsd.edu

Toddler Safe Art Mediums

Start with safe non-toxic paints, homemade play dough, and safe doodling supplies like crayons and tempera paint sticks. Use only safe non-toxic art supplies for toddlers. Create spill proof environments children can play and spill if needed. I recommend outdoors or rooms with no carpets.

Start with 15 minute art activities toddlers can explore, move to 20 minute segments. Be sure tables are short and children can move around easily. Only introduce 1-to-2 movements, like making a brushstroke, or rolling out clay.  Use colorful story books to make connections to art elements. Start with teaching very basic art elements like colors, shape and line.

arts and craft book by Spramani Elaun

Spramani’s Books

Teach children visual arts

Curriculum For Children

Get step-by-step art curriculum to teach visual arts. Check out our 4 art curriculums:
Painting
Drawing
Color Theory
Clay Modeling

All rights reserved © 2024, Nature of Art®

No part of this blog may be used or be reproduced in any manner whatsoever including reproducing, publishing, performing, and making any adaptions of the work – including translation into another foreign language without written permission except in the case of brief quotations embodied in critical articles and reviews. Nature of Art® Publishing P.O. Box 443 Solana Beach, California 92075.

Montessori Practical Life Activity | Winter Wrapping Paper Collage: Cut, Tear & Glue

Wrapping paper collage

Get ready to save all your wrapping paper scraps for a winter wrapping paper collage!
Bring them into the classroom and recycle them to give students the opportunity to create unique pieces of art. Ask your parents and students to collect their home wrapping paper scraps for this Montessori art activity.
This is one of the simplest Montessori practical life activities to keep kids busy. And while I put this into the winter art projects category, you can really do this any time of year, with any type of recycled scrap paper. This art activity is great for all ages, early childhood, lower and upper elementary.
And you can actually teach scaffold tasks while building essential foundational skill sets.

  • Coordination
  • Independence
  • Scissor cutting or tearing
  • Gluing & Pasting
  • Composition
  • Problem Solving

For more Montessori activities related to this project, download my Ultimate Winter Arts & Crafts Idea Guide and check out page 9.

Need more Collage ideas? Read my Collage Ultimate Montessori Collage Guide

wrapping paper collage
Early Childhood Group Collage

Preparing the Environment for Wrapping Paper Collaging


Supplies

  • Wrapping paper scraps
  • Scissors
  • Glue
  • Paper
  • (Optional) pencil and eraser

How to:

There are so many reasons you want to give your students the opportunity to gather their own materials, one is truly allowing the child to work creatively. Gathering allows children to create their own individual creations. Second, this supports problem-solving skill sets. Children will go back and forth working out their design elements.

This project can be done two ways:
1. Let students choose the paper designs they want to work with.
Cut or rip pieces into different shapes.
Using these pieces, they can aim to create a specific object/design or keep it abstract.
Have them move the pieces around their paper and experiment with the design.
Once they’re happy with their image, have them glue the pieces onto their paper.
Or,
2. Have students decide on an image they want to create (fish, butterfly, face, mountains, etc.). Lightly draw an outline of the design onto their paper.
Cut the wrapping paper into shapes that will fit within their image.
Once they’ve put the pieces together to their liking, glue them onto their paper drawing.

winter collage kids arts and crafts

Toddler/Early Childhood Group Collage

Gluing and pasting are essential art practices for young students that lead to advanced craft skills. Here is a simpler setup for early childhood grades as a group activity. You can have a couple of students working at one time, or have one student walk up to this activity table.
For more information on setting up for early childhood children, be sure to read my Early Childhood Art Collage Guide https://montessori-art.com/montessori-early-childhood-art-collaging/

Basic table set up steps:

  • Tape down a large paper filling up a tabletop
  • Tape masking tape down on paper into interesting sections so children can collage inside the open spaces
  • Prepare materials like wrapping paper scraps, glue, scissors in a basket or tray for children to reach easily
  • Demonstrate the movements of tearing, cutting, and gluing onto the large paper
  • When it’s fully covered, slowly pull take off, hang in the classroom as art the children can look at and be excited they took part in

Have fun creating your Winter Wrapping Paper Collage Art!

All rights reserved © 2024, Nature of Art®

No part of this blog may be used or be reproduced in any manner whatsoever including reproducing, publishing, performing, and making any adaptions of the work – including translation into another foreign language without written permission except in the case of brief quotations embodied in critical articles and reviews. Nature of Art® Publishing P.O. Box 443 Solana Beach, California 92075.

How-to PAINT PAPER like Eric Carle | Montessori Art

How-to PAINT PAPER like Eric Carle | Montessori Art

Paint paper like Eric Carle

Every summer, I host art camps in San Diego, and my students’ top favorite project to do with me is to paint papers! In this post, we will teach you how to paint paper and collage like artist and author Eric Carle. So I thought I would share this fun Montessori art activity you can introduce to your students.

I like to give my students unusual tools, bright paint colors, different colored papers, and crazy things to make interesting textures and patterns. This also prepares papers for future projects that can be cut and be collage into interesting shapes.

Teach the Elements

Painting papers is a great way to teach the Elements and Principles of Design. You can teach texture and patterns, a vital art standard topic children should learn in Montessori art lessons. The artist and author Eric Carle is famous for doing this fun and vibrant method in his book illustrations. Eric Carle is famous for PAINTED PAPERS and collaging them into beautiful creatures featured in all his books. 

Eric Carle, artist and children’s book author


Paint paper like Eric Carle
How-to PAINT PAPER like Eric Carle | Montessori Art

What is paint paper?

Painted paper is basically paint applied onto paper.  You can paint plain white paper or colored paper.  Paper painting can be created with different mediums like watercolor, gel paints, tempera, or acrylic paints (any paint). 

Children painting colors

What can you do with painted paper?

Like Eric Carle, the famous artist, paint the papers first, let them dry second, then third cut them up into new collage artworks. Eric Carle’s famous painting papers created The Very Hungry Caterpillar book with this unique painted technique.

Collaging with painted papers
ColColl
Montessori art painting supplies

What tools do you need to make painted papers?

  • Paint mediums
  • Paper
  • Paintbrushes
  • Interesting objects that make patterns and textures
  • Drying rack
  • Interesting tools
Painting supplies

Painted papers can be taught in a process-based manner

Process-based painting is more about the experience rather than following directions. When kids paint process-based, they are able to go in any direction they choose. They can explore any texture, use any color, and have any outcome happen, but have very cool painted paper; they can later cut turn into another art piece. Process-based art lessons and painted papers are a great way to start teaching Montessori art lessons.

Spramani Elaun


Early Childhood Guide – Book

You’ll learn:

  • The importance of early Art Literacy
  • How to speak the ‘Artist Language’
  • The art subjects students need to know
  • The characteristics of child artists
  • Methods and approaches to teaching
  • How to create art activity environments
  • The best art materials for your classroom
  • How to plan level-appropriate activities

Buy Guide Now!

All rights reserved © 2024, Nature of Art®

No part of this blog may be used or be reproduced in any manner whatsoever including reproducing, publishing, performing, and making any adaptions of the work – including translation into another foreign language without written permission except in the case of brief quotations embodied in critical articles and reviews. Nature of Art® Publishing P.O. Box 443 Solana Beach, California 92075.

How To Modify Montessori Art Lessons for Virtual Teaching

How To Modify Montessori Art Lessons for Virtual Teaching

We made it through another year and I’m super excited for all the new lessons I have planned for you in this new year! I have so many art teaching tips, advice, lessons, and trainings I can’t wait to share and talk about! But today, I want to share some advice on teaching kids virtually, specifically, how to modify Montessori art lessons for virtual teaching—since it looks like that’s how a lot of us will be starting the year off (at least for us here in California and a few other U.S. states).

(By the way… find me on Instagram, @nature.of.art.kids and let me know if schools in your area are currently open or closed!)

Last year was a rollercoaster, to say the least, but as teachers we had to adapt. I taught all my normal art lessons, but modified them to work virtually during the pandemic. And guess what? They were huge successes!

I hope this new year turns out to be so much better than last, but just in case we’re looking at more virtual teaching and crazy curveballs, here are a few ways to make virtual teaching a little easier—and even fun! 

How To Modify Montessori Art Lessons for Virtual Teaching, spramani

5 Ways I Modified Montessori Art Lessons for Virtual Teaching 

If I’m being honest, I genuinely loved teaching in 2020. It gave me the chance to be a little creative in how I taught my students. And being an art teacher, I love the chance to be creative! Here are five ways I changed my teaching methods!

  1. I embraced storybooks into my lessons. I read fun art storybooks out loud, virtually on camera. Then, kids created their own artworks based on the topics of each book. (This type of lesson can be repeated again and again and again—with a new book each time!)
  1. I shared fun links to really cool art museums. Kids had the chance to visit those museums virtually and tell me what they liked or thought was weird. Then we created our own version of the artworks we discussed. There are lots of virtual tours offered on museum websites from all over the world! That means there is a TON of lesson and project ideas. (Always check out the kids’ education pages and resources for inspiration.)
  1. I mixed things up. Rather than having the kids look at me or just listen to just me instruct, I shared pictures and presentation slides of artworks and did lots of screen sharing in Zoom. It kept students super engaged. I also timed these lessons to be 15 minutes or less, to keep kids from being bored or checking out of my talks.
  1. I had discussions about art, instead of just giving lectures. I listened and asked my students about their thoughts and opinions. I’m not talking boring art history lessons here—I mean cool art conversations about buildings, inventions, fun pop art, and unusual art pieces. And do you know what? Kids learned a ton about art without even having to make it. Just by having conversations and having students reflect on art, you are taking kids through one of the steps of the artistic process. So don’t feel pressured to make something creative or pretty every time.
  1. I gave kids less time to work on their projects. I didn’t want them to have to sit in front of the screen for too long or work so long they get distracted. I truly modified how each segment was addressed, so we worked on a project more slowly, over time (sometimes just working on it for 15 minutes a day). It gave myself and my students some breathing room and it gave kids something to look forward to working on the next day!

I truly believe there is always a way to keep your students engaged and excited for learning art literacy. 

Where to Start: Think Outside the Box

You just have to think outside of the box and maybe even step away from typical, traditional mediums.

For example, I challenged kids to make artworks using items from around the house and out of mediums they already had. Not everyone has the same supplies at home, so I was very relaxed and let them use anything they wanted.

One project that was a big hit was creating mandalas! I asked kids to make a mandala out of whatever they wanted, and it could be a 2D or 3D version. So many fun things came back! Chalk mandalas, sticks and stones mandalas, painted rock mandalas, colorings of mandalas—so much creativity! BUT get your kids’ parents’ permission first, because they just might use up all the toothpaste as paint—yes, this was one student’s brilliant idea and while I loved it, mom was not exactly on board.

How To Modify Montessori Art Lessons for Virtual Teaching

One Step Further: Download My Easy Montessori Art Lesson Prompts Cheat Sheet

Before I became a Montessori art teacher trainer, I was an artist and homeschool mom. I also taught other art students from around my community how to create art, and have led programs in museums and educational conferences from different pedagogies throughout the world. With all this experience (more than three decades!), I’ve been able to observe the activities that excite and engage students. I’ve also learned what prompts can be done virtually anywhere—from your classroom to your students’ homes!

These virtual Montessori lessons support independent learning—and I’m sure parents will thank you for them! While you can offer these prompts to students to do while schools are closed, I also encourage you to do them in your classroom as well once school starts up again. They’re easy for you and fun for your students!

You can download 10 FREE Easy Montessori Art Activities by clicking here.

A Short Cut Just for You: Downloadable Art Lessons for Virtual Teaching

Here’s some good news: YOU can teach your kids art at home—and you don’t need any experience to do so. I’ve created the Kids Art At Home Lessons Download so that you can start presenting easy and fun art lessons to your kids.

How To Modify Montessori Art Lessons for Virtual Teaching

This limited-time bundle features art lessons from each of the visual arts domains (drawing, painting, clay modeling, crafting, and color theory), so you’re actually laying a solid foundation for your child’s art education. You’ll receive:

  • 1 Drawing Lesson
  • 1 Color Mixing Lesson
  • 1 Painting Lesson
  • 1 Clay Modeling Lesson
  • 1 Craft Lesson

PLUS, you’ll also get 50 art lesson ideas, a materials list, and video and blog resources so your kids can continue to do art every day while at home! All of this is delivered as a bundle; you’ll download each item separately, so you and your child can be introduced to and work through the activities one at a time so they don’t get overwhelmed.

You can purchase Kids Art At Home: A Bundle of Beginner Art Curriculum & Activities for Kids—which is available for just a limited time—by clicking here.

All rights reserved © 2024, Nature of Art®

No part of this blog may be used or be reproduced in any manner whatsoever including reproducing, publishing, performing, and making any adaptions of the work – including translation into another foreign language without written permission except in the case of brief quotations embodied in critical articles and reviews. Nature of Art® Publishing P.O. Box 443 Solana Beach, California 92075.

Holiday Craft | Painting Ornaments

During the holiday things get busier, but we also create space for special moments, even in the Montessori classroom. Painting holiday crafts are a fantastic way for children to express their creativity and independence. I’ve painted ornaments with countless kids in classrooms and workshops during the holidays, and they all enjoy this craft immensely! It’s a keepsake that students and their families can cherish for years. Every year, I have kids coming back to create a new ornament for their collection.

Holiday Craft | Painting Ornaments

Setting Up a Kids Craft Activity

One of the great things about this kids’ holiday craft is its simplicity in setup, requiring just a basic paint kit without the need for many special items. Opting for woodcraft ornaments is beneficial as they are environmentally friendly compared to plastic and safer for younger children than glass ornaments.

Here are some handy tips for organizing this festive art activity for your students (or for kids at home too!):

Holiday Craft | Painting Ornaments, child painting

Creating a Mess-Free Painting Area

Ensure the painting space is located in an area where children can freely engage in a bit of messiness. Consider using a drop cloth, especially if painting indoors. Provide smocks, aprons, or large old t-shirts for the kids to wear, protecting their clothes from potential stains—some paints are challenging to wash off fabrics.

To enhance the painting experience, place the materials at eye level on a flat and stable surface, such as a table. Adding another layer of protection with a drop cloth or old newspaper on top can further safeguard the painting area from spills and splatters.

Holiday Craft | Painting Ornaments

Ornament Supplies

Here’s a list of everything you’ll need for this kids’ holiday craft:

  • Wooden ornaments – any shape will work, but ‘holiday shapes’ add to the festive spirit
  • Acrylic paint – for the best and longest-lasting results
  • Paintbrushes – various sizes, including fine/tiny ones for details
  • Paint palette – any size works, even a simple paper plate
  • Glitter – choose any color; white glitter adds a lovely touch to painted ornaments
  • Smock – or another cover-up to protect kids’ clothes from acrylic paint stains
  • Napkins – for cleaning paintbrushes between color changes
  • Water jar – for rinsing paintbrushes
  • Hairdryer (optional) – handy for speeding up the drying process, especially for older kids or adults working on intricate details
kids painting crafts
Painting Tips

Ornaments: You can purchase unfinished wood craft shapes at local superstores, craft stores, or online. Glass orb ornaments can also be used, but caution is advised with younger children. Consider recycling old ornaments by refreshing their designs or allowing kids to create new ones from scratch.

Paint: Opt for acrylic paint for its durability and longevity. Memories can last a lifetime—I still display ornaments my kids painted when they were young every holiday season! Ensure you use kid-safe, non-toxic acrylic paint for this activity.

Holiday Ornaments

How to choose colors

Encourage children to express their creativity freely by allowing them to paint whatever inspires them, whether traditional holiday themes or personal creations. While kids may opt for symbols of Christmas, Hanukkah, Kwanzaa, or other winter holidays, they have the freedom to choose.

Here are some recommended colors to kickstart the painting process:

  • Red
  • Black
  • White
  • Gold
  • Silver
  • Dark Green
  • Yellow
  • Orange
  • Pink
  • Purple
  • Brown
  • Burgundy deep red

If you don’t have all these colors, that’s perfectly fine; beautiful ornaments can still be created using just three to four colors!

Remember, when using glitter, ensure children apply it while the paint is wet. If they wait until the paint dries completely, the glitter won’t adhere well and may not stick effectively.

Take it a Step Further: Grab Your FREE Kids Holiday Crafts Painting Checklist!

If you’re new to painting activities with your students, get ready for a delightful experience—kids truly enjoy this craft! The setup is straightforward, making it easy to repeat with your students multiple times throughout the holiday season. You can also explore related activities like rock painting or painting on paper using the same materials; only the images, paint colors, and canvases may vary.

kids painting book

Buy Kids Painting Online Here

Painting Guide for Teachers and Parents

Discover a straightforward guide tailored for teachers and parents to kickstart painting lessons with ease. This book equips you with essential knowledge on the required materials, the best paints suited for kids, fundamental painting techniques, and my top tips for creating an exciting painting exploration experience for your students. Get ready to ignite a passion for art in your students as you embark on this colorful journey of creativity and learning. Unleash the joy of painting and inspire young minds to express themselves through art! ORDER NOW

A Short Cut Just for You

Once you see how much your students love painting, you’re going to want to include it as a regular part of your curriculum. My Kids Painting Practice & Process Curriculum has 57 master lessons that walk students through everything they need to know to be successful at painting, from setting up a paint station and holding a brush all the way to creating beautiful nature landscapes and painting different types of animals!

Each lesson is part of a sequence and includes all the components, tips, materials lists, and instructions you need to ensure you will be able to actually teach your students to become skilled painters. All you have to do is simply follow the instructions and easily present the activities to your students.

Kids Painting Practice & Process Curriculum sets the foundation for their art education and will help them transform into little artists! To purchase the curriculum, click here.

All rights reserved © 2024, Nature of Art®

No part of this blog may be used or be reproduced in any manner whatsoever including reproducing, publishing, performing, and making any adaptions of the work – including translation into another foreign language without written permission except in the case of brief quotations embodied in critical articles and reviews. Nature of Art® Publishing P.O. Box 443 Solana Beach, California 92075.

Crafting With Natural Found Objects | Montessori

This blog post is a part of a three-month series: Montessori Art in the Natural World. This series is about growing kids’ knowledge about the natural world by taking them outside their home or classroom and challenging them to create focused art, based on the nature around them. Every aspect of nature—seasons, layers of the earth’s soil, energy, rocks and minerals, fossils, landforms, water, flora, fauna, the atmosphere—can all be represented and expressed through art lessons including, nature crafting and crafting with natural objects.

Crafting With Natural Found Objects | Montessori

Crafting With Natural Objects

There are so many fun ideas and engaging, hands-on ways to teach your Montessori students about nature through crafting with natural objects. It’s a wonderful gateway to introduce and connect kids to the natural world. Also, the outdoors offers an endless selection of natural objects that are just waiting to be found and designed into clever nature crafts. 

These are a few commonly found, natural items that can be used for crafts:

  • Alabaster
  • Corn husks
  • Eggs shells
  • Feathers
  • Flowers
  • Gems
  • Gourds
  • Grasses
  • Leaves
  • Mushrooms
  • Pinecones
  • Rocks
  • Sandstone
  • Seashells
  • Seed pods
  • Twigs
  • Weeds
Crafting With Natural Found Objects | Montessori cultural studies
This is a simple dress similar to what may have been worn by Sacagawea 

History and Natural Found Objects

Crafting with natural objects is a great segway to teach students part of the Coming of Humans Great Lesson!

So much of human history and culture revolves around crafting. Our ancestors used natural found objects for making important tools that helped them survive their day-to-day lives. They would collect stones and bones to use for grinding, scraping, mortars for cooking, and as weapons to protect their villages from attacks and predators. They used stones and seashells in gift-giving. In addition, seeds and feathers were often used in ceremonial activities. These nature crafting activities have been found across all cultures!

Crafting With Natural Found Objects | Montessori

As society evolved, nature crafting evolved into a more leisure activity (although many people still used natural objects for daily tools too). Some nature crafts transcended both uses—being useful everyday items and also relaxing and calming to create! For example, in colonial times, the early settlers would craft candles from natural beeswax, make dolls from grass and reeds, and quilts were sewn together with naturally-woven materials. Crafting with natural objects was a normal event for so many generations. Unfortunately, many kids today have never been introduced to these types of nature crafts.

Many parents ask me the best ways to teach kids about nature and art and I always tell them to start crafting! Making crafts using only objects found in nature is an amazing way to have children slow down and become more present. This connects them not just to nature, but to our past and ancestors as well.

Take a look at ancient clothing and you can see natural objects—like bones, seeds, flowers, feathers, seashells and so much more—fastened and attached throughout the garments. Native American cultures used many objects found in nature to create elaborate headdresses too.

Crafting With Natural Found Objects | Montessori

Crafting with Natural Objects Helps Develop Fine-Motor Skills

Almost every crafting activity provides kids with excellent opportunities to develop their fine motor skills! Improving these skills is so important for kids to build their independence. Nature crafting activities like collecting (picking up) small natural objects, pasting, sewing, and cutting all require and strengthen fine-motor coordination.

Nature Crafts Can Teach Kids About Nature’s Limited Resources

Another great bonus of crafting with natural found objects is that they can teach kids important ideas and lessons about the limited natural resources of our world. It gives you a chance to teach students that although Mother Nature is plentiful when it comes to resources, today’s climate change and growing industrialism and commercialism mean we have to be diligent in protecting them. So, make sure you emphasize the need to gather the materials they find in nature responsibly. I love these types of crafts because they help our future leaders connect to nature and understand their role in protecting our environment and keeping our ecological systems balanced.

Crafting With Natural Found Objects | Montessori

Where to Start: Crafting With Natural Objects Ideas for Montessori Students

Forging natural items and using them to create heirloom gifts and artworks is a great way for students to receive from all the benefits of crafting with found nature objects. They are learning history, strengthening their fine motor skills, and taking responsibility for our Earth. 

Nature crafting activities for kids may include creating:

  • Baskets
  • Ceremonial bowls
  • Cornhusk dolls
  • Friendship bracelets
  • God’s eye mandalas
  • Lanterns
  • Memory boxes
  • Nature souvenirs boxes
  • Nature tapestries
  • Necklaces and other jewelry
  • Paper crafts, like collages
  • Pottery
  • Sandcastle jars
  • Sandstone sculptures
  • Shell medallions
  • Windchimes
How-to Teach Nature Journaling to Montessori Kids

One Step Further: Montessori Nature Activity Outdoor Journal Checklist

How-to Teach Nature Journaling to Montessori Kids

Here’s a bonus nature art activity for you! While your students are out collecting nature objects for crafting, have them take out their nature journals and record their observations. (For information and instructions on how to create a nature art journal, click here.) 

Nature journaling is a relatively independent activity, but you should still guide your students to make sure they’re following scientific principles and standards. This Nature Journal Checklist will help you make sure your students are including data that helps them implement both scientific and artistic principles during their expedition.

Print it out or save it on your phone so you have it with you the next time you lead your students outside to journal or collect nature objects for crafting.

To download the checklist for FREE, click here.

A Short Cut Just for You: Painting Curriculum For Kids

Along with crafting with natural objects, students can also use their found nature objects in painting lessons! My Kids Painting Practice & Process Curriculum has 57 master lessons that take kids from setting up a paint station and holding a brush all the way to creating beautiful nature landscapes and painting different types of animals! And, each lesson is featured as part of a sequence and includes all the information—materials, demonstration technique, and direct and indirect aims. So, you can simply follow the instructions and easily present the activity to your students.

Kids Painting Practice & Process Curriculum sets the foundation for their art education and will help them transform into little artists! To purchase the curriculum, click here.

All rights reserved © 2024, Nature of Art®

No part of this blog may be used or be reproduced in any manner whatsoever including reproducing, publishing, performing, and making any adaptions of the work – including translation into another foreign language without written permission except in the case of brief quotations embodied in critical articles and reviews. Nature of Art® Publishing P.O. Box 443 Solana Beach, California 92075.

Outdoor Nature Journaling | Montessori Kids

This blog post is a part of a three-month series: Montessori Art in the Natural World. Observing and drawing inspiration from nature is an important way to connect children with the structures and elements of the natural world around them. Pairing art with a Montessori nature activity can teach kids about the Coming of the Universe and Earth and the Coming of Life in a very meaningful way.

Outdoor Nature Journaling | Montessori Kids

Part 2. – Outdoor Nature Journaling

This series is about growing kids’ knowledge about the natural world by taking them outside their home or classroom and challenging them to create focused art, based on the nature around them. Every aspect of nature—seasons, layers of the earth’s soil, energy, rocks and minerals, fossils, landforms, water, flora, fauna, the atmosphere, different biomes, and even the building blocks of universal mitochondria—can all be represented and expressed through art.

Nature journaling is a tool scientists and explorers use to record important field notes and observations. It can also serve as a way to record history. Sometimes we can’t disturb nature, but we can record the experience by carefully observing and taking specific notes. Students can improve their critical-thinking skills through nature journaling.

Nature journals are unique to each individual owner; they’re composed of what inspires the artist, or in this case, student. Usually, nature journals are a variety of artistic expressions based on the natural objects students see outdoors, including:

  • Observation notes
  • Descriptions of experiences
  • Simple diagrams 
  • Simple sketches

Benefits of Outdoor Nature Journaling

Keeping a nature journal strengthens students’ observational skills. For instance, when a child knows they’ll have to draw or record specific characteristics of the natural world, they’ll put care into taking a closer look at their subjects as well as noticing and memorizing details.

Outdoor nature journaling is specifically suited for teaching Montessori students about biomes. It requires students to focus on, analyze, and record different parts of a biome. Each page can be dedicated to a different part of the biome. Montessori nature activities like art journaling can help students become naturalists who are more aware of and feel more responsible for their ecological footprints on earth.

[For more details on creating an art journal and its benefits, read: Montessori Art in the Natural World: Kids Art Journaling, Part I]

How-to Teach Montessori Kids Nature Journaling

Where to Start: Outdoor Nature Journaling

You don’t need very many materials to start outdoor nature journaling; it requires the same basic items you’d need to start general art journaling. For more information on the benefits of art journaling, and how to create an art/nature journal with your students, read last week’s post by clicking here

Once your students have a journal to work with, the next step is going outside; they can head out to the schoolyard, their backyards, or even a park or nature trail, depending on when and where they’re completing this Montessori nature activity. Instead of letting them wander, ask them to focus on and sketch one object for 5 to 8 minutes (this helps sharpen their observation skills). Then direct them to move on to another object and time them again. Once they’ve observed and drawn a few different specimens, head back into the classroom.

Before I take my students outside, I always remind them that they may only get a few minutes or even seconds to observe a specimen (especially animals and insects), so it’s important to observe and record details quickly. This will help them look up the correct information and do more research later; knowing how to observe and take notes can help put the pieces of the puzzle together once they’re back inside the classroom and can clean up their drawings.

It’s important to teach your students that nature journaling is about recording details—not creating perfect drawings. The key is to collect enough information quickly in pencil, with detailed observational notes. After they’re done observing and doing additional research, they can update their field notes and finalize their drawings with more details, colors, and descriptions. 

Naturalists, botanists, and book illustrators (artists) use this same observation and drawing techniques; they go outdoors to observe, and collect and record information, then, at a later time, they finish their journal pages with detailed sketches in color pencil or watercolor paint. They also fill in the gaps by doing further reading and research.

Outdoor Nature Journaling Prompts

While I encourage you to do a few “trial runs,” and give your students the freedom to observe and record whatever interests them, eventually you want them to complete and create more focused nature observations.

Every time students go out to fill in their nature journals, I ask them to record:

  • The date
  • The start and end time of their observations 
  • The location where they’re observing
  • The atmosphere (dry, humid, etc.) and temperature
  • A description of the outside landscape
  • How they were feeling that day

You can also ask them to make observations using their sensory system. Ask them to record the answers to these questions:

  • What do you smell?
  • What do you hear?
  • What do you see?
  • How do things feel to the touch?

Other prompt ideas:

  • Recording a species, include:
    • General name of species
    • Size
    • Color
    • Unique features
    • Describe their actions
    • Any noticeable patterns or textures
  • Observe the seasons 
  • Observe feelings and experiences
  • Observe interesting non-living objects
  • Observe plants
  • Observe states of matter
  • Observe local micro-biomes 
  • Observe things in the sky, things in the grass, and/or things in the water

One Step Further:

Outdoor Nature Journaling | Montessori Kids

Now that your students are ready to head outside with their nature journals, I want you to be prepared too! While nature journaling is a pretty independent activity, there are ways—besides just sharing the above prompts—that you can help guide them. This Outdoor Journal Checklist will make sure you have everything you need to keep your students on track and ensure they’re implementing both scientific and artistic principles during their expedition.

You can print it out or save it on your phone so you have it with you the next time you lead your students outside to journal.

To download the checklist for FREE, click here.

Video Training
How-to Theme Art & The Natural World

About this training

Grow your child’s knowledge about the natural world by taking them outside and challenging them to create focused art based on the nature around them.

Every aspect of nature—seasons, layers of the earth’s soil, energy, rocks and minerals, fossils, landforms, water, flora, fauna, the atmosphere—can all be represented and expressed through art lessons.

3 videos to watch

  • Inspire your child’s creative thinking
  • Make art connections with science topics
  • Book resources list download

To purchase the Theme Art & The Natural World, click here.

This image has an empty alt attribute; its file name is Unknown.jpeg

All rights reserved © 2020, Nature of Art®

No part of this blog may be used or be reproduced in any manner whatsoever including reproducing, publishing, performing, and making any adaptions of the work – including translation into another foreignlanguage without written permission except in the case of brief quotations embodied in critical articles and reviews. Nature of Art® Publishing P.O. Box 443 Solana Beach, California 92075.