Teach Process Based Activities | Early Childhood

Teach Process Based Activities | Early Childhood, girls making clay modeling art

I’ve noticed how children explore their creativity and expand their imagination through art activities. Art plays a important role in the holistic development of a creative child, with the cornerstone being process based art.

Upon my initial visits to Montessori schools and interactions with teachers, particularly those in Plane 1 and early childhood education, many tend to overlook the idea of teaching art to young children. They are both right and wrong in their approach. While this may seem contradictory, let’s delve deeper into this concept together.

Teach Process Based Activities | Early Childhood, boy with clay

When it comes to instructing art to toddlers and students aged 3-6, the actual act of teaching them specific art concepts is not always necessary. Why is that? Children need to engage in the process of creating art before delving into formal art instruction.

Understanding and recognizing process based art can be challenging. The objective of this blog post is to provide you with clarity on what process art is for early childhood education. Let’s explore what process-focused art encounters should entails.

Process art revolves around the experience itself; the emphasis is solely on engaging in art activities. In process art, there’s no concern about the final appearance of the artwork. Young learners are not expected to produce realistic or visually appealing pieces at this stage; they will delve into more intricate skills as they grow older. Currently, they are in a phase of exploration.

Teach Process Based Activities | Early Childhood

Exploration and experimentation play pivotal roles in process art for toddlers and young children. Their problem-solving abilities evolve through their involvement in process based activities.

By allowing youngsters to explore, experiment, and learn from mistakes, a stream of unique and imaginative artworks emerges. When children have the freedom to play and express themselves, they develop creative thinking skills. Additionally, process art enhances their fine motor skills, spatial intelligence, and cognitive reasoning.

For early childhood learners, engaging in the artistic process through process-based projects holds greater significance—it is the fundamental way in which children truly grasp art concepts.

Teach Process Based Activities | Early Childhood

Teaching Process Based Art

Process-based art is all about giving students room to explore their own art-making techniques. However, there should be a light, very simplistic introductory instructions on how mediums can work or be used. (This helps mitigate any messes and empowers children with the confidence to create.) I recommend showing early childhood students how mediums might turn out and the different techniques that can be achieved with each.

When teaching process art making, encourage students to experiment. Inspire them to be unique and original. Make sure they know that any type of exploration is great, and there is no wrong way to use mediums and attempt whatever they choose to create.

With process-based art, time is irrelevant, meaning they can go back and add to an older project during a different art-making session.

Process-Based Art, pictures of kids artworks, watercolor

When it comes to teaching process-based art, educators, despite their good intentions, can sometimes make errors. Here are some dos and don’ts to enhance your students’ process art experiences:

  • Don’t: Present art lessons as step-by-step instructions (reserve this for older students);
  • Do: Allow children the freedom to create without strict guidelines.
  • Don’t: Impose a right or wrong way to create a project;
  • Do: Encourage exploration and validate all creative outputs.
  • Don’t: Expect children’s artwork to mirror samples or be recognizable images;
  • Do: Appreciate that young learners are still developing their artistic skills, resulting in unique creations.
  • Don’t: Discourage students from experimenting with unfamiliar mediums;
  • Do: Provide space for creativity and individuality.
  • Don’t: Correct or push children to replicate examples;
  • Do: Embrace the idea that process art values the journey over the final outcome.

Free Mini Digital Video Course!

I hope this help gives you a understanding of how process-based art can work in the Montessori classroom. If you would like to learn more how to nurture children in the visual arts, register for my FREE mini digital course, Phases of Art Development Video.


3 to 6 Art – Early Childhood Montessori Teaching Resources

Sign-up to receive video

The Phases of Art Development is a quick digital course that explains how art making can help students develop their creativity, fine-motor skills, and focus. More importantly, I share what types of projects students at every age are capable of completing safely, and without making a mess.

Best of all—it’s free! To sign up for the course, click here.

process based art guide, by spramani good for Montessori, book cover

arts and craft book by Spramani Elaun

Spramani’s Books

Teach children visual arts

Curriculum For Children

Get step-by-step art curriculum to teach visual arts. Check out our 4 art curriculums:
Painting
Drawing
Color Theory
Clay Modeling

All rights reserved © 2024, Nature of Art®

No part of this blog may be used or be reproduced in any manner whatsoever including reproducing, publishing, performing, and making any adaptions of the work – including translation into another foreign language without written permission except in the case of brief quotations embodied in critical articles and reviews. Nature of Art® Publishing P.O. Box 443 Solana Beach, California 92075.
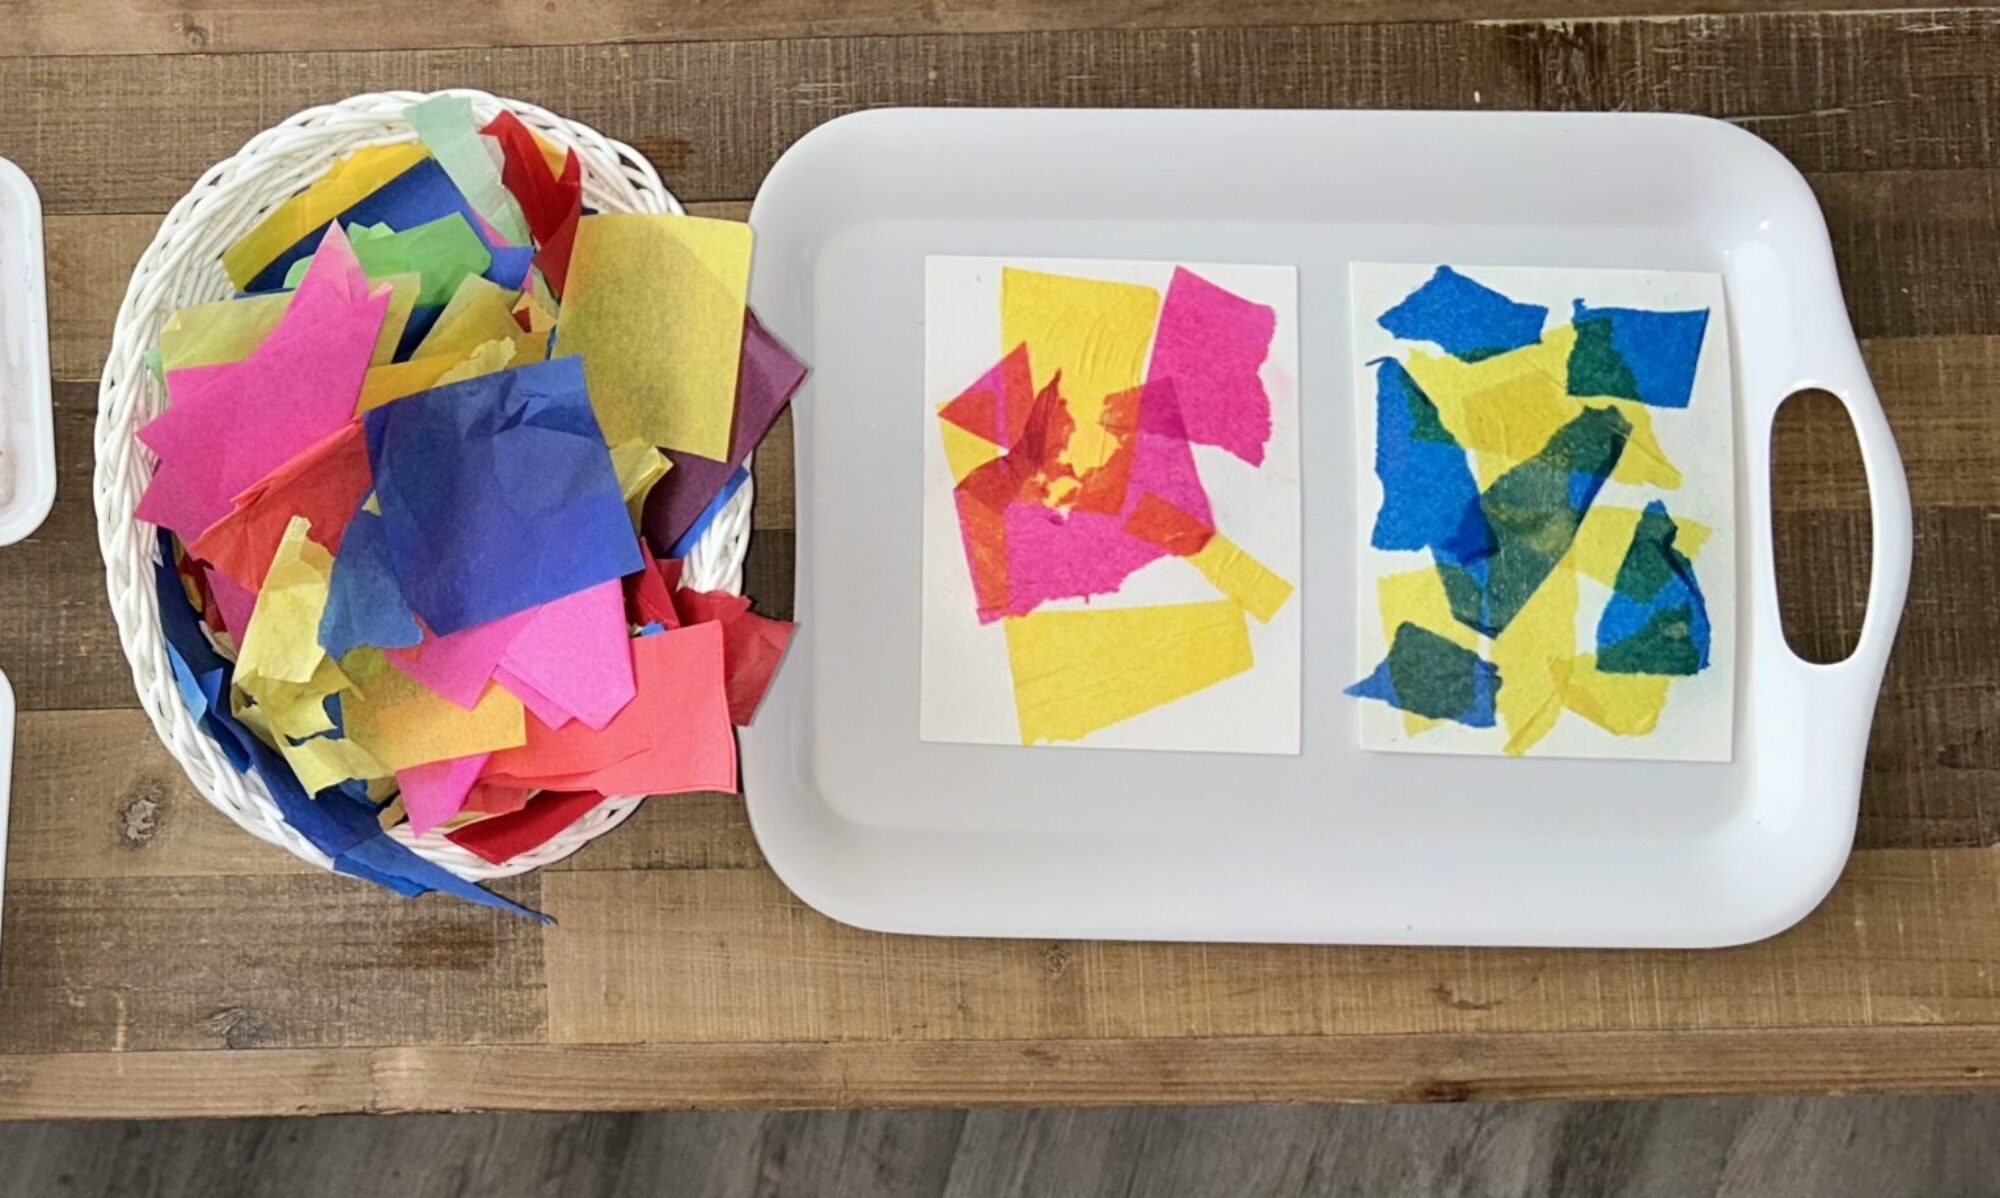
Upper Elementary Montessori Art Teach Method

Upper Elementary Montessori Art Teach Method

I’ve spent years and years researching and observing how children learn art, and what I’ve found is that children are able to grasp different artistic skills at different planes. In this new blog series, I’ll be sharing my insight on the art teaching methods that work for each age group of Montessori students.

Children of all ages can be taught visual arts and be guided through the artistic process. Each developmental phase requires different teaching styles and approaches.

Below you’ll find a general arts literacy guide for Montessori Early Childhood ages following the International Standards for the Arts Education & Sensory Visual Arts method that aligns with a child’s growth.

Montessori Upper Elementary Art Teaching Methods Resources

If you would like to understand more about which types of art projects children can work on, register for my free video course, Phases of Arts Development, which discusses teaching methods for Lower Elementary Montessori students (ages 7-9).

You can learn about Art Literacy Standards and the benefits of visual arts by reading Defining Visual Arts (paperback book).

If you would like to understand more about the phases of art development, register for this free mini digital course

Upper Elementary Montessori Art Teach Method

Upper Elementary, Ages 10-12, Montessori Visual Arts Teaching Curriculum

Students in upper L can go through the artistic process, conjure up their own ideas and see them through to completion. They’re able to do reflective work, bringing meaning to their creations and making connections to artworks in their community.

Children in this phase of art development should have different opportunities to explore different artist techniques. They can now work independently and follow guided instructions. Projects can be spread out over the course of a few days and should include a variety of concepts, such as line, shape, value, form, texture, color, symmetry, 3D and composition.

Continue to help students develop their art literacy by using art language in the classroom.

You can also continue to teach student Montessori art lessons through a combination of process-based art, creative mode, and simple copy mode.

Upper Elementary Montessori Art

Strengthen and Develop Upper Elementary Students’ Art Skills

By the time students are in upper elementary, they’re extremely competent when it comes to their fine-motor skills; in large part, this is due to the day-to-day activities they’re completing as part of their Montessori curriculum. Their muscles—both large and small—have been developed through school work and art creating, which gives them improved control over their movements. This means drawing and painting can be done in more detail.

At this age, students still need lots of exploratory sessions and opportunities to experiment with different mediums and techniques. Children are now drawing and painting with a 2D perspective, and can be introduced to simple 3D concepts—like value, shading, and basic three-point perspective ideas—as well. Again, keep lessons simple, easy to follow, and easy to understand.

Some upper elementary students might also be interested in learning realistic drawing and painting skills. However, not all children at this level will be developmentally ready for these types of advanced concepts.

Provide connections to The Elements and Principles of Design, introduction to three dimension 1 point perspective ideas, value shading, and composition relationships.

Upper Elementary Montessori Art Activities & Mediums

Here are some great Montessori Upper Elementary art projects for your students who are 10 – 12 ages in the elementary grades. These types of art activities will help develop their fine motor control and small muscles in fingers and hands while teaching the Elements & Principles of Design. (You can find non-toxic, kid-friendly art supplies needed for these art activities at Nature of Art for Kids.)

  • Drawing: crayons, color pencils, graphite pencil, and oil pastels, soft pastels etc.
  • Painting: watercolor paints, acrylic paints, watercolor crayons, watercolor pencils etc.
  • Color Theory: primary to secondary color mixing, tints & Shades, dropper color mixing, etc.
  • Clay Modeling: earth clay, non-harden plasticine clay, air-dry modeling clay, polymer bake clay
  • Crafts: Paper folding, origami, nature and paper collage, mosaic arrangement, sewing, wool felting, string weaving, nature crafting, 3D constructing etc.

Learn more about how to teach a in a Montessori curriculum by registering for my FREE mini digital course, Phases of Art Development Video. I get more into detail on upper elementary Montessori art lessons and provide fun and exciting art project ideas.

3 to 6 Art – Early Childhood Montessori Teaching Resources

Sign-up to receive video

The Phases of Art Development is a quick digital course that explains how art making can help students develop their creativity, fine-motor skills, and focus. More importantly, I share what types of projects students at every age are capable of completing safely, and without making a mess.

Best of all—it’s free! To sign up for the course, click here.

All rights reserved © 2024, Nature of Art®

No part of this blog may be used or be reproduced in any manner whatsoever including reproducing, publishing, performing, and making any adaptions of the work – including translation into another foreign language without written permission except in the case of brief quotations embodied in critical articles and reviews. Nature of Art® Publishing P.O. Box 443 Solana Beach, California 92075.

Lower Elementary Montessori Art Teach Method

Sensory Cognitive Child Art Method

I’ve spent years and years researching and observing how children learn art, and what I’ve found is that children are able to grasp different artistic skills at different planes. In this new blog series, I’ll be sharing my insight on the art teaching methods that work for each age group of Montessori students.

Children of all ages can be taught visual arts and be guided through the artistic process. Each developmental phase requires different teaching styles and approaches.

Below you’ll find a general arts literacy guide for Montessori Lower Elementary ages following the International Standards for the Arts Education & Sensory Visual Arts method that aligns with a child’s growth – Nature of Art®.

Montessori Lower Elementary Art Teaching Methods Resources

If you would like to understand more about which types of art projects children can work on, register for my free video course, Phases of Arts Development, which discusses teaching methods for Lower Elementary Montessori students (ages 7-9).

You can learn about Art Literacy Standards and the benefits of visual arts by reading Defining Visual Arts (paperback book).

Get more information on how to bring art lessons into the Montessori classroom by reading Introducing Visual Arts into the Montessori Classroom (paperback book).

montessori art how to

If you would like to understand more about the phases of art development, register for this free mini digital course.

Lower Elementary, Ages 7-9, Montessori Visual Arts Teaching Curriculum

Children at the lower L, age can do a number of different types of art projects. They can conjure up their own ideas and imaginative creations. Montessori lower elementary students can now plan with intention and think their ideas through to completion, going through the four steps of the artistic process.

At this age, students love to explore and discover what results different art mediums can produce. They encounter visual arts and Montessori art projects with lots of curiosity and a willingness to try different techniques.

Stretching Students’ Art Skills

Children can follow simple guided-art instructions and remain focused on their work for up to 1.5 hours. However, it’s still important to keep projects simple, with just a few un-complicated steps. Montessori art projects should start to introduce line, shape, form, texture, color, and symmetrical balance ideas.

You can also start introducing your lower elementary Montessori students to art language and the Elements & Principles of Design. For more information, reference Defining Visual Arts to better understand art language for young children.

Students’ fine-motor skills are becoming more controlled due to all the activities in their day-to-day Montessori curriculum and academic studies. Drawing and painting can be done with higher levels of control. The most important thing to focus on is giving children tasks that will continue to develop their fine-motor skills.

Children in lower elementary also need lots of exploratory sessions that allow them to experiment with varied mediums and techniques. Children are now drawing and painting with a 2D perspective and can be introduced to texture.

Art-Teaching Methods for Lower Elementary

Based on my proprietary sensory art method, I recommend teaching Montessori art through a combination of three methods: process-based art, creative-mode, and simple copy-mode.

  • Process-based art is about exploring and using their own imagination; it’s not necessarily focused on the child’s final piece of artwork.
  • Creative mode gives children the opportunity to explore mediums and conjure up creative images based on their own imaginations, thoughts, and ideas.
  • Copy mode refers to a systematic, step-by-step art instruction. Copy-mode should not be copy what you see in the image type lessons.

Lower Elementary Montessori Art Activities & Mediums

Here are some great Montessori Lower Elementary art projects for your students who are 7-9 years old, in the elementary grades. These types of art activities will help develop their fine motor control and small muscles in fingers and hands while teaching the Elements & Principles of Design. (You can find non-toxic, kid-friendly art supplies needed for these art activities at Nature of Art for Kids.)

  • Drawing: crayons, color pencils, graphite pencil, oil pastels, etc.
  • Painting: watercolor paints, tempera paints, acrylic paints, watercolor crayons, watercolor pencils etc.
  • Color Theory: primary color mixing, dropper color mixing, etc.
  • Clay Modeling: earth clay, non-harden plasticine clay, air-dry modeling clay, beeswax forming, etc.
  • Crafts: paper folding, nature and paper collage, mosaic arrangements, sewing basics, wool felting, string weaving, nature crafting, 3D constructing, etc.

Learn more about Montessori art teaching methods for lower elementary and get some Montessori art projects ideas by registering for my FREE mini digital course, Phases of Art Development Video.

3 to 6 Art – Early Childhood Montessori Teaching Resources

Sign-up to receive video

The Phases of Art Development is a quick digital course that explains how art making can help students develop their creativity, fine-motor skills, and focus. More importantly, I share what types of projects students at every age are capable of completing safely, and without making a mess.

Best of all—it’s free! To sign up for the course, click here.

All rights reserved © 2024, Nature of Art®

No part of this blog may be used or be reproduced in any manner whatsoever including reproducing, publishing, performing, and making any adaptions of the work – including translation into another foreign language without written permission except in the case of brief quotations embodied in critical articles and reviews. Nature of Art® Publishing P.O. Box 443 Solana Beach, California 92075.

3 to 6 Art – Early Childhood Montessori Teaching Resources

Sensory Cognitive Child Art Method, montessori

This is a guide to teaching art literacy to 3 to 6-year-old students. There is a downloadable resource available for Montessori guides. In this blog, I will highlight the important aspects of teaching early childhood art lessons. Below, you will find more information on Montessori Early Childhood for ages 3-6, following the International Arts Standards.

Children of all ages can learn visual arts and benefit from guided artistic exploration. Each developmental stage necessitates specific teaching methodologies and approaches. After extensive research and observation of children’s art education. I have discovered that youngsters acquire diverse artistic skills at various developmental planes. You can get more insights by ordering the book Montessori Art Guide – Early Childhood First Plane HERE

3 to 6 kids painting rocks, early childhood

Art making for young children involves exploration and discovery. Montessori students in the first plane, 3 to 6 years old, are prepared for simple art tasks. The most effective approach to teaching art lessons at this stage is through process-based art.

Process-based art focuses on the experience rather than the final artwork’s appearance. It emphasizes exploration and imaginative expression rather than creating recognizable pieces.

3 to 6 Art – Early Childhood Montessori Teaching Resources kids making clay

When implementing process art, provide a brief introduction to how art mediums function and can be utilized. Children in the 3-6 age group are highly curious about art materials and are rapid learners. Art lessons in Montessori early childhood education should encourage students to experiment freely. Without predetermined outcomes, fostering a spirit of exploration.

Incorporating specific activities in the Montessori art curriculum can aid in enhancing young students’ fine motor skills. Engaging in art activities helps refine both large and small muscle groups, promoting controlled movements in young learners. Introducing activities like clay modeling, brush stroking, and safe scissor usage can expedite the development of fine motor skills in children at this stage.


3 to 6 Art – Early Childhood Montessori Teaching Resources

Exploring Different Nature of Art® Modes

  • Creative-Mode: This mode serves as the foundation for process-based art learning, where children initiate their art-making journey. In creative mode, students are encouraged to explore art mediums without a specific reference or image to replicate. They rely on their imagination, thoughts, and ideas to craft unique creations.
  • Introducing Copy-Mode: Copy-mode entails structured, step-by-step art instruction. However, in early childhood education, direct replication of images should be avoided. Children at this stage enjoy imitating simple tasks observed in adults, like cleaning, painting, or gardening. Incorporate these activities into art lessons, allowing them to mimic your actions.
  • Transitioning to Copy-Mode: Begin with students replicating a basic design involving one to two steps. Once they grasp the initial concept, encourage them to transition back to creative-mode. This helps them to personalize and complete their projects according to their imagination and preferences.
3 to 6 Art – Early Childhood Montessori Teaching Resources

Art Activities & Mediums

Explore these engaging Montessori Early Childhood art projects designed for children aged 3 to 6. These activities aim to enhance fine motor control and strengthen small muscles in the fingers and hands. All while providing opportunities to engage in both creative-mode and copy-mode techniques. For the necessary non-toxic and kid-friendly art supplies, you can check out Nature of Art for Kids.

  • Doodling: Utilize crayons, colored pencils, tempera sticks, and more.
  • Painting: Experiment with watercolor paints, tempera paints, finger paints, homemade veggie dyes, etc.
  • Color Theory Play: Engage in activities like watercolor painting, dropper painting, and squeeze bottle painting to explore color theory.
  • Clay Modeling: Work with materials such as earth clay, homemade playdough, sculpting tools, beeswax, and non-hardening plasteline clay to mold and create.
  • Simple Crafts: Enjoy activities like paper cutting, string weaving, gluing, block building, and constructing with large popsicle sticks to foster creativity and dexterity.


Sensory Cognitive Child Art Method, montessori

Having the right art material for your early childhood classroom is just the first step. If you want more information on how to use each material. Or how to set up an art shelf with the materials. Plus how to teach lessons that actually help early childhood students learn art.

I’m currently selling my brand new, Early Childhood Art Guide. It includes everything you need to know to successfully bring art lessons into your early childhood classroom—without the stress. I go into more detail about art materials (such as how to use them and where to find them). And a ton of other valuable information that makes teaching art and setting up your shelf so much easier. And, right now, you can order yours today!, so don’t miss out!

3 to 6 Art – Early Childhood Montessori Teaching Resources

Sign-up to receive video

The Phases of Art Development is a quick digital course that explains how art making can help students develop their creativity, fine-motor skills, and focus. More importantly, I share what types of projects students at every age are capable of completing safely, and without making a mess.

Best of all—it’s free! To sign up for the course, click here.


3 to 6 Art Resources

If you would like to understand more about which types of art projects children can work on, register for my free video course, Phases of Arts Development.

You can learn about Art Literacy Standards and the benefits of visual arts by reading Defining Visual Arts Paperback (paperback book).

3 to 6 art guide for Montessori education

Buy Guide Now!

arts and craft book by Spramani Elaun

Spramani’s Books

Teach children visual arts

Curriculum For Children

Get step-by-step art curriculum to teach visual arts. Check out our 4 art curriculums:
Painting
Drawing
Color Theory
Clay Modeling

All rights reserved © 2024, Nature of Art®

No part of this blog may be used or be reproduced in any manner whatsoever including reproducing, publishing, performing, and making any adaptions of the work – including translation into another foreign language without written permission except in the case of brief quotations embodied in critical articles and reviews. Nature of Art® Publishing P.O. Box 443 Solana Beach, California 92075.

Practicing Brushstrokes for Chinese New Year – Montessori Art

chinese new year cultural arts kids

With the Chinese New Year just a few days away (in 2020, it falls on January 25th), why not use the holiday as inspiration for cultural arts or history art lessons? Chinese calligraphy and many pieces of Chinese art focus on brushstrokes and can easily be incorporated into a Montessori art lesson plan.

Thousands of years ago, painting and calligraphy emerged simultaneously, largely in part because they require the same tools: brush and ink. You might be surprised to know though, that calligraphy was considered to be “fine art” long before painting ever was. In fact, it wasn’t until the Song dynasty (960-1279), that painting was finally thought of as art.

montessori art lesson chinese

We can learn a lot about Chinese art—both painting and calligraphy. Namely, the importance and variety of the Chinese brushstroke.

3 to 6 Art – Early Childhood Montessori Teaching Resources

Sign-up to receive video

The Phases of Art Development is a quick digital course that explains how art making can help students develop their creativity, fine-motor skills, and focus. More importantly, I share what types of projects students at every age are capable of completing safely, and without making a mess.

Best of all—it’s free! To sign up for the course, click here.

Sumi-e Brushstrokes

Sumi-e ink painting is perfect for children to learn because of its simplistic pictorial nature-inspired images created using simple brushstrokes and without very many details or added texture.

In fact, I would say sumi-e paint exercises are ideal for beginner painters to start out with since it focuses on controlling brushstrokes—balancing between thin and thick. This is actually how I start painting lessons in my classes.

sumi-e brushstroke painting kids

I’m currently in the process of building out a complete lesson around Chinese brushstrokes, but here’s a look at the exercises I’ll be including.

montessori art painting chinese ink brushstroke
  • Lesson 1: Load paintbrush without twisting the fibers
  • Lesson 2: Wipe excess ink off the brush using the sides of a jar or ink stone
  • Lesson 3: Practice making thin, long brushstrokes with the tip of the paintbrush
  • Lesson 4: Practice making thick brushstrokes with a larger amount of the paintbrush
  • Lesson 5: Practice making spirals and lines very slowly
  • Lesson 6: Practice making dots and dashes
  • Lesson 7: Practice making bamboo leaves, with simple short and long strokes all in only one try
montessori chinese new year art project kids

Now, here’s a quick look at the Chinese New Year—feel free to share this information with your students!—and a way to practice brushstrokes to celebrate the holiday.

Chinese New Year

Chinese New Year is celebrated by more than 20% of the world. It’s the most important holiday in China and to Chinese people all over. It is a festival that celebrates the beginning of a new year on the traditional Chinese calendar.

2020 is the year of the rat.

2019 is the year of the pig.

In Chinese culture, pigs are the symbol of wealth. Their chubby faces and big ears are signs of fortune as well. Pigs have a beautiful personality and are blessed with good fortune in life.

Chinese New Year Art Project

Year Of The Pig, Chinese Sumi-e Ink Painting Lesson

The Chinese New Year is a great time to show students a way to embrace Montessori cultural arts. Here is a simple sumi-e ink brushstroke lesson. You will be creating—to celebrate the Year of the Pig—using simple brushtrokes and in just six steps.

chinese brushstroke art lesson for children how to
Basic round pointed tip paintbrush can work

Supplies:

chinese new year, pig, painting art project for kids

Steps:

  1. Make the head with a rounded line circle shape
  2. Inside of that circle, create the pig’s snout with another, smaller rounded line circle; add two slight dots for the nostrils
  3. Paint two eye marks above the snout, plus two ears on the top of the head
  4. Make a long oval line to shape the body, attached to the head
  5. Add two line strokes at the bottom of the oval shape for its legs
  6. Make a curly corkscrew twirl on the side of the oval body; this will be the pig’s tail
year of the pig, cultural art for kids, project kideas
spramani montessori art trainer in china
Teaching art lessons and training Montessori Teachers 3 – 6, in Yiwu, Province Zheijiang China.

If your students get excited about this project, make sure you sign up for my newsletter to get more Montessori art lesson ideas to share with them!

Buy Sumi-e Ink Now!

3 to 6 Art – Early Childhood Montessori Teaching Resources

Sign-up to receive video

The Phases of Art Development is a quick digital course that explains how art making can help students develop their creativity, fine-motor skills, and focus. More importantly, I share what types of projects students at every age are capable of completing safely, and without making a mess.

Best of all—it’s free! To sign up for the course, click here.

All rights reserved © 2024, Nature of Art®

No part of this blog may be used or be reproduced in any manner whatsoever including reproducing, publishing, performing, and making any adaptions of the work – including translation into another foreign language without written permission except in the case of brief quotations embodied in critical articles and reviews. Nature of Art® Publishing P.O. Box 443 Solana Beach, California 92075.

Montessori Art Early Childhood Guides

Early childhood montessori art


Below you’ll find a general arts literacy guide for Montessori Early Childhood ages following the International Standards for the Arts Education & Sensory Visual Arts method that aligns with a child’s growth – Nature of Art®.

Children of all ages can be taught visual arts and guided through the artistic process.

Each developmental phase requires different teaching styles and approaches.

Resources

If you would like to understand more about which types of art projects children can work on, register for this free video course Phases of Arts Development discussing Early Childhood, 3 – 6, and 6 – 13 years age.

You can learn about Art Literacy Standards and the benefits of visual arts read Defining Visual Arts Paperback (paperback book).Get information on how to bring art lessons into the Montessori classroom by reading Introducing Visual Arts into the Montessori Classroom (paperback book).

Get information on how to bring art lessons into the Montessori classrom by reading Introducing Visual Arts into the Montessori Classroom (paperback book).

montessori art early childhood toddler

Early Childhood, Toddler Art Teaching : 18 months to 3 years

For young children art making will be an exploratory and discovery based experience. Early childhood children do not understand the placement of visual arts, and are in a very curious state about mediums. Children should explore art mediums without any expected outcome.

So the best instruction method to introducing art lessons will be process based art, Process based art is about the experience and the process, and not focused on the child’s final piece of artwork, or whether it resembles art adults recognize.


And finally the important thing you want to focus on is giving children task for fine-motor skill development. Art creating helps develop muscles both small and large, which improves controlled movements. Be sure to provide plenty of opportunities to practice these skills.

Art Activities & Mediums For Early Childhood

Doodling – crayons, color pencils, tempera sticks

Painting – watercolor paints, tempera paints, finger paints, homemade veggie paints

Color Theory Play – water color paints

Clay Modeling – earth clay, homemade play dough

Simple Crafts  – cutting paper and weaving string. I recommend waiting to do crafts with small parts till after age of 3 years.

Learn more by registering for this free mini digital course, Phases of Art Development Video.

All rights reserved © 2024, Nature of Art®

No part of this blog may be used or be reproduced in any manner whatsoever including reproducing, publishing, performing, and making any adaptions of the work – including translation into another foreign language without written permission except in the case of brief quotations embodied in critical articles and reviews. Nature of Art® Publishing P.O. Box 443 Solana Beach, California 92075.

5 Ways to Integrate Art Activities into Montessori Great Lessons

5 Ways to Integrate Art Activities into Montessori Great Lessons

By Spramani Elaun

One of the most common questions Montessori teachers come to me with is, “How do I integrate art with my lessons?” When you combine the concepts of art and the Great Lessons, you can seamlessly support your students learning without any disconnection. And by incorporating art with what students are already learning you’re helping to instill the concepts of those subjects by putting them into a new perspective. You’re also giving their art context by showing its relationship to other parts of their world, which can lead to an increase in their art literacy. In this blog I want to share 5 simple ways you can start to integrate Montessori art activities.

5 Ways to Integrate Art Activities into Montessori Great Lessons

The Great Lessons in themselves are bold, exciting; they’re a way to awaken a child’s curiosity, imagination, and even creativity. There are really simple projects you can set up that help bring art into your everyday lessons, or specifically, your Great Lessons.

Students are used to learning new ideas through text and images, imagine how much more they’ll be able to understand and retain information when you tie in a multi-sensorial process like creating art. It will help your students learn on a deeper level. Having children create with a multitude of senses helps develop metacognitive reinforcement! I dive deeper into this in my books and online course, but here’s the gist:

5 Ways to Integrate Art Activities into Montessori Great Lessons

Art Activities Support Learning

When art lessons are integrated into the Great Lessons, you create new pathways to reach different learners in different ways, which maximizes your students’ learning on these topics. They learn to express diverse ideas through methods that can’t be done in most other academic subjects. Something I’ve discovered over the years of working directly with students is that they each have a unique way of demonstrating their true understanding. Art gives them a platform where there’s no wrong or right way to express themselves and their understanding. This is particularly why science today is backing STEAM education models!

You probably already have your calendar planned out for the year, so here are 5 simple ways to add in art and relate it to the Great Lessons.

5 Ways to Integrate Art Activities into Montessori Great Lessons

First Great Lesson: Coming of the Universe and the Earth

With the first Great Lesson, you’re teaching students about astronomy, meteorology, chemistry, physics, geology, and geography. One of my favorite projects to teach is watercolor or acrylic painting of galaxies. Students can create stunning images of galaxies and stars they see in their lessons, or let their imaginations loose and paint their own interpretations. In my sample here we created cosmic rocks by acrylic painting them with the big bang, milky way, starts and so much more.

5 Ways to Integrate Art and the Great Lessons

Second Great Lesson: Coming of Life

The second Great Lesson covers topics such as biology, botany, habitats, ancient life, and animals. I enjoy integrating nature into my projects whenever possible, making botanical art an exciting subject to teach! Be sure to explore my previous blogs where I detail various ways to incorporate fall leaves into projects. In the examples provided, we conducted a drawing lesson using oil pastels to depict rainforest animals. Another photo sample showcases drawings of natural elements like leaves, seashells, feathers, and other objects found in nature, combining pencil sketches with watercolor paint.

5 Ways to Integrate Art and the Great Lessons

Third Great Lesson: Coming of Human Beings

History, culture, social studies, and invention are all parts of the third Great Lesson. Earlier this year, I partnered with a fellow Montessori teacher (for grades 4-6), and we integrated art into a lesson on ancient civilizations. Children learned basic ideas about settlements and how government is formed. I brought in several art lessons moving children through the artistic process of brainstorming, sketching, and building a 3D model of a settlement—either ancient, modern, or imaginary. If you want to learn more about how to do this, make sure you register for my Art Teaching Blueprint online course, I provide a step-by-step process for this lesson and a ton of others.

Fourth Great Lesson: Communication and Writing

The fourth Great Lesson covers different forms of communication including reading, writing, language, and structure. As students learn about pictographs and hieroglyphics, they can draw them out or create their own and then explain in writing what they mean.

5 Ways to Integrate Art and the Great Lessons

Fifth Great Lesson: Numbers

In the final Great Lesson, students learn about numbers, mathematics, geometry, and the applications of these topics. Using clay to mold and create shapes can illustrate geometrical concepts to students, such as similarities and angles.

This is just the tip of the iceberg! I get so excited about integrating visual art and the Great Lessons and have so many more easy and practical ways to do so in your classroom. There are two ways to get more info and ideas on this: 1) sign up for my newsletter to keep up with my blog, and 2) get dozens of ideas, all in one place, by registering for my course, Art Teaching Blueprint. I can’t wait to inspire more of your Montessori lessons!

3 to 6 Art – Early Childhood Montessori Teaching Resources

Sign-up to receive video

The Phases of Art Development is a quick digital course that explains how art making can help students develop their creativity, fine-motor skills, and focus. More importantly, I share what types of projects students at every age are capable of completing safely, and without making a mess.

Best of all—it’s free! To sign up for the course, click here.

arts and craft book by Spramani Elaun

Spramani’s Books

Teach children visual arts

Curriculum For Children

Get step-by-step art curriculum to teach visual arts. Check out our 4 art curriculums:
Painting
Drawing
Color Theory
Clay Modeling

All rights reserved © 2024, Nature of Art®

No part of this blog may be used or be reproduced in any manner whatsoever including reproducing, publishing, performing, and making any adaptions of the work – including translation into another foreign language without written permission except in the case of brief quotations embodied in critical articles and reviews. Nature of Art® Publishing P.O. Box 443 Solana Beach, California 92075.

4 Fall Leaf Ideas for Your Montessori Classroom

Idea #1: Leaf Crayon Rubbing

Check out the video above for full details, or follow the instructions below.

Simple Steps:

  1. Place leaf facing down, vein side up.
  2. Place white paper on top of leaf.
  3. Hold paper and leaf firmly so they don’t move.
  4. Take crayon and start rubbing over the leaf area.
  5. The impression of your leaf should show up!

leaf rubbing with a crayon for kids

Idea #2: Leaf Pressing

Pressing leaves is a wonderful way to teach children how botanists preserve specimens. This activity can lead to many different types of art projects can down the road, such as leaf painting (see Idea #3, below). You can also let children come up with their own ideas of what to do with their pressed leaves once they’re done.

Simple Steps:

  1. Gently wipe off any dirt from the leaf.
  2. Place the leaf between newspaper sheets or in pages of a book.
  3. Place a note card with the date collected and any information gathered about the leaf, in a safe place so that you can retrieve it once the leaf is pressed.
  4. Pile a small stack of heavy books on top of the pages and press for 1 to 24 hours. 

leaf pressing ideas for kids

Idea #3: Leaf Painting

Allow your students to use leaves as a canvas and get creative with paint.

Simple Steps:

  1. Press leaves first—they are easier to paint when flattened.
  2. Select bright paint colors—acrylic, tempera, gauche, or craft paint will work best.
  3. Paint leaf with paintbrush as desired.
  4. Set aside to dry, then decorate note cards or other art projects with them.

leaf painting activity for kids

Idea #4: Clay Leaf Fossils

A great way to show children how fossils are created is by compressing leaves into wet clay!

clay leaf fossil compressions

Simple Steps:

  1. Roll out a flat slab of clay with a rolling pin. Use air dry model clay (which dries overnight), or white polymer clay (bakes to harden).
  2. Place leaf, with veins facing down, onto the clay and firmly but gently press the compression by hand or with a rolling pin.
  3. Carefully remove the leaf by pulling it by the stem.
  4. Bake or leave to air dry.

Optional: paint fossil

Clay Leaf Fossils ideas art kidsClay Leaf Fossils, model magic ideaClay Leaf FossilsClay Leaf FossilsClay Leaf Fossils MONTESSORI ACTIVITIESLEAF MONESSORI ART IDEAS FOR CHILDRENClay Leaf Fossils

The key to coming up with more engaging and exciting projects is understanding how kids learn and what would interest them. I’m launching an online course—The Art Teaching Blueprint—that teaches you everything you need to know about teaching art in a Montessori classroom and break it down into bite-sized videos so you can go through them at a pace that works for you. To get on the wait list and be notified when registration opens, click here!

montessori fall crafts fall leaf download

One Step Further: Download My Fall Leaf Inspiration Print

I personally think the fall season can give us hundreds of art activity and project ideas, but just to make it even easier on you (which, really, is such a joy because I get to share my love of both fall and art with you!), I’m giving you a FREE Fall Leaf Inspiration Print.

You can print it out and use it on your art shelf or hang it in your inspiration gallery to during the season, or let students fill it in with beautiful colors. It seems like a simple tool, right? But trust me, it’ll lead to so many amazing, creative artworks! Download the Fall Leaf Inspiration Print by clicking here.

A Short Cut Just for You

Of course, fall is just one season of the school year. If you want the tools to be able to come up with art activities all year long, you need the foundation of understanding how children are able to learn art. In my online course, Art Teaching Blueprint, I give you everything you need to easily start teaching art to your your Montessori students.

And fall registration for Art Teaching Blueprint is about to open!

I’ve been helping Montessori teachers all over the world bring art into their classroom for more than 20 years. And I’ve honed and perfected my own art teaching method, and have developed it to complement and support Montessori philosophy, so that you can start teaching art in your classroom too. From setting up a proper art environment and art shelf, to giving your students age-appropriate mediums to explore with, I cover everything a Montessori teacher needs to know.

I’m so excited to be opening up the course one more time for this year! You can sign up for the course starting November 1. But if you want a reminder, and to save your seat now, click here to join the waitlist!

3 to 6 Art – Early Childhood Montessori Teaching Resources

Sign-up to receive video

The Phases of Art Development is a quick digital course that explains how art making can help students develop their creativity, fine-motor skills, and focus. More importantly, I share what types of projects students at every age are capable of completing safely, and without making a mess.

Best of all—it’s free! To sign up for the course, click here.

arts and craft book by Spramani Elaun

Spramani’s Books

Teach children visual arts

Curriculum For Children

Get step-by-step art curriculum to teach visual arts. Check out our 4 art curriculums:
Painting
Drawing
Color Theory
Clay Modeling

All rights reserved © 2024, Nature of Art®

No part of this blog may be used or be reproduced in any manner whatsoever including reproducing, publishing, performing, and making any adaptions of the work – including translation into another foreign language without written permission except in the case of brief quotations embodied in critical articles and reviews. Nature of Art® Publishing P.O. Box 443 Solana Beach, California 92075.

How to Plan a Montessori Art Field Trip

The Best Way to Plan a Visit to Local Museums with Your Montessori Students

The Best Way to Plan a Visit to Local Museums with Your Montessori Students

By Spramani Elaun

Getting out of the classroom and visiting museums is essential for students to develop their art literacy. It also helps them grow in their understanding and appreciation of art. A Montessori art field trip can also be fun for both you and your students, if you know how to plan them correctly. 

Art offers students a window for exploring the social, historical, and cultural context of works from their own county. I dive deeper in the importance of relating art to a greater context in my new book Defining Visual Arts, but museum visits are a key to implementing this concept.

Many Montessori teachers enjoy taking their students out to learn in new settings, many of them experience the issue of students not engaging with the art. They’re too busy on their phones, running around, or gabbing with friends. That’s because the way students learn doesn’t align with the way most art museums are set up.

While you can’t change a museum’s environment, you can change the way your students experience it. Here are 5 tips for planning a successful art trip with your Montessori students.

Tip #1: Introduce Museum Collections Before You Go

Explain what museum collections mean to our society, how we learn from them, and the significance they have to our broadening our perspectives and culture. Before you visit a museum, show them samples of different types of collections. For example, bones, insects, or gems from the Natural History Museum; plants from a Botanical Garden; or pottery and written relics from the Museum of Man. By sharing these examples before your class goes to a museum, your students will build up some excitement because they have an idea of how special this trip will be. You might even want to consider creating a lesson around a topic that’ll be featured at the museum. For instance, if you’re going to have older students view classical paintings, be sure they have experience and knowledge on the era. Or your lesson can be as simple as a 15-minute Q & A with your students the day before your trip.

visit Museums with Students
3 to 6 Art – Early Childhood Montessori Teaching Resources

Sign-up to receive video

The Phases of Art Development is a quick digital course that explains how art making can help students develop their creativity, fine-motor skills, and focus. More importantly, I share what types of projects students at every age are capable of completing safely, and without making a mess.

Best of all—it’s free! To sign up for the course, click here.

Tip #2: Review Museum Restrictions

Explain and review museum restrictions and rules and why they’re important to follow. Teach kids museum observation skills: collecting information with their eyes, listening with their ears, and observing studying artifacts with their hands safely behind their backs. You can even do a run-through in your classroom before your field trip. Put out a few objects as a pretend collection in your classroom, then have students walk around with their hands behind their backs. Remind them of how precious many of the collections and items at the museum are, and why it’s important to observe them in this way.

museum field trip with classroom

Tip #3: Choose the Right Museums

Choose a museum with collections and ideas that relate to subjects your students will be learning. For example, if you’re focusing on botany then check out your local Botanical Gardens, if want to highlight what they’re learning in history then visit a history museum, if you’re studying the cosmos then take a trip to a planetarium, observatory, or science museum. Most large cities have historical societies and special collections that will most likely support one of the subjects you’re teaching in the classroom. I’m lucky I live near San Diego and Balboa Park, which has so many wonderful museums, like a train museum, quilt museum, butterfly sanctuary, and even farms with petting zoos. Trust me, if you do your research, you’ll find something that’ll engage your students and bring their learning to life.

children's museum trips how to plan

Tip #4: Look for Interactive Exhibits

Finding a museum that’ll relate to students’ studies will automatically spark their interest to some degree, but you can take it a step further by going to a museum with kid-friendly, interactive exhibits. You might also want to look for places that allow kids to touch the displays, where talking is acceptable, and that provide an area for restless movement. A designated lunch area and outdoor space will also make the trip more enjoyable for your students.

You can also provide ways to kind of force your students to engage, such as giving them a scavenger hunt to complete, or ways to collect data like sketch book, journal, or camera.

museum field trip with montessori students

Tip #5: Plan for their Attention Spans

Ultimately, you have to set realistic expectations of what to count on from your students. Understand what their attention spans typically are and plan for breaks and activities throughout the day. For example, I know I can’t expect my students to make it through lengthy docent tours, so I tend to skip those. Instead, I’ll choose museums with hands-on activities, or create my own interesting exercises for them to do. When I take my older students on field trips, I prepare them with sketch pencils and journals for follow-up work that they can later fill out after they collect information about the different subjects they observed during their visit. The goal is to make your museum trips exciting for younger students and interesting for older students.

If you want more information on the best ways to teach art and make it exciting for your Montessori students (and you!) make sure you register for my online course, Art Teaching Blueprint! I give you all the tools, resources, and information you need to build the foundation for a quality visual arts program.

All rights reserved © 2024, Nature of Art®

No part of this blog may be used or be reproduced in any manner whatsoever including reproducing, publishing, performing, and making any adaptions of the work – including translation into another foreign language without written permission except in the case of brief quotations embodied in critical articles and reviews. Nature of Art® Publishing P.O. Box 443 Solana Beach, California 92075.