Benefits of Clay Play | Montessori Arts and Crafts

Montessori | Benefits of Clay Play, early childhood 3-6 years. Montessori Art and craft | Benefits of Clay Play

Montessori Clay Play has been found to have positive effects on emotional well-being. Playing with clay can help children regulate stress levels. Playing with clay provides a highly tactile and sensory experience. As children squeeze, press, and manipulate the clay, they are actively engaging their senses. Sending valuable sensory information to their brain.

However, the benefits of clay play extend far beyond the realm of sensory development. In fact, there are numerous cognitive advantages associated with this activity.  Montessori education highlights the importance of hands-on learning. Clay play aligns perfectly with the Montessori philosophy. In my early childhood art guide, I discuss this topic and provide more insights into clay play for emotional health. You can learn more by reading about the benefits of clay play in my early childhood book.

Montessori arts and crafts| Benefits of Clay Play, student playing clay tools

The important thing to understand about clay play is that it should be a process-based activity, providing children with ample time to freely play and explore clay. There are various ways to engage children in exploring clay.

Including the use of simple tools such as natural elements, beads, seeds, rolling pins, and cookie cutters. Emphasizing the play aspect of clay play is crucial. Allowing children to take the lead in their learning and discoveries. By letting the child guide the fun, experiments, and creations, you can enhance their clay experience.

Montessori Art and Craft | Benefits of Clay Play, little girl making clay sculptures, clay play session at school
Montessori Art and Craft | Benefits of Clay Play

Once children have had ample opportunities for clay play and have reached the age of 4 or 5. You can begin introducing clay modeling skill sets. This includes teaching them forms, attaching pieces, cutting, and carving. If you would like to learn more about my clay curriculum you can view the Clay Modeling Curriculum HERE. Order Clay Play Tools HERE

Clay Play Classes in San Diego with Spramani Elaun – Nature of Art® School

Unsure of where to begin with clay play? Perhaps you’ve struggled with determining the desired outcome of art activity? Allow me to shed some light on the importance of early childhood clay play sessions.

In fact, I refer to this approach as “Clay Play.” Engaging in type of play offers numerous benefits for a child’s overall development. When it comes to clay play, this process-based exploratory approach should always come first! Clay play should happen before getting into foundational clay modeling lessons.

Montessori Art and Craft | Benefits of Clay Play book
Montessori Art and Craft | Benefits of Clay Play

I recommend incorporating clay play for young children in early childhood education. Montessori schools and daycare centers can introduce clay modeling stations into their classrooms to provide children with the opportunity to explore.

Plus support creative and cognitive skills. To learn more about setting up clay modeling environments, please refer to this comprehensive guide Monessori Early Childhood Art Guide.

Montessori Clay Play

Clay comes in various forms, ranging from very messy to less messy options. Additionally, clays can be homemade. Earth clay, in particular, is a wonderful material to introduce to children, similar to making mud pies.

If you’re interested in setting up earth pottery clay play stations, I recommend checking out this book. It contains numerous photos and examples illustrating how to arrange clay play. How to choose suitable clay play materials for children aged 3-6 years old.

Montessori clay modeling curriculum for school art lessons, Montessori Art and Craft | Benefits of Clay Play

All rights reserved © 2024, Nature of Art®

No part of this blog may be used or be reproduced in any manner whatsoever including reproducing, publishing, performing, and making any adaptions of the work – including translation into another foreign language without written permission except in the case of brief quotations embodied in critical articles and reviews. Nature of Art® Publishing P.O. Box 443 Solana Beach, California 92075.
10 Fun Art Activities

By Spramani Elaun

Share With Your Montessori Students

As a Montessori teacher, you know it can be overwhelming to choose the right fun art activities. But, that is why I’m here with some guidance on which Montessori art activities for The Great Lessons are appropriate for your classroom and enjoyable! Art activities related to The Great Lessons are my favorite to teach. Because they allow children to explore their imaginations and get creative in a concrete, meaningful way. From drawing explosions to painting supernovas, students can visualize and understand such a big concept.

color pencil mandala fun art lesson idea

Integrating art with science helps children express ideas creatively, stimulates their senses, and provides tactile experiences. So when it comes to teaching the universe, there is no reason you can’t integrate art and science to have some fun. To get started, take a look at some of your classroom books for visual inspiration. One of my favorite books to use is “Born With a Bang: The Universe Tells Our Cosmic Story” by Jennifer Morgan. The illustrations are colorful and beautiful and can be used for many art activities.

art activities, blow paint

And for more fun art ideas, download my top 5 Montessori Big Bang Art Activities.

art download for Montessori children

Adjustable Activities

These activities can easily be adjusted to fit early childhood, lower elementary, or upper elementary classrooms. Older students will, of course, pay more attention to details, while the early childhood students will engage with these art activities in an open-ended fashion. Fun and fascinating science topics you can incorporate into art projects. Below are ten art projects that Montessori teachers can use to teach elementary students.

collage paper art activities

Art Ideas

1. Create a Cosmic Painting: Take your students on a journey through the universe with a cosmic painting activity. Discuss the Big Bang and the creation of the universe with your students, then have them create a painting depicting the birth of the universe.

2. Constellations: Give your students a chance to create their own constellations using paint or clay. Educate them on how the Big Bang gave birth to stars and how stars are the building blocks of constellations.

3. Paper Mache Planets: Introduce the concept of planets and solar systems by having your students make paper mache planets. You can use this opportunity to discuss the origins of planets and how they were formed following the Big Bang.

4. Galaxy in a Bottle: Encourage your students to learn about galaxies by creating a galaxy in a bottle. This can be a great way to explore the vastness of space and how galaxies form after the Big Bang.

5. Moon Phases Art: Discuss the moon phases and how they are caused by the changing position of the moon. Have your students create art that depicts the different phases of the moon using paint or chalk.

6. Starry Night Sky: Teach your students about stars by creating a starry night sky mural. This activity can help them learn about the different types of stars and how they are formed.

7. Cosmic Collage: Give your students an opportunity to create a cosmic collage by cutting out pictures of planets, stars, and galaxies from magazines and newspapers. Discuss the Big Bang and how all these celestial bodies came into existence.

 Science Art Montessori

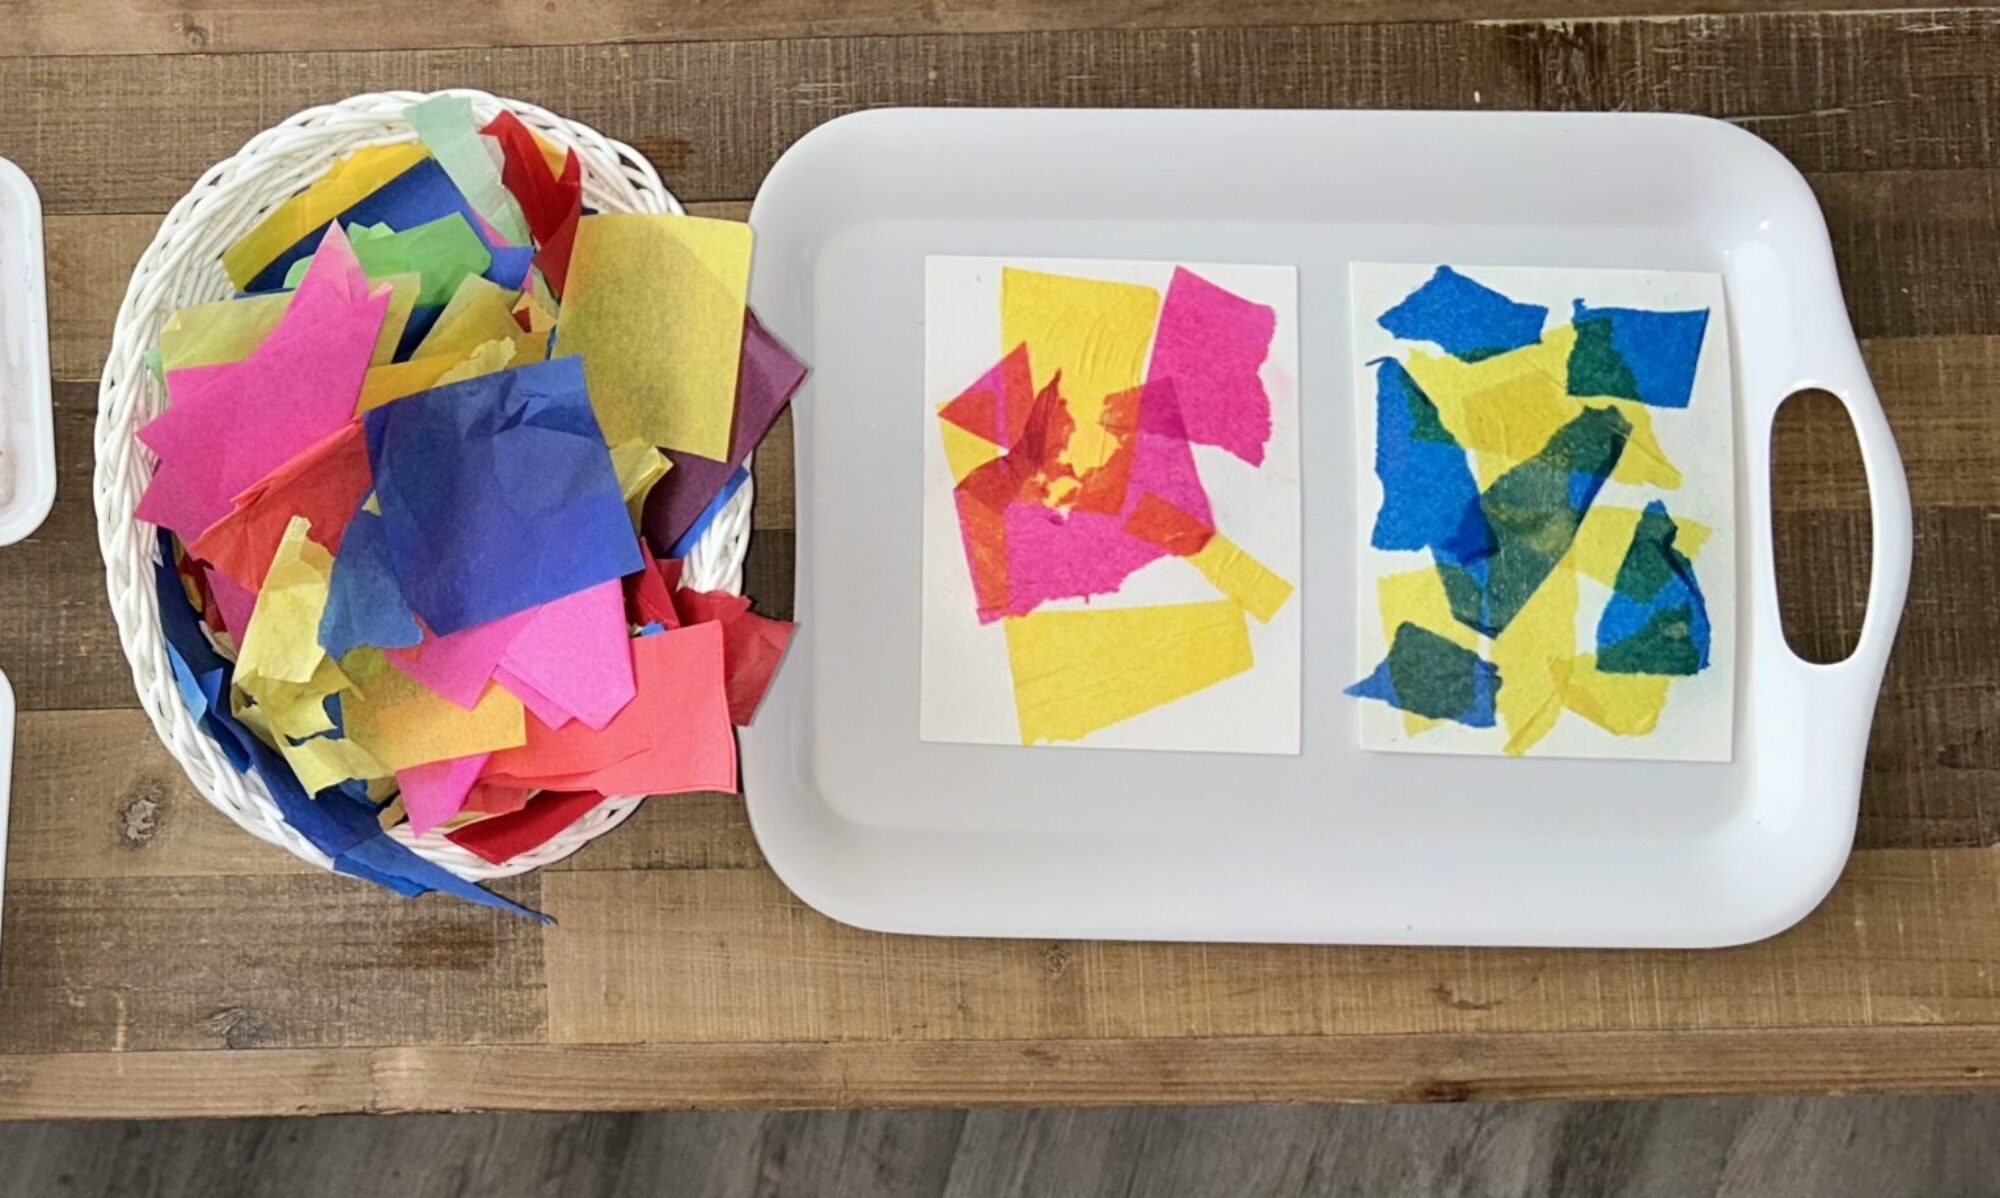
8. Sun Catchers: Discuss the origins of our solar system’s star, the sun, and have your students create sun catchers using colorful tissue paper. This can be a great way to explore the different colors of the sun and how they are visible to us.

9. Universe Mobile: Make a universe mobile to showcase the Big Bang and the creation of our universe. Students can create planets, stars, and galaxies to hang from the mobile.

10. Astronaut Art: Discuss space travel and astronauts’ role in exploring space. Let your students create astronaut art that depicts them exploring the galaxies and space beyond, giving them a glimpse into the vast universe beyond our planet.

children making clay objects in a montessori classroom with spramani

By incorporating these art projects into your Montessori lessons, your students can learn the vastness of space in a fun and interactive way.

montessori art curriculum

Order my Montessori Art Books & Curriculum HERE

All rights reserved © 2024, Nature of Art®

No part of this blog may be used or be reproduced in any manner whatsoever including reproducing, publishing, performing, and making any adaptions of the work – including translation into another foreign language without written permission except in the case of brief quotations embodied in critical articles and reviews. Nature of Art® Publishing P.O. Box 443 Solana Beach, California 92075.

Creative Activities for 3-6 Montessori Students

Exploring the World Through Art: Creative Activities for 3-6 Year Old Montessori Students

Hello are you new to teaching your Montessori student about visual arts? In this blog I want to give you some general art information if this is totally new to you. I’m a Montessori Art Teacher and the author of several Montessori art guides. And I want to share creative activities 3-6 for your Montessori students. So lets get started… Montessori education is focused on hands-on, experiential learning, and this approach extends to art education as well!

3-6 Art

Art lessons for 3 to 6 Montessori students should be designed to engage all their senses, promote creativity, self-expression, fine-motor movement and independence. To give you an idea of what art lesson activities might look like here are four types of lessons that are well-suited for Montessori students in this age range:

Sensory Art

Nature Art

Process Art

Storytelling Art

Sensory Art

Sensory art lessons are a great way to engage young children in the creative process. This type of art involves using materials such as clay and paint to support tactile experience. Sensory art projects allow children to explore different textures, colors, and shapes. Sensory art activities support good cognitive function. There are plenty of creative activities that are sensory!

    Exploring the World Through Art: Creative Activities for 3-6 Year Old Montessori Students

    Nature Art

    Montessori education emphasizes the importance of connecting with the natural world, so nature-based art projects are a great fit. Nature art can include activities such as making leaf rubbings, creating collages with natural materials like sticks and leaves. Or even painting on these types of natural materials.

    Process Based Art

      Process Art: Process art is all about the creative process, rather than the end product. This type of art encourages children to experiment with different materials and techniques, and to focus on the experience of creating rather than the final result. Process art projects can include activities such as painting, collages, 3D sculptures and doodling. 

        Exploring the World Through Art: Creative Activities for 3-6 Year Old Montessori Students art supplies

        Storytelling Art

        Montessori education emphasizes the importance of storytelling. Storytelling is a wonderful way to connect children to art language through beautiful books. Sharing stories and pointing out the art elements helps children build a rich art language. Art can be a catalyst to teaching primary vocabulary.

          Storytelling Art: Montessori education emphasizes the importance of storytelling

          So this is just a few examples of what visual arts lools like for 3 to 6 year old Montessori students. Get on my newsletter to start gettting free advise and offerings how to teach art. Sign-up HERE

          So overall, art lessons for 3 to 6 year old Montessori students can engage their senses, promote creativity and self-expression, and develop fine motor skills. Sensory art, nature art, process art, and storytelling art are all great options for Montessori students to start with.

          If you would like to learn more and get all my resources for teaching for 3-6 Year Old Montessori Students check links below and on the top menu. I have a great FREE video you can take to understand what visual arts should look like for Montessori student.

          By Spramani Elaun – Montessori Art Trainer

          EARLY CHILDHOOD ART VIDEO INFO

          How-to PAINT PAPER like Eric Carle | Montessori Art

          How-to PAINT PAPER like Eric Carle | Montessori Art

          Paint paper like Eric Carle

          Every summer, I host art camps in San Diego, and my students’ top favorite project to do with me is to paint papers! In this post, we will teach you how to paint paper and collage like artist and author Eric Carle. So I thought I would share this fun Montessori art activity you can introduce to your students.

          I like to give my students unusual tools, bright paint colors, different colored papers, and crazy things to make interesting textures and patterns. This also prepares papers for future projects that can be cut and be collage into interesting shapes.

          Teach the Elements

          Painting papers is a great way to teach the Elements and Principles of Design. You can teach texture and patterns, a vital art standard topic children should learn in Montessori art lessons. The artist and author Eric Carle is famous for doing this fun and vibrant method in his book illustrations. Eric Carle is famous for PAINTED PAPERS and collaging them into beautiful creatures featured in all his books. 

          Eric Carle, artist and children’s book author

          
Paint paper like Eric Carle
          How-to PAINT PAPER like Eric Carle | Montessori Art

          What is paint paper?

          Painted paper is basically paint applied onto paper.  You can paint plain white paper or colored paper.  Paper painting can be created with different mediums like watercolor, gel paints, tempera, or acrylic paints (any paint). 

          Children painting colors

          What can you do with painted paper?

          Like Eric Carle, the famous artist, paint the papers first, let them dry second, then third cut them up into new collage artworks. Eric Carle’s famous painting papers created The Very Hungry Caterpillar book with this unique painted technique.

          Collaging with painted papers
          ColColl
          Montessori art painting supplies

          What tools do you need to make painted papers?

          • Paint mediums
          • Paper
          • Paintbrushes
          • Interesting objects that make patterns and textures
          • Drying rack
          • Interesting tools
          Painting supplies

          Painted papers can be taught in a process-based manner

          Process-based painting is more about the experience rather than following directions. When kids paint process-based, they are able to go in any direction they choose. They can explore any texture, use any color, and have any outcome happen, but have very cool painted paper; they can later cut turn into another art piece. Process-based art lessons and painted papers are a great way to start teaching Montessori art lessons.

          Spramani Elaun


          Early Childhood Guide – Book

          You’ll learn:

          • The importance of early Art Literacy
          • How to speak the ‘Artist Language’
          • The art subjects students need to know
          • The characteristics of child artists
          • Methods and approaches to teaching
          • How to create art activity environments
          • The best art materials for your classroom
          • How to plan level-appropriate activities

          Buy Guide Now!

          All rights reserved © 2024, Nature of Art®

          No part of this blog may be used or be reproduced in any manner whatsoever including reproducing, publishing, performing, and making any adaptions of the work – including translation into another foreign language without written permission except in the case of brief quotations embodied in critical articles and reviews. Nature of Art® Publishing P.O. Box 443 Solana Beach, California 92075.

          Holiday Craft | Painting Ornaments

          During the holiday things get busier, but we also create space for special moments, even in the Montessori classroom. Painting holiday crafts are a fantastic way for children to express their creativity and independence. I’ve painted ornaments with countless kids in classrooms and workshops during the holidays, and they all enjoy this craft immensely! It’s a keepsake that students and their families can cherish for years. Every year, I have kids coming back to create a new ornament for their collection.

          Holiday Craft | Painting Ornaments

          Setting Up a Kids Craft Activity

          One of the great things about this kids’ holiday craft is its simplicity in setup, requiring just a basic paint kit without the need for many special items. Opting for woodcraft ornaments is beneficial as they are environmentally friendly compared to plastic and safer for younger children than glass ornaments.

          Here are some handy tips for organizing this festive art activity for your students (or for kids at home too!):

          Holiday Craft | Painting Ornaments, child painting

          Creating a Mess-Free Painting Area

          Ensure the painting space is located in an area where children can freely engage in a bit of messiness. Consider using a drop cloth, especially if painting indoors. Provide smocks, aprons, or large old t-shirts for the kids to wear, protecting their clothes from potential stains—some paints are challenging to wash off fabrics.

          To enhance the painting experience, place the materials at eye level on a flat and stable surface, such as a table. Adding another layer of protection with a drop cloth or old newspaper on top can further safeguard the painting area from spills and splatters.

          Holiday Craft | Painting Ornaments

          Ornament Supplies

          Here’s a list of everything you’ll need for this kids’ holiday craft:

          • Wooden ornaments – any shape will work, but ‘holiday shapes’ add to the festive spirit
          • Acrylic paint – for the best and longest-lasting results
          • Paintbrushes – various sizes, including fine/tiny ones for details
          • Paint palette – any size works, even a simple paper plate
          • Glitter – choose any color; white glitter adds a lovely touch to painted ornaments
          • Smock – or another cover-up to protect kids’ clothes from acrylic paint stains
          • Napkins – for cleaning paintbrushes between color changes
          • Water jar – for rinsing paintbrushes
          • Hairdryer (optional) – handy for speeding up the drying process, especially for older kids or adults working on intricate details
          kids painting crafts
          Painting Tips

          Ornaments: You can purchase unfinished wood craft shapes at local superstores, craft stores, or online. Glass orb ornaments can also be used, but caution is advised with younger children. Consider recycling old ornaments by refreshing their designs or allowing kids to create new ones from scratch.

          Paint: Opt for acrylic paint for its durability and longevity. Memories can last a lifetime—I still display ornaments my kids painted when they were young every holiday season! Ensure you use kid-safe, non-toxic acrylic paint for this activity.

          Holiday Ornaments

          How to choose colors

          Encourage children to express their creativity freely by allowing them to paint whatever inspires them, whether traditional holiday themes or personal creations. While kids may opt for symbols of Christmas, Hanukkah, Kwanzaa, or other winter holidays, they have the freedom to choose.

          Here are some recommended colors to kickstart the painting process:

          • Red
          • Black
          • White
          • Gold
          • Silver
          • Dark Green
          • Yellow
          • Orange
          • Pink
          • Purple
          • Brown
          • Burgundy deep red

          If you don’t have all these colors, that’s perfectly fine; beautiful ornaments can still be created using just three to four colors!

          Remember, when using glitter, ensure children apply it while the paint is wet. If they wait until the paint dries completely, the glitter won’t adhere well and may not stick effectively.

          Take it a Step Further: Grab Your FREE Kids Holiday Crafts Painting Checklist!

          If you’re new to painting activities with your students, get ready for a delightful experience—kids truly enjoy this craft! The setup is straightforward, making it easy to repeat with your students multiple times throughout the holiday season. You can also explore related activities like rock painting or painting on paper using the same materials; only the images, paint colors, and canvases may vary.

          kids painting book

          Buy Kids Painting Online Here

          Painting Guide for Teachers and Parents

          Discover a straightforward guide tailored for teachers and parents to kickstart painting lessons with ease. This book equips you with essential knowledge on the required materials, the best paints suited for kids, fundamental painting techniques, and my top tips for creating an exciting painting exploration experience for your students. Get ready to ignite a passion for art in your students as you embark on this colorful journey of creativity and learning. Unleash the joy of painting and inspire young minds to express themselves through art! ORDER NOW

          A Short Cut Just for You

          Once you see how much your students love painting, you’re going to want to include it as a regular part of your curriculum. My Kids Painting Practice & Process Curriculum has 57 master lessons that walk students through everything they need to know to be successful at painting, from setting up a paint station and holding a brush all the way to creating beautiful nature landscapes and painting different types of animals!

          Each lesson is part of a sequence and includes all the components, tips, materials lists, and instructions you need to ensure you will be able to actually teach your students to become skilled painters. All you have to do is simply follow the instructions and easily present the activities to your students.

          Kids Painting Practice & Process Curriculum sets the foundation for their art education and will help them transform into little artists! To purchase the curriculum, click here.

          All rights reserved © 2024, Nature of Art®

          No part of this blog may be used or be reproduced in any manner whatsoever including reproducing, publishing, performing, and making any adaptions of the work – including translation into another foreign language without written permission except in the case of brief quotations embodied in critical articles and reviews. Nature of Art® Publishing P.O. Box 443 Solana Beach, California 92075.

          Easy Montessori Halloween Crafts for Kids

          It’s hard to believe that it’s already October and Halloween is upon us! I love Halloween! I love the creativity that comes with it—the fun costumes, the sweet treats, and the spooky crafts! These easy Montessori Halloween crafts for kids are the perfect way to bring the Halloween season—and a little fun—into your classroom!

          If you’re like most of us right now, Halloween snuck up on you. Its a fun busy season for everyone!

          pumpkin painting, teach kids art ideas, spramani elaun

          Not to worry though! I’ve rounded up some last-minute, super easy Halloween crafts you can put together for you students (or your kids at home) with stuff you likely have around the house already.  

          Where to Start: 5 Last-Minute, Easy Montessori Halloween Crafts

          Here are some easy Montessori Halloween crafts for kids that you can pull together in just a few minutes!

          1. Stamped Halloween Ghosts

          If you have paper, a pencil, a pair of scissors, and some paint, you can do this project! Have your students or children draw out a ghost shape on a piece of paper, then cut it out. Place that cut out on top of another piece of paper, then dip the pencil eraser in paint and stamp along the edge of the paper. When you remove the paper, it’ll reveal spooky ghost shapes! 

          rock painting for halloween, spramani elaun, nature of art

          2. Halloween Rock Painting

          This is one of my favorite painting projects to do with kids any time of year! You can find rocks outside (or at a craft store), and then all you need is paint and a paintbrush. For Halloween, I like to encourage children to make spooky designs, like ghosts, monsters, jack-o’-lanterns, and even Frankenstein. For full instructions on how to set up this easy Halloween craft, click here.

          3. Toilet Paper Roll Spider Stamp + Craft

          You might have to dig through your recycle bin for this one, but the supplies are pretty basic! Start by making four even cuts on each side of a toilet paper roll; and then cut off a square piece on both sides, in between the sets of legs. Fold the ends back and then dip the stamp into black paint and stamp it onto paper. This will give you an outline for a spider that children can then decorate! Once they’re done using the stamps, they can then paint them, add some eyes, and now they have a spooky spider craft too!

          painting pumpkins with art teacher spramani elaun

          4. Pumpkin Painting

          Stores are still filled with pumpkins of all sizes, and believe it or not, they make the perfect canvas for painting projects for kids! I love this activity because kids of all ages can do it—you don’t have to worry about little hands and sharp knives like you would for carving pumpkins! If you want pumpkin painting ideas and details on how to set up a painting area, click here.

          montessori halloween ideas, spramani elaun, nature of art, bat template

          5. Black Bat Silhouettes

          This paper bat craft is a great one to do around Halloween. You will be cutting paper, learning how to teach your students about concentric circles and splattering paint. Click here for download and video insturctions

          kids painting ideas, spramani

          https://spramani.lpages.co/painting-materials-checklistOne Step Further: Download My FREE Kids Painting Materials Checklist

          As you can see, all these last-minute Halloween projects involve painting. Painting is such an easy project to set up and kids love it. With just a basic tool kit of painting materials, you’ll always be ready to set up a quick painting activity for your kids. If you want a free downloadable version of the paint materials listed above (plus a few more), get my Kids Painting Materials Checklist now by clicking here.

          paint curriculum, art for kids, montessori book

          A Short Cut Just for You

          Once you see how much your students love painting, you’re going to want to include it as a regular part of your curriculum. My Kids Painting Practice & Process Curriculum has 57 master lessons that walk students through everything they need to know to be successful at painting, from setting up a paint station and holding a brush all the way to creating beautiful nature landscapes and painting different types of animals!

          Each lesson is part of a sequence and includes all the components, tips, materials lists, and instructions you need to ensure you will be able to actually teach your students to become skilled painters. All you have to do is simply follow the instructions and easily present the activities to your students.

          Kids Painting Practice & Process Curriculum sets the foundation for their art education and will help them transform into little artists! To purchase the curriculum, click here.

          All rights reserved © 2024, Nature of Art®

          No part of this blog may be used or be reproduced in any manner whatsoever including reproducing, publishing, performing, and making any adaptions of the work – including translation into another foreign language without written permission except in the case of brief quotations embodied in critical articles and reviews. Nature of Art® Publishing P.O. Box 443 Solana Beach, California 92075.

          Cosmic Rock Painting | Montessori Art Lesson

          In my years of working with students, I’ve developed a few go-to art projects that are easy to put together and that kids LOVE. Cosmic Rock Painting is one of my favorite art projects for students. I think this project works especially well as a Montessori art project because it can be incorporated with the Great Lessons and cosmos. I find it a perfect fit for Lower L Montessori students, but with a few tweaks, it can be adapted for students at any age.

          Cosmic Rock Painting | Montessori Art Lesson
          Use any type of rocks!

          I actually got my inspiration for this project from the book Born with a Bang: The Universe Tells Our Cosmic Story by Jennifer Morgan. It’s a very common book in the Montessori world—you may even already have it in your classroom! While you don’t need to read this story with your students, it makes a great foundation for jumping into this art activity.

          Cosmic Rock Painting | Montessori Art Lesson
          Born With a Bang –Book

          Before you start this Cosmic Rock Painting project, make sure you go over the big bang, even if it’s only briefly. Show students photos of stars, constellations, and galaxies to serve as inspiration and give them ideas of what they can create.

          Supplies:

          • Paintbrush
          • Paint (acrylic paint works best, tempera paint can also be used but may wash off)
          • Palette (egg cartons, paper plates, and small bowls also work)
          • Wash jar
          • Napkin
          • Rocks or stones (any will work, but river rocks are preferred)

          Steps:

          1. Paint the surface of the rock black, let dry
          2. Using a variety of colors, paint on cosmic images (allow students to reference books and photos for inspiration)

          Watch Cosmic Rock Painting Video

          [In the video, I mention a tinting tutorial and brush stroke tutorial; to access these videos for free, register for my FREE online mini-course, Phases of Art Development. Each of these topics can be done as completely separate art lessons to help kids understand color tones and brush strokes.]

          Montessori cosmic rock painting art lesson

          Notes: Depending on how you want to introduce this lesson, you can have students complete the whole project in one day or break it up over the course of several days. You can teach this lesson in chronological order, starting with the big bang, then how galaxies develop, and then go into mini lessons on the milky way, super novas, the sun, Earth, and other planets. Students can paint individual rocks to represent each of these cosmic ideas.

          acrylic rock painting art kids

          This is just the tip of the iceberg when it comes to easy art activities for Montessori students! After working in the art industry for more than three decades, I’ve amassed a TON of art project ideas for kids. I’ve also developed and created my very own art teaching method that introduces art literacy to students in a way that’s fun and that makes sense to them.

          To explore some of the ways students learn art at each age level, and to fun and easy art project ideas, make sure you register for my FREE online mini-course, Phases of Art Development!

          3 to 6 Art – Early Childhood Montessori Teaching Resources

          Sign-up to receive video

          The Phases of Art Development is a quick digital course that explains how art making can help students develop their creativity, fine-motor skills, and focus. More importantly, I share what types of projects students at every age are capable of completing safely, and without making a mess.

          Best of all—it’s free! To sign up for the course, click here.

          All rights reserved © 2024, Nature of Art®

          No part of this blog may be used or be reproduced in any manner whatsoever including reproducing, publishing, performing, and making any adaptions of the work – including translation into another foreign language without written permission except in the case of brief quotations embodied in critical articles and reviews. Nature of Art® Publishing P.O. Box 443 Solana Beach, California 92075.

          Ultimate Montessori Art Teaching Method Guide

          Ultimate Montessori Art Teaching Method Guide

          I’ve worked with so many Montessori teachers who have never been taught art curriculum and have no idea how kids learn art. I’ve been in that boat before; it took me many years of working with children of all ages to really understand exactly how they learn art and what are skills they’re capable of at each age. I’m saving you from years of research and observation by creating and sharing the Ultimate Montessori Art Teaching Method Guide.

          I designed this guide specifically for Montessori teachers. It covers the two Montessori planes, and each section in this guide is linked to a more detailed posts for each age.

          This guide is the cumulation of more than three decades of experience working in the visual arts! I’m an artist turned mom, turned homeschool mom, turned art teacher and art manufacturer, and now I’m a Montessori art teacher trainer. My art teaching method has been taught to tens of thousands of children internationally, and now, I’m bringing the best of my knowledge and experience into the classroom of Montessori teachers.

          Ultimate Montessori Art Teaching Method Guide

          My Art Teaching Method

          I spent ten years observing children of all ages creating artworks so that I could understand recognizable cognitive patterns that revealed how children develop their skill sets. I’ve put this research on sensory art methods into studio-based practice and have seen success in many different environments.

          This method is unlike any other way of teaching art. It’s designed to give children art skills that are aligned with their cognitive milestones—cognitive processing, visual perception, and fine-motor development. The goal is to wire implicit memory through all phases of development from early childhood through adolescence.

          My art teaching method is extremely complementary to the Montessori way; it’s a natural progression for Montessori teachers and schools to enrich their programs and the enjoyment of the children they work with. This method connects visual art skill sets with creative thinking through sensorial experiences. Once you have an understanding of this Montessori art teaching method, you’ll be able to adapt your Montessori art curriculum to children’s three-part cognitive system (cognitive processing, visual perception, and fine-motor development), and help your students develop the necessary artistic high-order thinking needed to become artful.

          Ultimate Montessori Art Teaching Method Guide

          How to Use This Guide

          I invite you to read through this post to gain a high-level view of how this teaching method adapts to each Montessori plane. Then, click on each specific age range to find out how to effectively teach children based on their cognitive capabilities. As always, if you have questions, leave a comment, send me an email, or jump onto my exclusive Facebook page and let me know!

          Early Childhood (Toddler)

          Many people mistakenly think that toddlers cannot yet learn art, but that’s not the case. In early childhood, toddlers see art making as exploratory and a discovery-based experience. Young students in the Montessori art first plane do not yet understand the placement of visual arts, and are in a very curious state about mediums. At this age, children should explore art mediums without any expected outcome.

          The best way to teach early childhood students is through process-based art. This means the focus on is on the experience and the process, not on the child’s final piece of artwork.

          Teaching art to early childhood toddler students helps tremendously in improving their fine motor skills, which are essential to everyday tasks. To learn more about art teaching methods for this age group, read this blog.

          Ultimate Montessori Art Teaching Method Guide

          Early Childhood (3-6 Years)

          Students in early childhood should continue to learn primarily through process-based art. Children who are 3-6 years of age are quick learners and curious about art, so give them room to explore and experiment.

          You want to allow students to make art in creative mode, using their own own imaginations, thoughts, and ideas for inspiration. At this age you can begin to introduce copy-mode, but limit your instruction to movement rather than copying an image.

          For more information on exactly how to balance creative mode and copy mode for early childhood students, check out this post.

          Montessori Art Teaching Ideas

          Lower Elementary

          Children at the lower L age are able to come up with their own imaginative creations, plan with intention, and think their ideas through to completion, going through the four steps of the artistic process.

          At this age, lower elementary students approach art making with lots of curiosity and enthusiasm for trying different techniques and mediums. You can start introducing line, shape, form, texture, color, and symmetrical balance ideas.

          Art can be taught to students through process-based art, a continuation of creative mode, and very simplistic copy mode.

          If you want a more detailed explanation of how to art teaching methods for lower L students, read this post.

          How to Montessori Art Teaching  Guide

          Upper Elementary

          Students in upper L can go through the artistic process, conjure up their own ideas, and see them through to completion. They’re able to do reflective work, bringing meaning to their creations and making connections to artworks in their community.

          You can teach students Montessori art lessons through a combination of process-based art, creative mode, and copy mode.

          By the time students are in upper elementary, they’re extremely competent when it comes to their fine-motor skills. Allow them to experiment with different mediums, techniques, and perspectives.

          For more information on upper elementary art teaching methods, read this post.

          Montessori Art Teaching Methods Resources

          If you would like to understand more about which types of art projects children can work on, register for my free video course, Phases of Arts Development, which discusses teaching methods for Montessori students.


          Montessori art book for teaching students

          You can learn about Art Literacy Standards and the benefits of visual arts by reading Defining Visual Arts Paperback (paperback book).


          3 to 6 Art – Early Childhood Montessori Teaching Resources

          Sign-up to receive video

          The Phases of Art Development is a quick digital course that explains how art making can help students develop their creativity, fine-motor skills, and focus. More importantly, I share what types of projects students at every age are capable of completing safely, and without making a mess.

          Best of all—it’s free! To sign up for the course, click here.

          All rights reserved © 2024, Nature of Art®

          No part of this blog may be used or be reproduced in any manner whatsoever including reproducing, publishing, performing, and making any adaptions of the work – including translation into another foreign language without written permission except in the case of brief quotations embodied in critical articles and reviews. Nature of Art® Publishing P.O. Box 443 Solana Beach, California 92075.

          3 to 6 Art – Early Childhood Montessori Teaching Resources

          Sensory Cognitive Child Art Method, montessori

          This is a guide to teaching art literacy to 3 to 6-year-old students. There is a downloadable resource available for Montessori guides. In this blog, I will highlight the important aspects of teaching early childhood art lessons. Below, you will find more information on Montessori Early Childhood for ages 3-6, following the International Arts Standards.

          Children of all ages can learn visual arts and benefit from guided artistic exploration. Each developmental stage necessitates specific teaching methodologies and approaches. After extensive research and observation of children’s art education. I have discovered that youngsters acquire diverse artistic skills at various developmental planes. You can get more insights by ordering the book Montessori Art Guide – Early Childhood First Plane HERE

          3 to 6 kids painting rocks, early childhood

          Art making for young children involves exploration and discovery. Montessori students in the first plane, 3 to 6 years old, are prepared for simple art tasks. The most effective approach to teaching art lessons at this stage is through process-based art.

          Process-based art focuses on the experience rather than the final artwork’s appearance. It emphasizes exploration and imaginative expression rather than creating recognizable pieces.

          3 to 6 Art – Early Childhood Montessori Teaching Resources kids making clay

          When implementing process art, provide a brief introduction to how art mediums function and can be utilized. Children in the 3-6 age group are highly curious about art materials and are rapid learners. Art lessons in Montessori early childhood education should encourage students to experiment freely. Without predetermined outcomes, fostering a spirit of exploration.

          Incorporating specific activities in the Montessori art curriculum can aid in enhancing young students’ fine motor skills. Engaging in art activities helps refine both large and small muscle groups, promoting controlled movements in young learners. Introducing activities like clay modeling, brush stroking, and safe scissor usage can expedite the development of fine motor skills in children at this stage.


          3 to 6 Art – Early Childhood Montessori Teaching Resources

          Exploring Different Nature of Art® Modes

          • Creative-Mode: This mode serves as the foundation for process-based art learning, where children initiate their art-making journey. In creative mode, students are encouraged to explore art mediums without a specific reference or image to replicate. They rely on their imagination, thoughts, and ideas to craft unique creations.
          • Introducing Copy-Mode: Copy-mode entails structured, step-by-step art instruction. However, in early childhood education, direct replication of images should be avoided. Children at this stage enjoy imitating simple tasks observed in adults, like cleaning, painting, or gardening. Incorporate these activities into art lessons, allowing them to mimic your actions.
          • Transitioning to Copy-Mode: Begin with students replicating a basic design involving one to two steps. Once they grasp the initial concept, encourage them to transition back to creative-mode. This helps them to personalize and complete their projects according to their imagination and preferences.
          3 to 6 Art – Early Childhood Montessori Teaching Resources

          Art Activities & Mediums

          Explore these engaging Montessori Early Childhood art projects designed for children aged 3 to 6. These activities aim to enhance fine motor control and strengthen small muscles in the fingers and hands. All while providing opportunities to engage in both creative-mode and copy-mode techniques. For the necessary non-toxic and kid-friendly art supplies, you can check out Nature of Art for Kids.

          • Doodling: Utilize crayons, colored pencils, tempera sticks, and more.
          • Painting: Experiment with watercolor paints, tempera paints, finger paints, homemade veggie dyes, etc.
          • Color Theory Play: Engage in activities like watercolor painting, dropper painting, and squeeze bottle painting to explore color theory.
          • Clay Modeling: Work with materials such as earth clay, homemade playdough, sculpting tools, beeswax, and non-hardening plasteline clay to mold and create.
          • Simple Crafts: Enjoy activities like paper cutting, string weaving, gluing, block building, and constructing with large popsicle sticks to foster creativity and dexterity.


          Sensory Cognitive Child Art Method, montessori

          Having the right art material for your early childhood classroom is just the first step. If you want more information on how to use each material. Or how to set up an art shelf with the materials. Plus how to teach lessons that actually help early childhood students learn art.

          I’m currently selling my brand new, Early Childhood Art Guide. It includes everything you need to know to successfully bring art lessons into your early childhood classroom—without the stress. I go into more detail about art materials (such as how to use them and where to find them). And a ton of other valuable information that makes teaching art and setting up your shelf so much easier. And, right now, you can order yours today!, so don’t miss out!

          3 to 6 Art – Early Childhood Montessori Teaching Resources

          Sign-up to receive video

          The Phases of Art Development is a quick digital course that explains how art making can help students develop their creativity, fine-motor skills, and focus. More importantly, I share what types of projects students at every age are capable of completing safely, and without making a mess.

          Best of all—it’s free! To sign up for the course, click here.


          3 to 6 Art Resources

          If you would like to understand more about which types of art projects children can work on, register for my free video course, Phases of Arts Development.

          You can learn about Art Literacy Standards and the benefits of visual arts by reading Defining Visual Arts Paperback (paperback book).

          3 to 6 art guide for Montessori education

          Buy Guide Now!

          All rights reserved © 2024, Nature of Art®

          No part of this blog may be used or be reproduced in any manner whatsoever including reproducing, publishing, performing, and making any adaptions of the work – including translation into another foreign language without written permission except in the case of brief quotations embodied in critical articles and reviews. Nature of Art® Publishing P.O. Box 443 Solana Beach, California 92075.

          Making Gratitude Cards to Celebrate Thanksgiving, Montessori Activities

          The holiday and Thanksgiving season are a time of reflection for most people—most adults, anyway. It’s a time we think about everything we’re grateful for, and it’s a practice we should be sharing with our children and students.

          Expressing gratitude has the power to reduce stress, foster a sense of belonging, and yield a host of emotional and mental health advantages. Fundamentally, gratitude involves feeling thankful and appreciative of the positive aspects in your life. As educators, we have the opportunity to lead our students toward recognizing and appreciating the multitude of “gifts” they encounter daily, spanning from the wonders of nature to the joys of delicious food and the warmth of cherished friendships.

          Every year, around our Thanksgiving holiday here in North America, for as far as I can remember, I would have my children make gratitude cards for all our guests. We would place them around the dinner table for each guest to read when they sat down. Each card would be something simple, the guest’s name and a sweet sentiment of appreciation for who they are.

          I would also surprise my own kids with tiny gratitude gifts as well, telling them how thankful I was to have them in my life. I still do this every year, even though they are all grown up! 🙂


          I think it is so important to write and document these thoughts and feelings. I know this activity has always grounded my children and given them a heart of giving, rather than receiving. I still journal myself about what I’m grateful for, and give thanks all year long for the big and little things in my life—like the free lemons that grow in my garden.

          Making Gratitude Cards to Celebrate Thanksgiving, Montessori Activities

          Teaching Gratitude to Your Students

          Preschool students should be taught to say thank you when they receive a gift or a kindness from another person. Remember to teach them that the size of the generosity doesn’t matter. They can be grateful for a big gift, but also for a sunny day or hug from a friend.

          Students in lower elementary can think a little more in depth and should be encouraged to reflect on their day. They can even create and keep a gratitude list of good things that happened.

          Upper elementary students can also focus on keeping gratitude lists or journals. But introduce the concept of good coming from bad, and teach them they can be grateful in negative situations too.

          Making Gratitude Cards to Celebrate Thanksgiving, Montessori Activities

          Gratitude Card Making Project Idea:

          Here’s a great way to combine a writing and drawing lesson that helps students express their gratitude.

          Gather your students, talk about what gratitude means. Give examples of things you are grateful for, or suggest things they might feel grateful for. Then pass out index cards and have each child write, “I am grateful for…” Be sure to write prompts out to copy as an example.

          Once they’re done, have them draw a picture about what the thing(s) they were thankful for. Students can make a booklet or paste their card to their picture. Be sure to check out the video below for supplies and simple instructions.

          Supplies:

          • Paper or card stock—any size, color, weight
          • Stickers—any theme
          • Stamps and ink pads—any colors
          • Pencils
          • Crayons
          • Color pencils
          • Glue
          • Tape
          • Scissors
          • Washi decorative tape

          Gratitude Cards from Spramani Elaun on Vimeo.

          For more project ideas, make sure you sign up for my newsletter or check out my sample art calendar.

          3 to 6 Art – Early Childhood Montessori Teaching Resources

          Sign-up to receive video

          The Phases of Art Development is a quick digital course that explains how art making can help students develop their creativity, fine-motor skills, and focus. More importantly, I share what types of projects students at every age are capable of completing safely, and without making a mess.

          Best of all—it’s free! To sign up for the course, click here.

          All rights reserved © 2024, Nature of Art®

          No part of this blog may be used or be reproduced in any manner whatsoever including reproducing, publishing, performing, and making any adaptions of the work – including translation into another foreign language without written permission except in the case of brief quotations embodied in critical articles and reviews. Nature of Art® Publishing P.O. Box 443 Solana Beach, California 92075.