When’s the Best Time to Teach Montessori Art Lessons?

As teachers, we always want what’s best for our students; we want them to excel at the task at hand and get the most out of their lessons. If you want them to succeed, knowing when to teach them is just as important as how and what you teach them. Because, believe it or not, there are actually optimal times to teach specific types of lessons. And the best time to teach Montessori art lessons is going to differ from math or science.

There’s been a lot of research and studies done on the optimal time for learning, and much of it has found that people tend to be the most primed for analytical thinking in the early morning.

This means that morning will typically be the best time to teach the more logical or methodical lessons—such as math, science, reading, and writing. These subjects require sharp, critical thinking. 

When's the Best Time to Teach Montessori Art Lessons?

A Danish study, conducted over the course of three years, looked at how the time of day affected kids’ test-taking skills. The results showed that for every hour later in the day the test was scheduled, scores decreased by about 1%. This, again, shows that children are ‘better thinkers’ in the morning and earlier in the day.

So what does this mean for the best time to teach Montessori art lessons?

Art is pretty much on the other side of the spectrum from those critical-thinking type subjects. A big difference between visual arts and academics is that there are no wrong answers in creative art; it’s all about each artist’s perception and how they want to design, make, and create things. Instead of needing to think logically or analytically, art involves a more relaxed state of mind.

To get into a creative flow, kids don’t need to have full focus on their project—in fact, it’s best if they have very little on their minds, and are actually in a more playful mood. 

That’s why I suggest that the best time to teach Montessori art is in the later afternoon. 

When's the Best Time to Teach Montessori Art Lessons?

So if you’re in a traditional classroom setting, schedule your more analytical subjects in the morning; and after kids break for lunch, they can set up for their art lessons and assignments. If you wait until after lunch, kids will typically be more refreshed, more playful, and in a more relaxed state—which is the optimum state for creative and innovative thinking.

Where to Start: Build Your Schedule Around the Best Time to Teach Montessori Art

Your classroom’s schedule is likely to change from day to day and week to week, but if you know that there really is a best time to teach analytical subjects and a best time to teach art, that should be the place to start. This should help you organize and plan ahead for your lessons during the academic school year. And if you need ideas on the what—as in what to teach in those art lessons, check out this blog for more Montessori art lesson-planning ideas.

One Step Further: Watch My Training, ‘How-to Teach Art Montessori Art Lessons Using Storybooks

I’ve worked with so many Montessori teachers from all over the world and they’ve all told me how intimidating it is to actually teach art in their classrooms. I want art to be accessible to every child, from early elementary on up—and to do that, I know that actually teaching art needs to be easy. 

One way I love to introduce teachers to the idea of how to teach art is by showing you how to work with tools you already have—like storybooks! I created a virtual training that teaches you how to teach art by using storybooks to create art lesson themes. And as a bonus, I share some quick-planning ideas to help you regularly and easily schedule art activities in your Montessori classroom. 

To get access to this incredible training (for free!), click here!

A Short Cut Just for You

If you’d like to learn more about all the benefits art can offer to children, read my book, Defining Visual Arts. It provides art literacy standards and gives you a guide to what you should be teaching your students. The book also includes tips for using artistic language, choosing the best art mediums, and putting together art projects for kids of different ages.

It’s truly a solid foundation to help you teach art in your classroom (in a way that’s stress-free for you, and exciting and fun for your students!). To purchase Defining Visual Arts, click here.

All rights reserved © 2024, Nature of Art®

No part of this blog may be used or be reproduced in any manner whatsoever including reproducing, publishing, performing, and making any adaptions of the work – including translation into another foreign language without written permission except in the case of brief quotations embodied in critical articles and reviews. Nature of Art® Publishing P.O. Box 443 Solana Beach, California 92075.
5 Montessori Rocks and Minerals Art Lessons

This blog post is a part of a three-month series: Montessori Art in the Natural World: Kids Nature Journal Color Lessons. This series is about growing kids’ knowledge about the natural world by taking them outside their home or classroom and challenging them to create focused art, based on the nature around them. Every aspect of nature—seasons, layers of the earth’s soil, energy, rocks and minerals, fossils, landforms, water, flora, fauna, the atmosphere—can all be represented and expressed through art lessons. These Montessori rocks and minerals art lessons encourage your students to use natural rocks in their art projects and learn more about nature, rocks, and our world’s lands!

5 Montessori Rocks and Minerals Art Lessons

The natural rock cycle can be an interesting topic for Montessori students to learn; when you bring ideas from the Coming of the Universe and the Earth Great Lessons and combine them with rock art lessons—your students will really become engaged! You might even see them paying more attention to and investigating rock formations in the natural world.

It doesn’t matter what grade level you are teaching, rock art lessons can be fun for all Montessori students. I often work with rocks in my art studio and art programing classes, and have done many of these activities with children of all ages—sometimes even adults! You can use these art lessons to help introduce subjects like igneous rocks, sedimentary rocks, metamorphic rocks, or fossils; you can even use these rock art activities to help build fine-motor skills for early childhood students through rock arranging.

Here are five different ways to integrate art making with rock lessons in all areas of visual arts.

Montessori Rocks and Minerals Art Lessons:

  1. Rock painting
  2. Natural art arrangements
  3. Designing biomes
  4. Sketching rocks
  5. Making pigments from rocks 

Sticks n' Stones, Painting Art Projects For Kids

Painting on Rocks

Rock painting with acrylic paint is one of my all-time favorite art projects and kids love it too! This lesson can teach so many skills, such as brushstrokes, color mixing, creating textures, and making lines. Rocks are a wonderful surface to use as a canvas, plus, they’re 100% sustainable and can be found in any environment.

5 Montessori Rocks and Minerals Art Lessons

Natural Art Rock Arrangements

Arranging rocks into concentric designs is a fun way to teach kids about balance and develop their concentration skills. It also gets kids outdoors and sparks discussions about different types of rocks and how to select specimens for arrangements. With these types of Montessori rocks and minerals art lessons, I try to focus on collecting, sorting, and organizing the natural objects. While kids are organizing and arranging, they’ll also learn about key art elements like symmetry and balance. 

Designing Biomes with Rocks

Letting children design their own biomes with rocks they’ve collected is a great way to teach them about diverse natural biomes. You can even teach students about the Coming of Human Beings, and how humans have migrated to and from different biomes throughout history. There are many biomes children can design using rocks: rivers, mountains, caves, savannahs, and forests, etc.

5 Montessori Rocks and Minerals Art Lessons, spramani elaun art teacher

Sketching Rocks Shadows

Drawing is an important skill all students—especially at elementary ages—should have. I often use rocks to teach 3-D perspectives, identifying color value, and how to create shadows in drawings and paintings. Rocks can usually be found in every type of outdoor landscape and can be captured in outdoor nature journal sketching. Start this activity by collecting rocks locally; then you can have students make sketch marks in the shapes of the rocks they’re observing. The next step would be to have your students observe how light placement (like the sun in the sky) casts shadows, and have them include the shadows in their sketches.

5 Montessori Rocks and Minerals Art Lessons, art teacher spramani

Making Pigments from Rocks  and Minerals

Explaining to students how natural pigments can be made from minerals and rocks is a wonderful way to teach them to observe color in nature and connect how art and colors are made. Natural dyes and pigments can come from a wide variety of nature objects, including rocks! One of simplest ways to teach kids about rock composition is to have them make paint  from grounded rock minerals; for details and instructions on how to do this, check out this blog:

How to Make Paint, Inks & Dyes from Nature

Where to Start: Setting Up a Rock Painting Table

Again, painting rocks is one of my favorite activities to do with Montessori kids! The activity itself allows kids to be independent and creative, and the finished project is just so fun and colorful! It’s very simple to do, the majority of “work” just involves setting up a space for students to work.

You will need:

5 Montessori Rocks and Minerals Art Lessons

How to do it:

  1. Wash rocks in water and wipe clean (this ensures the paint sticks); completely dry rocks before painting
  2. Prepare and fill a palette with a variety of paint colors
  3. Set out paint brushes (a variety of brush sizes allows kids to create whatever brush stroke they desire)
  4. Paint one layer of color at a time; set aside to dry before painting the next color
  5. Once students finish their desired image, set rocks out to dry; rocks dry best when left in direct sunlight

One Step Further: Montessori Nature Activity Outdoor Journal Checklist

Here’s a bonus nature art activity for you! While your students are out collecting rocks outside, have them take out their nature journals and record their observations. (For information and instructions on how to create a nature art journal, click here.) 

Nature journaling is a relatively independent activity, but you should still guide your students to make sure they’re following scientific principles and standards. This Nature Journal Checklist will help you make sure your students are including data that helps them implement both scientific and artistic principles during their expedition.

To download the checklist for FREE, click here.

Print it out or save it on your phone so you have it with you the next time you lead your students outside to journal or collect nature objects for crafting.

A Short Cut Just for You: Buy Painting Step-by-Step Curriculum

spramani elaun paint curriculum for kids

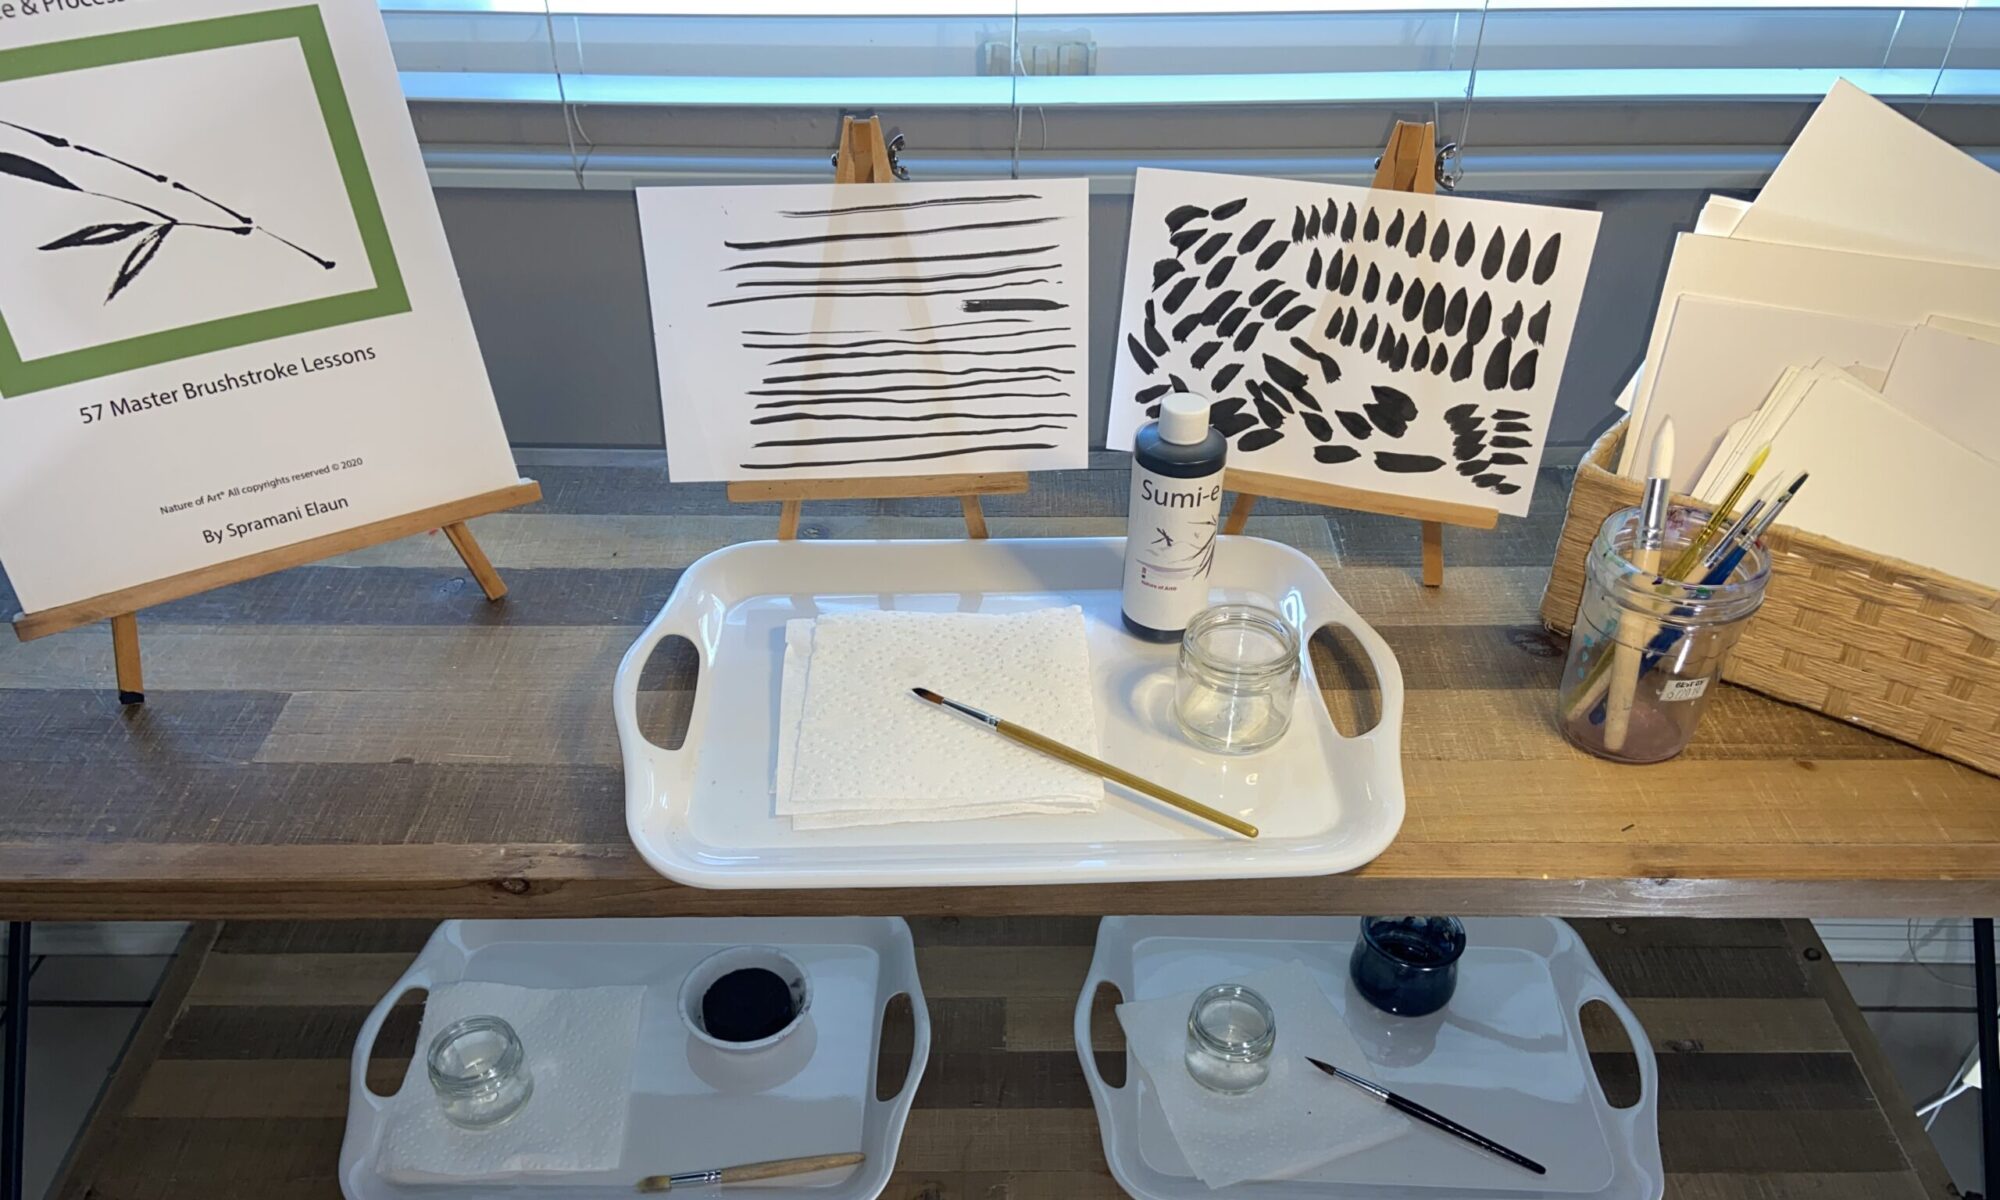
One of the reasons I really like painting on rocks is because it opens up a whole world of painting for kids. A rock is such an interesting and unique canvas; once they start painting there, they’ll want to learn even more techniques. Before kids explore all the different ways to paint, it’s important that they learn proper paint brush and brushstroke techniques to help them develop their painting skills.

My Kids Painting Practice & Process Curriculum has 57 master lessons that take kids from setting up a paint station and holding a brush all the way to creating beautiful nature landscapes and painting different types of animals! Each lesson is featured as part of a sequence and includes all the information—materials, demonstration technique, and direct and indirect aims—you need to properly present the activity to your students.

To purchase the curriculum, click here.

All rights reserved © 2024, Nature of Art®

No part of this blog may be used or be reproduced in any manner whatsoever including reproducing, publishing, performing, and making any adaptions of the work – including translation into another foreign language without written permission except in the case of brief quotations embodied in critical articles and reviews. Nature of Art® Publishing P.O. Box 443 Solana Beach, California 92075.

Watercolor Play | Montessori Art Lesson

If you’re looking for a hands-off project that’s fun for kids, I have the perfect art lesson for you! Watercolor Play introduces young children to the basics of color and lets them explore their creativity. Because this project is process-based—meaning it’s about experimenting and experiencing the process of making art—it’s a perfect Montessori art lesson, since students can work independently.

Watercolor Play is a simple, natural way for kids to learn the basis of color. Students in Plane 1 or younger can’t really be sat down and taught color theory, so this activity is a way for them to be introduced to color in a way that meets their level of understanding. It teaches them how color behaves and mixes, which are things all artists need to learn, without getting into technical details and overwhelming them.

This lesson provides the building blocks of color theory so students are ready for more advanced work as they get more experience. This foundation will help them be more willing to experiment when they’re older, because they already have an introduction to art and the knowledge of how colors work together.

Watercolor Play is Ideal for Early Childhood

While this activity is ideal for early childhood, you can adapt aspects of it to work for older children too. You’ll see that I try to keep this art lesson very simple to start off with, but you can add in primary and secondary color concepts once students have a better understanding.

Early childhood montessori art

No matter how old your students are, mixing colors can be therapeutic. It’s soothing, relaxing, and can relieve stress. Giving children the opportunity to play like this also helps them develop the wiring in their minds.

I recommend setting up this art lesson on a regular basis—maybe once a month, or even once a week—so their understanding consistently grows and deepens.

Watercolor Play from Spramani Elaun on Vimeo.

Supplies

  • Kid-safe, non-toxic liquid paint (acrylic, tempera, or watercolor) that’s been watered down to be transparent
  • Bottles with adjustable caps OR clear plastic tubs
  • Bowls
  • Paintbrushes, sponges, stampers, drippers
  • Watercolor paper or thick/butcher paper (optional)
  • Aprons or old clothes

Steps:

  1. Put all your materials out on a table
  2. Let kids explore and play

That’s it! Watercolor Play is such a simple activity. You don’t want to direct it or try to teach anything if your students are at a young age. Let them play with the colors and mix things naturally, they’ll create their own colors and see things for themselves. If they’re old enough to ask about colors, then you can go ahead and start naming the general hues, and hint at what adding other colors might do to change the original color (i.e. make it lighter).

Watercolor Paints

You can start with whatever colors you want. You can start with primary colors, or set out just one color at a time, then add new or different colors the next time. I recommend sticking with limited color options to start out with, especially for children 24 months or younger. Once they’re older and have had more exposure to colors and the activity, they’ll be able to start experimenting more, and getting more excited about their experimentation.

With this art lesson, you’re not focusing on the outcome; do not expect kids to create an actual finished work. The watercolor paper is optional because older students may want to make their own artwork, if the choose to do so, make sure there’s a place to keep the paper out to dry. Seeing how the paint and color changes once their work is done is part of the experience as well.

You may also want to consider starting with lighter colors before introducing darker ones, since dark colors can “stain” the other ones by eventually turning everything a murky gray—which is less exciting.

While this project is relatively hands off, you may need to take the lead initially by squirting and mixing the paint in your own bowl or tub. Kids are so used to us telling them to be careful, and not to make messes, so this is a new experience for them.

NOTE: This project should be set up outdoors or somewhere that water can be splashed (i.e., not rugs or carpet). This project can get messy with younger children, since most toddlers and lower elementary students don’t yet have very developed fine motor skills to control what they’re doing.

For more activities and lessons on color theory, check out my book Kids Color Theory.

montessori art early childhood

Sign-up to receive video course & Montessori art teaching e-newsletter.

The Phases of Art Development is a quick digital course that explains how art making can help students develop their creativity, fine-motor skills, and focus. More importantly, I share what types of projects students at every age are capable of completing safely, and without making a mess.

Best of all—it’s free! To sign up for the course, click here.

All rights reserved © 2024, Nature of Art®

No part of this blog may be used or be reproduced in any manner whatsoever including reproducing, publishing, performing, and making any adaptions of the work – including translation into another foreign language without written permission except in the case of brief quotations embodied in critical articles and reviews. Nature of Art® Publishing P.O. Box 443 Solana Beach, California 92075.


Lower Elementary Montessori Art Teach Method

Sensory Cognitive Child Art Method

I’ve spent years and years researching and observing how children learn art, and what I’ve found is that children are able to grasp different artistic skills at different planes. In this new blog series, I’ll be sharing my insight on the art teaching methods that work for each age group of Montessori students.

Children of all ages can be taught visual arts and be guided through the artistic process. Each developmental phase requires different teaching styles and approaches.

Below you’ll find a general arts literacy guide for Montessori Lower Elementary ages following the International Standards for the Arts Education & Sensory Visual Arts method that aligns with a child’s growth – Nature of Art®.

Montessori Lower Elementary Art Teaching Methods Resources

If you would like to understand more about which types of art projects children can work on, register for my free video course, Phases of Arts Development, which discusses teaching methods for Lower Elementary Montessori students (ages 7-9).

You can learn about Art Literacy Standards and the benefits of visual arts by reading Defining Visual Arts (paperback book).

Get more information on how to bring art lessons into the Montessori classroom by reading Introducing Visual Arts into the Montessori Classroom (paperback book).

montessori art how to

If you would like to understand more about the phases of art development, register for this free mini digital course.

Lower Elementary, Ages 7-9, Montessori Visual Arts Teaching Curriculum

Children at the lower L, age can do a number of different types of art projects. They can conjure up their own ideas and imaginative creations. Montessori lower elementary students can now plan with intention and think their ideas through to completion, going through the four steps of the artistic process.

At this age, students love to explore and discover what results different art mediums can produce. They encounter visual arts and Montessori art projects with lots of curiosity and a willingness to try different techniques.

Stretching Students’ Art Skills

Children can follow simple guided-art instructions and remain focused on their work for up to 1.5 hours. However, it’s still important to keep projects simple, with just a few un-complicated steps. Montessori art projects should start to introduce line, shape, form, texture, color, and symmetrical balance ideas.

You can also start introducing your lower elementary Montessori students to art language and the Elements & Principles of Design. For more information, reference Defining Visual Arts to better understand art language for young children.

Students’ fine-motor skills are becoming more controlled due to all the activities in their day-to-day Montessori curriculum and academic studies. Drawing and painting can be done with higher levels of control. The most important thing to focus on is giving children tasks that will continue to develop their fine-motor skills.

Children in lower elementary also need lots of exploratory sessions that allow them to experiment with varied mediums and techniques. Children are now drawing and painting with a 2D perspective and can be introduced to texture.

Art-Teaching Methods for Lower Elementary

Based on my proprietary sensory art method, I recommend teaching Montessori art through a combination of three methods: process-based art, creative-mode, and simple copy-mode.

  • Process-based art is about exploring and using their own imagination; it’s not necessarily focused on the child’s final piece of artwork.
  • Creative mode gives children the opportunity to explore mediums and conjure up creative images based on their own imaginations, thoughts, and ideas.
  • Copy mode refers to a systematic, step-by-step art instruction. Copy-mode should not be copy what you see in the image type lessons.

Lower Elementary Montessori Art Activities & Mediums

Here are some great Montessori Lower Elementary art projects for your students who are 7-9 years old, in the elementary grades. These types of art activities will help develop their fine motor control and small muscles in fingers and hands while teaching the Elements & Principles of Design. (You can find non-toxic, kid-friendly art supplies needed for these art activities at Nature of Art for Kids.)

  • Drawing: crayons, color pencils, graphite pencil, oil pastels, etc.
  • Painting: watercolor paints, tempera paints, acrylic paints, watercolor crayons, watercolor pencils etc.
  • Color Theory: primary color mixing, dropper color mixing, etc.
  • Clay Modeling: earth clay, non-harden plasticine clay, air-dry modeling clay, beeswax forming, etc.
  • Crafts: paper folding, nature and paper collage, mosaic arrangements, sewing basics, wool felting, string weaving, nature crafting, 3D constructing, etc.

Learn more about Montessori art teaching methods for lower elementary and get some Montessori art projects ideas by registering for my FREE mini digital course, Phases of Art Development Video.

Sign-up to receive video course & Montessori art teaching e-newsletter.

The Phases of Art Development is a quick digital course that explains how art making can help students develop their creativity, fine-motor skills, and focus. More importantly, I share what types of projects students at every age are capable of completing safely, and without making a mess.

Best of all—it’s free! To sign up for the course, click here.

All rights reserved © 2024, Nature of Art®

No part of this blog may be used or be reproduced in any manner whatsoever including reproducing, publishing, performing, and making any adaptions of the work – including translation into another foreign language without written permission except in the case of brief quotations embodied in critical articles and reviews. Nature of Art® Publishing P.O. Box 443 Solana Beach, California 92075.

5 Ways to Integrate Art Activities into Montessori Great Lessons

5 Ways to Integrate Art Activities into Montessori Great Lessons

By Spramani Elaun

One of the most common questions Montessori teachers come to me with is, “How do I integrate art with my lessons?” When you combine the concepts of art and the Great Lessons, you can seamlessly support your students learning without any disconnection.

And by incorporating art with what students are already learning you’re helping to instill the concepts of those subjects by putting them into a new perspective. You’re also giving their art context in showing its relationship to other parts of their world, which can ultimately lead to an increase in their art literacy.

5 Ways to Integrate Art Activities into Montessori Great Lessons

The Great Lessons in themselves are bold, exciting; they’re a way to awaken a child’s curiosity, imagination, and even creativity. There are really simple projects you can set up that help bring art into your everyday lessons, or specifically, your Great Lessons.

Students are used to learning new ideas through text and images, imagine how much more they’ll be able to understand and retain information when you tie in a multi-sensorial process like creating art. It’ll help your students learn on a deeper level. Having children create with a multitude of senses helps develop metacognitive reinforcement! I dive deeper into this in my books and new online training course, but here’s the gist:

5 Ways to Integrate Art Activities into Montessori Great Lessons

When art lessons are integrated into the Great Lessons, you create new pathways to reach different learners in different ways, which maximizes your students’ learning on these topics. They learn to express diverse ideas through methods that can’t be done in most other academic subjects. Something I’ve discovered over the years of working directly with students is that they each have a unique way of demonstrating their true understanding. Art gives them a platform where there’s no wrong or right way to express themselves and their understanding. This is particularly why science today is backing STEAM education models!

You probably already have your calendar planned out for the year, so here are just a few simple ways to add in art and relate it to the Great Lessons.

5 Ways to Integrate Art Activities into Montessori Great Lessons

First Great Lesson: Coming of the Universe and the Earth

With the first Great Lesson, you’re teaching students about astronomy, meteorology, chemistry, physics, geology, and geography. One of my favorite projects to teach is watercolor painting of galaxies. Students can create stunning images of galaxies and stars they see in their lessons, or let their imaginations loose and paint their own interpretations.

5 Ways to Integrate Art and the Great Lessons

Second Great Lesson: Coming of Life

The second Great Lesson covers topics like biology, botany, habitats, ancient life, and animals. I love incorporating nature with my projects whenever possible, so for me, botanical art is always exciting to teach! Make sure you check out my past blog post where I share ways to use fall leaves in projects for some ideas to use in your classroom.

5 Ways to Integrate Art and the Great Lessons

Third Great Lesson: Coming of Human Beings

History, culture, social studies, and invention are all parts of the third Great Lesson. Earlier this year, I partnered with a fellow Montessori teacher (for grades 4-6), and we integrated art into a lesson on ancient civilizations. Children learned basic ideas about settlements and how government is formed. I brought in several art lessons moving children through the artistic process of brainstorming, sketching, and building a 3D model of a settlement—either ancient, modern, or imaginary. If you want to learn more about how to do this, make sure you register for my Art Teaching Blueprint online course, I provide a step-by-step process for this lesson and a ton of others.

Fourth Great Lesson: Communication and Writing

The fourth Great Lesson covers different forms of communication including reading, writing, language, and structure. As students learn about pictographs and hieroglyphics, they can draw them out or create their own and then explain in writing what they mean.

5 Ways to Integrate Art and the Great Lessons

Fifth Great Lesson: Numbers

In the final Great Lesson, students learn about numbers, mathematics, geometry, and the applications of these topics. Using clay to mold and create shapes can illustrate geometrical concepts to students, such as similarities and angles.

This is just the tip of the iceberg! I get so excited about integrating visual art and the Great Lessons and have so many more easy and practical ways to do so in your classroom. There are two ways to get more info and ideas on this: 1) sign up for my newsletter to keep up with my blog, and 2) get dozens of ideas, all in one place, by registering for my course, Art Teaching Blueprint. I can’t wait to inspire more of your Montessori lessons!

Sign-up to receive video course & Montessori art teaching e-newsletter.

The Phases of Art Development is a quick digital course that explains how art making can help students develop their creativity, fine-motor skills, and focus. More importantly, I share what types of projects students at every age are capable of completing safely, and without making a mess.

Best of all—it’s free! To sign up for the course, click here.

All rights reserved © 2024, Nature of Art®

No part of this blog may be used or be reproduced in any manner whatsoever including reproducing, publishing, performing, and making any adaptions of the work – including translation into another foreign language without written permission except in the case of brief quotations embodied in critical articles and reviews. Nature of Art® Publishing P.O. Box 443 Solana Beach, California 92075.

Building a Montessori Art Calendar to Keep Students Busy Every Month

Building Out an Art Calendar to Keep Your Students Busy with Something New Every Month

By Spramani Elaun

“Teaching” art can seem overwhelming, and creating an art calendar to keep your students busy with art all year long can seem impossible. The beginning of a new school year is both exciting but stressful for that very reason. While you’re mapping out all your projects and lessons for the year, art can sometimes take a backseat.

But I don’t want that to be the case for you or for your students! All it takes is some simple planning to get you going. I promise you, if you take some time to plan out your calendar, art lessons will flow better and be so much easier for you during the school year.

The best part of all this? There’s a simple, stress-free way to break it down.

In my course, Art Teaching Blueprint, I go over in detail how to create an art schedule (and the specific resources and materials you may need!) but here’s the basic idea to it.

Building Your Calendar

You’re going to start by counting up the number of teachable weeks in the school year. That may mean excluding the first two weeks of the year (when you’re still getting your class situated), weeks where you’re off for the holidays, and the last couple weeks of school (when you’re likely busy with testing). This number can vary depending on your schedule.

Now, you’re going to follow this formula:

# of teachable weeks / 5 domains = # of lessons per domain

  • You might be asking, what’s a domain? The way I’ve developed my art training is by breaking down visual art into five different categories, or domains. Here is an example of two:
    • Drawing
    • Painting
  •  

Let’s say you’ve counted 30 teachable weeks for the year, that would mean:

30 / 5 = 6 lessons for each domain

Knowing you only have to teach six lessons on drawing, six on painting, and so on already makes your calendar seem a bit more manageable, right?

Don’t worry, I won’t leave you here. This formula is just the basis for your calendar, you now need to fill it out with more specific lessons, or themes.

Inspiration for Your Calendar

What you decide to teach for your lessons is completely up to you, but here are some tips and monthly theme inspiration to help you finish filling in your calendar.

I’d suggest trying to integrate art projects with the lessons you’re already planning on teaching, like the Great Lessons, astronomy, physical science, etc. With this information, decide which domain makes sense for each topic. For example, if you’re learning about dinosaurs, put clay on your art shelf for students to create their own tyrannosaurus; or let them experiment with watercolors as they learn about the cosmos.

You might also want to think about holidays or special events as you map out your lessons. For instance, Earth Day is in April, so your lessons that month can focus on nature and the earth.

Here are a few other themes for each month to get you started.


Monthly Theme Ideas:

September

  • The Big Bang
  • Cosmic Education
    If you haven’t already, make sure you sign up for my FREE mini-course—I share a lesson on cosmic rock painting

October

  • World Peace
  • Fall Leaves

November

  • Outdoor Nature Crafts (leaves, rocks, sticks, natural paints)

December

  • Cultural Geography
    Think about crafts from different cultures around the world, like Japanese origami, skull paintings from Mexico, etc.

January

  • Winter Snowflakes
    Students can cut out snowflakes from pieces of paper, or paint a sheet full of them—each with its unique shape and design.

February

  • Zoology (like dinosaurs, birds, insects, etc.)

March

  • Geography
    Students can create maps of places they’re learning about in other lessons this week.)

April

  • Botany (seeds, plants, trees, etc.)

May

  • Astronomy

Summer

  • Beach or Ocean

Hopefully this is enough to get you started!

There are SO many ways to organize your lessons, and that’s the fun part of all this!

You can teach each lesson in succession (six straight weeks of drawing, followed by six straight weeks of painting, etc.) or rotate each lesson throughout the year.

I cover a few specific ways in Art Teaching Blueprint, and even give you a few sample calendars to follow.

So if this still feels overwhelming, make sure you check out my art certification, to enroll or email me directly at info@Spramani.com with any questions.

I’ll also be sharing a specific art project each month on the blog, so make sure you’re signed up for my newsletter for even more ideas throughout the year.

Sign-up to receive video course & Montessori art teaching e-newsletter.

The Phases of Art Development is a quick digital course that explains how art making can help students develop their creativity, fine-motor skills, and focus. More importantly, I share what types of projects students at every age are capable of completing safely, and without making a mess.

Best of all—it’s free! To sign up for the course, click here.

All rights reserved © 2024, Nature of Art®

No part of this blog may be used or be reproduced in any manner whatsoever including reproducing, publishing, performing, and making any adaptions of the work – including translation into another foreign language without written permission except in the case of brief quotations embodied in critical articles and reviews. Nature of Art® Publishing P.O. Box 443 Solana Beach, California 92075.