


What These Rock and Mineral Art Lessons Are
This post is part of a three-month creative series focused on helping children explore the natural world through art. The goal is to encourage kids to observe their surroundings more closely and express what they see through drawing, painting, and hands-on making. Nature offers endless inspiration, from seasons and soil layers to rocks, minerals, fossils, and landforms. Art provides a powerful way for children to slow down and notice these details. These rock and mineral art lessons invite children to learn through creative exploration.
Rocks are especially engaging because they are easy to find and naturally fascinating. Children enjoy collecting, sorting, and working with them. Art activities using rocks help connect creativity with real-world observation. As a result, children often begin noticing rocks and landforms more intentionally outdoors. Learning becomes personal and meaningful.
Why Rocks Make Great Art Inspiration
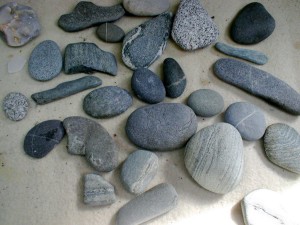
Rocks offer texture, weight, shape, and color, all qualities that support visual exploration. Children can observe how rocks differ and imagine where they come from. These activities work well for a wide age range, from young children to older students. Art experiences with rocks support curiosity and focus. They also encourage outdoor exploration.
Using natural materials adds a sense of discovery to art time. Children feel connected to their environment. Rocks become more than objects. They become tools for creativity and learning. Art and nature work together naturally.
Five Creative Rock and Mineral Art Ideas
1. Rock Painting
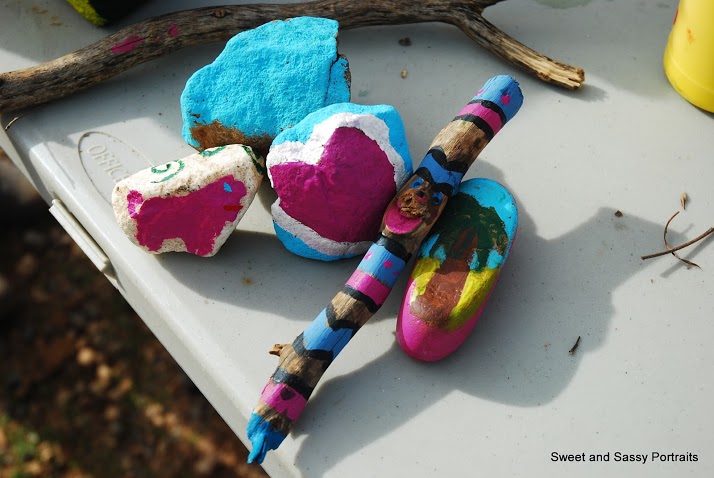
Painting on rocks is a favorite activity for many children. The unique surface encourages experimentation with color, lines, and texture. Rocks make interesting, sustainable canvases. Children enjoy choosing shapes that inspire their designs. Each finished piece feels special and personal.
2. Natural Rock Arrangements
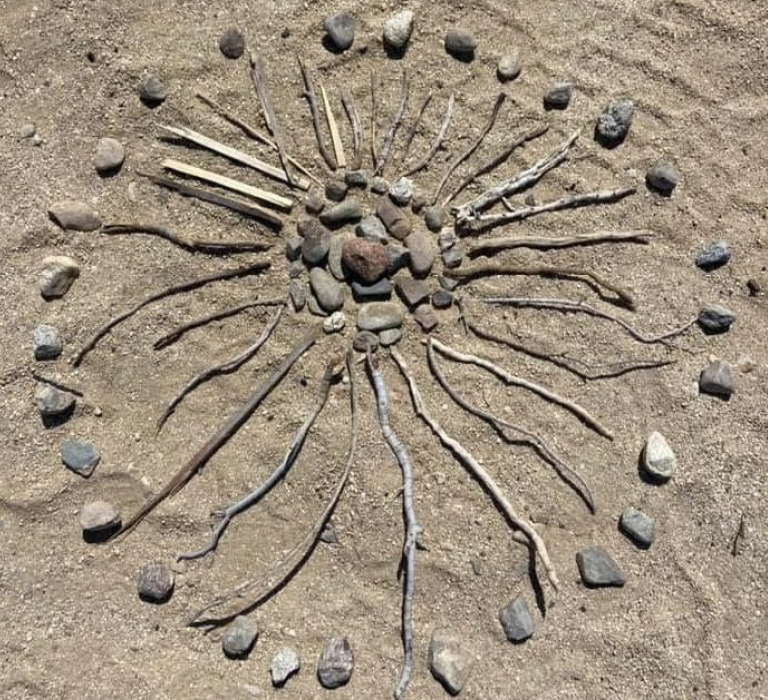
Arranging rocks into patterns or designs supports focus and visual balance. Children enjoy sorting by size, color, or shape. These arrangements encourage careful observation. The process feels calm and engaging. Creativity emerges through placement rather than instruction.

3. Designing Mini Landscapes with Rocks
Children can use rocks to create small landscapes such as rivers, caves, mountains, or paths. This activity supports imagination and storytelling. Kids enjoy planning and adjusting their designs. Rocks become symbols for larger ideas. Creativity and problem-solving work together.
4. Sketching Rocks and Shadows
Drawing rocks helps children notice form, light, and shadow. Observing how sunlight changes the appearance of a rock builds visual awareness. Sketching outdoors adds excitement and realism. Children learn to look closely rather than rush. Drawing becomes a way to study nature.

5. Exploring Color Through Natural Pigments
Rocks and minerals are a wonderful way to talk about where colors come from. Observing natural color variation encourages curiosity. Children enjoy discovering that nature provides many hues. This connection helps them understand art materials in a new way. Color becomes part of the natural world.
Creating a Simple Rock Art Space
Rock-based art activities work best when children have space to explore independently. A simple table or outdoor surface is often enough. Keeping materials organized helps children focus on creating. When setup is calm and inviting, children engage longer. Art time feels relaxed and enjoyable.
You can rotate materials to keep interest fresh. Different rocks, brushes, or drawing tools encourage new ideas. Children appreciate variety without complexity. The environment supports creativity. Less instruction leads to more discovery.

Extending Learning with Nature Journals
Nature journaling is a wonderful way to extend rock art activities. While children collect rocks, they can also record observations through sketches or simple notes. This practice strengthens observation skills. It also helps children reflect on what they see. Journaling adds depth without pressure.
Guidance can help children notice details like shape, color, or texture. Over time, their confidence grows. Journals become personal records of discovery. Art and observation work together seamlessly.

Building Painting Confidence Through Skill Practice
Painting on rocks often inspires children to want to explore painting more deeply. Before trying complex subjects, it helps to build comfort with brushes and paint. Skill-focused practice supports confidence. Children enjoy learning how tools work. Progress feels empowering.
The Nature of Art® painting curriculum supports this growth through thoughtfully designed lessons. Created by Spramani Elaun, the curriculum focuses on building foundational painting skills over time. It is designed to support confidence, creativity, and independence. Many families and educators use it to bring structure to creative learning.
About the Instructor
Spramani Elaun is an international art trainer, professional artist, and the author of 10 books on early childhood visual arts education. Over the past two decades, she has developed the Science Art Method™ and certified thousands of Montessori educators, school teachers, and independent guides globally, empowering them to deliver structured, joyful art programs with total developmental clarity.
A Final Thought
Rocks and minerals offer endless opportunities for creative exploration. When children work with natural materials, learning feels grounded and meaningful. Art becomes a way to understand the world around them. Curiosity leads the way. Creativity grows naturally.
For deeper guidance and creative structure, explore my books and art teaching resources.

A Short Cut Just for You: Buy Painting Step-by-Step Curriculum

One of the reasons I really like painting on rocks is because it opens up a whole world of painting for kids. A rock is such an interesting and unique canvas; once they start painting there, they’ll want to learn even more techniques. Before kids explore all the different ways to paint, it’s important that they learn proper paint brush and brushstroke techniques to help them develop their painting skills.
My Kids Painting Practice & Process Curriculum has 57 master lessons that take kids from setting up a paint station and holding a brush all the way to creating beautiful nature landscapes and painting different types of animals! Each lesson is featured as part of a sequence and includes all the information—materials, demonstration technique, and direct and indirect aims—you need to properly present the activity to your students.
To purchase the curriculum, click here.


All rights reserved © 2026, Nature of Art®
Nature of Art® provides art pedagogy
This website and its blogs supports individual educators in teaching children visual arts. It does not authorize professional development, staff training, or adaptation of the Science Art Method™ for institutional use.
No part of this blog may be used or be reproduced in any manner whatsoever including reproducing, publishing, performing, and making any adaptions of the work – including translation into another foreign language without written permission except in the case of brief quotations embodied in critical articles and reviews.
Nature of Art® Publishing P.O. Box 443 Solana Beach, California 92075.