5 Ways to Become an Art-Trained Montessori Teacher Over Winter Break

Usually when I tell Montessori teachers they can start teaching art in their classroom, they look at me like I’m crazy! So many of them tell me they have no training, they’re not creative, or they struggle with just drawing stick figures! Trust me though, you CAN become an art-trained Montessori teacher!

In fact, winter break is one of the best times to get started. Think about how excited your students will be to come back to school and find out you’ll be introducing art lessons to them. They’ll love it! Not only will it help develop their creativity and art literacy, but it helps them make connections between all the other subjects they’re learning—such as the Great Lessons.

So, now I’m sure you’re thinking, “Look, Spramani, I definitely want to become a better Montessori teacher, and it would be really cool to start providing visual arts in my classroom, but how can I become art trained in a matter of weeks? Winter break is only so long.

I’ve done the hard work for you. After 20 years of observing the way kids learn art, I’ve created a simple way to teach art that works perfectly in the Montessori classroom. It really doesn’t require much leg work from you, and students get to explore the entire artistic process. Of course, you’ll have to sign up for my Art Teaching Blueprint and get all the info you need (I’ll touch on what the course is and why it’s so awesome further below), but here are five things to do to get you started to becoming art trained over winter break.

1. Buy Some Supplies

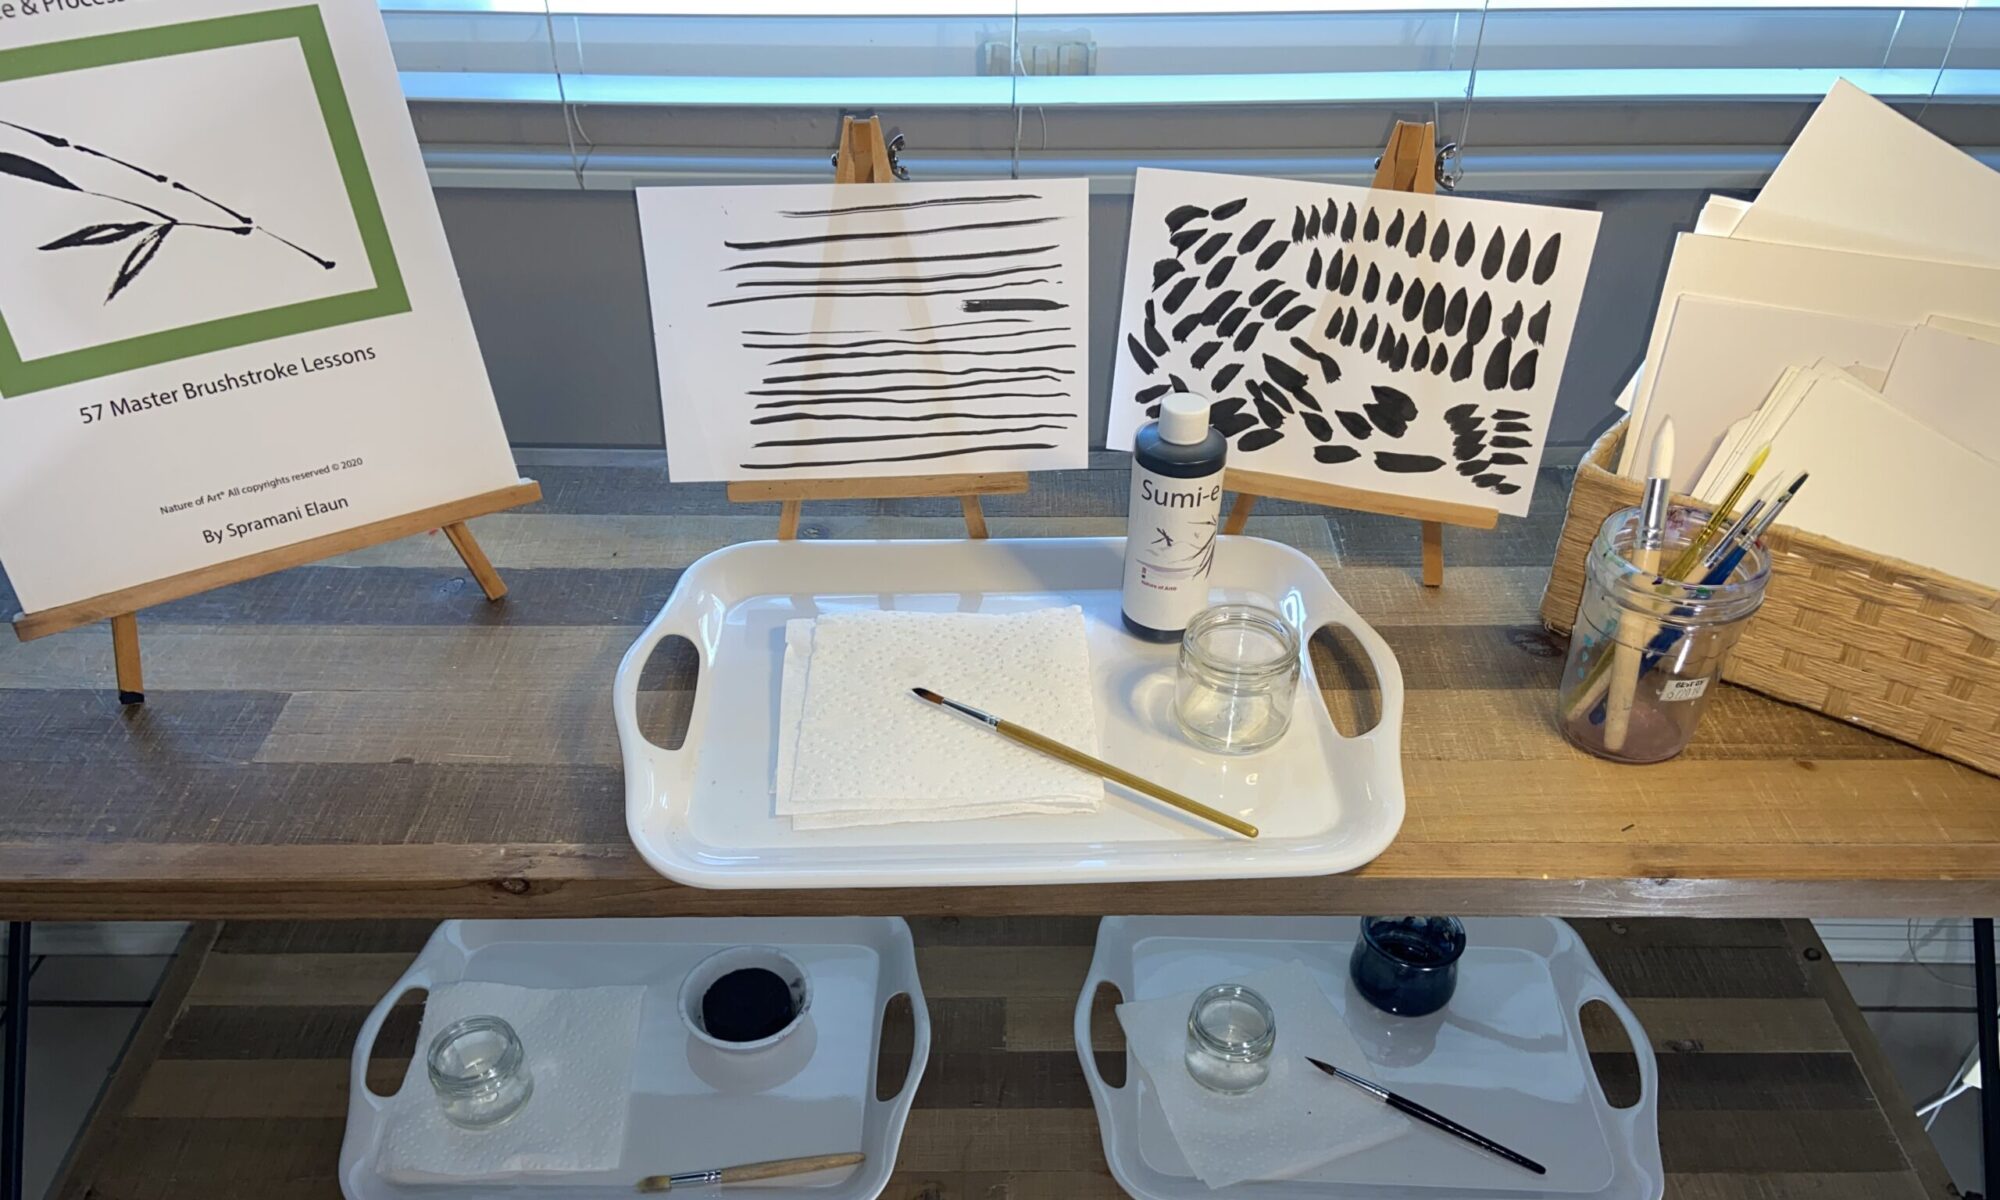
The first step to becoming art trained is setting yourself—as well as your classroom and students—up with the right tools and supplies. (I’ve broken down the essential art supplies every Montessori classroom needs in this blog post.) Starting with a stocked classroom gives you the foundation to explore the visual arts.

2. Set Up an Art Shelf

As you know, subject-based shelves are the basis of a successful Montessori classroom, so it only makes sense that you should set up an art shelf. You can read how to set up an art shelf in your classroom here. A proper art shelf supports art literacy and helps keep all your supplies organized in one easy-to-reach place for your students to access.

3. Build an Inspiration Gallery

Another way to get your classroom set up for teaching art is to create an inspiration gallery. It can give students a place to observe and talk about artwork, which can increase their art literacy, language, and self-esteem. While an inspiration gallery is a simple concept, there are some tricks to it. For instance, you don’t want to solely include fine art examples; it’s important to incorporate students’ own work too. (If you want to learn more about how inspiration galleries work, read this blog post.)

4. Pick Up a Book

Once you’re all set with supplies, an art shelf, and an inspiration gallery, it’s time to start your training. You can give yourself a great base by doing some quick reading. I’ve written two visual art books that create a framework for learning the subject. Defining Visual Arts focuses on the latest standards and the most important projects, mediums, and techniques to teach. Introducing Visual Arts to The Montessori Classrooms gets a little more specific in providing solid guidance for teaching art in a Montessori environment. Either one—but of course, both—of these books are helpful in giving you the context for how children learn art and are a great option in kicking off your art training.

5. Register for my FREE teacher course: Phases of Art Development Guides & Art Project Ideas!

I created a free video course to teach Montessori teachers like you the phases of art development—or what art skills your students are capable of learning in each age range. The course also includes three bonus videos of art lessons, projects, and techniques to use in your classroom, no matter what grade you’re teaching. Best of all, you can go through this mini training in the comfort of your own home (while on winter break!).

You can do it, YOU can become an art-trained Montessori teacher. I believe in you and your students will thank you for taking the time to learn how to teach art in your classroom. If you have any questions or want to connect with other Montessori teachers who are going through my course, make sure you go like my Facebook page.

All rights reserved © 2024, Nature of Art®

No part of this blog may be used or be reproduced in any manner whatsoever including reproducing, publishing, performing, and making any adaptions of the work – including translation into another foreign language without written permission except in the case of brief quotations embodied in critical articles and reviews. Nature of Art® Publishing P.O. Box 443 Solana Beach, California 92075.

Setting Up Your Montessori Classroom Art Space

Setting Up Your Montessori Classroom Art Space

By Spramani Elaun

Inspiring children to be creative is my business! I’ve spent more than 20 years observing how they learn and teaching them visual art. In my experience, one of the most essential components of students exploring and learning art is their environment. Luckily, it’s actually so easy to set up your Montessori classroom art space!

If you’ve been following this blog, then you know I believe every Montessori classroom should have an inspiration gallery and an art shelf, so I bet you’re wondering what else you could possibly need. I can go on and on about all the things you can use to set up an art space, but to keep it simple, I’ll just share the five basic necessities with you. (Of course, you can dive deeper and learn about all the fun, unique, colorful, exciting things that you can add to your classroom by reading my books Introducing Visual Arts to The Montessori Classroom and Defining Visual Arts.)

The most important thing to understand is that making a space for art means making space to get creative and have fun. Now, when I say that, I know a lot of teachers think fun means mess. While that’s the case sometimes, if you set up a designated space for making art, it’ll contain the mess, while still giving students the freedom to create as they please.

Setting Up an Art Space

Kids need an art space to doodle, draw, write, paint, craft, sew, knit, cut, glue, build, construct, and play with clay. For kids to make these types of art projects successfully, they need the proper space. Here are the five basic necessities for creating a place for art in your classroom.

1. Rugs & Floor Coverings

Spills are inevitable, so it’s important to consider the flooring of your art space. If your classroom has wood, tile, or linoleum floors then spills will be an easy, worry-free clean up. However you may still want to a rug to lay out that will protect your floors—especially if your floor is carpet.

Rugs come in many sizes and can be inexpensive or pricey. If you don’t want to invest in a rug, then you can use a drop cloth or tarp while your students are working, and then fold it up and put it away when they’re done.

Setting Up Your Montessori Classroom Art Space

2. Table

Table size will not affect your students’ ability to be creative, but the sturdiness of it will. I’ve witnessed kids create beautiful works of art on a surface as large as their lap, so don’t feel like you need a huge, glorious art table in your classroom.

When I’m hosting events and teaching art classes I’m usually setting up on the fly and rely on a small (but sturdy!), cheap, portable fold-up tables. These are great—not just for my events but in the classroom as well—because you can set them up when you need to and not be limited to a full-time art table since they can be folded up and tucked out of the way when not in use.

3. Chairs

Along with a sturdy table, kids need a sturdy chair or stool to sit on safely. A bench or folding chair can work just fine, as will pulling a chair from elsewhere in your classroom. Having a table and chairs available makes invites a child to create and lets them know art should be made in that specific place (containing any mess to that space as well).

Setting Up Your Montessori Classroom Art Space

4. Light Source

I’ve spent many years observing children making artworks, and the ways in which they visually perceive their work is key to developing their artistic skills. That’s why a good, bright light source is important—it helps them identify pigments and color hues. Natural sunlight is the best, but a lamp light source can work just as well.

5. Art Supply Storage

Every art space should have a place where art supplies are stored. I’ve found that children can be overly stimulated or even get bored if they’re given total access to every art supply in your classroom. The best way to keep them excited and engaged with art is to keep rotating the materials that are available to them. You can use jars, baskets, or closed plastic containers to separate different types of art supply and store them away from the art space when necessary.

Setting Up Your Montessori Classroom Art Space

Creating your Montessori classroom art space doesn’t need to be fancy or complicated; it’s really not that different from the areas you have set aside for other lessons.

If this has you inspired and eager to start teaching art in your classroom, you should definitely sign up for my online training, Art Teaching Blueprint. It’s a quick, seven-week course that takes everything I’ve learned about teaching art to students and breaks it down into 43 short, easily-digestible videos. It’ll help you build a foundation for teaching a quality visual arts program in your school or classroom. I’m so excited to offer this course to you and I really think it’ll empower you and give you invaluable teaching skills. You can click here to register.

All rights reserved © 2024, Nature of Art®

No part of this blog may be used or be reproduced in any manner whatsoever including reproducing, publishing, performing, and making any adaptions of the work – including translation into another foreign language without written permission except in the case of brief quotations embodied in critical articles and reviews. Nature of Art® Publishing P.O. Box 443 Solana Beach, California 92075.

Making Gratitude Cards to Celebrate Thanksgiving, Montessori Activities

The holiday and Thanksgiving season are a time of reflection for most people—most adults, anyway. It’s a time we think about everything we’re grateful for, and it’s a practice we should be sharing with our children and students.

Expressing gratitude has the power to reduce stress, foster a sense of belonging, and yield a host of emotional and mental health advantages. Fundamentally, gratitude involves feeling thankful and appreciative of the positive aspects in your life. As educators, we have the opportunity to lead our students toward recognizing and appreciating the multitude of “gifts” they encounter daily, spanning from the wonders of nature to the joys of delicious food and the warmth of cherished friendships.

Every year, around our Thanksgiving holiday here in North America, for as far as I can remember, I would have my children make gratitude cards for all our guests. We would place them around the dinner table for each guest to read when they sat down. Each card would be something simple, the guest’s name and a sweet sentiment of appreciation for who they are.

I would also surprise my own kids with tiny gratitude gifts as well, telling them how thankful I was to have them in my life. I still do this every year, even though they are all grown up! 🙂


I think it is so important to write and document these thoughts and feelings. I know this activity has always grounded my children and given them a heart of giving, rather than receiving. I still journal myself about what I’m grateful for, and give thanks all year long for the big and little things in my life—like the free lemons that grow in my garden.

Making Gratitude Cards to Celebrate Thanksgiving, Montessori Activities

Teaching Gratitude to Your Students

Preschool students should be taught to say thank you when they receive a gift or a kindness from another person. Remember to teach them that the size of the generosity doesn’t matter. They can be grateful for a big gift, but also for a sunny day or hug from a friend.

Students in lower elementary can think a little more in depth and should be encouraged to reflect on their day. They can even create and keep a gratitude list of good things that happened.

Upper elementary students can also focus on keeping gratitude lists or journals. But introduce the concept of good coming from bad, and teach them they can be grateful in negative situations too.

Making Gratitude Cards to Celebrate Thanksgiving, Montessori Activities

Gratitude Card Making Project Idea:

Here’s a great way to combine a writing and drawing lesson that helps students express their gratitude.

Gather your students, talk about what gratitude means. Give examples of things you are grateful for, or suggest things they might feel grateful for. Then pass out index cards and have each child write, “I am grateful for…” Be sure to write prompts out to copy as an example.

Once they’re done, have them draw a picture about what the thing(s) they were thankful for. Students can make a booklet or paste their card to their picture. Be sure to check out the video below for supplies and simple instructions.

Supplies:

  • Paper or card stock—any size, color, weight
  • Stickers—any theme
  • Stamps and ink pads—any colors
  • Pencils
  • Crayons
  • Color pencils
  • Glue
  • Tape
  • Scissors
  • Washi decorative tape

Gratitude Cards from Spramani Elaun on Vimeo.

For more project ideas, make sure you sign up for my newsletter or check out my sample art calendar.

Sign-up to receive video course & Montessori art teaching e-newsletter.

The Phases of Art Development is a quick digital course that explains how art making can help students develop their creativity, fine-motor skills, and focus. More importantly, I share what types of projects students at every age are capable of completing safely, and without making a mess.

Best of all—it’s free! To sign up for the course, click here.

All rights reserved © 2024, Nature of Art®

No part of this blog may be used or be reproduced in any manner whatsoever including reproducing, publishing, performing, and making any adaptions of the work – including translation into another foreign language without written permission except in the case of brief quotations embodied in critical articles and reviews. Nature of Art® Publishing P.O. Box 443 Solana Beach, California 92075.

Ways to Stimulate Positive Art Talk in Montessori Classrooms

I know that if you’re reading this blog right now, then you want to teach your Montessori students visual art! And I applaud you for that! It’s such an awesome thing to see kids get excited about art and making things with their own hands—and one way to do that is through positive art talk.

I’ve worked with so many Montessori teachers over the years, and for the most part, their number one fear is that because they don’t have a background in art they won’t be able to teach it to their students. If this is your fear, I’d suggest enrolling in my new online course Art Teaching Blueprint; in just seven modules, I go through how children learn art, and break it down so it’s easy for you to understand and then turn around and teach—I even include several step-by-step lesson guides!

The truth is, you can get students interested in art without having a strong background in the subject, you just have to know how to talk to them and encourage them. Here are a few pieces of advice for the next time you talk to a student about his or her artwork.

Ways to Stimulate Positive Art Talk in Montessori Classrooms

Remember Their Skill Level

When kids are creating and then sharing their artworks, it’s important to remember rein your expectations. Depending on your students’ ages, they might be brand new to art still learning how to paint, draw, and craft. Most artworks made by young kids are simply experimental, led by curiosity and art play. For them, the point of art is just to create, and their finished pieces won’t look like anything at all. That’s perfectly fine—it’s still art!

Listen First

As students get older, they might be creating art to represent actual ideas or objects…but their finished work still might not look like what they intend it to. My advice is to listen first. Let them describe what they’ve made on their own. Listening is very supportive and won’t make a child feel judged or bring focus to their artistic skills.

Speak Second

I encourage you to listen first because you don’t want to ask too many questions about what your students painted and why, because it can quickly overwhelm them. One of the most common mistakes teachers is trying to analyze a student’s work like an art critic. We want students to create art for themselves, based on their own ideas, interests and creativity. If you judge their work—even positively—it can cause them to begin creating work they believe you’ll like or appreciated, which can stump their own expression in the long run.

Slowly Introduce Art Language

If you have a child that shows interest in discussing their artwork and skills, try to introduce art language slowly. Supportive and nurturing language can sound like, “I like your work, do you want to share with me what you created?” If they still look for some type of confirmation from you, then use neutral, observational comments about their work. For example, acknowledging their use of colors, shapes or textures can give them the approval they want, since it shows you’re paying attention to their creation, without putting a “good” or “bad” stamp on their finished work.

Montessori Early Childhood Art
Click here!

Download my Beginner Elements and Principle of Design Cheat Sheet for a list of Montessori early childhood art language terms. I’ve included definitions for each term as well, so you’ll feel more confident using them, knowing you’re using them correctly. In truth, these art language terms can be used in all Montessori classrooms, no matter how old your students are!

To download the Art Language cheat sheet, click here.

Remember That Actions Speak Louder Than Words

At the end of the day, you can create positive reinforcement of a child’s creativity by simply showing off their work. After the child has explained all they can about their art, ask if they want to save, showcase, or maybe give it away to someone special. A reassuring smile of approval and displaying it in your classroom’s inspiration gallery can do so much for their confidence when it comes to visual arts!

Of course, this is just the beginning. Positive art talk is the start building up a child’s confidence and creativity. For more ideas and tips on creating a positive art environment sign up for my newsletter and keep up with my blog. I also strongly recommend that you register for my course, Art Teaching Blueprint. I share the very best way to teach art to your students—it’s taken years of study and experience on my end—but you get all the secrets in one place, in a flexible, easy-to-digest online course. It’s awesome, it’s fun, and I know you’ll love it and learn so much from it!

All rights reserved © 2024, Nature of Art®

No part of this blog may be used or be reproduced in any manner whatsoever including reproducing, publishing, performing, and making any adaptions of the work – including translation into another foreign language without written permission except in the case of brief quotations embodied in critical articles and reviews. Nature of Art® Publishing P.O. Box 443 Solana Beach, California 92075.

5 Ways to Integrate Art Activities into Montessori Great Lessons

5 Ways to Integrate Art Activities into Montessori Great Lessons

By Spramani Elaun

One of the most common questions Montessori teachers come to me with is, “How do I integrate art with my lessons?” When you combine the concepts of art and the Great Lessons, you can seamlessly support your students learning without any disconnection.

And by incorporating art with what students are already learning you’re helping to instill the concepts of those subjects by putting them into a new perspective. You’re also giving their art context in showing its relationship to other parts of their world, which can ultimately lead to an increase in their art literacy.

5 Ways to Integrate Art Activities into Montessori Great Lessons

The Great Lessons in themselves are bold, exciting; they’re a way to awaken a child’s curiosity, imagination, and even creativity. There are really simple projects you can set up that help bring art into your everyday lessons, or specifically, your Great Lessons.

Students are used to learning new ideas through text and images, imagine how much more they’ll be able to understand and retain information when you tie in a multi-sensorial process like creating art. It’ll help your students learn on a deeper level. Having children create with a multitude of senses helps develop metacognitive reinforcement! I dive deeper into this in my books and new online training course, but here’s the gist:

5 Ways to Integrate Art Activities into Montessori Great Lessons

When art lessons are integrated into the Great Lessons, you create new pathways to reach different learners in different ways, which maximizes your students’ learning on these topics. They learn to express diverse ideas through methods that can’t be done in most other academic subjects. Something I’ve discovered over the years of working directly with students is that they each have a unique way of demonstrating their true understanding. Art gives them a platform where there’s no wrong or right way to express themselves and their understanding. This is particularly why science today is backing STEAM education models!

You probably already have your calendar planned out for the year, so here are just a few simple ways to add in art and relate it to the Great Lessons.

5 Ways to Integrate Art Activities into Montessori Great Lessons

First Great Lesson: Coming of the Universe and the Earth

With the first Great Lesson, you’re teaching students about astronomy, meteorology, chemistry, physics, geology, and geography. One of my favorite projects to teach is watercolor painting of galaxies. Students can create stunning images of galaxies and stars they see in their lessons, or let their imaginations loose and paint their own interpretations.

5 Ways to Integrate Art and the Great Lessons

Second Great Lesson: Coming of Life

The second Great Lesson covers topics like biology, botany, habitats, ancient life, and animals. I love incorporating nature with my projects whenever possible, so for me, botanical art is always exciting to teach! Make sure you check out my past blog post where I share ways to use fall leaves in projects for some ideas to use in your classroom.

5 Ways to Integrate Art and the Great Lessons

Third Great Lesson: Coming of Human Beings

History, culture, social studies, and invention are all parts of the third Great Lesson. Earlier this year, I partnered with a fellow Montessori teacher (for grades 4-6), and we integrated art into a lesson on ancient civilizations. Children learned basic ideas about settlements and how government is formed. I brought in several art lessons moving children through the artistic process of brainstorming, sketching, and building a 3D model of a settlement—either ancient, modern, or imaginary. If you want to learn more about how to do this, make sure you register for my Art Teaching Blueprint online course, I provide a step-by-step process for this lesson and a ton of others.

Fourth Great Lesson: Communication and Writing

The fourth Great Lesson covers different forms of communication including reading, writing, language, and structure. As students learn about pictographs and hieroglyphics, they can draw them out or create their own and then explain in writing what they mean.

5 Ways to Integrate Art and the Great Lessons

Fifth Great Lesson: Numbers

In the final Great Lesson, students learn about numbers, mathematics, geometry, and the applications of these topics. Using clay to mold and create shapes can illustrate geometrical concepts to students, such as similarities and angles.

This is just the tip of the iceberg! I get so excited about integrating visual art and the Great Lessons and have so many more easy and practical ways to do so in your classroom. There are two ways to get more info and ideas on this: 1) sign up for my newsletter to keep up with my blog, and 2) get dozens of ideas, all in one place, by registering for my course, Art Teaching Blueprint. I can’t wait to inspire more of your Montessori lessons!

Sign-up to receive video course & Montessori art teaching e-newsletter.

The Phases of Art Development is a quick digital course that explains how art making can help students develop their creativity, fine-motor skills, and focus. More importantly, I share what types of projects students at every age are capable of completing safely, and without making a mess.

Best of all—it’s free! To sign up for the course, click here.

All rights reserved © 2024, Nature of Art®

No part of this blog may be used or be reproduced in any manner whatsoever including reproducing, publishing, performing, and making any adaptions of the work – including translation into another foreign language without written permission except in the case of brief quotations embodied in critical articles and reviews. Nature of Art® Publishing P.O. Box 443 Solana Beach, California 92075.

Building a Montessori Art Calendar to Keep Students Busy Every Month

Building Out an Art Calendar to Keep Your Students Busy with Something New Every Month

By Spramani Elaun

“Teaching” art can seem overwhelming, and creating an art calendar to keep your students busy with art all year long can seem impossible. The beginning of a new school year is both exciting but stressful for that very reason. While you’re mapping out all your projects and lessons for the year, art can sometimes take a backseat.

But I don’t want that to be the case for you or for your students! All it takes is some simple planning to get you going. I promise you, if you take some time to plan out your calendar, art lessons will flow better and be so much easier for you during the school year.

The best part of all this? There’s a simple, stress-free way to break it down.

In my course, Art Teaching Blueprint, I go over in detail how to create an art schedule (and the specific resources and materials you may need!) but here’s the basic idea to it.

Building Your Calendar

You’re going to start by counting up the number of teachable weeks in the school year. That may mean excluding the first two weeks of the year (when you’re still getting your class situated), weeks where you’re off for the holidays, and the last couple weeks of school (when you’re likely busy with testing). This number can vary depending on your schedule.

Now, you’re going to follow this formula:

# of teachable weeks / 5 domains = # of lessons per domain

  • You might be asking, what’s a domain? The way I’ve developed my art training is by breaking down visual art into five different categories, or domains. Here is an example of two:
    • Drawing
    • Painting
  •  

Let’s say you’ve counted 30 teachable weeks for the year, that would mean:

30 / 5 = 6 lessons for each domain

Knowing you only have to teach six lessons on drawing, six on painting, and so on already makes your calendar seem a bit more manageable, right?

Don’t worry, I won’t leave you here. This formula is just the basis for your calendar, you now need to fill it out with more specific lessons, or themes.

Inspiration for Your Calendar

What you decide to teach for your lessons is completely up to you, but here are some tips and monthly theme inspiration to help you finish filling in your calendar.

I’d suggest trying to integrate art projects with the lessons you’re already planning on teaching, like the Great Lessons, astronomy, physical science, etc. With this information, decide which domain makes sense for each topic. For example, if you’re learning about dinosaurs, put clay on your art shelf for students to create their own tyrannosaurus; or let them experiment with watercolors as they learn about the cosmos.

You might also want to think about holidays or special events as you map out your lessons. For instance, Earth Day is in April, so your lessons that month can focus on nature and the earth.

Here are a few other themes for each month to get you started.


Monthly Theme Ideas:

September

  • The Big Bang
  • Cosmic Education
    If you haven’t already, make sure you sign up for my FREE mini-course—I share a lesson on cosmic rock painting

October

  • World Peace
  • Fall Leaves

November

  • Outdoor Nature Crafts (leaves, rocks, sticks, natural paints)

December

  • Cultural Geography
    Think about crafts from different cultures around the world, like Japanese origami, skull paintings from Mexico, etc.

January

  • Winter Snowflakes
    Students can cut out snowflakes from pieces of paper, or paint a sheet full of them—each with its unique shape and design.

February

  • Zoology (like dinosaurs, birds, insects, etc.)

March

  • Geography
    Students can create maps of places they’re learning about in other lessons this week.)

April

  • Botany (seeds, plants, trees, etc.)

May

  • Astronomy

Summer

  • Beach or Ocean

Hopefully this is enough to get you started!

There are SO many ways to organize your lessons, and that’s the fun part of all this!

You can teach each lesson in succession (six straight weeks of drawing, followed by six straight weeks of painting, etc.) or rotate each lesson throughout the year.

I cover a few specific ways in Art Teaching Blueprint, and even give you a few sample calendars to follow.

So if this still feels overwhelming, make sure you check out my art certification, to enroll or email me directly at info@Spramani.com with any questions.

I’ll also be sharing a specific art project each month on the blog, so make sure you’re signed up for my newsletter for even more ideas throughout the year.

Sign-up to receive video course & Montessori art teaching e-newsletter.

The Phases of Art Development is a quick digital course that explains how art making can help students develop their creativity, fine-motor skills, and focus. More importantly, I share what types of projects students at every age are capable of completing safely, and without making a mess.

Best of all—it’s free! To sign up for the course, click here.

All rights reserved © 2024, Nature of Art®

No part of this blog may be used or be reproduced in any manner whatsoever including reproducing, publishing, performing, and making any adaptions of the work – including translation into another foreign language without written permission except in the case of brief quotations embodied in critical articles and reviews. Nature of Art® Publishing P.O. Box 443 Solana Beach, California 92075.

Montessori Art Shelf – 10 Art Supplies

10 Items to Include on Your Montessori Art Shelf

Fun art supplies

There’s something about fall and the back-to-school season that makes you reevaluate and take inventory of your work and study areas and processes. Don’t you just love it? One of my favorite things about this time of year is the opportunity to start off fresh, and I think your classroom or teaching space should get the same treatment—starting with an Art Shelf!

If you’ve never had an art shelf in your classroom, I’d like to encourage you to designate a space specifically for art supplies and projects. This can go a long way in supporting art literacy and creating a good foundation of basic art skills in your students. The basic idea is to keep everything your students need to get creative, in one easy-to-reach place.

Setting up an art shelf really isn’t all that difficult. Fill it up with a few basic art supplies and keep it stocked and refreshed throughout the year. Here are the 10 items I’d recommend for you to include as you set it up for the new school year.

10 Items to Include as You Set Up Your Montessori Art Shelf for the New School Year

1. Baskets of Paper

This will be the foundation for the majority of your students’ artwork.  Stock up on plenty of uncoated white drawing paper. absorbant watercolor paper, and colored craft paper for cutting, folding and collaging. A large roll of butcher paper for younger students. And for special painting have some type of canvas fabric. Cardboard type papers are also great for crafting and gluing.

10 Items to Include as You Set Up Your Montessori Art Shelf for the New School Year

2. Painting – Paints + Brushes

Your art programming should include painting activities. You should be teaching early childhood and elementary grades basic painting skills. Stage different types of paints; watercolor, tempera paint, or student grade acrylic. If you want to learn more about different children’s paint check out my book called Kids Painting HERE. You should include a variety of different sized paintbrushes. (Download my painting checklist HERE). Include painting tools to experiment; sponges, paint droppers, and items to make textures.

10 Items to Include on Your Montessori Art Shelf, spramani

3. Drawing & Doodling Supplies

Also include in your art shelf from time to time drawing materials. Children can explore making lines and texture in their doodles with. There are so many drawing mediums you can introduce to children. From drawing mediums you could bring out every few months. Here are some of my favorite to draw with:

  • Crayons
  • Color pencils
  • Oil pastels
  • Soft pastels
  • Tempera sticks
  • Sketching pencils

These all make great alternatives at times when paint is too messy or there’s not enough time for a project to dry.
If you want to learn more about drawing mediums to include in your art programing read these blogs:

Best Childrens Drawing Supplies to Buy

Childrens Drawing Tools | Elementary Grades

10 Items to Include on Your Montessori Art Shelf

4. Crafting Supplies

Crafting is a whole domain in itself, include: a variety of glues (glue sticks, craft glue, glue dots, etc.). Tape, masking tape or washi tape for creating interesting projects. Scissors and staplers. String, yarn or cross-stitch yarn. Small embellishments like buttons, googly eyes and small pieces of fabric to collage. Small wood scraps or popsicle sticks.

10 Items to Include as You Set Up Your Montessori Art Shelf for the New School Year

5. Modeling Clay

Clay is very important for teaching many important fine-motor movements. I recommend all art programming for children include some type of clay modeling. Clays come in many forms from quick-drying, to non-hardening. Clay modeling is a very tactile experience and good for development. If you would like to learn more about why clay, read Clay Play Theory, or check out my Clay Modeling Curriculum HERE.

6. Clay Tools

While students will enjoy molding the clay with their hands, providing items like shape cutters (or cookie cutters!), rolling pins, textured plates, and modeling wood tools will allow them to create even more.

7. Stamps + Stencils

Stencils are so much fun to use. Children love tracing them and coloring inside them. Stencils come in many shapes and sizes. Great for tracing and building hand dexterity.  Stamps also are fun to press in clay and use on ink pads. Surprise your students and put some on the shelf!

8. Seeds + Beans  + Buttons + Etc.

Whether a student wants to use buttons for eyes on their clay figurine, or glue a bunch of seeds to accent their collage, small accessories can give them freedom to add some oomph to their projects.

10 Items to Include on Your Montessori Art Shelf

9. Seasonal Inspiration

While you want most of these supplies to remain on your art shelf year-round, you’ll find that students will respond creatively to new tools or inspiration. Rotate out your stencils or offer a still life props (like bright flowers in the spring, or gourds in the fall) to reflect the season. Professional Development – How To Stage An Art Shelf Training

10. Art Drawing Boards + Table + Aprons

Drawing boards can help stabilize paper in place while moving around the classroom. Drawing boards are also good for laying down on the carpet. If you can’t get custom drawing boards, you can use a clipboard. You can use a drawing board outside when there is no table to sit and draw on.

What do you have on your art shelf? Share your go-to supplies in the comments below and send me photos of your new art shelf by tagging me on Instagram (@nature.of.art.for.kids)!

Sign-up to receive video course & Montessori art teaching e-newsletter.

The Phases of Art Development is a quick digital course that explains how art making can help students develop their creativity, fine-motor skills, and focus. More importantly, I share what types of projects students at every age are capable of completing safely, and without making a mess.

Best of all—it’s free! To sign up for the course, click here.

All rights reserved © 2024, Nature of Art®

No part of this blog may be used or be reproduced in any manner whatsoever including reproducing, publishing, performing, and making any adaptions of the work – including translation into another foreign language without written permission except in the case of brief quotations embodied in critical articles and reviews. Nature of Art® Publishing P.O. Box 443 Solana Beach, California 92075.