Montessori Art The Essential Elementary Guide – Second Plane 6-12

by Spramani Elaun

Are you eager to teach your students Montessori art lessons, yet uncertain about where to begin or what constitutes quality art instruction?

Ready to dive into the world of elementary art?

Spramani Elaun, an author, International Montessori Art Trainer, and art curriculum developer, is here to guide you. With her sensory art method and expertise as the founder of Nature of Art® art school , she has empowered tens of thousands of students to explore painting and drawing.

With the world wide web and social media saturated with Montessori art projects, many guides find themselves at a loss.

Which Montessori art lessons should take precedence?

How do you select the right mediums?

Do you need to be an artist yourself to lead art lessons effectively?

A Primer for Montessori Guides

Montessori Art –The Essential Elementary Guide – Second Plane 6-12

About this book:

This comprehensive guide offers clear, concise, and practical insights on establishing an art program tailored for elementary-aged children in the Montessori environment. Designed as an essential reference for Montessorians, it provides guidance, instructions, tips, and best practices in a structured and accessible format.

Delving into key visual art concepts, the optimal sequence of essential steps, and valuable insights accumulated over Spramani’s three decades of experience, this book offers actionable advice aimed at supporting beginner teachers and parents alike.

By simplifying intricate ideas surrounding art lessons and subjects, addressing common questions, and tackling challenges head-on, this guide empowers Montessorians with the knowledge and resources necessary to excel as an art facilitator.

This Essential Second Plane 6-12 art guide will:

  • Cover the essential visual art standards
  • Identify foundational building blocks and key initial lessons
  • Show you how to select suitable art materials
  • How to set-up art environments
  • Set up a proper Montessori art shelf effectively
  • Learn what art elements should be taught in elementary grades
  • Master Effective Teacher Management
  • Implement optimal art routines
  • Create Engaging and Meaningful Art Projects
  • Understand the Benefits of Integrating Art into the Montessori Curriculum
  • Foster Positive Art Dialogue and Encouragement
  • Receive guidance on crafting comprehensive art lesson plans

This book caters to Montessori teachers, art instructors, and homeschooling parents, equipping them with the knowledge and tools needed to excel in teaching art. By the end of this read, you’ll feel more confident and prepared to create a meaningful art program for elementary students.

Spramani shares foundational principles and practical examples drawn from her extensive 30 years of hands-on teaching experience. Her systems and processes streamline the art instruction process, making teaching art to children a rewarding and structured endeavor.

Embrace the vivid color pictures, rich examples, and insightful stories woven throughout this book to gain the confidence and support you need on your artistic teaching journey.

About the Author

Spramani Elaun is an author and art curriculum developer from San Diego California. She is a homeschooling mom, art teacher with a science art methodology. Her success is led by observations and real-life practice of how children cognitively and sensorially process art over twenty years. She is the founder of Nature of Art® Art school & Art supply company, Art Teaching Blueprint Montessori Certification Training Program. Spramani holds degrees in Graphic Design, Digital Media Design, Visual Communications, Print Media, and Fine Arts.

All Rights Reserved, © Spramani Elaun 2024

Other Books by Spramani Elaun

Montessori Art: Early Childhood Art Guide – Visual Arts Guide For Teaching 13 month olds – 6 years

Montessori Art – Esseintal Art Guide for Secondary 6-12 years

Early Childhood Art: Visual Arts Teaching Guide For 13 Months – 6 Years Old

Defining Visual Arts: Children’s standards for arts education, using the language of artist

Kids Color Theory: Contemparay color mixing guide with pigmented colorants for children.

Kids Painting: Teach young kids how to paint, materials & set-up guide

Clay Play: The natural art method that aligns with a child’s growth.

Nurturing Children in the Visual Arts Naturally

Introducing Visual Arts to The Montessori Classrooms: The natural art method that aligns with a child’s growth

Montessori Elementary Art | How To Bring Art In To The Classroom

How to bring elementary art into the Montessori classroom
Elementary Montessori

How to bring elementary art into the Montessori classroom

By Spramani Elaun

Every Montessori school should have an art environment. Whether an art shelf inside the classroom, dedicated classroom, or specials visiting. Elementary students should be engaging in some type of art. Allowing them to express creativity plus building basic skill sets. One of the reasons art programs exist is to expose children to different kinds of mediums. When exposed to different art activities students are likely to find the right art domain they enjoy. When children find the right art experience they enjoy, they become independent as they practice these skill-sets. When Montessori elementary students work independently they can also self regulate their own stress with hand work. Independent working students can also reach creative flow states! So where should you start with bringing Montessori elementary art into the classroom?

There’s six areas to focus on first:

  • Schedule Art
  • Choose Art Subjects
  • Teach Art Elements
  • Choose Art Mediums
  • Choose An Artist Technique
  • Teach Skill Building Foundations
  • Focus On Art Direct Aims

Schedule Montessori Art Lessons

Start with scheduling regular interactions with art making. Schedule daily, weekly or even bi weekly art lessons. Even bi monthly if your teaching schedule is super busy. I did this as a visiting Montessori art specials and I heard from Montessori guides how the children learned so much from just 4 visits! Once you have chosen the day, move to creating time segments. Be sure your timeline is specific to lower or upper elementary attention spans.

Art Subjects

Then move into deciding which visual art subjects you want to explore. I recommend choosing from my five art domains. Subjects like painting or color theory. Learn more about the 5 domains by buying: Defining Visual Arts Book HERE

Montessori Elementary Art | How To Bring Art In To The Classroom

Teach Art Elements

To meet the national art standards it’s important to teach children the Art Elements. The Art Elements cover things like line, color, shape – etc.

Each one of your art lessons should always focus on a key art element. I can’t stress enough how important this is to a solid art program. I meet many Montessori teachers not even aware of art literacy standards. Even the artistic process, or how-to scaffold art lessons, or what art sequences should come next. Learn more about the Art Elements by buying: Defining Visual Arts Book HERE

Mediums & Technique

Then the fun stuff starts by deciding on which mediums to experiment with first. This also includes what presentations and demonstrations to schedule. For example you could teach the subject of painting and focus on the watercolor medium. Then show children a crayon technique – wax resist marks. Or let’s say you decide to integrate a sensory craft with zoology. Like cutting sea life shapes from paper with a collage – technique.

Montessori Elementary Art | How To Bring Art In To The Classroom

Building Montessori Art Skill-Sets

The best advice I have for you is to teach how to set-up, clean-up, and prepare the environment for their next classmate, learning to complete the cycle in the Montessori way first is important. This supports independent work through the school year. Then foucs on building skill-sets and don’t waste time on the wrong type of art lessons. Like focusing on the Masters, copying images, or too much process- based art. Try not to focus lessons on copying the Masters artworks. These lessons can be lacking in developing independent art skill-sets or their own creativity. Montessori elementary students need the right order of skill-set lesson first.

Focus on Montessori Art – Direct Aims

The other important thing I want to share is even if you can’t draw or paint you can still teach proper art lessons. Your own refined skill-sets are not the focus. What’s important is knowing your direct aims. Direct aims like preparing the environment, and presenting the right order of demonstrations. Scheduling and choosing age appropriate art lessons. Indirect Aims will happen like – your students brainstorming or conjuring up original ideas. Even exploration that leads to the most optimal state of creative flow!

Teaching art can be intimidating without any basic knowledge or experience. But I’m here to tell you I’ve taught thousands of parents and teachers. I have lots of preparatory teaching methods easy for you to follow. But here’s a secret… you will learn right beside your students, I promise!

Montessori Elementary Art | How To Bring Art In To The Classroom

Art Professional Development

I invite you… 

No matter what capacity of training you desire, I’ve built art teaching resources you can have access to!

Choose:

Blog Articles

Free Checklist

Art Teaching Books

Art Video Training

Art Lesson plans

Sequential Art Curriculum

Montessori Professional Development

Montessori In-service Training (email info@Spramani.com)

Montessori Art Certification

Custom Art Programing (email info@Spramani.com)

All rights reserved © 2023, Nature of Art®

No part of this blog may be used or be reproduced in any manner whatsoever including reproducing, publishing, performing, and making any adaptions of the work – including translation into another foreign language without written permission except in the case of brief quotations embodied in critical articles and reviews. Nature of Art® Publishing P.O. Box 443 Solana Beach, California 92075.

How-to teach children age appropriate art activities

I get questions every day on how to teach age appropriate art activities.

I’m going to share some tips to get you on the right track.

I’ll also be sharing lots of resources.

There’s only four important things you should consider when teaching age appropriate art activities:

  1. Use only safe non-toxic children’s art supplies
  2. Focus on discovery exploratory type of activities
  3. Keep steps very minimal
  4. Focus on introducing the basic 7 elements

Early Childhood Art Activities

Very young children from toddler to six years can not plan art ideas out yet. So their art activities should be very exploration and discovery in style. They should only do process based style art activities. These lessons should generally introduce art mediums and art tools. You should only be introducing the very basic elements of art like line and colors etc. If you want to understand what art programs should consist of you can order:

Defining Visual Arts. This book explains what art literacy is for children and what you should be focusing on teaching. If you want to learn all about early childhood art programming you can order: Early Childhood Art Guide, this book shows you how to design an age appropriate art program.

Elementary Art Activities

Elementary age students can plan and create with intention. They are able to imagine an idea and plan it out. They can also follow one to six step instructions. These ages should also work in an exploratory discovery fashion. Allow children full freedom to express their own ideas. This means you should allow them to change the final outcome of their creation and not insist they follow an exact example.

Safe Non-Toxic Art Supplies

I recommend children under the age of 12 years old not use adult grade fine art supplies. Many artist grade supplies may contain hazards pigments like cadmium, lead, formaldehyde, solvents. Some paints may add additives, mildew resistance or other chemicals. Or also have special instructions for handling. These chemicals could be harmful to children not aware of special handling instructions. Pick non-toxic kids products that bare the ASTM D 4236 on them. This is a U.S. labeling law to protect children from dangerous chemicals.

If you start with these four suggestions you will be starting out on the right foot. If you need more guidance I have many training videos, books and professional development. 

Warmly,

SpramaniE laun


Sign up here to watch for free: Phases of Art Development Video


READ BLOG: 

Montessori Early Childhood Materials List

Montessori Upper Elementary Materials List


Order Art Teaching Books HERE


Virtual lessons

Get professional development by taking the ART TEACHING BLUEPRINT


Need to train your teachers?

Book a free zoom consult call, email Spramani @ info@Spramani.com

Early Childhood Montessori Art Lesson Training Video | FREE

Montessori art lesson

1-hour Montessori Art Lesson Training for Teachers

As a teacher, I sometimes struggle with coming up with the next art activity for my early childhood Montessori students. That’s why I created this Montessori art lesson for teachers just like you. I will be sharing all kinds of new ideas on how to pull together simple art lessons for you to teach to your students.

Teachers have these preconceived notions on what it takes to create art lessons. 

They often think they need to be an artist, or have to introduce the Masters to children, and even know how to appreciate the arts themselves.

This 1-hour video training is full of creative ideas on ways to teach simple art concepts  – Just by using children’s storybooks!

I share so many ideas, talk about what’s really important to teach and I share some tips on scheduling art projects through the school year. 

Need Montessori art teaching tips from a pro?

Tap over and register for this limited time video training, and watch today:

How-to Theme Art Activities – 1 Hr. Video Training

Hosted by Spramani Elaun – International Montessori Art Trainer

1-hour video training 

REGISTER NOW TO WATCH!

Early Childhood Montessori Art Lesson Training Video | FREE, spramani elaun, how we montessori art lessons
Montessori Art Teacher Trainer, Spramani Elaun, Nature of Art®
Montessori early childhood

Early Childhood Art Guide

Visual Arts Teaching Guide
for 13 Months – 6 Years Old

This book includes:
✅ My proprietary art teaching method
✅ The proper and complete list of art materials
✅ A guide for staging and setting up a successful art environment
✅ Tips and art lesson ideas for early childhood
✅ A convenient three-ring binder presentation

5 Montessori Rocks and Minerals Art Lessons

This blog post is a part of a three-month series: Montessori Art in the Natural World: Kids Nature Journal Color Lessons. This series is about growing kids’ knowledge about the natural world by taking them outside their home or classroom and challenging them to create focused art, based on the nature around them. Every aspect of nature—seasons, layers of the earth’s soil, energy, rocks and minerals, fossils, landforms, water, flora, fauna, the atmosphere—can all be represented and expressed through art lessons. These Montessori rocks and minerals art lessons encourage your students to use natural rocks in their art projects and learn more about nature, rocks, and our world’s lands!

5 Montessori Rocks and Minerals Art Lessons

The natural rock cycle can be an interesting topic for Montessori students to learn; when you bring ideas from the Coming of the Universe and the Earth Great Lessons and combine them with rock art lessons—your students will really become engaged! You might even see them paying more attention to and investigating rock formations in the natural world.

It doesn’t matter what grade level you are teaching, rock art lessons can be fun for all Montessori students. I often work with rocks in my art studio and art programing classes, and have done many of these activities with children of all ages—sometimes even adults! You can use these art lessons to help introduce subjects like igneous rocks, sedimentary rocks, metamorphic rocks, or fossils; you can even use these rock art activities to help build fine-motor skills for early childhood students through rock arranging.

Here are five different ways to integrate art making with rock lessons in all areas of visual arts.

Montessori Rocks and Minerals Art Lessons:

  1. Rock painting
  2. Natural art arrangements
  3. Designing biomes
  4. Sketching rocks
  5. Making pigments from rocks 

Sticks n' Stones, Painting Art Projects For Kids

Painting on Rocks

Rock painting with acrylic paint is one of my all-time favorite art projects and kids love it too! This lesson can teach so many skills, such as brushstrokes, color mixing, creating textures, and making lines. Rocks are a wonderful surface to use as a canvas, plus, they’re 100% sustainable and can be found in any environment.

5 Montessori Rocks and Minerals Art Lessons

Natural Art Rock Arrangements

Arranging rocks into concentric designs is a fun way to teach kids about balance and develop their concentration skills. It also gets kids outdoors and sparks discussions about different types of rocks and how to select specimens for arrangements. With these types of Montessori rocks and minerals art lessons, I try to focus on collecting, sorting, and organizing the natural objects. While kids are organizing and arranging, they’ll also learn about key art elements like symmetry and balance. 

Designing Biomes with Rocks

Letting children design their own biomes with rocks they’ve collected is a great way to teach them about diverse natural biomes. You can even teach students about the Coming of Human Beings, and how humans have migrated to and from different biomes throughout history. There are many biomes children can design using rocks: rivers, mountains, caves, savannahs, and forests, etc.

5 Montessori Rocks and Minerals Art Lessons, spramani elaun art teacher

Sketching Rocks Shadows

Drawing is an important skill all students—especially at elementary ages—should have. I often use rocks to teach 3-D perspectives, identifying color value, and how to create shadows in drawings and paintings. Rocks can usually be found in every type of outdoor landscape and can be captured in outdoor nature journal sketching. Start this activity by collecting rocks locally; then you can have students make sketch marks in the shapes of the rocks they’re observing. The next step would be to have your students observe how light placement (like the sun in the sky) casts shadows, and have them include the shadows in their sketches.

5 Montessori Rocks and Minerals Art Lessons, art teacher spramani

Making Pigments from Rocks  and Minerals

Explaining to students how natural pigments can be made from minerals and rocks is a wonderful way to teach them to observe color in nature and connect how art and colors are made. Natural dyes and pigments can come from a wide variety of nature objects, including rocks! One of simplest ways to teach kids about rock composition is to have them make paint  from grounded rock minerals; for details and instructions on how to do this, check out this blog:

How to Make Paint, Inks & Dyes from Nature

Where to Start: Setting Up a Rock Painting Table

Again, painting rocks is one of my favorite activities to do with Montessori kids! The activity itself allows kids to be independent and creative, and the finished project is just so fun and colorful! It’s very simple to do, the majority of “work” just involves setting up a space for students to work.

You will need:

5 Montessori Rocks and Minerals Art Lessons

How to do it:

  1. Wash rocks in water and wipe clean (this ensures the paint sticks); completely dry rocks before painting
  2. Prepare and fill a palette with a variety of paint colors
  3. Set out paint brushes (a variety of brush sizes allows kids to create whatever brush stroke they desire)
  4. Paint one layer of color at a time; set aside to dry before painting the next color
  5. Once students finish their desired image, set rocks out to dry; rocks dry best when left in direct sunlight

One Step Further: Montessori Nature Activity Outdoor Journal Checklist

Here’s a bonus nature art activity for you! While your students are out collecting rocks outside, have them take out their nature journals and record their observations. (For information and instructions on how to create a nature art journal, click here.) 

Nature journaling is a relatively independent activity, but you should still guide your students to make sure they’re following scientific principles and standards. This Nature Journal Checklist will help you make sure your students are including data that helps them implement both scientific and artistic principles during their expedition.

To download the checklist for FREE, click here.

Print it out or save it on your phone so you have it with you the next time you lead your students outside to journal or collect nature objects for crafting.

A Short Cut Just for You: Buy Painting Step-by-Step Curriculum

spramani elaun paint curriculum for kids

One of the reasons I really like painting on rocks is because it opens up a whole world of painting for kids. A rock is such an interesting and unique canvas; once they start painting there, they’ll want to learn even more techniques. Before kids explore all the different ways to paint, it’s important that they learn proper paint brush and brushstroke techniques to help them develop their painting skills.

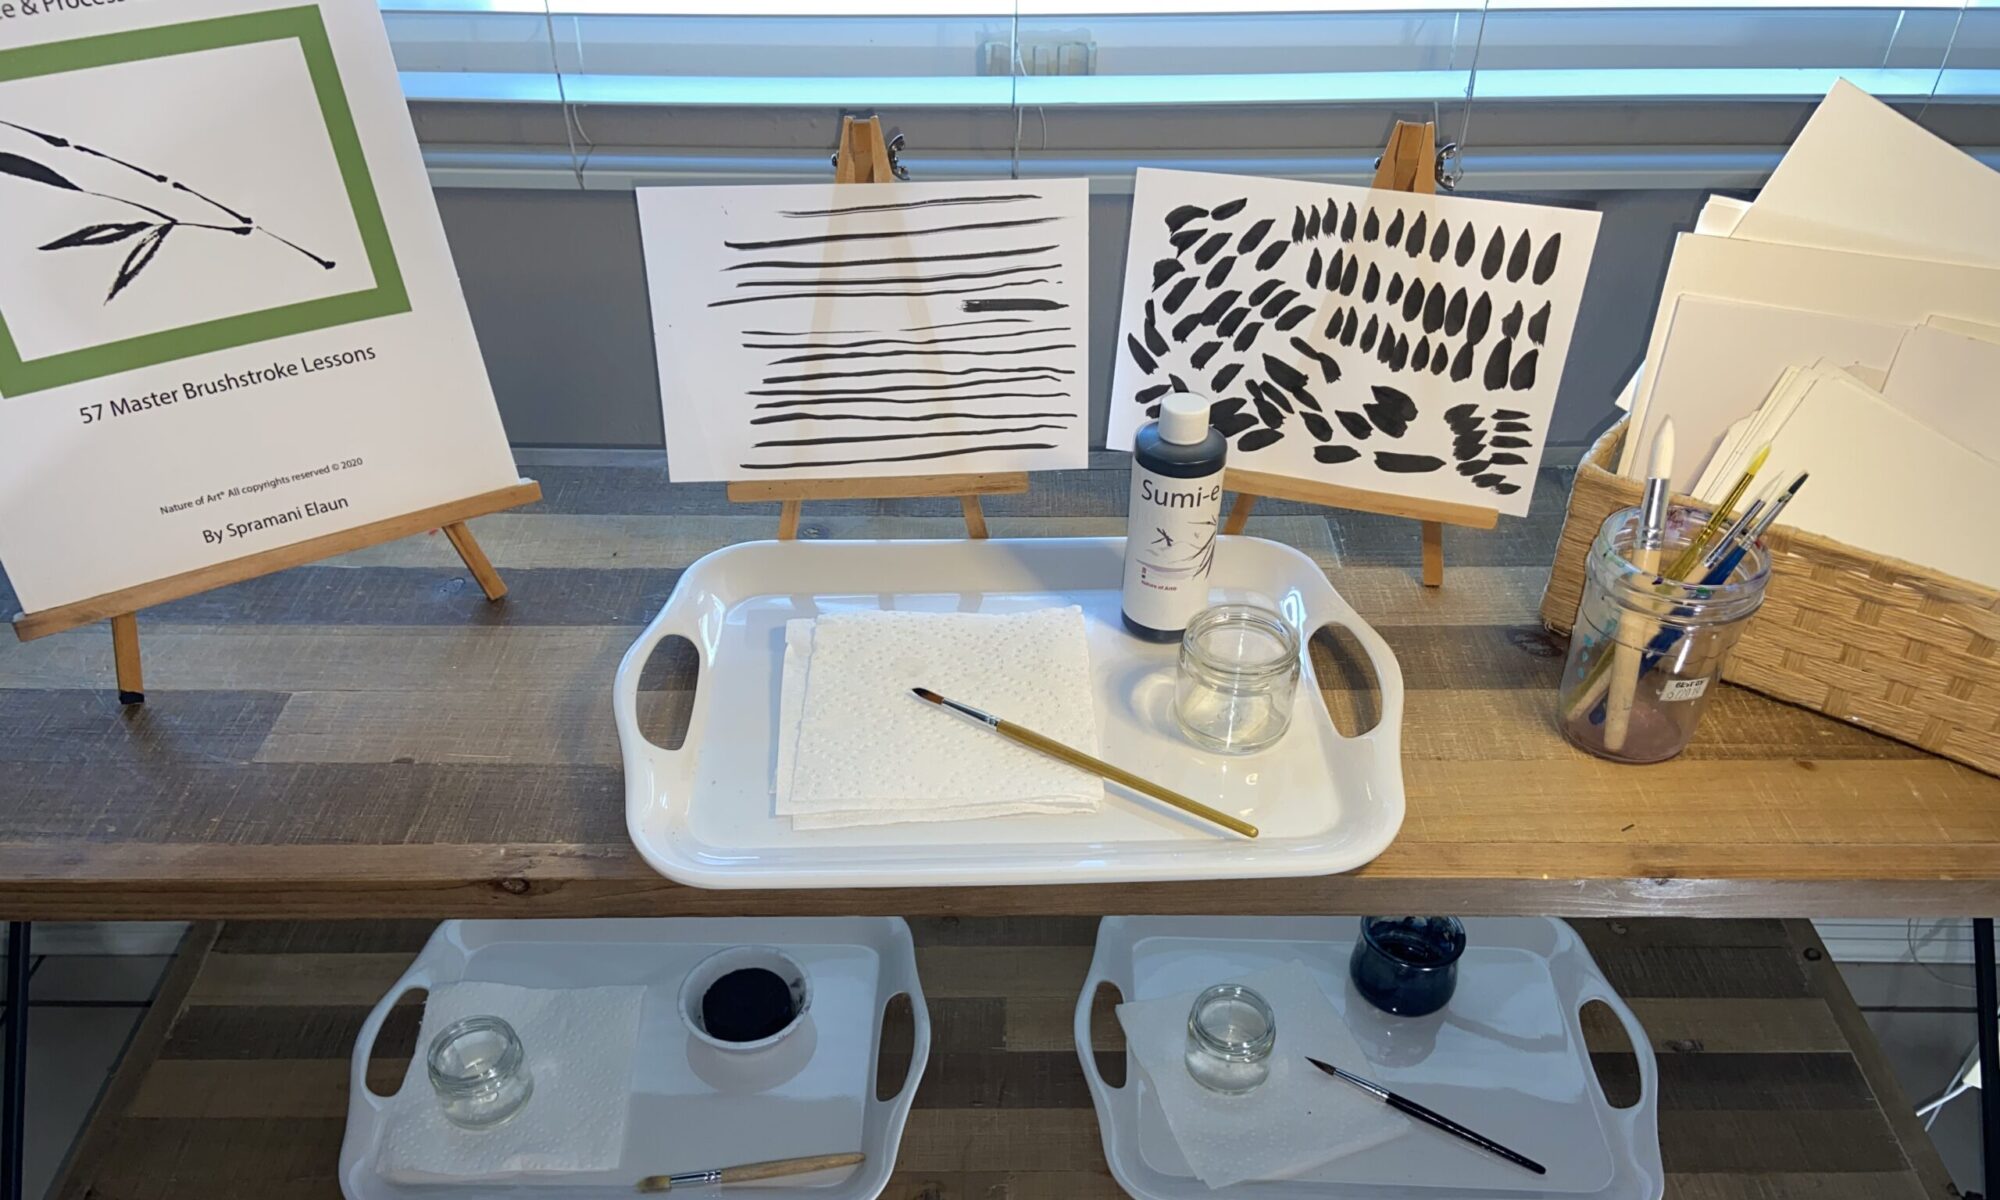
My Kids Painting Practice & Process Curriculum has 57 master lessons that take kids from setting up a paint station and holding a brush all the way to creating beautiful nature landscapes and painting different types of animals! Each lesson is featured as part of a sequence and includes all the information—materials, demonstration technique, and direct and indirect aims—you need to properly present the activity to your students.

To purchase the curriculum, click here.

All rights reserved © 2023, Nature of Art®

No part of this blog may be used or be reproduced in any manner whatsoever including reproducing, publishing, performing, and making any adaptions of the work – including translation into another foreign language without written permission except in the case of brief quotations embodied in critical articles and reviews. Nature of Art® Publishing P.O. Box 443 Solana Beach, California 92075.

Happy Thanksgiving to All You Montessori Teachers!

Happy Thanksgiving to All You Montessori Teachers!

Hello from San Diego!

This is my favorite blog to write each year because it gives me a chance to pause, count my blessings, and give thanks for all the things I’m most grateful for in 2019.

As teachers, we have a responsibility for raising and teaching our students the meaning of gratitude, including being mindful of world peace. And I know at times it can be truly difficult since there’s so many negative things going on across the globe. But, as Mark Frost put it, “there is no light without darkness;” that means, in spite of the darkness, there is still so much to be thankful for!

Happy Thanksgiving to All You Montessori Teachers!, Spramani Elaun

So this season, pause with me. In fact, I’d encourage you to grab a piece of paper or notebook and jot down a few of the things you’re grateful for this year. As for me…

I’m grateful for so much this year—my children, my work, my dearest friends (coaching me daily), my mother’s recovery from a heart surgery, traveling and meeting beautiful friendly people in different parts of the world—but I have to say, this year, my gratitude focus is on being a teacher and being able to share my passions with all my young students.

I’m also grateful for and want to acknowledge the amazing teachers that get up every day to teach young minds. I work with children almost every week, but it’s been a while since I’ve had to teach a class daily like most of you do.

Happy Thanksgiving to All You Montessori Teachers!

When I am teaching a class, one of my favorite things is listening to my art students share stories of things they’ve learned in their classrooms and all the fun they’ve had at school; you might not realize it in your day-to-day, but you are truly appreciated!

This year, I’ve also heard some very tragic stories from teachers I work with, about young students dying and having to help their whole classroom cope with such loss, or learning some students only get to eat at school and realizing those children are going home to poverty or broken homes every night. I’ve also talked to so many teachers that are battling it out with students who have behavioral problems—even some physical altercations or violent outbursts—and if you’re experiencing anything like that, my heart goes out to you!

I am very grateful for all you beautiful teachers who head into class every morning. Our children need their teachers!

A teacher recently told me that he had a student track him down on Facebook this year to thank him for his support and encouragement in the classroom. It had been more than 25 years since the student was in his class, but he clearly had left a great impact on this young person’s life.

Happy Thanksgiving to All You Montessori Teachers!, Gracias

I can relate to this story, and I’m sure if you’re a teacher, you can too. I remember my sixth grade teacher, Mrs. Martinez. She gave me the desire to be adventurous and want to travel and she supported my creative spirit.

So while you are off and out of the classroom this week, spending time with your loved ones, just know that I—and so many others—are grateful for all you do.

Thank you for touching the lives of your students, and thank you for showing up here and sharing my art teaching adventures with me!

Wishing you and your family a very warm, happy holiday in this season of Thanksgiving!


谢谢, gracias, cảm ơn bạn, teşekkür ederim,

Warmly,

Spramani

Sign-up to receive video course & Montessori art teaching e-newsletter.

The Phases of Art Development is a quick digital course that explains how art making can help students develop their creativity, fine-motor skills, and focus. More importantly, I share what types of projects students at every age are capable of completing safely, and without making a mess.

Best of all—it’s free! To sign up for the course, click here.

Montessori early childhood

Early Childhood Art Guide

Visual Arts Teaching Guide
for 13 Months – 6 Years Old

This book includes:
✅ My proprietary art teaching method
✅ The proper and complete list of art materials
✅ A guide for staging and setting up a successful art environment
✅ Tips and art lesson ideas for early childhood
✅ A convenient three-ring binder presentation

Buy Guide Now!

All rights reserved © 2023, Nature of Art®

No part of this blog may be used or be reproduced in any manner whatsoever including reproducing, publishing, performing, and making any adaptions of the work – including translation into another foreign language without written permission except in the case of brief quotations embodied in critical articles and reviews. Nature of Art® Publishing P.O. Box 443 Solana Beach, California 92075.

How to Bring Art, Beauty, and Relaxation into YOUR Space This Summer

If you’re not fortunate enough to travel to far-off, exotic places this summer, then, chances are, your home is your oasis for the next couple months. I love summer! It’s a time to relax and enjoy colorful sunsets, refreshing libations, and gorgeous warm days.

If you’re anything like me, you tend to celebrate a new season by (slightly) redecorating your house. I love incorporating brighter works of art or fresh flowers in the summertime—it makes me feel like I’m on a little holiday every day. And you know what, Montessori teachers need vacay vibes and beautiful spaces too!

I can’t tell you how excited I got planning this blog!

First of all, hats off to you for spending another year in the classroom supporting our future young minds! I want you to really take stock in how lucky parents are for having you working with their children all day (you Montessori-at-home folks too!). I’ve seen the beautiful, inspiring spaces you create for your students.

And that brings me to why I’m writing this blog.

I know if you’re an educator, you have a soft heart and you put everyone first…right?!

I’m a mom of two—a teen and a young adult— and still I worry about  them first. But, you know what I’ve learned as they’ve gotten older? It’s like the emergency presentation on planes, you’ve got to put your own oxygen mask on before helping someone else with theirs. In order to do your best in taking care of others—your students, and your own family too—you have to take care of yourself first. And, what better time than summer break to give yourself a little TLC?

Art making is relaxing and an excellent form of emotional therapy. These benefits aren’t just for kids; art can help you unwind too. 

So I want to share some lovely ideas to help you put yourself—and your space—first. Doing little things to bring beauty into your home gives you the chance to relax, be creative, and start feeling those carefree, summertime vibes.

Here’s a roundup of fun, easy, gorgeous ideas that you can do to make your home a creative haven—even if you don’t consider yourself a crafty person. Click and follow the links for more instructions and inspiration…now, dig in!

How to Bring Art, Beauty, and Relaxation into YOUR Space This Summer

Make a Succulent Garden this summer

Succulents are still a huge home trend, and it makes sense—they’re very chic, very versatile (there are so many varieties), and very easy to take care of. Here’s a guide to making your own terrarium to fit your home’s style. 

Organize Your Closet Space

Time to achieve your own closet goals! I dream about having a gorgeous, Instagram-worthy closet all the time. This link goes back to a great article with advice and practical tips from a celebrity closet designer to help you get there.

Press and Keep Your Flowers and Memories

If you’ve been on this blog before, you know how much I love nature! This decor idea brings bits of nature into your home in a way that’ll help preserve your memories too. If you don’t have anything to work with yet, keep an eye out for fallen leaves or flowers next time you’re on a summer adventure out in the wild.

Peg Your Walls This Summer

You know how I said I like changing up my space a bit with every new season? This wall peg idea will make is so much easier! I can’t wait to give it a try in my home office.

Display Your Baskets Artfully

I love this idea, I’m always admiring and using baskets in my art classroom, but never keep the beautiful works of art for myself. I love buying baskets when I travel or peruse yard sales, so I think I’m going to try this idea this summer too.

ArtSpace

Create a Personalized Ring Dish

I’m excited to try this one out too. I’ve been following their A Beautiful Mess for years, and I love their ideas! This ring dish can be personalized for your home, or it makes a great, meaningful gift too!

 How to Bring Art, Beauty, and Relaxation into YOUR Space This Summer

Become Your Own Barista

Save money this summer by learning how to make your own Starbucks drinks at home! Of course, running into a coffee shop might be a lot easier, but this way, you can add special touches to make it your own then put it in a beautiful, eco-friendly glass and style it to feel luxurious.

How to Bring Art, Beauty, and Relaxation into YOUR Space This Summer

Catch Up On Summer Reading

Once you’ve added these special touches to your home, cozy up and catch up on some reading. I created a summer reading list full of fun and inspiring books, take a look and let me know which one you choose to read!

Montessori Art Newsletter

Make sure you subscribe to my newsletter for more creative ideas—for your home, classroom, and beyond!

GET ON THIS LIST!

Sign-up to receive video course & Montessori art teaching e-newsletter.

The Phases of Art Development is a quick digital course that explains how art making can help students develop their creativity, fine-motor skills, and focus. More importantly, I share what types of projects students at every age are capable of completing safely, and without making a mess.

Best of all—it’s free! To sign up for the course, click here.

All rights reserved © 2023, Nature of Art®

No part of this blog may be used or be reproduced in any manner whatsoever including reproducing, publishing, performing, and making any adaptions of the work – including translation into another foreign language without written permission except in the case of brief quotations embodied in critical articles and reviews. Nature of Art® Publishing P.O. Box 443 Solana Beach, California 92075.

Are You Ready to Teach Montessori Art?

How do I Teach Montessori Art?

Are You Ready to Teach Montessori Art?

When was the last time you thought about how to present Montessori art lessons in your classroom?

Maybe you’ve tried leading an art project once, and chaos ensued, leaving a huge mess behind. Or maybe you started pulling ideas together only to get overwhelmed at how much you thought you actually had to do. Or maybe you’ve completely shied away from teaching your students art altogether because you have no idea where to start.

First of all, I want to commend you for even thinking about adding art to your Montessori lessons! It’s a big deal, and you’ve already taken the first step!

I’ve been teaching and working in visual art for almost three decades, specifically focusing on helping Montessori teachers bring art programming into their classrooms over the last 10 years or so, and I’ve developed a truly unique method for teaching students.

I dive deeper into how my art teaching method was developed and how it works in this blog post, but today, I want to share the one thing you really need—even without any prior knowledge—to bring art into your classroom.

Where to Start

Sticking with the basis of the Montessori, you want any art lesson in your classroom to allow your students to work independently and explore the joys of art on their own. That’s why you always want to make sure you’re providing your students with independent projects that engage their imaginations.

Instruction should be minimal. While you want to give material presentations and demonstrations, beyond that, students should have the freedom to explore.

It helps to have an art shelf or inspiration gallery in your classroom, as well as a space that’s been designated specifically for art projects. You can look at these as tools to help students find ways to create art even without specific lessons or guidelines.

One Step Further

Of course, you want to add some level of structure or reason to the art projects your students create. Ideally, I’d recommend finding ways to connect the Montessori art projects you teach to the Great Lessons.

Using art as a tool to supplement other things you’re teaching—such as the The Story of the Universe—helps instill the concepts in their minds. Creating art can offer a different perspective and larger context on different subjects, such as history, science, and communication. And the more you introduce art into their world the stronger their art literacy grows, helping them become curious, courageous artists and learners.

One reason I encourage tying art back to Montessori Great Lessons is because they offer so much inspiration! They tend to excite students and spark their curiosities, imaginations, and creativity. Take a look at the books that are in your classroom—the art within those pages can lead to project ideas. Check out this blog post for more ideas on incorporating the Great Lessons into your art lessons.

how to teach kid montessori art lessons and crafts

A Short Cut Just for You

Montessori early childhood

Early Childhood Art Guide

Visual Arts Teaching Guide
for 13 Months – 6 Years Old

This book includes:
✅ My proprietary art teaching method
✅ The proper and complete list of art materials
✅ A guide for staging and setting up a successful art environment
✅ Tips and art lesson ideas for early childhood
✅ A convenient three-ring binder presentation

Buy Guide Now!

Watercolor Play | Montessori Art Lesson

If you’re looking for a hands-off project that’s fun for kids, I have the perfect art lesson for you! Watercolor Play introduces young children to the basics of color and lets them explore their creativity. Because this project is process-based—meaning it’s about experimenting and experiencing the process of making art—it’s a perfect Montessori art lesson, since students can work independently.

Watercolor Play is a simple, natural way for kids to learn the basis of color. Students in Plane 1 or younger can’t really be sat down and taught color theory, so this activity is a way for them to be introduced to color in a way that meets their level of understanding. It teaches them how color behaves and mixes, which are things all artists need to learn, without getting into technical details and overwhelming them.

This lesson provides the building blocks of color theory so students are ready for more advanced work as they get more experience. This foundation will help them be more willing to experiment when they’re older, because they already have an introduction to art and the knowledge of how colors work together.

Watercolor Play is Ideal for Early Childhood

While this activity is ideal for early childhood, you can adapt aspects of it to work for older children too. You’ll see that I try to keep this art lesson very simple to start off with, but you can add in primary and secondary color concepts once students have a better understanding.

Early childhood montessori art

No matter how old your students are, mixing colors can be therapeutic. It’s soothing, relaxing, and can relieve stress. Giving children the opportunity to play like this also helps them develop the wiring in their minds.

I recommend setting up this art lesson on a regular basis—maybe once a month, or even once a week—so their understanding consistently grows and deepens.

Watercolor Play from Spramani Elaun on Vimeo.

Supplies

  • Kid-safe, non-toxic liquid paint (acrylic, tempera, or watercolor) that’s been watered down to be transparent
  • Bottles with adjustable caps OR clear plastic tubs
  • Bowls
  • Paintbrushes, sponges, stampers, drippers
  • Watercolor paper or thick/butcher paper (optional)
  • Aprons or old clothes

Steps:

  1. Put all your materials out on a table
  2. Let kids explore and play

That’s it! Watercolor Play is such a simple activity. You don’t want to direct it or try to teach anything if your students are at a young age. Let them play with the colors and mix things naturally, they’ll create their own colors and see things for themselves. If they’re old enough to ask about colors, then you can go ahead and start naming the general hues, and hint at what adding other colors might do to change the original color (i.e. make it lighter).

Watercolor Paints

You can start with whatever colors you want. You can start with primary colors, or set out just one color at a time, then add new or different colors the next time. I recommend sticking with limited color options to start out with, especially for children 24 months or younger. Once they’re older and have had more exposure to colors and the activity, they’ll be able to start experimenting more, and getting more excited about their experimentation.

With this art lesson, you’re not focusing on the outcome; do not expect kids to create an actual finished work. The watercolor paper is optional because older students may want to make their own artwork, if the choose to do so, make sure there’s a place to keep the paper out to dry. Seeing how the paint and color changes once their work is done is part of the experience as well.

You may also want to consider starting with lighter colors before introducing darker ones, since dark colors can “stain” the other ones by eventually turning everything a murky gray—which is less exciting.

While this project is relatively hands off, you may need to take the lead initially by squirting and mixing the paint in your own bowl or tub. Kids are so used to us telling them to be careful, and not to make messes, so this is a new experience for them.

NOTE: This project should be set up outdoors or somewhere that water can be splashed (i.e., not rugs or carpet). This project can get messy with younger children, since most toddlers and lower elementary students don’t yet have very developed fine motor skills to control what they’re doing.

For more activities and lessons on color theory, check out my book Kids Color Theory.

montessori art early childhood

Sign-up to receive video course & Montessori art teaching e-newsletter.

The Phases of Art Development is a quick digital course that explains how art making can help students develop their creativity, fine-motor skills, and focus. More importantly, I share what types of projects students at every age are capable of completing safely, and without making a mess.

Best of all—it’s free! To sign up for the course, click here.

All rights reserved © 2023, Nature of Art®

No part of this blog may be used or be reproduced in any manner whatsoever including reproducing, publishing, performing, and making any adaptions of the work – including translation into another foreign language without written permission except in the case of brief quotations embodied in critical articles and reviews. Nature of Art® Publishing P.O. Box 443 Solana Beach, California 92075.


The Value of Art Journaling for Kids, Montessori Activities

I’ve shared with you the importance of stimulating positive art talk in your Montessori classroom. It’s one of the easiest ways to get students interested in art. Once they’ve been allowed to explore their creativity through visual art, chances are, they’re going to be hooked and want to learn so much more. I’ve see it happen so many times! One of the best ways to keep them captivated, allow them to explore even more, and track their progress is through art journaling.

What I love about art journaling is that there’s no minimum talent or skill required—students of any age can benefit. All you really need is a journal, some simple art materials, and the willingness to get creative and have some fun.

What is Art Journaling?

An art journal is a book kept by artists as a visual—sometimes verbal—log of their thoughts, ideas, and creations. Art journaling the same concept as a written journal, but it combines writing with art and visual aspects. It’s a way for children to record their ideas and observations or respond to information they’ve learned with simple drawings and basic written descriptions.

It also gives them a space to explore. With art journaling, anything goes! Every style, medium, and technique can be used.

Art making is also powerful and therapeutic. Journaling gives students a healthy outlet to express their feelings and work through their emotions. For example, communicating through doodles can be much easier for children than talking.

How Art Journals Works

There’s no right or wrong way to do art journaling because they are personal to each artist! Students can use it to try out new techniques, document what happened to them that day or week, or artistically express the different emotions or issues they’re experiencing.

Students can keep their art journals with them or you can store them in a specific place on your art shelf or in a cabinet where they can grab them when they’re feeling creative. They can use the art supplies you put out on your art shelf to fill in the pages of their journal.

For the most part, journaling is an independent project and doesn’t require any lessons to complete. However, if you want to, you can provide simple prompts to inspire them; some examples may be: elaborate doodling, depicting poems, illustrating specific emotions, and creating patterned pages.

Make & Decorate Your Own Art Journal

Making an art journal is simple, all you really need is the journal itself—preferably filled with blank, un-lined pages.

Composition notebooks—although lined—usually cost about $1 or $2 each, and bulk pasts can be even cheaper. But I know purchasing a journal for each child in your class can still add up…so I’m offering you two solutions to cut down on costs.

1. Ask parents to donate journals. You’ll be surprised at how many parents will be willing to donate a few notebooks for your classroom.

2. Create a mini art journal out of plain paper:

  1. Take 4 sheets of 8 1/2 x 11 plain white copy paper
  2. Cut sheets in half (8 1/2 x 5 1/2), then fold in half into a mini booklet
  3. Bind loose pages with a rubber band or stitch together (along the fold)
  4. Stitching Instructions: get a thumb tack and press to make 3 holes along the fold; bind pages using a simple string stitch (watch video below).

Once you have your journal figured out, give students the opportunity to decorate their notebooks. If they’ll be using their own individual books make sure they put their names on them. Then put out a few basic art supplies (markers, stickers, glue, scissors, colored paper, beads, ribbons, etc.) and let them have fun. These will more than likely be the same supplies they’ll use to decorate the inside of their journals as well.

If your students choose to share their art journals with you, make sure you offer them supportive and nurturing language.

You never know…creating and encouraging your students to keep art journals might inspire you to start one yourself!

Learn more about teaching kids art lessons

Want more information on the types of techniques your students can handle or ideas for art projects outside of journals? Sign up for my absolutely FREE mini course, Phases of Art Development Guides & Art Project Ideas. It’s a quick guide to what your students are capable of and what to teach them at each age. They’re bite-sized videos that have proven helpful to many other Montessori teachers and they’ll give you a solid foundation to begin teaching art in your classroom!

Sign-up to receive video course & Montessori art teaching e-newsletter.

The Phases of Art Development is a quick digital course that explains how art making can help students develop their creativity, fine-motor skills, and focus. More importantly, I share what types of projects students at every age are capable of completing safely, and without making a mess.

Best of all—it’s free! To sign up for the course, click here.

Of course, if you want to stay up-to-date on more teaching tips and art project ideas, make sure you sign up for my newsletter!

All rights reserved © 2023, Nature of Art®

No part of this blog may be used or be reproduced in any manner whatsoever including reproducing, publishing, performing, and making any adaptions of the work – including translation into another foreign language without written permission except in the case of brief quotations embodied in critical articles and reviews. Nature of Art® Publishing P.O. Box 443 Solana Beach, California 92075.