Watercolor Play | Montessori Art Lesson

If you’re looking for a hands-off project that’s fun for kids, I have the perfect art lesson for you! Watercolor Play introduces young children to the basics of color and lets them explore their creativity. Because this project is process-based—meaning it’s about experimenting and experiencing the process of making art—it’s a perfect Montessori art lesson, since students can work independently.

Watercolor Play is a simple, natural way for kids to learn the basis of color. Students in Plane 1 or younger can’t really be sat down and taught color theory, so this activity is a way for them to be introduced to color in a way that meets their level of understanding. It teaches them how color behaves and mixes, which are things all artists need to learn, without getting into technical details and overwhelming them.

This lesson provides the building blocks of color theory so students are ready for more advanced work as they get more experience. This foundation will help them be more willing to experiment when they’re older, because they already have an introduction to art and the knowledge of how colors work together.

Watercolor Play is Ideal for Early Childhood

While this activity is ideal for early childhood, you can adapt aspects of it to work for older children too. You’ll see that I try to keep this art lesson very simple to start off with, but you can add in primary and secondary color concepts once students have a better understanding.

Early childhood montessori art

No matter how old your students are, mixing colors can be therapeutic. It’s soothing, relaxing, and can relieve stress. Giving children the opportunity to play like this also helps them develop the wiring in their minds.

I recommend setting up this art lesson on a regular basis—maybe once a month, or even once a week—so their understanding consistently grows and deepens.

Watercolor Play from Spramani Elaun on Vimeo.

Supplies

  • Kid-safe, non-toxic liquid paint (acrylic, tempera, or watercolor) that’s been watered down to be transparent
  • Bottles with adjustable caps OR clear plastic tubs
  • Bowls
  • Paintbrushes, sponges, stampers, drippers
  • Watercolor paper or thick/butcher paper (optional)
  • Aprons or old clothes

Steps:

  1. Put all your materials out on a table
  2. Let kids explore and play

That’s it! Watercolor Play is such a simple activity. You don’t want to direct it or try to teach anything if your students are at a young age. Let them play with the colors and mix things naturally, they’ll create their own colors and see things for themselves. If they’re old enough to ask about colors, then you can go ahead and start naming the general hues, and hint at what adding other colors might do to change the original color (i.e. make it lighter).

Watercolor Paints

You can start with whatever colors you want. You can start with primary colors, or set out just one color at a time, then add new or different colors the next time. I recommend sticking with limited color options to start out with, especially for children 24 months or younger. Once they’re older and have had more exposure to colors and the activity, they’ll be able to start experimenting more, and getting more excited about their experimentation.

With this art lesson, you’re not focusing on the outcome; do not expect kids to create an actual finished work. The watercolor paper is optional because older students may want to make their own artwork, if the choose to do so, make sure there’s a place to keep the paper out to dry. Seeing how the paint and color changes once their work is done is part of the experience as well.

You may also want to consider starting with lighter colors before introducing darker ones, since dark colors can “stain” the other ones by eventually turning everything a murky gray—which is less exciting.

While this project is relatively hands off, you may need to take the lead initially by squirting and mixing the paint in your own bowl or tub. Kids are so used to us telling them to be careful, and not to make messes, so this is a new experience for them.

NOTE: This project should be set up outdoors or somewhere that water can be splashed (i.e., not rugs or carpet). This project can get messy with younger children, since most toddlers and lower elementary students don’t yet have very developed fine motor skills to control what they’re doing.

For more activities and lessons on color theory, check out my book Kids Color Theory.

montessori art early childhood

Sign-up to receive video course & Montessori art teaching e-newsletter.

The Phases of Art Development is a quick digital course that explains how art making can help students develop their creativity, fine-motor skills, and focus. More importantly, I share what types of projects students at every age are capable of completing safely, and without making a mess.

Best of all—it’s free! To sign up for the course, click here.

All rights reserved © 2024, Nature of Art®

No part of this blog may be used or be reproduced in any manner whatsoever including reproducing, publishing, performing, and making any adaptions of the work – including translation into another foreign language without written permission except in the case of brief quotations embodied in critical articles and reviews. Nature of Art® Publishing P.O. Box 443 Solana Beach, California 92075.

Cosmic Rock Painting | Montessori Art Lesson

In my years of working with students, I’ve developed a few go-to art projects that are easy to put together and that kids LOVE. Cosmic Rock Painting is one of my favorite art projects for students. I think this project works especially well as a Montessori art project because it can be incorporated with the Great Lessons and cosmos. I find it a perfect fit for Lower L Montessori students, but with a few tweaks, it can be adapted for students at any age.

Cosmic Rock Painting | Montessori Art Lesson
Use any type of rocks!

I actually got my inspiration for this project from the book Born with a Bang: The Universe Tells Our Cosmic Story by Jennifer Morgan. It’s a very common book in the Montessori world—you may even already have it in your classroom! While you don’t need to read this story with your students, it makes a great foundation for jumping into this art activity.

Cosmic Rock Painting | Montessori Art Lesson
Born With a Bang –Book

Before you start this Cosmic Rock Painting project, make sure you go over the big bang, even if it’s only briefly. Show students photos of stars, constellations, and galaxies to serve as inspiration and give them ideas of what they can create.

Supplies:

  • Paintbrush
  • Paint (acrylic paint works best, tempera paint can also be used but may wash off)
  • Palette (egg cartons, paper plates, and small bowls also work)
  • Wash jar
  • Napkin
  • Rocks or stones (any will work, but river rocks are preferred)

Steps:

  1. Paint the surface of the rock black, let dry
  2. Using a variety of colors, paint on cosmic images (allow students to reference books and photos for inspiration)

Watch Cosmic Rock Painting Video

[In the video, I mention a tinting tutorial and brush stroke tutorial; to access these videos for free, register for my FREE online mini-course, Phases of Art Development. Each of these topics can be done as completely separate art lessons to help kids understand color tones and brush strokes.]

Montessori cosmic rock painting art lesson

Notes: Depending on how you want to introduce this lesson, you can have students complete the whole project in one day or break it up over the course of several days. You can teach this lesson in chronological order, starting with the big bang, then how galaxies develop, and then go into mini lessons on the milky way, super novas, the sun, Earth, and other planets. Students can paint individual rocks to represent each of these cosmic ideas.

acrylic rock painting art kids

This is just the tip of the iceberg when it comes to easy art activities for Montessori students! After working in the art industry for more than three decades, I’ve amassed a TON of art project ideas for kids. I’ve also developed and created my very own art teaching method that introduces art literacy to students in a way that’s fun and that makes sense to them.

To explore some of the ways students learn art at each age level, and to fun and easy art project ideas, make sure you register for my FREE online mini-course, Phases of Art Development!

Sign-up to receive video course & Montessori art teaching e-newsletter.

The Phases of Art Development is a quick digital course that explains how art making can help students develop their creativity, fine-motor skills, and focus. More importantly, I share what types of projects students at every age are capable of completing safely, and without making a mess.

Best of all—it’s free! To sign up for the course, click here.

All rights reserved © 2024, Nature of Art®

No part of this blog may be used or be reproduced in any manner whatsoever including reproducing, publishing, performing, and making any adaptions of the work – including translation into another foreign language without written permission except in the case of brief quotations embodied in critical articles and reviews. Nature of Art® Publishing P.O. Box 443 Solana Beach, California 92075.

Earth Day Activities for Montessori Students

Earth Day is one of my favorite holidays! Not only do I encourage teachers and schools to use eco-friendly art materials and supplies whenever possible, but I love incorporating natural elements into the art projects I share with children. That’s why Earth Day activities that involve art are my favorite to do with children and young artists.

Earth Day—held annually on April 22—marks the anniversary of the birth of the modern environmental movement that started in 1970. Every year, nearly 1 billion people in more than 190 countries come together to protect our environment and celebrate everything Mother Nature provides us.

In honor of Earth Day, I’ve decided to share 5 earth-friendly art projects that Montessori students of all ages can do. These are some Earth Day activities I’ve done with children at some of the largest Earth Day celebrations on the West Coast.


Earth Day Activities for Montessori Students
The City of Trash up-cycled project below was on display for the community to view at the EarthWorks Earth Day Festival in San Diego.

Project 1: City of Trash

“City of Trash” is a collaborative recycle project that I designed for one of the largest annual Earth Day events held in Balboa Park in San Diego, Calif. It’s a way to show children how much trash and waste one household (or classroom) can produce in a week and to start instilling eco-friendly shopping habits.

This project should be planned a few days to a week in advance. Start by challenging students to save their trash throughout the week—everything that would normally go into the trash or recycle bin, minus perishable items. They can bring in a bag of trash from home, or you can set up a collection bin in your classroom.

Earth Day art teacher, spramani

Supplies:

  • Collected trash (i.e., cardboard, boxes, and anything that is non-biodegradable or that commonly goes into the recycle bin)
  • Strong scissors
  • Hot glue gun, set at a low temperature
  • Non-toxic paints
  • Paint brushes
  • Duct tape or a strong clear tape

How to:

  1. After collecting a week’s worth of garbage, your class will be ready to start constructing City of Trash. Keep on the lookout for an extra-large cardboard box, you’ll recycle this to be a flat canvas to build onto. If you prefer, each student can use a smaller cardboard to create their own scene, rather than a large, collaborative, classroom-effort cityscape.
  2. Guide students and offer simple ideas of building features usually found around city landscapes.
  3. Allow them to construct the elements of their city using the collected materials.
  4. Once everything is glued down to the cardboard, have students paint in details to finish the cityscape.

Earth Day Activities for Montessori Students, rock painting

Project 2: Sticks n’ Stones

This is my signature earth-friendly art activity; it made waves around San Diego communities and has traveled to major Green Festivals, Earth Day events, museums, and educational venues all over the world.

I was looking to create Earth Day activities that kids would enjoy and were also 100% sustainable for the environment. I searched for the most earth-friendly surfaces to paint, found natural elements like rocks and sticks, then searched for the most earth-friendly paints to paint them with. This art project was actually very instrumental in the founding of my non-toxic, kid-safe, earth-friendly art supply company, Nature of Art for Kids!

The idea for this earth-friendly art project is simple—use earth’s natural resources as a canvas for creating beautiful art!

Earth Day Painting Activities for Montessori Students

Supplies:

  • Kid-safe acrylic paint
  • Paint palette (paper plates or a cardboard egg carton will also work)
  • Paint brushes
  • Napkins
  • Water jar
  • Rocks (I prefer river rocks because they seem to have the flattest surface to paint an image on, but any shape will work)
  • Sticks

How to:

  1. Brush dirt off sticks and wipe rocks clean by washing them in water (completely dry rock before painting).
  2. Prepare a palette with a variety of paint colors.
  3. Let students paint their rocks and sticks; remind them that painting one layer at a time will give them best results. Set aside their “canvas” for a few minutes to dry before they add a new layer of color.
  4. Let their rocks and sticks dry overnight or until the end of class. They’ll dry best when left in direct sunlight.

Earth Day Activities for Montessori Students

Project 3: Paper Roll Shark

A simple recycled paper roll can transform into a shark art project kids can’t wait to sink their teeth into! It is a inexpensive Montessori art project that is easily manageable for students in both Plane 1 and Plane 2.

Best yet, this project meets all of my earth-friendly art criteria: recycled paper rolls are re-used, the project is easy for young kids to create, and many species of sharks are on the endangered animal list (which makes it a great topic to study).

Supplies:

  • Recycled Paper Rolls
  • Kid-safe paints (acrylic works best on paper rolls, giving a nice opaque coverage)
  • Googly eyes, fabric scraps, or buttons
  • Wide paint brush or sponge brush
  • Writing utensils for tracing (pencils, pens, markers, etc.)
  • Paint palette (paper plates or a cardboard egg carton will also work)
  • Water jar
  • Napkins
  • Scissors
  • Glue
  • Shark template

How to:

  1. Cut out shark template pattern.
  2. Place template on top of flattened paper roll and trace.
  3. Cut along the tracing lines and unflatten the paper roll, popping it back into a roll shape.
  4. Use scraps from the roll to make a fin shape.
  5. Glue fins on with glue or a glue gun. (I’ve found that it’s easier and I get sturdier results if  I cut a slit in the roll, place the fin inside, and glue around it to secure it in place.)
  6. Paint and embellish the shapes to look like a shark or other swimming creature.
  7. Cut small triangle shapes out of scraps from the roll or white paper for the teeth. Students can also paint or draw these onto their roll using white paint.
  8. Glue buttons, fabric scraps, or googly eyes onto the roll for the eyes.

Note: If younger students will be completing this project, cut rolls out ahead of time.


Earth Day Activities for Montessori Students, art lessons ideas

Project 4: Recycle Cardboard Canvas

Did you know that one ton of recycled cardboard saves 390 kWh hours of electricity, 46 gallons of oil, 6.6 million Btu’s of energy, and 9 cubic yards of landfill space!?

Cardboard and paper waste make up 41% of the municipal solid waste stream. Recycling cardboard takes 24% less energy and produces 50% less sulfur dioxide than making cardboard from raw materials.

Painting on cardboard is earth-friendly and kids love it! I’ve hosted many community collaborative painting projects with large TV cardboard boxes with great creative results.

Besides using it as a canvas for flat painting, cardboard can be used for mixed media projects (like City of Trash) and dioramas.

Earth Day Activities for Montessori Students in the classroom

Supplies:

  • Cardboard (from paper rolls, egg cartons, any-sized boxes, etc.)
  • Kid-safe acrylic paint (tempera paint also works, but will not have an opaque finish)
  • Paint brushes (all sizes)
  • Paint palette (paper plates or a cardboard egg carton will also work)
  • Water jar
  • Napkins
  • Scissors
  • Decorative objects (glitter, fabric scraps, straws, string, bubble wrap, buttons, etc.)
  • Glue

How to:

  1. Allow kids to experiment with how they want to use their cardboard as a canvas. Some may want to paint it as a 3D object others may want to cut open the boxes so that they can create their art on a flat canvas.
  2. Fill the palette with different color paints.
  3. Paint, cut out, and decorate the cardboard.
  4. Because cardboard is so sturdy, students can revisit these art projects and paint over them or add to them at later dates.

Earth Day Activities for Montessori Students, natural organic paints

Project 5: Veggie Paint

Over the years of creating Montessori activities, many teachers and parents have asked me what the safest paint is for their young students. I always tell them the absolute safest is homemade veggie paint! It’s made straight from the vegetables found in your garden—or grocery store. This type of paint is especially safe for toddlers who are still in a phase of putting everything into their mouths.

Natural veggie paints are generally made with ingredients like fruits, vegetables, flowers, seeds, and leaves. Usually this means natural pigments are extracted from these types of vegetable plants. Natural, organic pigments have been used for thousands of years—even in cave drawings!

Supplies:

  • Bunch of dark, pigment-rich veggies (e.g. kale, beets, carrots, etc.)
  • Food processor, juicer, or blender
  • Water
  • Strainer
  • Cornstarch (optional)
  • Jar or paint container
  • Paint brushes
  • Paper (watercolor paper works best for paint with a thin consistency)
Earth Day Activities for Montessori Students

How to:

  1. Blend your choice of vegetable with water in a food processor or blender—three parts water, to one part vegetables. If you’re using a juicer, you can skip adding water.
  2. Strain the juice so you have only liquid, removing thick lumpy parts.
  3. If you want a thicker paint, add cornstarch until it reaches your desired consistency.
  4. Paint away!

Note: Veggie paint can be stored in the refrigerator for up to two weeks.


Sign-up to receive video course & Montessori art teaching e-newsletter.

The Phases of Art Development is a quick digital course that explains how art making can help students develop their creativity, fine-motor skills, and focus. More importantly, I share what types of projects students at every age are capable of completing safely, and without making a mess.

Best of all—it’s free! To sign up for the course, click here.

All rights reserved © 2024, Nature of Art®

No part of this blog may be used or be reproduced in any manner whatsoever including reproducing, publishing, performing, and making any adaptions of the work – including translation into another foreign language without written permission except in the case of brief quotations embodied in critical articles and reviews. Nature of Art® Publishing P.O. Box 443 Solana Beach, California 92075.

Valentine’s Day Art Projects: Potato Stamp Cards

Looking for fun Valentine’s Day art projects for your classroom? I love making homemade cards for my family, friends, and special people in my life, and I’m sure your early childhood Montessori students would too!

I started a tradition of making potato Valentine cards with my young art students and every year, they look forward to this art project.

Valentine’s Day Art Projects: Potato Stamp Cards

Here’s a quick and fun way to bring a little love into your classroom—and all you really need is a few potatoes. The spud makes a great, inexpensive stamp and are easy for little hands to grasp and hold. Plus, you can carve almost any shape you want out of a potato, so while I do this art lesson with my students for Valentine’s Day, you can really do it with your Montessori class any time of the year!

Potato Stamping Supplies

  • Potatoes — large Russet potatoes work best; organic potatoes are even better because they have no pesticides sprayed on them
  • Knife — a medium size paring knife (you may want to cut the potatoes ahead of time, that way you don’t have to worry about safety)
  • Newspaper — a few sheets to lay out and keep the work area clean
  • Paint Brushes, Sponges, or Popsicle Sticks — to spread paint on the stamps
  • Paints — tempera, acrylic, watercolor, and/or natural veggie dye will work
  • Paper or Card Stock — card stock, news print, construction paper, copy paper or any type of stationary cards
  • Writing Utensils — Crayons, pencils, etc.; for Valentines, I usually put out warm colors (red, pink, purple, white, teal blue)
  • Napkins — napkins or rags to clean off potatoes between use
  • Water Jar — for cleaning paint brushes in between color changes
Valentine’s Day Art Projects: Potato Stamp Cards Montessori

Potato Stamp StepsP

  1. Cut or carve a heart shape out of the potato.
  2. Pat dry the potato with a napkin or rag before stamping. Potatoes are a root vegetable, so they hold and release lots of water when cutting open; potatoes work much better at stamping and absorbing paint when they are dry.
  3. Cover the flat, stamp portion of the potato with paint.
  4. Press potato stamp on the paper and lift to see impression that’s been left.

Your students may need to practice a couple of times to thin out the layer of paint on the potato, which results in a clearer and better desired shape impression. I always tell kids to practice on a scrap paper before making their impressions on a nicer paper or card.

montessori art hearts

Potato stamping can be an earth-friendly art project! You can make this project totally earth-friendly by using recycled paper, organic potatoes, and non-toxic paints for kids! If you’re using veggie dyes, then you can even compost all your scraps once you’re done with this project.

Teachers Say…

I’ve had teachers email me later and tell me how they’ve started doing this Montessori art project in their classroom, and how their students have been making quick cards, banners, and gift wrap for different holidays and seasons throughout the year. Think about carving out leaves for fall, pumpkins for Thanksgiving, and trees and flowers for spring or Earth Day!

Valentine’s Day Art Projects: Potato Stamp Cards, montessori art

Want more ideas for Montessori art projects? Download the Ultimate Winter Arts & Crafts Idea Guide! It’s packed with a more than 40 of fun and educational Montessori art projects that’ll get your students pumped and excited about art!

All rights reserved © 2024, Nature of Art®

No part of this blog may be used or be reproduced in any manner whatsoever including reproducing, publishing, performing, and making any adaptions of the work – including translation into another foreign language without written permission except in the case of brief quotations embodied in critical articles and reviews. Nature of Art® Publishing P.O. Box 443 Solana Beach, California 92075.

3 Montessori Art Projects for Winter

Montessori Art Winter Art Project Ideas For teaching kids

Now that we’re smack in the middle of winter, I’m sure you’re looking for a few exciting Montessori art projects to keep your students occupied on days they’re stuck inside. Well, I say, embrace the season and have your students participate in a few winter art projects.

Here are 3 Montessori art lessons I’m sure your students will be excited about. Plus, they’re easy to set up and fun to do!

Project 1. Snow Coloring: Color Theory

Winter art project activities for monessori classroom

I love teaching young students color theory, and one of the funnest ways to do so during the winter is with snow! Living in California, seeing snow—let alone using it for art projects!—is very rare, but if you’re in the middle of a winter wonderland, bring it into the classroom and have some fun with this project.

Supplies:

  • Food coloring or mixing paint in the primary colors: red, blue, and yellow; or this Primary Mixing Kit
  • Empty dropper bottles
  • Tap water
  • Containers, tubs, or buckets (for the snow)
  • Snow
  • Towels
primary mixing paints for kids art projects winter art idea

How to:

  1. You can do this part yourself, or you can have students go outside and fill up containers of clean snow. Each child should have their own container.
  2. Fill up dropper or squirt bottles with the food coloring or mixing paint plus tap water to dilute it.
  3. Have students squirt a little bit of each color onto different areas of the snow.
  4. Then, allow students to experiment with creating secondary colors. They can squirt one color on top of another to mix them and see what colors they can create on their own.
montessori art activities for kids, tear collage

Project 2. Wrapping Paper Collage: Tear, Collage, & Glue

Do you still have scraps of wrapping paper laying around your home? Bring them into the classroom and recycle it to give students the opportunity to create unique pieces of art. This is one of the simplest Montessori activities to keep kids busy. And while I put this into the winter art projects category, you can really do this any time of year, with any type of paper you have in your classroom. (For more Montessori activities related to this project, download my Ultimate Winter Arts & Crafts Idea Guide and check out page 9.) Need more Collage ideas? Read my Collage Ultimate Montessori Collage Guide

Supplies:

  • Wrapping paper scraps
  • Scissors
  • Glue
  • Paper
  • (Optional) pencil and eraser

How to:

This project can be done two ways:

  1. Let students choose the paper designs they want to work with
  2. Cut or rip pieces into different shapes
  3. Using these pieces, they can aim to create a specific object/design or keep it abstract
  4. Have them move the pieces around their paper and experiment with the design
  5. Once they’re happy with their image, have them glue the pieces onto their paper

Or,

  1. Have students decide on an image they want to create (fish, butterfly, face, mountains, etc.)
  2. Lightly draw an outline of the design onto their paper
  3. Cut the wrapping paper into shapes that will fit within their image
  4. Once they’ve put the pieces together to their liking, glue them onto their paper drawing
Winter art lesson idea, painting art project for Montessori how to

Project 3. Watercolor Painting the Northern Lights: Wet-on-Wet Painting, Wax Resist

Seeing the Northern Lights is on a lot of people’s bucket lists. What you may not know is that they’re easier to see in the winter—especially after making this artwork! Watch the video below to see how to use just paints and crayons to create this Northern Lights landscape, complete with a colorful sky and mountain peaks.

Supplies:

  • Jar of water
  • Crayons
  • Watercolor paints
  • Wide and thin paint brushes
  • Basic sketching pencil
  • Napkins
  • Watercolor paper (or another thick paper)

Where to Start: Ultimate Winter Arts & Crafts Free Download

Want more ideas for winter art projects? Download the Ultimate Winter Arts & Crafts Idea Guide! It’s packed with a more than 40 of fun and educational Montessori art projects that’ll get your students pumped and excited about art!


Winter Arts & Crafts montessori art activities

All rights reserved © 2024, Nature of Art®

No part of this blog may be used or be reproduced in any manner whatsoever including reproducing, publishing, performing, and making any adaptions of the work – including translation into another foreign language without written permission except in the case of brief quotations embodied in critical articles and reviews. Nature of Art® Publishing P.O. Box 443 Solana Beach, California 92075.

Practicing Brushstrokes for Chinese New Year – Montessori Art

chinese new year cultural arts kids

With the Chinese New Year just a few days away (in 2020, it falls on January 25th), why not use the holiday as inspiration for cultural arts or history art lessons? Chinese calligraphy and many pieces of Chinese art focus on brushstrokes and can easily be incorporated into a Montessori art lesson plan.

Thousands of years ago, painting and calligraphy emerged simultaneously, largely in part because they require the same tools: brush and ink. You might be surprised to know though, that calligraphy was considered to be “fine art” long before painting ever was. In fact, it wasn’t until the Song dynasty (960-1279), that painting was finally thought of as art.

montessori art lesson chinese

We can learn a lot about Chinese art—both painting and calligraphy. Namely, the importance and variety of the Chinese brushstroke.

Sign-up to receive video course & Montessori art teaching e-newsletter.

The Phases of Art Development is a quick digital course that explains how art making can help students develop their creativity, fine-motor skills, and focus. More importantly, I share what types of projects students at every age are capable of completing safely, and without making a mess.

Best of all—it’s free! To sign up for the course, click here.

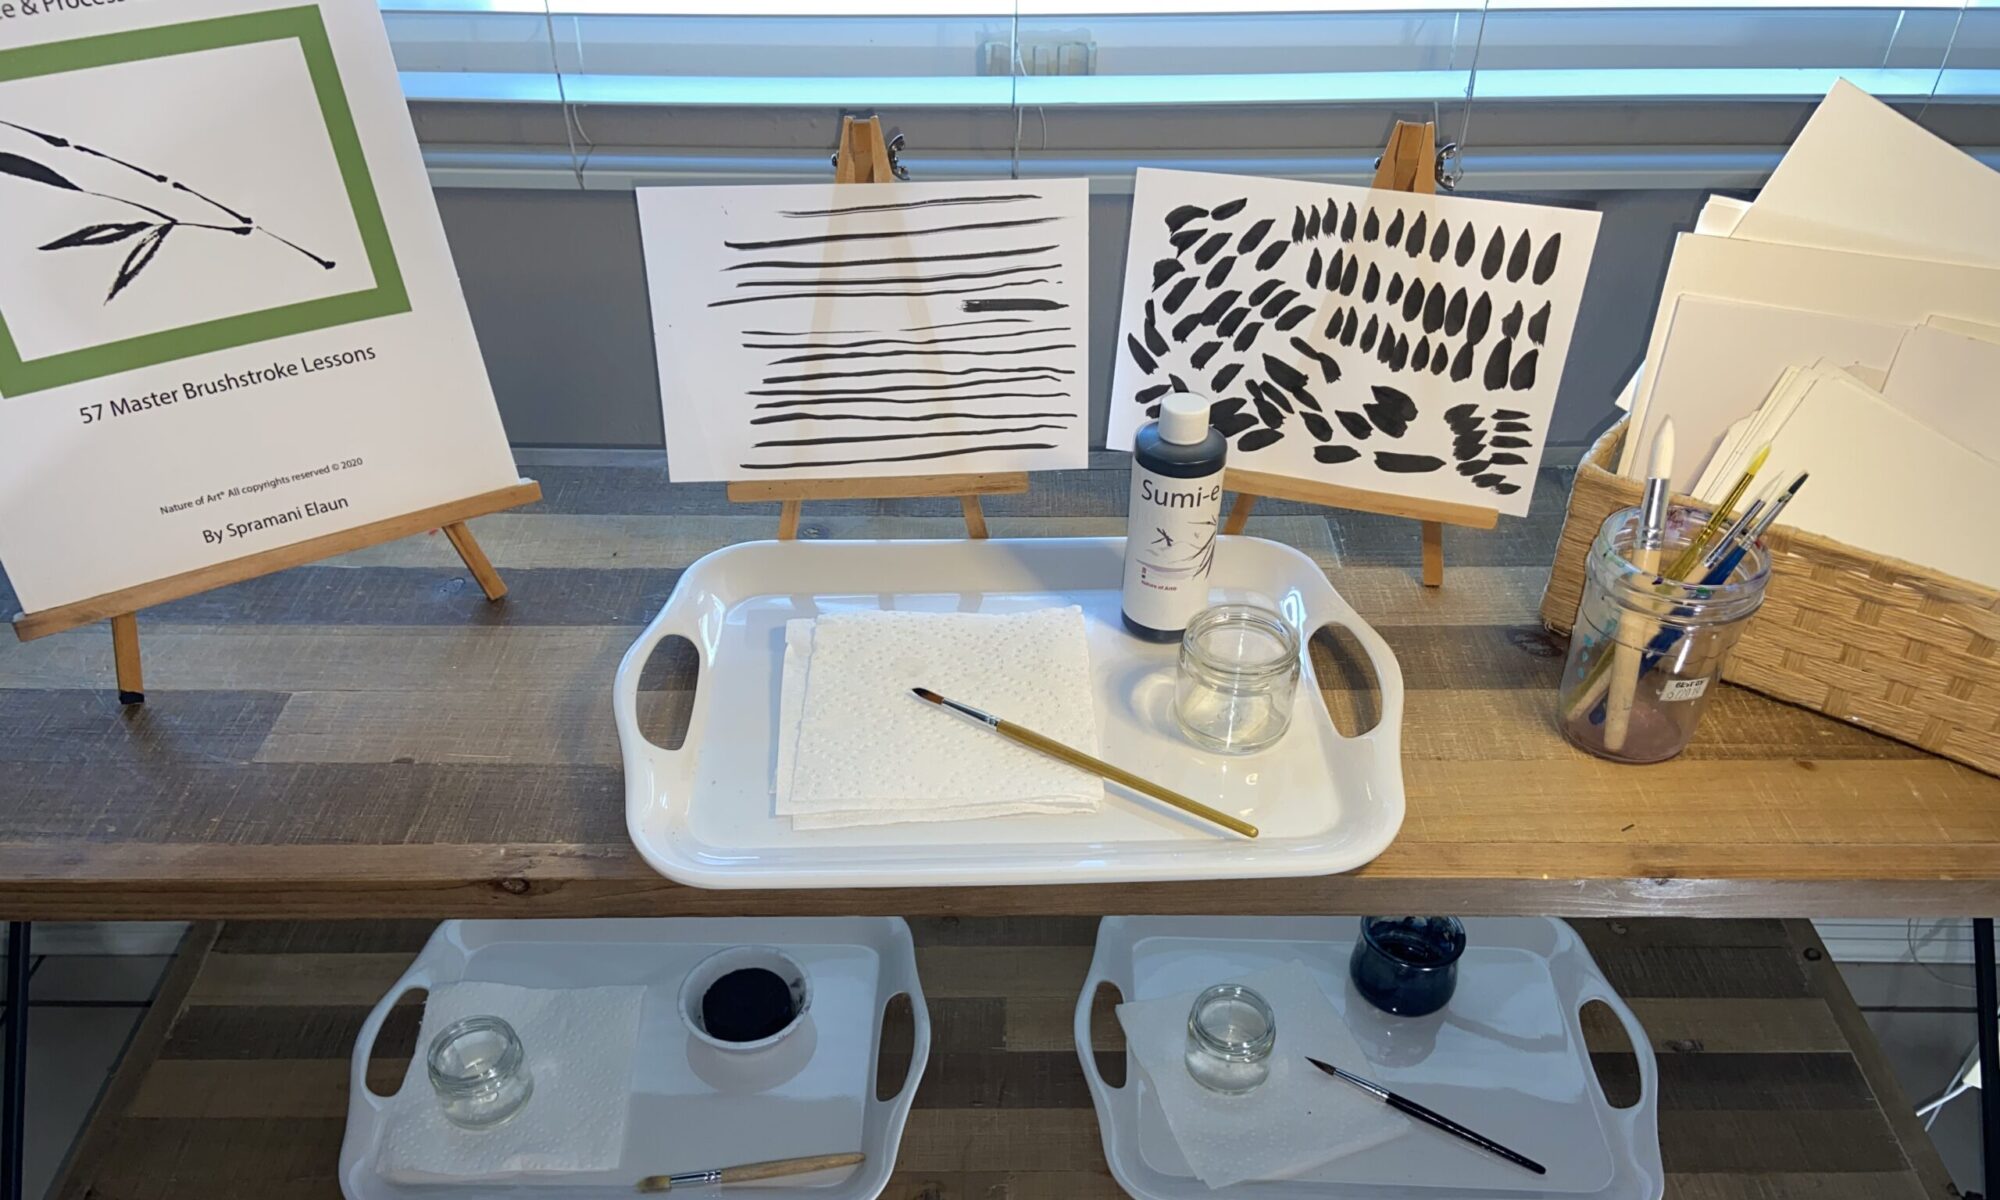
Sumi-e Brushstrokes

Sumi-e ink painting is perfect for children to learn because of its simplistic pictorial nature-inspired images created using simple brushstrokes and without very many details or added texture.

In fact, I would say sumi-e paint exercises are ideal for beginner painters to start out with since it focuses on controlling brushstrokes—balancing between thin and thick. This is actually how I start painting lessons in my classes.

sumi-e brushstroke painting kids

I’m currently in the process of building out a complete lesson around Chinese brushstrokes, but here’s a look at the exercises I’ll be including.

montessori art painting chinese ink brushstroke
  • Lesson 1: Load paintbrush without twisting the fibers
  • Lesson 2: Wipe excess ink off the brush using the sides of a jar or ink stone
  • Lesson 3: Practice making thin, long brushstrokes with the tip of the paintbrush
  • Lesson 4: Practice making thick brushstrokes with a larger amount of the paintbrush
  • Lesson 5: Practice making spirals and lines very slowly
  • Lesson 6: Practice making dots and dashes
  • Lesson 7: Practice making bamboo leaves, with simple short and long strokes all in only one try
montessori chinese new year art project kids

Now, here’s a quick look at the Chinese New Year—feel free to share this information with your students!—and a way to practice brushstrokes to celebrate the holiday.

Chinese New Year

Chinese New Year is celebrated by more than 20% of the world. It’s the most important holiday in China and to Chinese people all over. It is a festival that celebrates the beginning of a new year on the traditional Chinese calendar.

2020 is the year of the rat.

2019 is the year of the pig.

In Chinese culture, pigs are the symbol of wealth. Their chubby faces and big ears are signs of fortune as well. Pigs have a beautiful personality and are blessed with good fortune in life.

Chinese New Year Art Project

Year Of The Pig, Chinese Sumi-e Ink Painting Lesson

The Chinese New Year is a great time to show students a way to embrace Montessori cultural arts. Here is a simple sumi-e ink brushstroke lesson. You will be creating—to celebrate the Year of the Pig—using simple brushtrokes and in just six steps.

chinese brushstroke art lesson for children how to
Basic round pointed tip paintbrush can work

Supplies:

chinese new year, pig, painting art project for kids

Steps:

  1. Make the head with a rounded line circle shape
  2. Inside of that circle, create the pig’s snout with another, smaller rounded line circle; add two slight dots for the nostrils
  3. Paint two eye marks above the snout, plus two ears on the top of the head
  4. Make a long oval line to shape the body, attached to the head
  5. Add two line strokes at the bottom of the oval shape for its legs
  6. Make a curly corkscrew twirl on the side of the oval body; this will be the pig’s tail
year of the pig, cultural art for kids, project kideas
spramani montessori art trainer in china
Teaching art lessons and training Montessori Teachers 3 – 6, in Yiwu, Province Zheijiang China.

If your students get excited about this project, make sure you sign up for my newsletter to get more Montessori art lesson ideas to share with them!

Buy Sumi-e Ink Now!

Sign-up to receive video course & Montessori art teaching e-newsletter.

The Phases of Art Development is a quick digital course that explains how art making can help students develop their creativity, fine-motor skills, and focus. More importantly, I share what types of projects students at every age are capable of completing safely, and without making a mess.

Best of all—it’s free! To sign up for the course, click here.

All rights reserved © 2024, Nature of Art®

No part of this blog may be used or be reproduced in any manner whatsoever including reproducing, publishing, performing, and making any adaptions of the work – including translation into another foreign language without written permission except in the case of brief quotations embodied in critical articles and reviews. Nature of Art® Publishing P.O. Box 443 Solana Beach, California 92075.

The Value of Art Journaling for Kids, Montessori Activities

I’ve shared with you the importance of stimulating positive art talk in your Montessori classroom. It’s one of the easiest ways to get students interested in art. Once they’ve been allowed to explore their creativity through visual art, chances are, they’re going to be hooked and want to learn so much more. I’ve see it happen so many times! One of the best ways to keep them captivated, allow them to explore even more, and track their progress is through art journaling.

What I love about art journaling is that there’s no minimum talent or skill required—students of any age can benefit. All you really need is a journal, some simple art materials, and the willingness to get creative and have some fun.

What is Art Journaling?

An art journal is a book kept by artists as a visual—sometimes verbal—log of their thoughts, ideas, and creations. Art journaling the same concept as a written journal, but it combines writing with art and visual aspects. It’s a way for children to record their ideas and observations or respond to information they’ve learned with simple drawings and basic written descriptions.

It also gives them a space to explore. With art journaling, anything goes! Every style, medium, and technique can be used.

Art making is also powerful and therapeutic. Journaling gives students a healthy outlet to express their feelings and work through their emotions. For example, communicating through doodles can be much easier for children than talking.

How Art Journals Works

There’s no right or wrong way to do art journaling because they are personal to each artist! Students can use it to try out new techniques, document what happened to them that day or week, or artistically express the different emotions or issues they’re experiencing.

Students can keep their art journals with them or you can store them in a specific place on your art shelf or in a cabinet where they can grab them when they’re feeling creative. They can use the art supplies you put out on your art shelf to fill in the pages of their journal.

For the most part, journaling is an independent project and doesn’t require any lessons to complete. However, if you want to, you can provide simple prompts to inspire them; some examples may be: elaborate doodling, depicting poems, illustrating specific emotions, and creating patterned pages.

Make & Decorate Your Own Art Journal

Making an art journal is simple, all you really need is the journal itself—preferably filled with blank, un-lined pages.

Composition notebooks—although lined—usually cost about $1 or $2 each, and bulk pasts can be even cheaper. But I know purchasing a journal for each child in your class can still add up…so I’m offering you two solutions to cut down on costs.

1. Ask parents to donate journals. You’ll be surprised at how many parents will be willing to donate a few notebooks for your classroom.

2. Create a mini art journal out of plain paper:

  1. Take 4 sheets of 8 1/2 x 11 plain white copy paper
  2. Cut sheets in half (8 1/2 x 5 1/2), then fold in half into a mini booklet
  3. Bind loose pages with a rubber band or stitch together (along the fold)
  4. Stitching Instructions: get a thumb tack and press to make 3 holes along the fold; bind pages using a simple string stitch (watch video below).

Once you have your journal figured out, give students the opportunity to decorate their notebooks. If they’ll be using their own individual books make sure they put their names on them. Then put out a few basic art supplies (markers, stickers, glue, scissors, colored paper, beads, ribbons, etc.) and let them have fun. These will more than likely be the same supplies they’ll use to decorate the inside of their journals as well.

If your students choose to share their art journals with you, make sure you offer them supportive and nurturing language.

You never know…creating and encouraging your students to keep art journals might inspire you to start one yourself!

Learn more about teaching kids art lessons

Want more information on the types of techniques your students can handle or ideas for art projects outside of journals? Sign up for my absolutely FREE mini course, Phases of Art Development Guides & Art Project Ideas. It’s a quick guide to what your students are capable of and what to teach them at each age. They’re bite-sized videos that have proven helpful to many other Montessori teachers and they’ll give you a solid foundation to begin teaching art in your classroom!

Sign-up to receive video course & Montessori art teaching e-newsletter.

The Phases of Art Development is a quick digital course that explains how art making can help students develop their creativity, fine-motor skills, and focus. More importantly, I share what types of projects students at every age are capable of completing safely, and without making a mess.

Best of all—it’s free! To sign up for the course, click here.

Of course, if you want to stay up-to-date on more teaching tips and art project ideas, make sure you sign up for my newsletter!

All rights reserved © 2024, Nature of Art®

No part of this blog may be used or be reproduced in any manner whatsoever including reproducing, publishing, performing, and making any adaptions of the work – including translation into another foreign language without written permission except in the case of brief quotations embodied in critical articles and reviews. Nature of Art® Publishing P.O. Box 443 Solana Beach, California 92075.

Making Gratitude Cards to Celebrate Thanksgiving, Montessori Activities

The holiday and Thanksgiving season are a time of reflection for most people—most adults, anyway. It’s a time we think about everything we’re grateful for, and it’s a practice we should be sharing with our children and students.

Expressing gratitude has the power to reduce stress, foster a sense of belonging, and yield a host of emotional and mental health advantages. Fundamentally, gratitude involves feeling thankful and appreciative of the positive aspects in your life. As educators, we have the opportunity to lead our students toward recognizing and appreciating the multitude of “gifts” they encounter daily, spanning from the wonders of nature to the joys of delicious food and the warmth of cherished friendships.

Every year, around our Thanksgiving holiday here in North America, for as far as I can remember, I would have my children make gratitude cards for all our guests. We would place them around the dinner table for each guest to read when they sat down. Each card would be something simple, the guest’s name and a sweet sentiment of appreciation for who they are.

I would also surprise my own kids with tiny gratitude gifts as well, telling them how thankful I was to have them in my life. I still do this every year, even though they are all grown up! 🙂


I think it is so important to write and document these thoughts and feelings. I know this activity has always grounded my children and given them a heart of giving, rather than receiving. I still journal myself about what I’m grateful for, and give thanks all year long for the big and little things in my life—like the free lemons that grow in my garden.

Making Gratitude Cards to Celebrate Thanksgiving, Montessori Activities

Teaching Gratitude to Your Students

Preschool students should be taught to say thank you when they receive a gift or a kindness from another person. Remember to teach them that the size of the generosity doesn’t matter. They can be grateful for a big gift, but also for a sunny day or hug from a friend.

Students in lower elementary can think a little more in depth and should be encouraged to reflect on their day. They can even create and keep a gratitude list of good things that happened.

Upper elementary students can also focus on keeping gratitude lists or journals. But introduce the concept of good coming from bad, and teach them they can be grateful in negative situations too.

Making Gratitude Cards to Celebrate Thanksgiving, Montessori Activities

Gratitude Card Making Project Idea:

Here’s a great way to combine a writing and drawing lesson that helps students express their gratitude.

Gather your students, talk about what gratitude means. Give examples of things you are grateful for, or suggest things they might feel grateful for. Then pass out index cards and have each child write, “I am grateful for…” Be sure to write prompts out to copy as an example.

Once they’re done, have them draw a picture about what the thing(s) they were thankful for. Students can make a booklet or paste their card to their picture. Be sure to check out the video below for supplies and simple instructions.

Supplies:

  • Paper or card stock—any size, color, weight
  • Stickers—any theme
  • Stamps and ink pads—any colors
  • Pencils
  • Crayons
  • Color pencils
  • Glue
  • Tape
  • Scissors
  • Washi decorative tape

Gratitude Cards from Spramani Elaun on Vimeo.

For more project ideas, make sure you sign up for my newsletter or check out my sample art calendar.

Sign-up to receive video course & Montessori art teaching e-newsletter.

The Phases of Art Development is a quick digital course that explains how art making can help students develop their creativity, fine-motor skills, and focus. More importantly, I share what types of projects students at every age are capable of completing safely, and without making a mess.

Best of all—it’s free! To sign up for the course, click here.

All rights reserved © 2024, Nature of Art®

No part of this blog may be used or be reproduced in any manner whatsoever including reproducing, publishing, performing, and making any adaptions of the work – including translation into another foreign language without written permission except in the case of brief quotations embodied in critical articles and reviews. Nature of Art® Publishing P.O. Box 443 Solana Beach, California 92075.

5 Ways to Integrate Art Activities into Montessori Great Lessons

5 Ways to Integrate Art Activities into Montessori Great Lessons

By Spramani Elaun

One of the most common questions Montessori teachers come to me with is, “How do I integrate art with my lessons?” When you combine the concepts of art and the Great Lessons, you can seamlessly support your students learning without any disconnection.

And by incorporating art with what students are already learning you’re helping to instill the concepts of those subjects by putting them into a new perspective. You’re also giving their art context in showing its relationship to other parts of their world, which can ultimately lead to an increase in their art literacy.

5 Ways to Integrate Art Activities into Montessori Great Lessons

The Great Lessons in themselves are bold, exciting; they’re a way to awaken a child’s curiosity, imagination, and even creativity. There are really simple projects you can set up that help bring art into your everyday lessons, or specifically, your Great Lessons.

Students are used to learning new ideas through text and images, imagine how much more they’ll be able to understand and retain information when you tie in a multi-sensorial process like creating art. It’ll help your students learn on a deeper level. Having children create with a multitude of senses helps develop metacognitive reinforcement! I dive deeper into this in my books and new online training course, but here’s the gist:

5 Ways to Integrate Art Activities into Montessori Great Lessons

When art lessons are integrated into the Great Lessons, you create new pathways to reach different learners in different ways, which maximizes your students’ learning on these topics. They learn to express diverse ideas through methods that can’t be done in most other academic subjects. Something I’ve discovered over the years of working directly with students is that they each have a unique way of demonstrating their true understanding. Art gives them a platform where there’s no wrong or right way to express themselves and their understanding. This is particularly why science today is backing STEAM education models!

You probably already have your calendar planned out for the year, so here are just a few simple ways to add in art and relate it to the Great Lessons.

5 Ways to Integrate Art Activities into Montessori Great Lessons

First Great Lesson: Coming of the Universe and the Earth

With the first Great Lesson, you’re teaching students about astronomy, meteorology, chemistry, physics, geology, and geography. One of my favorite projects to teach is watercolor painting of galaxies. Students can create stunning images of galaxies and stars they see in their lessons, or let their imaginations loose and paint their own interpretations.

5 Ways to Integrate Art and the Great Lessons

Second Great Lesson: Coming of Life

The second Great Lesson covers topics like biology, botany, habitats, ancient life, and animals. I love incorporating nature with my projects whenever possible, so for me, botanical art is always exciting to teach! Make sure you check out my past blog post where I share ways to use fall leaves in projects for some ideas to use in your classroom.

5 Ways to Integrate Art and the Great Lessons

Third Great Lesson: Coming of Human Beings

History, culture, social studies, and invention are all parts of the third Great Lesson. Earlier this year, I partnered with a fellow Montessori teacher (for grades 4-6), and we integrated art into a lesson on ancient civilizations. Children learned basic ideas about settlements and how government is formed. I brought in several art lessons moving children through the artistic process of brainstorming, sketching, and building a 3D model of a settlement—either ancient, modern, or imaginary. If you want to learn more about how to do this, make sure you register for my Art Teaching Blueprint online course, I provide a step-by-step process for this lesson and a ton of others.

Fourth Great Lesson: Communication and Writing

The fourth Great Lesson covers different forms of communication including reading, writing, language, and structure. As students learn about pictographs and hieroglyphics, they can draw them out or create their own and then explain in writing what they mean.

5 Ways to Integrate Art and the Great Lessons

Fifth Great Lesson: Numbers

In the final Great Lesson, students learn about numbers, mathematics, geometry, and the applications of these topics. Using clay to mold and create shapes can illustrate geometrical concepts to students, such as similarities and angles.

This is just the tip of the iceberg! I get so excited about integrating visual art and the Great Lessons and have so many more easy and practical ways to do so in your classroom. There are two ways to get more info and ideas on this: 1) sign up for my newsletter to keep up with my blog, and 2) get dozens of ideas, all in one place, by registering for my course, Art Teaching Blueprint. I can’t wait to inspire more of your Montessori lessons!

Sign-up to receive video course & Montessori art teaching e-newsletter.

The Phases of Art Development is a quick digital course that explains how art making can help students develop their creativity, fine-motor skills, and focus. More importantly, I share what types of projects students at every age are capable of completing safely, and without making a mess.

Best of all—it’s free! To sign up for the course, click here.

All rights reserved © 2024, Nature of Art®

No part of this blog may be used or be reproduced in any manner whatsoever including reproducing, publishing, performing, and making any adaptions of the work – including translation into another foreign language without written permission except in the case of brief quotations embodied in critical articles and reviews. Nature of Art® Publishing P.O. Box 443 Solana Beach, California 92075.