Montessori Art and Craft | Benefits of Clay Play

Montessori | Benefits of Clay Play, early childhood 3-6 years. Montessori Art and craft | Benefits of Clay Play

By Spramani Elaun

Playing with clay provides a highly tactile and sensory experience. As children squeeze, press, and manipulate the clay, they are actively engaging their senses. Sending valuable sensory information to their brain.

Montessori Clay Play has been found to have positive effects on emotional well-being. Playing with clay can help children regulate stress levels.

However, the benefits of Montessori clay play extend far beyond the realm of sensory development. In fact, there are numerous cognitive advantages associated with this activity.  Montessori education highlights the importance of hands-on learning. Clay play aligns perfectly with the Montessori philosophy.

In my early childhood art guide, I discuss this topic and provide more insights into Clay Play for emotional health.

Unsure of where to begin with clay play? Perhaps you’ve struggled with determining the desired outcome of art activity?

Allow me to shed some light on the importance of early childhood clay play sessions.

In fact, I refer to this approach as “Clay Play.” Engaging in clay play offers numerous benefits for a child’s overall development.

When it comes to clay play, this process-based exploratory approach should always come first! Clay play should happen before getting into foundational clay modeling skills.

Montessori arts and crafts| Benefits of Clay Play, student playing clay tools

I recommend incorporating clay play for young children in early childhood education. Montessori schools and daycare centers can introduce clay modeling stations into their classrooms to provide children with the opportunity to explore. Plus support creative and cognitive skills. To learn more about setting up clay modeling environments, please refer to this comprehensive guide Monessori Early Childhood Art Guide.

Montessori Clay Play

Clay comes in various forms, ranging from very messy to less messy options. Additionally, clays can be homemade. Earth clay, in particular, is a wonderful material to introduce to children, similar to making mud pies.

If you’re interested in setting up earth pottery clay play stations, I recommend checking out this book. It contains numerous photos and examples illustrating how to arrange clay play. How to choose suitable clay play materials for children aged 3-6 years old.

Montessori Art and Craft | Benefits of Clay Play book
Montessori Art and Craft | Benefits of Clay Play
Montessori Art and Craft | Benefits of Clay Play, little girl making clay sculptures, clay play session at school
Montessori Art and Craft | Benefits of Clay Play

The important thing to understand about clay play is that it should be a process-based activity, providing children with ample time to freely play and explore clay. There are various ways to engage children in exploring clay. Including the use of simple tools such as natural elements, beads, seeds, rolling pins, and cookie cutters. Emphasizing the play aspect of clay play is crucial. Allowing children to take the lead in their learning and discoveries. By letting the child guide the fun, experiments, and creations, you can enhance their clay experience.

When are children ready for guided clay modeling lessons? Once children have had ample opportunities for clay play and have reached the age of 4 or 5. You can begin introducing clay modeling skill sets. This includes teaching them forms, attaching pieces, cutting, and carving. If you would like to learn more about my clay curriculum you can view the Clay Modeling Curriculum HERE. Order Clay Play Tools HERE

Montessori clay modeling curriculum for school art lessons, Montessori Art and Craft | Benefits of Clay Play
Clay Play Classes in San Diego with Spramani Elaun – Nature of Art® School

All rights reserved © 2024, Nature of Art®

No part of this blog may be used or be reproduced in any manner whatsoever including reproducing, publishing, performing, and making any adaptions of the work – including translation into another foreign language without written permission except in the case of brief quotations embodied in critical articles and reviews. Nature of Art® Publishing P.O. Box 443 Solana Beach, California 92075.
Professional Development in Montessori Visual Arts Education | 6 Video Trainings

Professional Development in Montessori Visual Arts Education | 6 Video Trainings, yellow logo
Earn 7 hours of professional development in visual arts education.

Get proper art literacy training to set up your classroom for fall.

Catch up with videos this summer.

No more guessing on what you should be teaching!

There’s a lot of art advice out there that is not designed to teach YOU proper art literacy for children.

I’ve spent years designing curriculum and training courses to help Montessori guides effectively teach art lessons to children.

I have designed this summer art video bonus 
to help you get on the right track!

When you purchase this 6-video set, you will also be invited to a special Q&A session with me to help you get all your questions answered and to demonstrate the right art materials to bring into your classroom.

This live session will be held in the middle of August (date TBA), giving you enough time to consume the videos.

BUY 6 VIDEO BUNDLE NOW for instant access!
These summer 6-video trainings are on sale for only 72 hours!
image

What Visual Arts Looks Like For Children & Why It’s Important

In this pre-recorded 20-minute training, Spramani explains the areas young children should learn in visual arts and why it is important to teach in the 21st century.


image
The Art You Should Teach First!
In this pre-recorded 1-hour training, Spramani explains what Montessori art guides should focus on teaching first. She describes the areas to focus on and gives examples of art lessons. She also explains what you should present and demonstrate to children who are just beginning to learn art. She shares a wealth of professional art teaching advice.
image
How to Theme Art & The Natural World
In this 3-part video series, 2 hr.
Spramani shares: -How to take your child outside and encourage them to observe like a scientist & artist.How to use art and Montessori subjects to inspire exploration of the natural world and expand their knowledge. Learn how art lessons can represent various aspects of Montessori topics in nature, such as seasons, soil layers, energy, rocks and minerals, fossils, landforms, water, flora, fauna, and the atmosphere.
image
How to Stage A Montessori Art Shelf
In this 1-hour pre-recorded video, Spramani shares her: – Proprietary staging system for Montessori classrooms – How to stage to meet the arts standards – What types of materials to stage – How to support group and independent work, and much more!
image
Positive Artful Ways To Talk To Your Students
Spramani shares her 30 years of experience in talking to students in a positive, supportive way, encouraging creative expression as an art facilitator. Spell and grammar check: She shares examples of how these conversations sound.
image
Watercolor Joy
In this 1-hour video, Spramani shows you which watercolor paints to use for teaching children. She provides you with all the tips on what to buy, how to set up, and how to prepare for watercolor process-based activities. Great if you are curious.
Art Sale – 72 Hours Only!
Buy Now
Get instant access to watch the videos you’ve been waiting for! With a generous 3-year viewing window, you’ll have plenty of time to dive into the pre-recorded live sessions hosted by renowned art teacher Spramani Elaun. Whether you prefer watching on your phone, tablet, or desktop, you can enjoy these videos anytime, anywhere. Don’t miss out on this opportunity to enhance your artistic skills and knowledge. Start your creative journey today!

BUY NOW | CLICK HERE

Teaching Art Activities by Using Children’s Storybooks

Children's storybooks
children’s storybooks

Video Narrated by Art Teacher Spramani Elaun

As an art teacher, I love using children’s storybooks to teach art lessons to engage my students; however, there are many other great reasons you should integrate books into art-making lessons. Using children’s storybooks can not only inspire creative ideas, but it can also bring characters and plots to life by following up with art activities.

Storybooks can bridge connections to the elements and principles of design within illustrations, pictures, or descriptive words. Storybooks can help you communicate, especially in art language. In addition, book illustrations give visual clues to what color or shape looks like in the context of artworks. Storybooks don’t just have to be related to art topics or artists; you can use basic, classic children’s literature, such as The Giving Tree, The Ugly Duckling, Green Eggs and Ham, and The Very Hungry Caterpillar. Though, remember that almost all children’s storybooks are illustrated by an artist.

Combining Children’s Storybooks and Art

Combining children’s storybooks and art supports:

  • Developing early literacy
  • Bringing characters and plots to life
  • Engaging in open-ended questions
  • Fostering multi-sensory learning
  • Enriching reading and writing techniques

Developing Early Literacy

Children can learn art language by reading stories and following up with art activities. This can be a great way for you to enrich your teaching techniques by getting children to read more. Educational research confirms that when children read regularly, they expand their vocabularies, which leads to more reading and doing better academically in the upper grades. 

I regularly use this method when introducing new techniques to my students. I love theming art activities with stories! 

Bringing Characters and Plots to Life

Books bring characters and plots to life, but following up by creating your own character from a book is an immersive experience! You can appeal to young readers’ imagination by transforming a flat 2D character into physical pieces of art. Also, you can read a wonderful story like The Velveteen Rabbit and have them create their own rabbit character they can play with. And in addition, you can ask children to create art with an unexpected twist to the story or their own version of how the story ends. Allow them to paint a different image and draw their own scenes. Children love imagining themselves within stories.

Engaging in Open-Ended Questions

I usually read-aloud stories and point out art elements like colors and shapes. It’s a natural way I teach art language. I can prompt students with questions like “What colors do you see in this picture?” “Can you see lines used in the artwork?” “Can you describe what you see on this page?” “Look how interesting these shapes are.” “What shapes do you see?” “What are your favorite colors used in this art?” “Do you see the small dots?” “Would you like to go to the art shelf and experiment making some of these wavy lines with crayons?”

Fostering Multi-Sensory Learning

Reading to children is positive, but making the experience tactile is even better for cognitive processing. You can give children a different dimension to learning than just audio or visual senses by adding tactile sensory learning to deepen their understanding. Making art is a tactile, multi-sensory experience. For example, let’s say you read to a child a story about a duck; you can give the child an opportunity to create a three-dimensional duck out of clay by sparking lots of questions about the duck’s features, such as its size, color, and shape, further deepening their understanding about the characters or topics in the story. Another example could be looking at rainbows in illustrations. The conversations can go deeper by painting and mixing colors leading to scientific inquiries. Connecting storybooks and art activities is a multi-sensory experience for better comprehension.

Enriches Reading and Writing Techniques

Integrating art with reading and writing work can be exciting for students. Over the past ten years, I have visited many elementary grades as a special guest art teacher. As a result, I’ve had amazing opportunities to team up with other teachers to teach the Great Lessons.

Most of the lessons usually started with me coming into the classroom to teach an art technique, followed by the classroom’s teacher reading about the topic, and finally ending with the students following up with writing exercises related to the artwork they created in my session.

These teachers all reported back to me how their students were super engaged with reading and writing follow-up work because of their art lesson connection to the stories. They also reported to me that writing improved with some of their struggling students. In addition, they felt that the children were more invested in the outcome of how their artwork was reflected and open to writing critiques. 

My favorite Children’s Art Storybooks

Below are three videos where I read stories that can inspire and engage young children in both literacy and their interest in creating art through the Montessori art methods.

The Dot by Peter H. Reynolds, illustrator of the Judy Moody, Narrated by Art Teacher Spramani Elaun

Henri’s Scissors, by Jeanette Winter, Narrated by Art Teacher Spramani Elaun

Lines that Wiggle by Candace Whitman (Author), Steve Wilson (Illustrator), Narrated by Art Teacher Spramani Elaun

5 Montessori Rocks and Minerals Art Lessons

This blog post is a part of a three-month series: Montessori Art in the Natural World: Kids Nature Journal Color Lessons. This series is about growing kids’ knowledge about the natural world by taking them outside their home or classroom and challenging them to create focused art, based on the nature around them. Every aspect of nature—seasons, layers of the earth’s soil, energy, rocks and minerals, fossils, landforms, water, flora, fauna, the atmosphere—can all be represented and expressed through art lessons. These Montessori rocks and minerals art lessons encourage your students to use natural rocks in their art projects and learn more about nature, rocks, and our world’s lands!

5 Montessori Rocks and Minerals Art Lessons

The natural rock cycle can be an interesting topic for Montessori students to learn; when you bring ideas from the Coming of the Universe and the Earth Great Lessons and combine them with rock art lessons—your students will really become engaged! You might even see them paying more attention to and investigating rock formations in the natural world.

It doesn’t matter what grade level you are teaching, rock art lessons can be fun for all Montessori students. I often work with rocks in my art studio and art programing classes, and have done many of these activities with children of all ages—sometimes even adults! You can use these art lessons to help introduce subjects like igneous rocks, sedimentary rocks, metamorphic rocks, or fossils; you can even use these rock art activities to help build fine-motor skills for early childhood students through rock arranging.

Here are five different ways to integrate art making with rock lessons in all areas of visual arts.

Montessori Rocks and Minerals Art Lessons:

  1. Rock painting
  2. Natural art arrangements
  3. Designing biomes
  4. Sketching rocks
  5. Making pigments from rocks 

Sticks n' Stones, Painting Art Projects For Kids

Painting on Rocks

Rock painting with acrylic paint is one of my all-time favorite art projects and kids love it too! This lesson can teach so many skills, such as brushstrokes, color mixing, creating textures, and making lines. Rocks are a wonderful surface to use as a canvas, plus, they’re 100% sustainable and can be found in any environment.

5 Montessori Rocks and Minerals Art Lessons

Natural Art Rock Arrangements

Arranging rocks into concentric designs is a fun way to teach kids about balance and develop their concentration skills. It also gets kids outdoors and sparks discussions about different types of rocks and how to select specimens for arrangements. With these types of Montessori rocks and minerals art lessons, I try to focus on collecting, sorting, and organizing the natural objects. While kids are organizing and arranging, they’ll also learn about key art elements like symmetry and balance. 

Designing Biomes with Rocks

Letting children design their own biomes with rocks they’ve collected is a great way to teach them about diverse natural biomes. You can even teach students about the Coming of Human Beings, and how humans have migrated to and from different biomes throughout history. There are many biomes children can design using rocks: rivers, mountains, caves, savannahs, and forests, etc.

5 Montessori Rocks and Minerals Art Lessons, spramani elaun art teacher

Sketching Rocks Shadows

Drawing is an important skill all students—especially at elementary ages—should have. I often use rocks to teach 3-D perspectives, identifying color value, and how to create shadows in drawings and paintings. Rocks can usually be found in every type of outdoor landscape and can be captured in outdoor nature journal sketching. Start this activity by collecting rocks locally; then you can have students make sketch marks in the shapes of the rocks they’re observing. The next step would be to have your students observe how light placement (like the sun in the sky) casts shadows, and have them include the shadows in their sketches.

5 Montessori Rocks and Minerals Art Lessons, art teacher spramani

Making Pigments from Rocks  and Minerals

Explaining to students how natural pigments can be made from minerals and rocks is a wonderful way to teach them to observe color in nature and connect how art and colors are made. Natural dyes and pigments can come from a wide variety of nature objects, including rocks! One of simplest ways to teach kids about rock composition is to have them make paint  from grounded rock minerals; for details and instructions on how to do this, check out this blog:

How to Make Paint, Inks & Dyes from Nature

Where to Start: Setting Up a Rock Painting Table

Again, painting rocks is one of my favorite activities to do with Montessori kids! The activity itself allows kids to be independent and creative, and the finished project is just so fun and colorful! It’s very simple to do, the majority of “work” just involves setting up a space for students to work.

You will need:

5 Montessori Rocks and Minerals Art Lessons

How to do it:

  1. Wash rocks in water and wipe clean (this ensures the paint sticks); completely dry rocks before painting
  2. Prepare and fill a palette with a variety of paint colors
  3. Set out paint brushes (a variety of brush sizes allows kids to create whatever brush stroke they desire)
  4. Paint one layer of color at a time; set aside to dry before painting the next color
  5. Once students finish their desired image, set rocks out to dry; rocks dry best when left in direct sunlight

One Step Further: Montessori Nature Activity Outdoor Journal Checklist

Here’s a bonus nature art activity for you! While your students are out collecting rocks outside, have them take out their nature journals and record their observations. (For information and instructions on how to create a nature art journal, click here.) 

Nature journaling is a relatively independent activity, but you should still guide your students to make sure they’re following scientific principles and standards. This Nature Journal Checklist will help you make sure your students are including data that helps them implement both scientific and artistic principles during their expedition.

To download the checklist for FREE, click here.

Print it out or save it on your phone so you have it with you the next time you lead your students outside to journal or collect nature objects for crafting.

A Short Cut Just for You: Buy Painting Step-by-Step Curriculum

spramani elaun paint curriculum for kids

One of the reasons I really like painting on rocks is because it opens up a whole world of painting for kids. A rock is such an interesting and unique canvas; once they start painting there, they’ll want to learn even more techniques. Before kids explore all the different ways to paint, it’s important that they learn proper paint brush and brushstroke techniques to help them develop their painting skills.

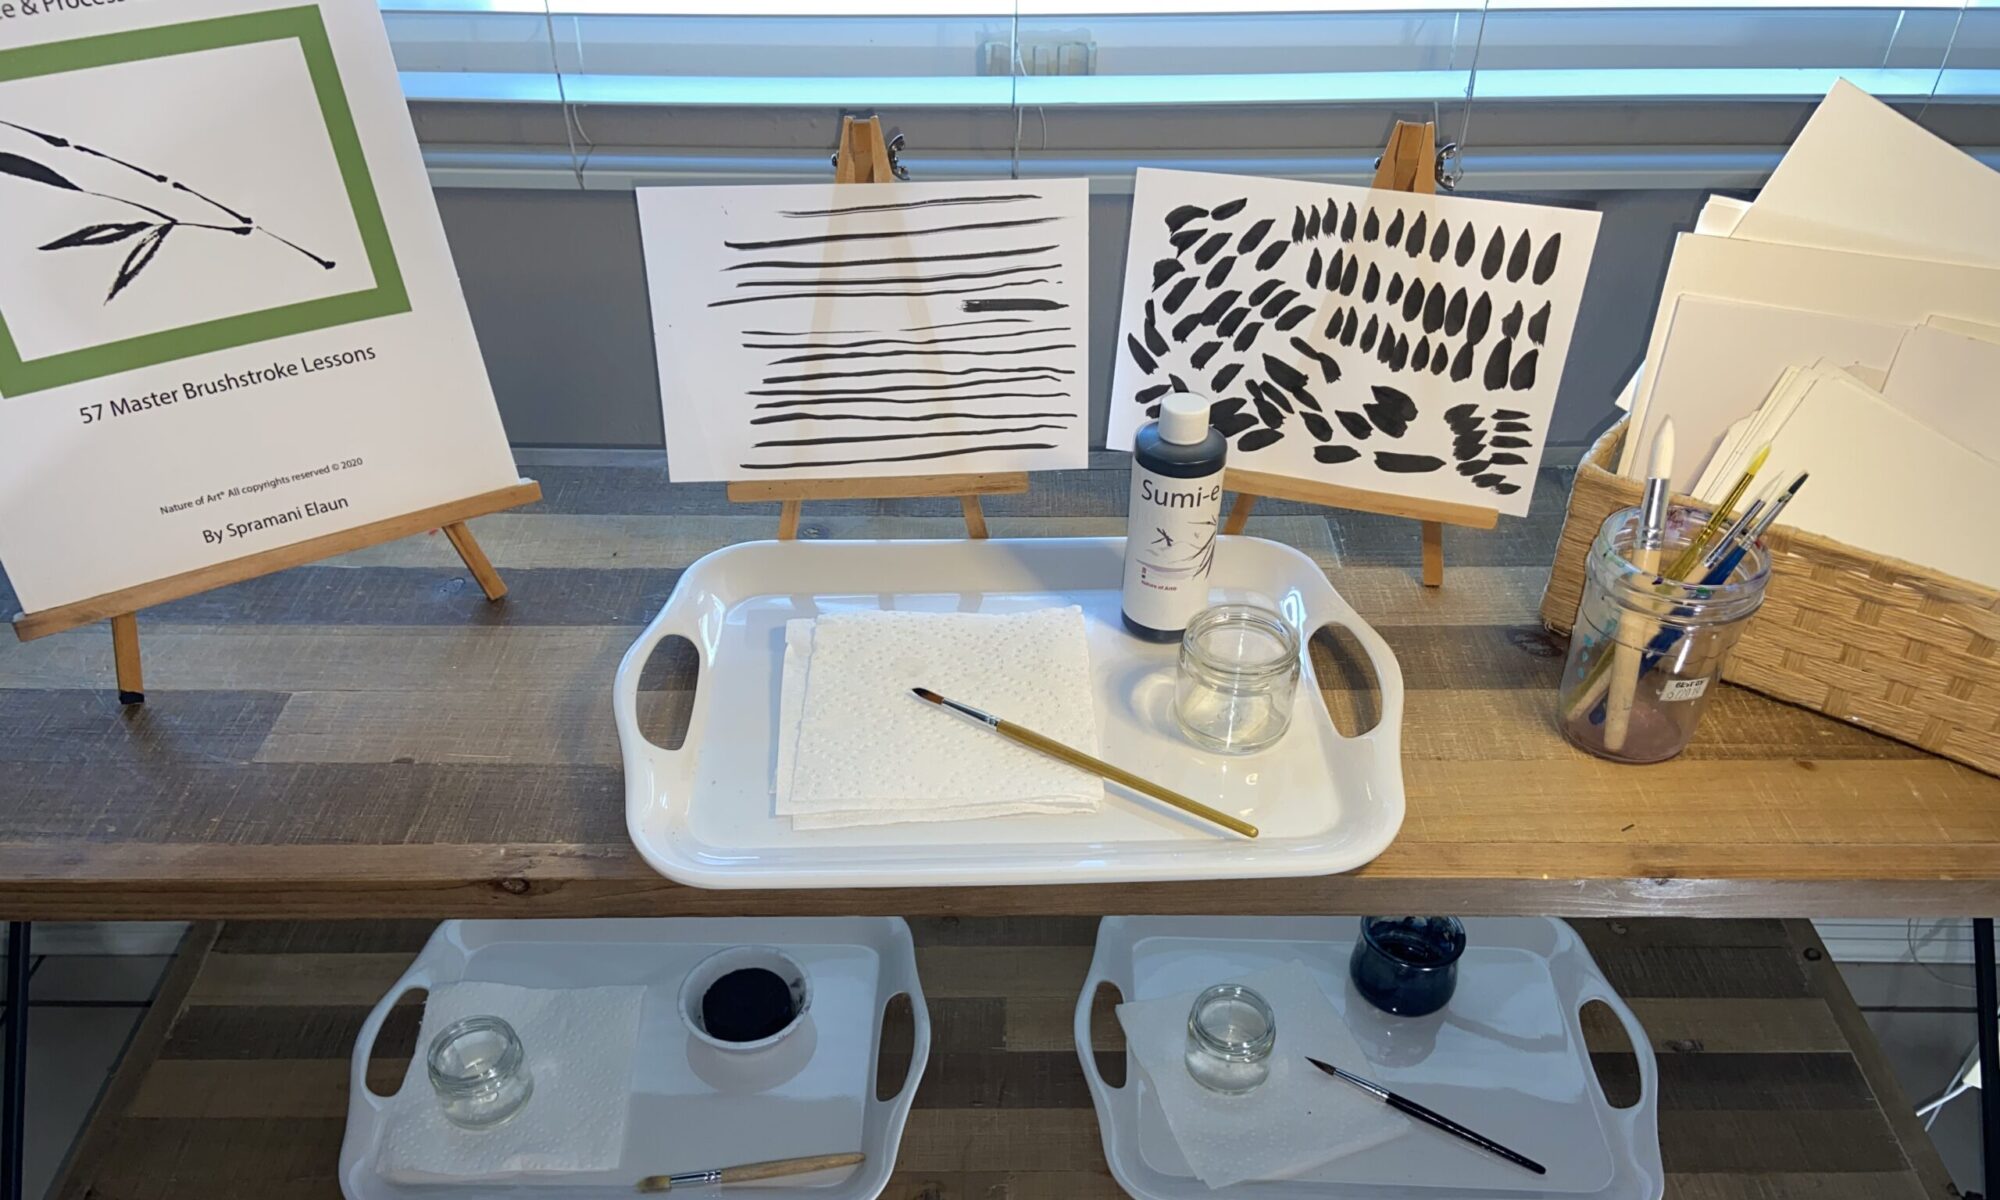
My Kids Painting Practice & Process Curriculum has 57 master lessons that take kids from setting up a paint station and holding a brush all the way to creating beautiful nature landscapes and painting different types of animals! Each lesson is featured as part of a sequence and includes all the information—materials, demonstration technique, and direct and indirect aims—you need to properly present the activity to your students.

To purchase the curriculum, click here.

All rights reserved © 2024, Nature of Art®

No part of this blog may be used or be reproduced in any manner whatsoever including reproducing, publishing, performing, and making any adaptions of the work – including translation into another foreign language without written permission except in the case of brief quotations embodied in critical articles and reviews. Nature of Art® Publishing P.O. Box 443 Solana Beach, California 92075.

Montessori Art: Mandala Activity for Stress Relief

Montessori Art: Mandala Activity for Stress Relief

Mandalas are a geometric design pattern that offer several mental and emotional benefits. Mandala, which means “circle” in Sanskrit, is a sacred symbol that is used for meditation, prayer, healing, relaxation, and art therapy for both adults and children—especially when used in a Montessori art mandala activity.

In Hindu and Buddhist cultures, the circular design of mandalas represents the idea that everything in life is connected and the infiniteness of the universe.  Mandalas can also symbolize a personal spiritual journey for each individual viewer.

While there are several types of mandalas, the three most common are: the teaching, healing, and sand mandalas.

  • Each shape, line, and color in a teaching mandala represents different aspects of Buddhism. Monks learn to create these mandalas during their monastic education.
  • A healing mandala is an intuitive design made for the purposes of meditation, focus, and concentration.
  • Sand mandalas are unique in that both their creation and destruction have symbolic meanings. Multi-colored sand is placed in concentric circles, working from the outer part of the design to the center.
Montessori Art: Mandala Activity

Many clinical studies have shown that mandalas can be used to boost the immune system, reduce stress, ease depression, alleviate pain, lower blood pressure and promote healthy sleep.

Designing and coloring mandalas can help your students (or you) focus their attention. That’s why they’re a great exercise for helping kids calm down when they’re stressed. Here are some other benefits of mandalas:

  • They create a feeling of balance
  • They bring peace and tranquility
  • They strengthen fine-motor skills through repetitive movement
  • Looking at them produces a sense of calmness
  • They help with focus and concentration
  • They encourage mindfulness
  • They calm the nervous system
  • Working on them opens pathways to allow creativity to flow
  • The different color schemes in mandalas can be therapeutic
Montessori Art: Mandala Activity for Stress Relief

Mandalas have been recognized by psychology as a therapy tool. The Swiss psychologist Carl Jung believed that mandalas are representations of our minds and that we project our thoughts and feelings onto how we perceive and interpret mandals. And different branches of psychology recognize different benefits of mandalas; for example, transpersonal psychology uses mandalas as an exercise for connections and behavioral psychology uses them to improve memory, attention, and coordination.

The intricate design of mandalas can be intimidating, but children don’t need to be artists to reap the many benefits of mandalas.

Montessori Art: Mandala Activity using nature

Where to Start: Montessori Art Mandala Coloring Activity

Your students can use natural or found objects to make their own mandalas—which doesn’t require any drawing at all. Or, you can download a blank mandala (or purchase a mandala coloring book—there are plenty for sale online) and have your students color them. You can also use Montessori insets to create simple mandala designs to color. 

Making the conscious effort to embrace mandalas and to introduce Montessori art mandala activities in your classroom are the first steps to helping your students feel calmer, more mindful, and less stressed.

One Step Further: Watch My ‘Combating Stress with Art’ Webinar for FREE

Again, even just the action of coloring a mandala can offer your students tremendous mental and emotional health benefits. A few weeks ago, I co-hosted a webinar titled Combating Stress with Artwith Montessori teacher Kristen Richter, about using mandalas to combat stress, and encouraged the attendees—Montessori parents and teachers—to color mandalas as we went through the information.

The webinar teaches about the emotional literacy cycle and types of stress kids face, as well as a deeper dive into how simple art techniques like doodling or coloring mandalas can help alleviate stress.

Montessori Art: Mandala Activity for Stress Relief

You can download and watch the Combating Stress with Art replay, by clicking here!

A Short Cut Just for You

A Montessori art mandala activity isn’t the only way to help students work through difficult emotions like stress. If you’re looking for more art lessons to teach your students, check out my Kids Art at Home Lesson Bundle! I created it as an introduction to Montessori art; it includes lessons from each of the five visual arts domains, so you can give your students a well-rounded art foundation.

how to teach kids art lessons digital download

The bundle also includes materials lists and resources so you can feel confident knowing your students will get the most out of each lesson. On top of that, I’ve just added a very special Nature Art Mandala lesson for a limited time. It applies many of the mandala benefits described in this blog, while giving students the opportunity to be in and explore their natural surroundings—which also promotes stress-relief! 
To purchase the Kids Art at Home Lesson Bundle, click here.

Montessori Fine Motor Art Activities

Montessori Fine Motor Art Activities

I’ve spent years observing how young students learn art, and in my experience I’ve seen how sensory art projects and art-making actions can help students achieve better control of their fine motor skills. In fact, I encourage you to look for Montessori fine motor art activities to do with your students in your classroom.

It’s important to understand how fine motor development plays a role in a child’s daily life, both inside and outside of school. They give kids the strength to press, push, pull, and squeeze so they can learn and be able to dress themselves, tie their own shoes, eat without assistance, and play outdoors safely. In the classroom, this translates to holding a pencil to write, using scissors safely, handling papers, opening lunch and supply boxes, and using art supplies (like glue) without a mess.

Montessori Fine Motor Art Activities for children

Increasingly, over the years, early childhood students are coming to my classes and workshops with very little, or even no, finger or hand-strength capabilities. Many Montessori teachers have shared with me that students entering their classrooms also seem to lack the capabilities of completing simple tasks that rely on fine motor skills.

Because these basic skills are lacking, it’s slowing down student progression in the classrooms and some teachers worry that students aren’t able to participate in independent art activities. Not only does that limit a student’s ability to learn and develop their art literacy, it increases the chance of mess or injury in the classroom—and both are major problems. 

Montessori Fine Motor Art Activities lessons

These issues can be remedied, on a large scale, if you give children the opportunities to make art. In fact, not providing kids with enough chances to do repetitive movements, especially in the lower grades, can delay their confidence to work independently and successfully progress within the school year. Make sure you’re designating plenty of time for your students to work on implicit memory functions—which means performing certain tasks without conscious awareness, while building strength.

Where to Start: Sensory Activities to Build Fine Motor Skills

Typically, when I teach my own classes or go into Montessori classrooms, I start my students out with clay modeling, paint brush stroking, sensory painting, and safety scissor activities. I’ve found that these types of activities, plus many others, can help students develop their skills quickly over a short period of time.

Montessori Fine Motor Art Activities, method and advice

You want to start your students out with very basic one- to two-step isolated movements. For instance, I’ll often introduce clay to a classroom and then we’ll work on kneading the clay and forming it into a sphere. After that, I’ll give them time to just sculpt simple creatures, botanicals, or anything else they desire—but only working with simple movements. Same thing with painting—I’ll teach kids one isolated movement like dipping a paintbrush into a palette then making a smooth brush stroke. I’ll give kids time for these movements over and over so that they build implicit memory and concentrate on that one moment.

One Step Further: Download My 10 Creative Art Movements Guide

Fortunately, there are some great Montessori fine motor art activities and movements that can adapted for early childhood, lower elementary, and upper elementary students. These types of art making activities will help students develop fine motor control and small muscles in their fingers and hands.

how to Montessori Fine Motor Art Activities

The guide includes 10 different types of movements that will help strengthen students’ hand-eye coordination and help refine their manual dexterity. Each movement can even be used to set up a simple, stress-free lesson; or you can make sure these movements are involved with any other art lesson you have planned.

To download your FREE guide, click here.


A Short Cut Just for You – Early Childhood Art Guide

Montessori early childhood

Early Childhood Art Guide

Visual Arts Teaching Guide
for 13 Months – 6 Years Old

This book includes:
✅ My proprietary art teaching method
✅ The proper and complete list of art materials
✅ A guide for staging and setting up a successful art environment
✅ Tips and art lesson ideas for early childhood
✅ A convenient three-ring binder presentation

Buy Guide Now!

All rights reserved © 2024, Nature of Art®

No part of this blog may be used or be reproduced in any manner whatsoever including reproducing, publishing, performing, and making any adaptions of the work – including translation into another foreign language without written permission except in the case of brief quotations embodied in critical articles and reviews. Nature of Art® Publishing P.O. Box 443 Solana Beach, California 92075.

Are You Ready to Teach Montessori Art?

How do I Teach Montessori Art?

Are You Ready to Teach Montessori Art?

When was the last time you thought about how to present Montessori art lessons in your classroom?

Maybe you’ve tried leading an art project once, and chaos ensued, leaving a huge mess behind. Or maybe you started pulling ideas together only to get overwhelmed at how much you thought you actually had to do. Or maybe you’ve completely shied away from teaching your students art altogether because you have no idea where to start.

First of all, I want to commend you for even thinking about adding art to your Montessori lessons! It’s a big deal, and you’ve already taken the first step!

I’ve been teaching and working in visual art for almost three decades, specifically focusing on helping Montessori teachers bring art programming into their classrooms over the last 10 years or so, and I’ve developed a truly unique method for teaching students.

I dive deeper into how my art teaching method was developed and how it works in this blog post, but today, I want to share the one thing you really need—even without any prior knowledge—to bring art into your classroom.

Where to Start

Sticking with the basis of the Montessori, you want any art lesson in your classroom to allow your students to work independently and explore the joys of art on their own. That’s why you always want to make sure you’re providing your students with independent projects that engage their imaginations.

Instruction should be minimal. While you want to give material presentations and demonstrations, beyond that, students should have the freedom to explore.

It helps to have an art shelf or inspiration gallery in your classroom, as well as a space that’s been designated specifically for art projects. You can look at these as tools to help students find ways to create art even without specific lessons or guidelines.

One Step Further

Of course, you want to add some level of structure or reason to the art projects your students create. Ideally, I’d recommend finding ways to connect the Montessori art projects you teach to the Great Lessons.

Using art as a tool to supplement other things you’re teaching—such as the The Story of the Universe—helps instill the concepts in their minds. Creating art can offer a different perspective and larger context on different subjects, such as history, science, and communication. And the more you introduce art into their world the stronger their art literacy grows, helping them become curious, courageous artists and learners.

One reason I encourage tying art back to Montessori Great Lessons is because they offer so much inspiration! They tend to excite students and spark their curiosities, imaginations, and creativity. Take a look at the books that are in your classroom—the art within those pages can lead to project ideas. Check out this blog post for more ideas on incorporating the Great Lessons into your art lessons.

how to teach kid montessori art lessons and crafts

A Short Cut Just for You

Montessori early childhood

Early Childhood Art Guide

Visual Arts Teaching Guide
for 13 Months – 6 Years Old

This book includes:
✅ My proprietary art teaching method
✅ The proper and complete list of art materials
✅ A guide for staging and setting up a successful art environment
✅ Tips and art lesson ideas for early childhood
✅ A convenient three-ring binder presentation

Buy Guide Now!

Watercolor Play | Montessori Art Lesson

If you’re looking for a hands-off project that’s fun for kids, I have the perfect art lesson for you! Watercolor Play introduces young children to the basics of color and lets them explore their creativity. Because this project is process-based—meaning it’s about experimenting and experiencing the process of making art—it’s a perfect Montessori art lesson, since students can work independently.

Watercolor Play is a simple, natural way for kids to learn the basis of color. Students in Plane 1 or younger can’t really be sat down and taught color theory, so this activity is a way for them to be introduced to color in a way that meets their level of understanding. It teaches them how color behaves and mixes, which are things all artists need to learn, without getting into technical details and overwhelming them.

This lesson provides the building blocks of color theory so students are ready for more advanced work as they get more experience. This foundation will help them be more willing to experiment when they’re older, because they already have an introduction to art and the knowledge of how colors work together.

Watercolor Play is Ideal for Early Childhood

While this activity is ideal for early childhood, you can adapt aspects of it to work for older children too. You’ll see that I try to keep this art lesson very simple to start off with, but you can add in primary and secondary color concepts once students have a better understanding.

Early childhood montessori art

No matter how old your students are, mixing colors can be therapeutic. It’s soothing, relaxing, and can relieve stress. Giving children the opportunity to play like this also helps them develop the wiring in their minds.

I recommend setting up this art lesson on a regular basis—maybe once a month, or even once a week—so their understanding consistently grows and deepens.

Watercolor Play from Spramani Elaun on Vimeo.

Supplies

  • Kid-safe, non-toxic liquid paint (acrylic, tempera, or watercolor) that’s been watered down to be transparent
  • Bottles with adjustable caps OR clear plastic tubs
  • Bowls
  • Paintbrushes, sponges, stampers, drippers
  • Watercolor paper or thick/butcher paper (optional)
  • Aprons or old clothes

Steps:

  1. Put all your materials out on a table
  2. Let kids explore and play

That’s it! Watercolor Play is such a simple activity. You don’t want to direct it or try to teach anything if your students are at a young age. Let them play with the colors and mix things naturally, they’ll create their own colors and see things for themselves. If they’re old enough to ask about colors, then you can go ahead and start naming the general hues, and hint at what adding other colors might do to change the original color (i.e. make it lighter).

Watercolor Paints

You can start with whatever colors you want. You can start with primary colors, or set out just one color at a time, then add new or different colors the next time. I recommend sticking with limited color options to start out with, especially for children 24 months or younger. Once they’re older and have had more exposure to colors and the activity, they’ll be able to start experimenting more, and getting more excited about their experimentation.

With this art lesson, you’re not focusing on the outcome; do not expect kids to create an actual finished work. The watercolor paper is optional because older students may want to make their own artwork, if the choose to do so, make sure there’s a place to keep the paper out to dry. Seeing how the paint and color changes once their work is done is part of the experience as well.

You may also want to consider starting with lighter colors before introducing darker ones, since dark colors can “stain” the other ones by eventually turning everything a murky gray—which is less exciting.

While this project is relatively hands off, you may need to take the lead initially by squirting and mixing the paint in your own bowl or tub. Kids are so used to us telling them to be careful, and not to make messes, so this is a new experience for them.

NOTE: This project should be set up outdoors or somewhere that water can be splashed (i.e., not rugs or carpet). This project can get messy with younger children, since most toddlers and lower elementary students don’t yet have very developed fine motor skills to control what they’re doing.

For more activities and lessons on color theory, check out my book Kids Color Theory.

montessori art early childhood

Sign-up to receive video course & Montessori art teaching e-newsletter.

The Phases of Art Development is a quick digital course that explains how art making can help students develop their creativity, fine-motor skills, and focus. More importantly, I share what types of projects students at every age are capable of completing safely, and without making a mess.

Best of all—it’s free! To sign up for the course, click here.

All rights reserved © 2024, Nature of Art®

No part of this blog may be used or be reproduced in any manner whatsoever including reproducing, publishing, performing, and making any adaptions of the work – including translation into another foreign language without written permission except in the case of brief quotations embodied in critical articles and reviews. Nature of Art® Publishing P.O. Box 443 Solana Beach, California 92075.


Cosmic Rock Painting | Montessori Art Lesson

In my years of working with students, I’ve developed a few go-to art projects that are easy to put together and that kids LOVE. Cosmic Rock Painting is one of my favorite art projects for students. I think this project works especially well as a Montessori art project because it can be incorporated with the Great Lessons and cosmos. I find it a perfect fit for Lower L Montessori students, but with a few tweaks, it can be adapted for students at any age.

Cosmic Rock Painting | Montessori Art Lesson
Use any type of rocks!

I actually got my inspiration for this project from the book Born with a Bang: The Universe Tells Our Cosmic Story by Jennifer Morgan. It’s a very common book in the Montessori world—you may even already have it in your classroom! While you don’t need to read this story with your students, it makes a great foundation for jumping into this art activity.

Cosmic Rock Painting | Montessori Art Lesson
Born With a Bang –Book

Before you start this Cosmic Rock Painting project, make sure you go over the big bang, even if it’s only briefly. Show students photos of stars, constellations, and galaxies to serve as inspiration and give them ideas of what they can create.

Supplies:

  • Paintbrush
  • Paint (acrylic paint works best, tempera paint can also be used but may wash off)
  • Palette (egg cartons, paper plates, and small bowls also work)
  • Wash jar
  • Napkin
  • Rocks or stones (any will work, but river rocks are preferred)

Steps:

  1. Paint the surface of the rock black, let dry
  2. Using a variety of colors, paint on cosmic images (allow students to reference books and photos for inspiration)

Watch Cosmic Rock Painting Video

[In the video, I mention a tinting tutorial and brush stroke tutorial; to access these videos for free, register for my FREE online mini-course, Phases of Art Development. Each of these topics can be done as completely separate art lessons to help kids understand color tones and brush strokes.]

Montessori cosmic rock painting art lesson

Notes: Depending on how you want to introduce this lesson, you can have students complete the whole project in one day or break it up over the course of several days. You can teach this lesson in chronological order, starting with the big bang, then how galaxies develop, and then go into mini lessons on the milky way, super novas, the sun, Earth, and other planets. Students can paint individual rocks to represent each of these cosmic ideas.

acrylic rock painting art kids

This is just the tip of the iceberg when it comes to easy art activities for Montessori students! After working in the art industry for more than three decades, I’ve amassed a TON of art project ideas for kids. I’ve also developed and created my very own art teaching method that introduces art literacy to students in a way that’s fun and that makes sense to them.

To explore some of the ways students learn art at each age level, and to fun and easy art project ideas, make sure you register for my FREE online mini-course, Phases of Art Development!

Sign-up to receive video course & Montessori art teaching e-newsletter.

The Phases of Art Development is a quick digital course that explains how art making can help students develop their creativity, fine-motor skills, and focus. More importantly, I share what types of projects students at every age are capable of completing safely, and without making a mess.

Best of all—it’s free! To sign up for the course, click here.

All rights reserved © 2024, Nature of Art®

No part of this blog may be used or be reproduced in any manner whatsoever including reproducing, publishing, performing, and making any adaptions of the work – including translation into another foreign language without written permission except in the case of brief quotations embodied in critical articles and reviews. Nature of Art® Publishing P.O. Box 443 Solana Beach, California 92075.

Ultimate Montessori Art Teaching Method Guide

Ultimate Montessori Art Teaching Method Guide

I’ve worked with so many Montessori teachers who have never been taught art curriculum and have no idea how kids learn art. I’ve been in that boat before; it took me many years of working with children of all ages to really understand exactly how they learn art and what are skills they’re capable of at each age. I’m saving you from years of research and observation by creating and sharing the Ultimate Montessori Art Teaching Method Guide.

I designed this guide specifically for Montessori teachers. It covers the two Montessori planes, and each section in this guide is linked to a more detailed posts for each age.

This guide is the cumulation of more than three decades of experience working in the visual arts! I’m an artist turned mom, turned homeschool mom, turned art teacher and art manufacturer, and now I’m a Montessori art teacher trainer. My art teaching method has been taught to tens of thousands of children internationally, and now, I’m bringing the best of my knowledge and experience into the classroom of Montessori teachers.

Ultimate Montessori Art Teaching Method Guide

My Art Teaching Method

I spent ten years observing children of all ages creating artworks so that I could understand recognizable cognitive patterns that revealed how children develop their skill sets. I’ve put this research on sensory art methods into studio-based practice and have seen success in many different environments.

This method is unlike any other way of teaching art. It’s designed to give children art skills that are aligned with their cognitive milestones—cognitive processing, visual perception, and fine-motor development. The goal is to wire implicit memory through all phases of development from early childhood through adolescence.

My art teaching method is extremely complementary to the Montessori way; it’s a natural progression for Montessori teachers and schools to enrich their programs and the enjoyment of the children they work with. This method connects visual art skill sets with creative thinking through sensorial experiences. Once you have an understanding of this Montessori art teaching method, you’ll be able to adapt your Montessori art curriculum to children’s three-part cognitive system (cognitive processing, visual perception, and fine-motor development), and help your students develop the necessary artistic high-order thinking needed to become artful.

Ultimate Montessori Art Teaching Method Guide

How to Use This Guide

I invite you to read through this post to gain a high-level view of how this teaching method adapts to each Montessori plane. Then, click on each specific age range to find out how to effectively teach children based on their cognitive capabilities. As always, if you have questions, leave a comment, send me an email, or jump onto my exclusive Facebook page and let me know!

Early Childhood (Toddler)

Many people mistakenly think that toddlers cannot yet learn art, but that’s not the case. In early childhood, toddlers see art making as exploratory and a discovery-based experience. Young students in the Montessori art first plane do not yet understand the placement of visual arts, and are in a very curious state about mediums. At this age, children should explore art mediums without any expected outcome.

The best way to teach early childhood students is through process-based art. This means the focus on is on the experience and the process, not on the child’s final piece of artwork.

Teaching art to early childhood toddler students helps tremendously in improving their fine motor skills, which are essential to everyday tasks. To learn more about art teaching methods for this age group, read this blog.

Ultimate Montessori Art Teaching Method Guide

Early Childhood (3-6 Years)

Students in early childhood should continue to learn primarily through process-based art. Children who are 3-6 years of age are quick learners and curious about art, so give them room to explore and experiment.

You want to allow students to make art in creative mode, using their own own imaginations, thoughts, and ideas for inspiration. At this age you can begin to introduce copy-mode, but limit your instruction to movement rather than copying an image.

For more information on exactly how to balance creative mode and copy mode for early childhood students, check out this post.

Montessori Art Teaching Ideas

Lower Elementary

Children at the lower L age are able to come up with their own imaginative creations, plan with intention, and think their ideas through to completion, going through the four steps of the artistic process.

At this age, lower elementary students approach art making with lots of curiosity and enthusiasm for trying different techniques and mediums. You can start introducing line, shape, form, texture, color, and symmetrical balance ideas.

Art can be taught to students through process-based art, a continuation of creative mode, and very simplistic copy mode.

If you want a more detailed explanation of how to art teaching methods for lower L students, read this post.

How to Montessori Art Teaching  Guide

Upper Elementary

Students in upper L can go through the artistic process, conjure up their own ideas, and see them through to completion. They’re able to do reflective work, bringing meaning to their creations and making connections to artworks in their community.

You can teach students Montessori art lessons through a combination of process-based art, creative mode, and copy mode.

By the time students are in upper elementary, they’re extremely competent when it comes to their fine-motor skills. Allow them to experiment with different mediums, techniques, and perspectives.

For more information on upper elementary art teaching methods, read this post.

Montessori Art Teaching Methods Resources

If you would like to understand more about which types of art projects children can work on, register for my free video course, Phases of Arts Development, which discusses teaching methods for Montessori students.


Montessori art book for teaching students

You can learn about Art Literacy Standards and the benefits of visual arts by reading Defining Visual Arts Paperback (paperback book).


Sign-up to receive video course & Montessori art teaching e-newsletter.

The Phases of Art Development is a quick digital course that explains how art making can help students develop their creativity, fine-motor skills, and focus. More importantly, I share what types of projects students at every age are capable of completing safely, and without making a mess.

Best of all—it’s free! To sign up for the course, click here.

All rights reserved © 2024, Nature of Art®

No part of this blog may be used or be reproduced in any manner whatsoever including reproducing, publishing, performing, and making any adaptions of the work – including translation into another foreign language without written permission except in the case of brief quotations embodied in critical articles and reviews. Nature of Art® Publishing P.O. Box 443 Solana Beach, California 92075.