Montessori Art and Craft | Benefits of Clay Play

Montessori | Benefits of Clay Play, early childhood 3-6 years. Montessori Art and craft | Benefits of Clay Play

By Spramani Elaun

Playing with clay provides a highly tactile and sensory experience. As children squeeze, press, and manipulate the clay, they are actively engaging their senses. Sending valuable sensory information to their brain.

Montessori Clay Play has been found to have positive effects on emotional well-being. Playing with clay can help children regulate stress levels.

However, the benefits of Montessori clay play extend far beyond the realm of sensory development. In fact, there are numerous cognitive advantages associated with this activity.  Montessori education highlights the importance of hands-on learning. Clay play aligns perfectly with the Montessori philosophy.

In my early childhood art guide, I discuss this topic and provide more insights into Clay Play for emotional health.

Unsure of where to begin with clay play? Perhaps you’ve struggled with determining the desired outcome of art activity?

Allow me to shed some light on the importance of early childhood clay play sessions.

In fact, I refer to this approach as “Clay Play.” Engaging in clay play offers numerous benefits for a child’s overall development.

When it comes to clay play, this process-based exploratory approach should always come first! Clay play should happen before getting into foundational clay modeling skills.

Montessori arts and crafts| Benefits of Clay Play, student playing clay tools

I recommend incorporating clay play for young children in early childhood education. Montessori schools and daycare centers can introduce clay modeling stations into their classrooms to provide children with the opportunity to explore. Plus support creative and cognitive skills. To learn more about setting up clay modeling environments, please refer to this comprehensive guide Monessori Early Childhood Art Guide.

Montessori Clay Play

Clay comes in various forms, ranging from very messy to less messy options. Additionally, clays can be homemade. Earth clay, in particular, is a wonderful material to introduce to children, similar to making mud pies.

If you’re interested in setting up earth pottery clay play stations, I recommend checking out this book. It contains numerous photos and examples illustrating how to arrange clay play. How to choose suitable clay play materials for children aged 3-6 years old.

Montessori Art and Craft | Benefits of Clay Play book
Montessori Art and Craft | Benefits of Clay Play
Montessori Art and Craft | Benefits of Clay Play, little girl making clay sculptures, clay play session at school
Montessori Art and Craft | Benefits of Clay Play

The important thing to understand about clay play is that it should be a process-based activity, providing children with ample time to freely play and explore clay. There are various ways to engage children in exploring clay. Including the use of simple tools such as natural elements, beads, seeds, rolling pins, and cookie cutters. Emphasizing the play aspect of clay play is crucial. Allowing children to take the lead in their learning and discoveries. By letting the child guide the fun, experiments, and creations, you can enhance their clay experience.

When are children ready for guided clay modeling lessons? Once children have had ample opportunities for clay play and have reached the age of 4 or 5. You can begin introducing clay modeling skill sets. This includes teaching them forms, attaching pieces, cutting, and carving. If you would like to learn more about my clay curriculum you can view the Clay Modeling Curriculum HERE. Order Clay Play Tools HERE

Montessori clay modeling curriculum for school art lessons, Montessori Art and Craft | Benefits of Clay Play
Clay Play Classes in San Diego with Spramani Elaun – Nature of Art® School

All rights reserved © 2024, Nature of Art®

No part of this blog may be used or be reproduced in any manner whatsoever including reproducing, publishing, performing, and making any adaptions of the work – including translation into another foreign language without written permission except in the case of brief quotations embodied in critical articles and reviews. Nature of Art® Publishing P.O. Box 443 Solana Beach, California 92075.
Crafting With Natural Found Objects | Montessori

This blog post is a part of a three-month series: Montessori Art in the Natural World. This series is about growing kids’ knowledge about the natural world by taking them outside their home or classroom and challenging them to create focused art, based on the nature around them. Every aspect of nature—seasons, layers of the earth’s soil, energy, rocks and minerals, fossils, landforms, water, flora, fauna, the atmosphere—can all be represented and expressed through art lessons including, nature crafting and crafting with natural objects.

Crafting With Natural Found Objects | Montessori

Crafting With Natural Objects

There are so many fun ideas and engaging, hands-on ways to teach your Montessori students about nature through crafting with natural objects. It’s a wonderful gateway to introduce and connect kids to the natural world. Also, the outdoors offers an endless selection of natural objects that are just waiting to be found and designed into clever nature crafts. 

These are a few commonly found, natural items that can be used for crafts:

  • Alabaster
  • Corn husks
  • Eggs shells
  • Feathers
  • Flowers
  • Gems
  • Gourds
  • Grasses
  • Leaves
  • Mushrooms
  • Pinecones
  • Rocks
  • Sandstone
  • Seashells
  • Seed pods
  • Twigs
  • Weeds
Crafting With Natural Found Objects | Montessori cultural studies
This is a simple dress similar to what may have been worn by Sacagawea 

History and Natural Found Objects

Crafting with natural objects is a great segway to teach students part of the Coming of Humans Great Lesson!

So much of human history and culture revolves around crafting. Our ancestors used natural found objects for making important tools that helped them survive their day-to-day lives. They would collect stones and bones to use for grinding, scraping, mortars for cooking, and as weapons to protect their villages from attacks and predators. They used stones and seashells in gift-giving. In addition, seeds and feathers were often used in ceremonial activities. These nature crafting activities have been found across all cultures!

Crafting With Natural Found Objects | Montessori

As society evolved, nature crafting evolved into a more leisure activity (although many people still used natural objects for daily tools too). Some nature crafts transcended both uses—being useful everyday items and also relaxing and calming to create! For example, in colonial times, the early settlers would craft candles from natural beeswax, make dolls from grass and reeds, and quilts were sewn together with naturally-woven materials. Crafting with natural objects was a normal event for so many generations. Unfortunately, many kids today have never been introduced to these types of nature crafts.

Many parents ask me the best ways to teach kids about nature and art and I always tell them to start crafting! Making crafts using only objects found in nature is an amazing way to have children slow down and become more present. This connects them not just to nature, but to our past and ancestors as well.

Take a look at ancient clothing and you can see natural objects—like bones, seeds, flowers, feathers, seashells and so much more—fastened and attached throughout the garments. Native American cultures used many objects found in nature to create elaborate headdresses too.

Crafting With Natural Found Objects | Montessori

Crafting with Natural Objects Helps Develop Fine-Motor Skills

Almost every crafting activity provides kids with excellent opportunities to develop their fine motor skills! Improving these skills is so important for kids to build their independence. Nature crafting activities like collecting (picking up) small natural objects, pasting, sewing, and cutting all require and strengthen fine-motor coordination.

Nature Crafts Can Teach Kids About Nature’s Limited Resources

Another great bonus of crafting with natural found objects is that they can teach kids important ideas and lessons about the limited natural resources of our world. It gives you a chance to teach students that although Mother Nature is plentiful when it comes to resources, today’s climate change and growing industrialism and commercialism mean we have to be diligent in protecting them. So, make sure you emphasize the need to gather the materials they find in nature responsibly. I love these types of crafts because they help our future leaders connect to nature and understand their role in protecting our environment and keeping our ecological systems balanced.

Crafting With Natural Found Objects | Montessori

Where to Start: Crafting With Natural Objects Ideas for Montessori Students

Forging natural items and using them to create heirloom gifts and artworks is a great way for students to receive from all the benefits of crafting with found nature objects. They are learning history, strengthening their fine motor skills, and taking responsibility for our Earth. 

Nature crafting activities for kids may include creating:

  • Baskets
  • Ceremonial bowls
  • Cornhusk dolls
  • Friendship bracelets
  • God’s eye mandalas
  • Lanterns
  • Memory boxes
  • Nature souvenirs boxes
  • Nature tapestries
  • Necklaces and other jewelry
  • Paper crafts, like collages
  • Pottery
  • Sandcastle jars
  • Sandstone sculptures
  • Shell medallions
  • Windchimes
How-to Teach Nature Journaling to Montessori Kids

One Step Further: Montessori Nature Activity Outdoor Journal Checklist

How-to Teach Nature Journaling to Montessori Kids

Here’s a bonus nature art activity for you! While your students are out collecting nature objects for crafting, have them take out their nature journals and record their observations. (For information and instructions on how to create a nature art journal, click here.) 

Nature journaling is a relatively independent activity, but you should still guide your students to make sure they’re following scientific principles and standards. This Nature Journal Checklist will help you make sure your students are including data that helps them implement both scientific and artistic principles during their expedition.

Print it out or save it on your phone so you have it with you the next time you lead your students outside to journal or collect nature objects for crafting.

To download the checklist for FREE, click here.

A Short Cut Just for You: Painting Curriculum For Kids

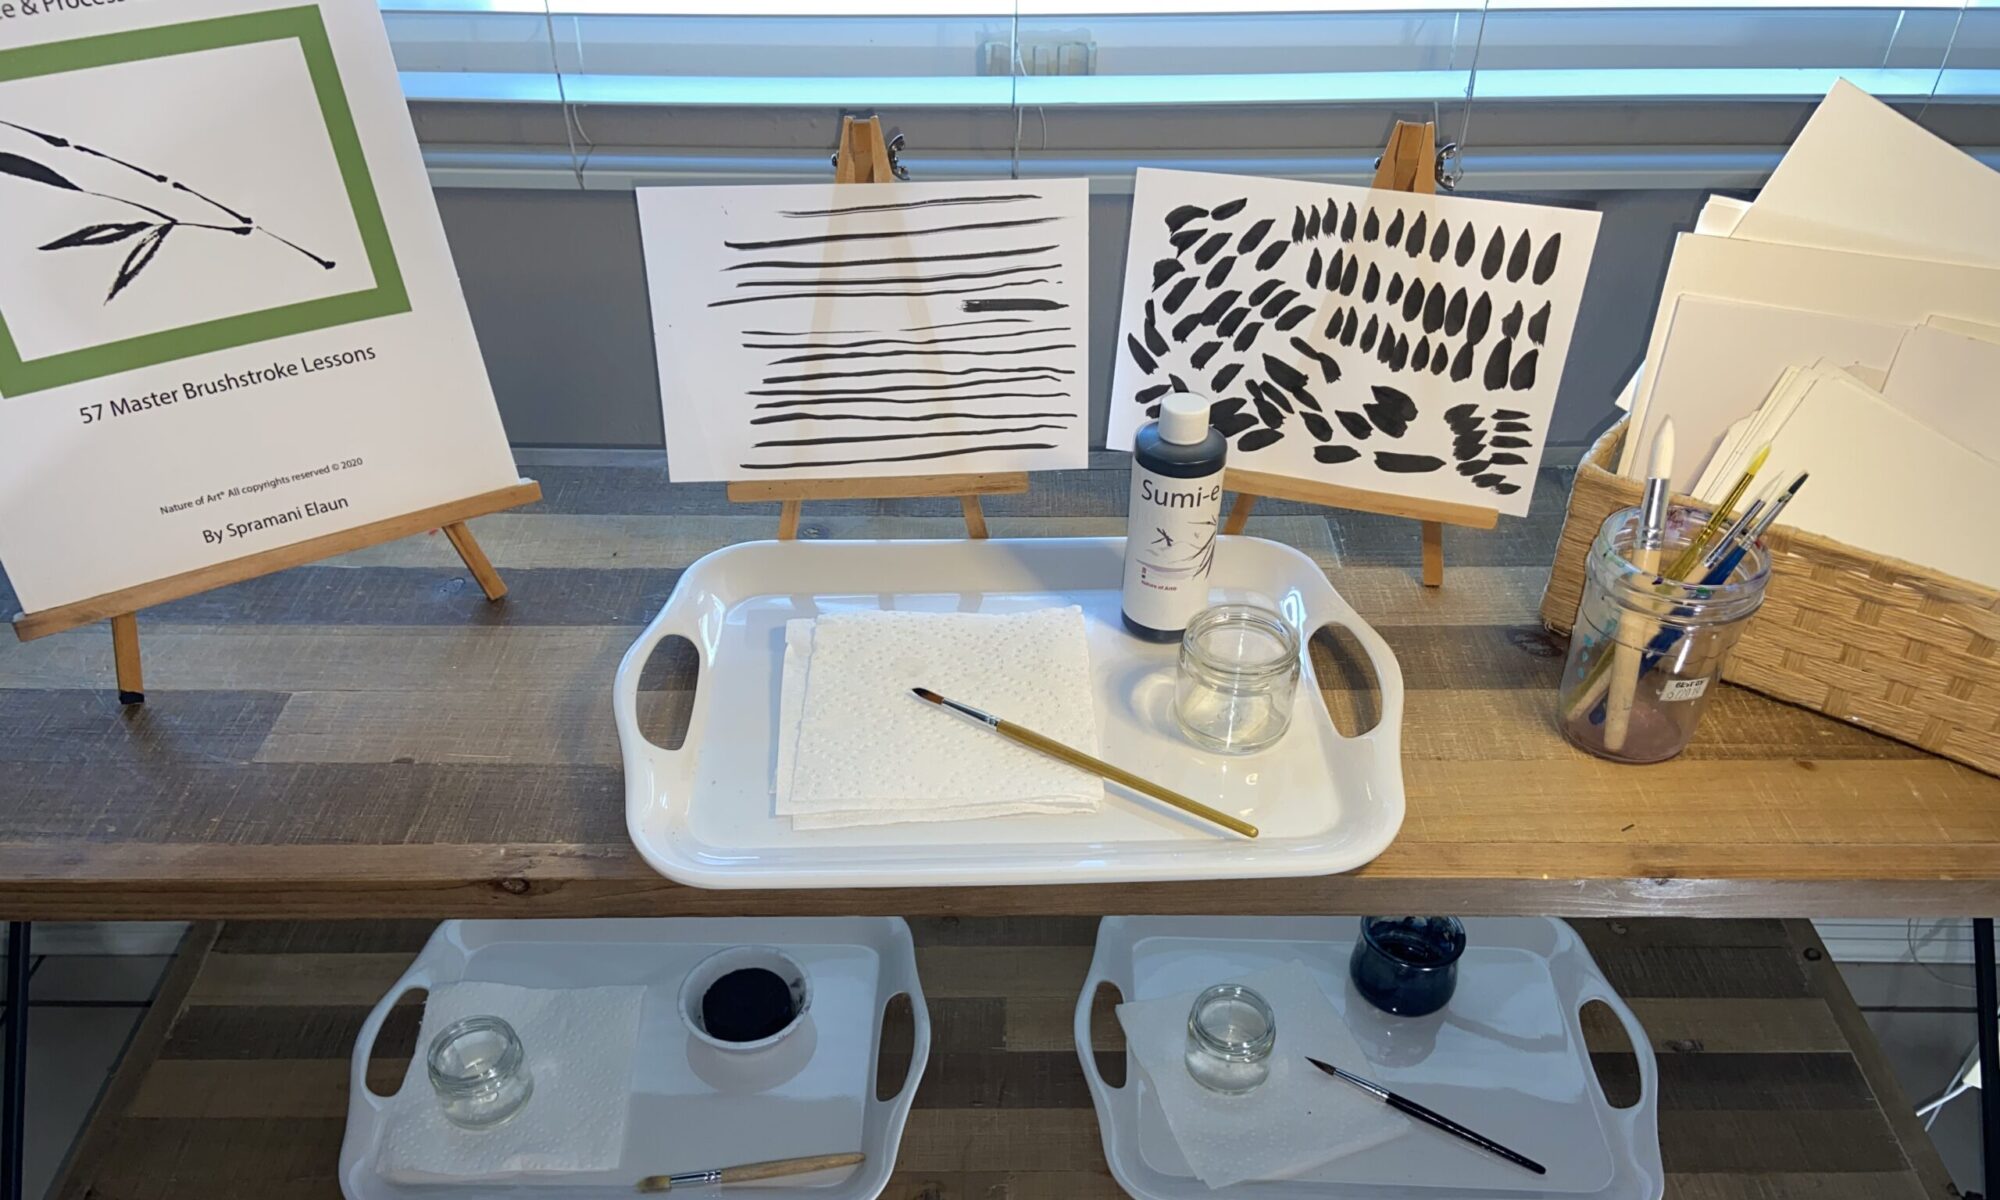
Along with crafting with natural objects, students can also use their found nature objects in painting lessons! My Kids Painting Practice & Process Curriculum has 57 master lessons that take kids from setting up a paint station and holding a brush all the way to creating beautiful nature landscapes and painting different types of animals! And, each lesson is featured as part of a sequence and includes all the information—materials, demonstration technique, and direct and indirect aims. So, you can simply follow the instructions and easily present the activity to your students.

Kids Painting Practice & Process Curriculum sets the foundation for their art education and will help them transform into little artists! To purchase the curriculum, click here.

Montessori Art: Mandala Activity for Stress Relief

Montessori Art: Mandala Activity for Stress Relief

Mandalas are a geometric design pattern that offer several mental and emotional benefits. Mandala, which means “circle” in Sanskrit, is a sacred symbol that is used for meditation, prayer, healing, relaxation, and art therapy for both adults and children—especially when used in a Montessori art mandala activity.

In Hindu and Buddhist cultures, the circular design of mandalas represents the idea that everything in life is connected and the infiniteness of the universe.  Mandalas can also symbolize a personal spiritual journey for each individual viewer.

While there are several types of mandalas, the three most common are: the teaching, healing, and sand mandalas.

  • Each shape, line, and color in a teaching mandala represents different aspects of Buddhism. Monks learn to create these mandalas during their monastic education.
  • A healing mandala is an intuitive design made for the purposes of meditation, focus, and concentration.
  • Sand mandalas are unique in that both their creation and destruction have symbolic meanings. Multi-colored sand is placed in concentric circles, working from the outer part of the design to the center.
Montessori Art: Mandala Activity

Many clinical studies have shown that mandalas can be used to boost the immune system, reduce stress, ease depression, alleviate pain, lower blood pressure and promote healthy sleep.

Designing and coloring mandalas can help your students (or you) focus their attention. That’s why they’re a great exercise for helping kids calm down when they’re stressed. Here are some other benefits of mandalas:

  • They create a feeling of balance
  • They bring peace and tranquility
  • They strengthen fine-motor skills through repetitive movement
  • Looking at them produces a sense of calmness
  • They help with focus and concentration
  • They encourage mindfulness
  • They calm the nervous system
  • Working on them opens pathways to allow creativity to flow
  • The different color schemes in mandalas can be therapeutic
Montessori Art: Mandala Activity for Stress Relief

Mandalas have been recognized by psychology as a therapy tool. The Swiss psychologist Carl Jung believed that mandalas are representations of our minds and that we project our thoughts and feelings onto how we perceive and interpret mandals. And different branches of psychology recognize different benefits of mandalas; for example, transpersonal psychology uses mandalas as an exercise for connections and behavioral psychology uses them to improve memory, attention, and coordination.

The intricate design of mandalas can be intimidating, but children don’t need to be artists to reap the many benefits of mandalas.

Montessori Art: Mandala Activity using nature

Where to Start: Montessori Art Mandala Coloring Activity

Your students can use natural or found objects to make their own mandalas—which doesn’t require any drawing at all. Or, you can download a blank mandala (or purchase a mandala coloring book—there are plenty for sale online) and have your students color them. You can also use Montessori insets to create simple mandala designs to color. 

Making the conscious effort to embrace mandalas and to introduce Montessori art mandala activities in your classroom are the first steps to helping your students feel calmer, more mindful, and less stressed.

One Step Further: Watch My ‘Combating Stress with Art’ Webinar for FREE

Again, even just the action of coloring a mandala can offer your students tremendous mental and emotional health benefits. A few weeks ago, I co-hosted a webinar titled Combating Stress with Artwith Montessori teacher Kristen Richter, about using mandalas to combat stress, and encouraged the attendees—Montessori parents and teachers—to color mandalas as we went through the information.

The webinar teaches about the emotional literacy cycle and types of stress kids face, as well as a deeper dive into how simple art techniques like doodling or coloring mandalas can help alleviate stress.

Montessori Art: Mandala Activity for Stress Relief

You can download and watch the Combating Stress with Art replay, by clicking here!

A Short Cut Just for You

A Montessori art mandala activity isn’t the only way to help students work through difficult emotions like stress. If you’re looking for more art lessons to teach your students, check out my Kids Art at Home Lesson Bundle! I created it as an introduction to Montessori art; it includes lessons from each of the five visual arts domains, so you can give your students a well-rounded art foundation.

how to teach kids art lessons digital download

The bundle also includes materials lists and resources so you can feel confident knowing your students will get the most out of each lesson. On top of that, I’ve just added a very special Nature Art Mandala lesson for a limited time. It applies many of the mandala benefits described in this blog, while giving students the opportunity to be in and explore their natural surroundings—which also promotes stress-relief! 
To purchase the Kids Art at Home Lesson Bundle, click here.

Montessori Early Childhood Art Guide

Montessori early childhood art guide

Montessori Early Childhood Art Guide

Isn’t it amazing to see the sparks fly and the little cogs in young students’ brains ignite when they start learning a new subject!? Whether it’s language, science, or the coming of the universe, introducing new subjects to early childhood students can be super exciting! Art is no different—in fact, I think it’s even more exciting! Montessori early childhood art is an essential part of a child’s intellectual and motor skills development and it should be included in early childhood students’ educations!

But for some reason, many people—including teachers—believe that young kids can’t learn art. Or that if they introduce art to early childhood students, it’s going to lead to a huge mess.

But I’m here to tell you that’s not the case!

Toddlers and early childhood students CAN learn art! You just have to know HOW exactly to teach them.

Montessori early childhood art guide, toddler

After years and years of working with and teaching children about art, I’ve discovered the way they naturally learn and comprehend the subject. It’s led me to develop my very own teaching method that engages and excites early childhood students and introduces them to art in a way that makes sense to their developing brains. It’s all in my new book, Early Childhood Art: Visual Arts Teaching Guide

Montessori early childhood art guide, preschool

Being able to present art concepts and lessons in a way early childhood students can understand is completely key in helping them understand the different aspects of this important subject. Early Childhood Art: Visual Arts Teaching Guide gives you the foundation for teaching art and presenting successful art activities in early childhood classrooms.


Montessori Guide

Montessori early childhood

Early Childhood Art Guide

Visual Arts Teaching Guide
for 13 Months – 6 Years Old

This book includes:
✅ My proprietary art teaching method
✅ The proper and complete list of art materials
✅ A guide for staging and setting up a successful art environment
✅ Tips and art lesson ideas for early childhood
✅ A convenient three-ring binder presentation

Buy Guide Now!

This Montessori art guide is the accumulation of more than 20 years of experience in teaching visual art to early childhood students all over the world. I’ve taught thousands of children how to paint, draw, sculpt, craft, and mix colors, all while observing how they engage in art. My success is led by my observations and real-life practice of how children in early childhood cognitively and sensorially process different art matters.

Montessori early childhood art guide, teaching activities

I’ve seen Montessori teachers stress out and lose confidence when it comes to art because they have no previous experience in the subject. I know how intimidating it can be to jump into something so unknown. When we surround ourselves with fine works of art, we set extremely high expectations, but the truth is, art should be fun! What’s more, early childhood students should be encouraged to explore and experiment, not be held to strict standards. Art is all about experimentation and exploring, so you don’t need to be an artist to participate or even teach it! 


Download a FREE Mini Course: Child Art Phase Development

Understanding how early childhood students comprehend and learn art is the first step. If you would like to learn more how to nurture children in the visual arts, register for my FREE mini digital course, Phases of Art Development Video.

Sign-up to receive video course & Montessori art teaching e-newsletter.

The Phases of Art Development is a quick digital course that explains how art making can help students develop their creativity, fine-motor skills, and focus. More importantly, I share what types of projects students at every age are capable of completing safely, and without making a mess.

Best of all—it’s free! To sign up for the course, click here.

You’re on your way to teaching art with confidence!

All rights reserved © 2024, Nature of Art®

No part of this blog may be used or be reproduced in any manner whatsoever including reproducing, publishing, performing, and making any adaptions of the work – including translation into another foreign language without written permission except in the case of brief quotations embodied in critical articles and reviews. Nature of Art® Publishing P.O. Box 443 Solana Beach, California 92075.

Cosmic Rock Painting | Montessori Art Lesson

In my years of working with students, I’ve developed a few go-to art projects that are easy to put together and that kids LOVE. Cosmic Rock Painting is one of my favorite art projects for students. I think this project works especially well as a Montessori art project because it can be incorporated with the Great Lessons and cosmos. I find it a perfect fit for Lower L Montessori students, but with a few tweaks, it can be adapted for students at any age.

Cosmic Rock Painting | Montessori Art Lesson
Use any type of rocks!

I actually got my inspiration for this project from the book Born with a Bang: The Universe Tells Our Cosmic Story by Jennifer Morgan. It’s a very common book in the Montessori world—you may even already have it in your classroom! While you don’t need to read this story with your students, it makes a great foundation for jumping into this art activity.

Cosmic Rock Painting | Montessori Art Lesson
Born With a Bang –Book

Before you start this Cosmic Rock Painting project, make sure you go over the big bang, even if it’s only briefly. Show students photos of stars, constellations, and galaxies to serve as inspiration and give them ideas of what they can create.

Supplies:

  • Paintbrush
  • Paint (acrylic paint works best, tempera paint can also be used but may wash off)
  • Palette (egg cartons, paper plates, and small bowls also work)
  • Wash jar
  • Napkin
  • Rocks or stones (any will work, but river rocks are preferred)

Steps:

  1. Paint the surface of the rock black, let dry
  2. Using a variety of colors, paint on cosmic images (allow students to reference books and photos for inspiration)

Watch Cosmic Rock Painting Video

[In the video, I mention a tinting tutorial and brush stroke tutorial; to access these videos for free, register for my FREE online mini-course, Phases of Art Development. Each of these topics can be done as completely separate art lessons to help kids understand color tones and brush strokes.]

Montessori cosmic rock painting art lesson

Notes: Depending on how you want to introduce this lesson, you can have students complete the whole project in one day or break it up over the course of several days. You can teach this lesson in chronological order, starting with the big bang, then how galaxies develop, and then go into mini lessons on the milky way, super novas, the sun, Earth, and other planets. Students can paint individual rocks to represent each of these cosmic ideas.

acrylic rock painting art kids

This is just the tip of the iceberg when it comes to easy art activities for Montessori students! After working in the art industry for more than three decades, I’ve amassed a TON of art project ideas for kids. I’ve also developed and created my very own art teaching method that introduces art literacy to students in a way that’s fun and that makes sense to them.

To explore some of the ways students learn art at each age level, and to fun and easy art project ideas, make sure you register for my FREE online mini-course, Phases of Art Development!

Sign-up to receive video course & Montessori art teaching e-newsletter.

The Phases of Art Development is a quick digital course that explains how art making can help students develop their creativity, fine-motor skills, and focus. More importantly, I share what types of projects students at every age are capable of completing safely, and without making a mess.

Best of all—it’s free! To sign up for the course, click here.

All rights reserved © 2024, Nature of Art®

No part of this blog may be used or be reproduced in any manner whatsoever including reproducing, publishing, performing, and making any adaptions of the work – including translation into another foreign language without written permission except in the case of brief quotations embodied in critical articles and reviews. Nature of Art® Publishing P.O. Box 443 Solana Beach, California 92075.

Lower Elementary Montessori Art Teach Method

Sensory Cognitive Child Art Method

I’ve spent years and years researching and observing how children learn art, and what I’ve found is that children are able to grasp different artistic skills at different planes. In this new blog series, I’ll be sharing my insight on the art teaching methods that work for each age group of Montessori students.

Children of all ages can be taught visual arts and be guided through the artistic process. Each developmental phase requires different teaching styles and approaches.

Below you’ll find a general arts literacy guide for Montessori Lower Elementary ages following the International Standards for the Arts Education & Sensory Visual Arts method that aligns with a child’s growth – Nature of Art®.

Montessori Lower Elementary Art Teaching Methods Resources

If you would like to understand more about which types of art projects children can work on, register for my free video course, Phases of Arts Development, which discusses teaching methods for Lower Elementary Montessori students (ages 7-9).

You can learn about Art Literacy Standards and the benefits of visual arts by reading Defining Visual Arts (paperback book).

Get more information on how to bring art lessons into the Montessori classroom by reading Introducing Visual Arts into the Montessori Classroom (paperback book).

montessori art how to

If you would like to understand more about the phases of art development, register for this free mini digital course.

Lower Elementary, Ages 7-9, Montessori Visual Arts Teaching Curriculum

Children at the lower L, age can do a number of different types of art projects. They can conjure up their own ideas and imaginative creations. Montessori lower elementary students can now plan with intention and think their ideas through to completion, going through the four steps of the artistic process.

At this age, students love to explore and discover what results different art mediums can produce. They encounter visual arts and Montessori art projects with lots of curiosity and a willingness to try different techniques.

Stretching Students’ Art Skills

Children can follow simple guided-art instructions and remain focused on their work for up to 1.5 hours. However, it’s still important to keep projects simple, with just a few un-complicated steps. Montessori art projects should start to introduce line, shape, form, texture, color, and symmetrical balance ideas.

You can also start introducing your lower elementary Montessori students to art language and the Elements & Principles of Design. For more information, reference Defining Visual Arts to better understand art language for young children.

Students’ fine-motor skills are becoming more controlled due to all the activities in their day-to-day Montessori curriculum and academic studies. Drawing and painting can be done with higher levels of control. The most important thing to focus on is giving children tasks that will continue to develop their fine-motor skills.

Children in lower elementary also need lots of exploratory sessions that allow them to experiment with varied mediums and techniques. Children are now drawing and painting with a 2D perspective and can be introduced to texture.

Art-Teaching Methods for Lower Elementary

Based on my proprietary sensory art method, I recommend teaching Montessori art through a combination of three methods: process-based art, creative-mode, and simple copy-mode.

  • Process-based art is about exploring and using their own imagination; it’s not necessarily focused on the child’s final piece of artwork.
  • Creative mode gives children the opportunity to explore mediums and conjure up creative images based on their own imaginations, thoughts, and ideas.
  • Copy mode refers to a systematic, step-by-step art instruction. Copy-mode should not be copy what you see in the image type lessons.

Lower Elementary Montessori Art Activities & Mediums

Here are some great Montessori Lower Elementary art projects for your students who are 7-9 years old, in the elementary grades. These types of art activities will help develop their fine motor control and small muscles in fingers and hands while teaching the Elements & Principles of Design. (You can find non-toxic, kid-friendly art supplies needed for these art activities at Nature of Art for Kids.)

  • Drawing: crayons, color pencils, graphite pencil, oil pastels, etc.
  • Painting: watercolor paints, tempera paints, acrylic paints, watercolor crayons, watercolor pencils etc.
  • Color Theory: primary color mixing, dropper color mixing, etc.
  • Clay Modeling: earth clay, non-harden plasticine clay, air-dry modeling clay, beeswax forming, etc.
  • Crafts: paper folding, nature and paper collage, mosaic arrangements, sewing basics, wool felting, string weaving, nature crafting, 3D constructing, etc.

Learn more about Montessori art teaching methods for lower elementary and get some Montessori art projects ideas by registering for my FREE mini digital course, Phases of Art Development Video.

Sign-up to receive video course & Montessori art teaching e-newsletter.

The Phases of Art Development is a quick digital course that explains how art making can help students develop their creativity, fine-motor skills, and focus. More importantly, I share what types of projects students at every age are capable of completing safely, and without making a mess.

Best of all—it’s free! To sign up for the course, click here.

All rights reserved © 2024, Nature of Art®

No part of this blog may be used or be reproduced in any manner whatsoever including reproducing, publishing, performing, and making any adaptions of the work – including translation into another foreign language without written permission except in the case of brief quotations embodied in critical articles and reviews. Nature of Art® Publishing P.O. Box 443 Solana Beach, California 92075.

Early Childhood Montessori Art Teaching Method (3-6 Years)

Sensory Cognitive Child Art Method, montessori

I’ve spent years and years researching and observing how children learn art, and what I’ve found is that children are able to grasp different artistic skills at different planes. In this new blog series, I’ll be sharing my insight on the art teaching methods that work for each age group of Montessori students.

Children of all ages can be taught visual arts and be guided through the artistic process. Each developmental phase requires different teaching styles and approaches.

Below you’ll find a general arts literacy guide for Montessori Early Childhood ages 3-6, which follows the International Standards for the Arts Education & Sensory Visual Arts method that aligns with a child’s growth™.

Early Childhood Montessori

Montessori Early Childhood Art Teaching Methods Resources

Sign-up to receive video course & Montessori art teaching e-newsletter.

The Phases of Art Development is a quick digital course that explains how art making can help students develop their creativity, fine-motor skills, and focus. More importantly, I share what types of projects students at every age are capable of completing safely, and without making a mess.

Best of all—it’s free! To sign up for the course, click here.

If you would like to understand more about which types of art projects children can work on, register for my free video course, Phases of Arts Development, which discusses teaching methods for Early Childhood Montessori students.

You can learn about Art Literacy Standards and the benefits of visual arts by reading Defining Visual Arts Paperback (paperback book).

Get more information on how to bring art lessons into the Montessori classroom by reading Introducing Visual Arts into the Montessori Classroom (paperback book).

If you would like to understand more about the phases of art development, register for this free mini digital course.

art literacy standards, montessori

Early Childhood Art Teaching: 3 to 6 Years

For young children, art making is an exploratory- and discovery-based experience. Students in the Montessori first plane and who are aged 3 to 6 years are ready for simple art making tasks. They’re now able to make connections to their own imagination.

Learning Through Process-Based Art

The best instruction method to introducing art lessons is through process-based art, creative-mode, and copy-mode, with the goal of building implicit memory.

Process-based art is about the experience and the process; it’s not focused on the child’s final piece of artwork or whether it resembles art adults can recognize, but rather, it’s about exploring and using their own imagination.

When teaching by process art, you should give a brief introductory instruction on how mediums work and can be used. Children who are 3-6 years of age are very curious about art mediums and their results. They’re also quick learners. Montessori early childhood art lessons should allow students to explore art mediums without any expected outcome. Give students opportunities to focus on experimentation.

By providing specific activities in your Montessori art classroom, you can actually help young students develop and refine their small motor muscles. Creating art helps develop both large and small muscles, which improves young students’ controlled movements. I will usually start young students off with clay modeling, paint brush stroking, and activities using safety scissors—each of these help them strengthen their fine motor skills more quickly.

montessori art standards

Continuing with Creative-Mode

Creative-mode is how children first learn to create art. It is the basis of process-based art learning. In creative mode, you should refrain from giving students a point of reference or image to copy. The child creates art by exploring the medium and conjuring up their own creative images from their own imaginations, thoughts, and ideas.

Introducing Copy-Mode

Copy-mode refers to a systematic, step-by-step art instruction. But in early childhood, you don’t want to yet introduce copy what you see in the image-type lessons. At this stage, children love to mimic easy task the see adults do, such as sweeping, cleaning, sewing, painting, cutting, and gardening. Bring this into your art lessons, and allow them to copy your movements.

Introduce copy-mode by having students copy a simple design (one that only involves one to two steps). Once they have the basic design complete, let them continue on in creative-mode and finish their projects however they want.


Montessori 3 to 6 ages art

Early Childhood Art Activities & Mediums

Here are some great Montessori Early Childhood art projects for your students who are ages 3 to 6. These types of art activities will help develop their fine motor control and small muscles in fingers and hands; they also allow room to utilize creative-mode and copy-mode during activities. (You can find non-toxic, kid-friendly art supplies needed for these art projects at Nature of Art for Kids.)

  • Doodling: crayons, color pencils, tempera sticks, etc.
  • Painting: watercolor paints, tempera paints, finger paints, homemade veggie dyes, etc.
  • Color Theory Play: watercolor painting, dropper painting, squeeze bottle painting, etc.
  • Clay Modeling: earth clay, homemade play dough, pressing sculptures, beeswax forming, non-hardening plastine clay, etc.
  • Simple Crafts: cutting paper, weaving string, glueing, building with blocks, large popsicle-stick structures, etc.

A Short Cut Just for You

Having the right art material for your early childhood classroom is just the first step. If you want more information on how to use each material, how to set up an art shelf with the materials, and how to teach lessons that actually help early childhood students learn art (YES, they can learn art at that early of an age!) then I have some good news for you!

I’m currently selling my brand new, Early Childhood Art Guide. It includes everything you need to know to successfully bring art lessons into your early childhood classroom—without the stress. I go into more detail about art materials (such as how to use them and where to find them), give you step-by-step art presentations, and a ton of other valuable information that makes teaching art and setting up your shelf so much easier. And, right now, you can order yours today!, so don’t miss out!

Montessori early childhood

Early Childhood Art Guide

Visual Arts Teaching Guide
for 13 Months – 6 Years Old

This book includes:
✅ My proprietary art teaching method
✅ The proper and complete list of art materials
✅ A guide for staging and setting up a successful art environment
✅ Tips and art lesson ideas for early childhood
✅ A convenient three-ring binder presentation

Buy Guide Now!

All rights reserved © 2024, Nature of Art®

No part of this blog may be used or be reproduced in any manner whatsoever including reproducing, publishing, performing, and making any adaptions of the work – including translation into another foreign language without written permission except in the case of brief quotations embodied in critical articles and reviews. Nature of Art® Publishing P.O. Box 443 Solana Beach, California 92075.

Valentine’s Day Art Projects: Potato Stamp Cards

Looking for fun Valentine’s Day art projects for your classroom? I love making homemade cards for my family, friends, and special people in my life, and I’m sure your early childhood Montessori students would too!

I started a tradition of making potato Valentine cards with my young art students and every year, they look forward to this art project.

Valentine’s Day Art Projects: Potato Stamp Cards

Here’s a quick and fun way to bring a little love into your classroom—and all you really need is a few potatoes. The spud makes a great, inexpensive stamp and are easy for little hands to grasp and hold. Plus, you can carve almost any shape you want out of a potato, so while I do this art lesson with my students for Valentine’s Day, you can really do it with your Montessori class any time of the year!

Potato Stamping Supplies

  • Potatoes — large Russet potatoes work best; organic potatoes are even better because they have no pesticides sprayed on them
  • Knife — a medium size paring knife (you may want to cut the potatoes ahead of time, that way you don’t have to worry about safety)
  • Newspaper — a few sheets to lay out and keep the work area clean
  • Paint Brushes, Sponges, or Popsicle Sticks — to spread paint on the stamps
  • Paints — tempera, acrylic, watercolor, and/or natural veggie dye will work
  • Paper or Card Stock — card stock, news print, construction paper, copy paper or any type of stationary cards
  • Writing Utensils — Crayons, pencils, etc.; for Valentines, I usually put out warm colors (red, pink, purple, white, teal blue)
  • Napkins — napkins or rags to clean off potatoes between use
  • Water Jar — for cleaning paint brushes in between color changes
Valentine’s Day Art Projects: Potato Stamp Cards Montessori

Potato Stamp StepsP

  1. Cut or carve a heart shape out of the potato.
  2. Pat dry the potato with a napkin or rag before stamping. Potatoes are a root vegetable, so they hold and release lots of water when cutting open; potatoes work much better at stamping and absorbing paint when they are dry.
  3. Cover the flat, stamp portion of the potato with paint.
  4. Press potato stamp on the paper and lift to see impression that’s been left.

Your students may need to practice a couple of times to thin out the layer of paint on the potato, which results in a clearer and better desired shape impression. I always tell kids to practice on a scrap paper before making their impressions on a nicer paper or card.

montessori art hearts

Potato stamping can be an earth-friendly art project! You can make this project totally earth-friendly by using recycled paper, organic potatoes, and non-toxic paints for kids! If you’re using veggie dyes, then you can even compost all your scraps once you’re done with this project.

Teachers Say…

I’ve had teachers email me later and tell me how they’ve started doing this Montessori art project in their classroom, and how their students have been making quick cards, banners, and gift wrap for different holidays and seasons throughout the year. Think about carving out leaves for fall, pumpkins for Thanksgiving, and trees and flowers for spring or Earth Day!

Valentine’s Day Art Projects: Potato Stamp Cards, montessori art

Want more ideas for Montessori art projects? Download the Ultimate Winter Arts & Crafts Idea Guide! It’s packed with a more than 40 of fun and educational Montessori art projects that’ll get your students pumped and excited about art!

All rights reserved © 2024, Nature of Art®

No part of this blog may be used or be reproduced in any manner whatsoever including reproducing, publishing, performing, and making any adaptions of the work – including translation into another foreign language without written permission except in the case of brief quotations embodied in critical articles and reviews. Nature of Art® Publishing P.O. Box 443 Solana Beach, California 92075.

Making Gratitude Cards to Celebrate Thanksgiving, Montessori Activities

The holiday and Thanksgiving season are a time of reflection for most people—most adults, anyway. It’s a time we think about everything we’re grateful for, and it’s a practice we should be sharing with our children and students.

Expressing gratitude has the power to reduce stress, foster a sense of belonging, and yield a host of emotional and mental health advantages. Fundamentally, gratitude involves feeling thankful and appreciative of the positive aspects in your life. As educators, we have the opportunity to lead our students toward recognizing and appreciating the multitude of “gifts” they encounter daily, spanning from the wonders of nature to the joys of delicious food and the warmth of cherished friendships.

Every year, around our Thanksgiving holiday here in North America, for as far as I can remember, I would have my children make gratitude cards for all our guests. We would place them around the dinner table for each guest to read when they sat down. Each card would be something simple, the guest’s name and a sweet sentiment of appreciation for who they are.

I would also surprise my own kids with tiny gratitude gifts as well, telling them how thankful I was to have them in my life. I still do this every year, even though they are all grown up! 🙂


I think it is so important to write and document these thoughts and feelings. I know this activity has always grounded my children and given them a heart of giving, rather than receiving. I still journal myself about what I’m grateful for, and give thanks all year long for the big and little things in my life—like the free lemons that grow in my garden.

Making Gratitude Cards to Celebrate Thanksgiving, Montessori Activities

Teaching Gratitude to Your Students

Preschool students should be taught to say thank you when they receive a gift or a kindness from another person. Remember to teach them that the size of the generosity doesn’t matter. They can be grateful for a big gift, but also for a sunny day or hug from a friend.

Students in lower elementary can think a little more in depth and should be encouraged to reflect on their day. They can even create and keep a gratitude list of good things that happened.

Upper elementary students can also focus on keeping gratitude lists or journals. But introduce the concept of good coming from bad, and teach them they can be grateful in negative situations too.

Making Gratitude Cards to Celebrate Thanksgiving, Montessori Activities

Gratitude Card Making Project Idea:

Here’s a great way to combine a writing and drawing lesson that helps students express their gratitude.

Gather your students, talk about what gratitude means. Give examples of things you are grateful for, or suggest things they might feel grateful for. Then pass out index cards and have each child write, “I am grateful for…” Be sure to write prompts out to copy as an example.

Once they’re done, have them draw a picture about what the thing(s) they were thankful for. Students can make a booklet or paste their card to their picture. Be sure to check out the video below for supplies and simple instructions.

Supplies:

  • Paper or card stock—any size, color, weight
  • Stickers—any theme
  • Stamps and ink pads—any colors
  • Pencils
  • Crayons
  • Color pencils
  • Glue
  • Tape
  • Scissors
  • Washi decorative tape

Gratitude Cards from Spramani Elaun on Vimeo.

For more project ideas, make sure you sign up for my newsletter or check out my sample art calendar.

Sign-up to receive video course & Montessori art teaching e-newsletter.

The Phases of Art Development is a quick digital course that explains how art making can help students develop their creativity, fine-motor skills, and focus. More importantly, I share what types of projects students at every age are capable of completing safely, and without making a mess.

Best of all—it’s free! To sign up for the course, click here.

All rights reserved © 2024, Nature of Art®

No part of this blog may be used or be reproduced in any manner whatsoever including reproducing, publishing, performing, and making any adaptions of the work – including translation into another foreign language without written permission except in the case of brief quotations embodied in critical articles and reviews. Nature of Art® Publishing P.O. Box 443 Solana Beach, California 92075.

Defining Art Literacy & Standards in the Montessori Classroom

I’ve learned from experience that if you’re like most Montessori teachers, you’re probably not trained in art. It can seem daunting—or maybe even unimportant—to teach art in the Montessori classroom. But the truth is, teaching visual arts and art literacy to students can have a huge impact on their education.

I get deep into all of this in my new book, Defining Visual Arts. I go over the standards for visual arts, how to understand artistic technique and process, and the art projects and mediums that are best for children. It’s really a quick guide to teaching art in your classroom.

Defining Art Literacy & Standards in the Montessori Classroom

Why Teach Visual Arts?

In my book, I also explain why it’s so beneficial for students to have art lessons as part of their Montessori education. Here are just a few of those reasons you should be teaching it.

Art offers a unique form of communication

Student learn diverse ways to communicate their emotions, ideas, and even other subjects they’ve learned in the classroom.

Art encourages critical and creative thinking

How do you express an idea like peace through watercolors? Through art, students get the chance to think creatively as they express themselves through different mediums and projects.

Art offers a tool for societal, historical, and cultural understanding

Art can be connected back to many different Montessori subjects, from science to literature to history. Experiencing art from other time periods or cultures can give students a different perspective on the other subjects they’re learning.

Art cultivates enjoyment and wellbeing

Being able to express themselves in a way that is neither “right” nor “wrong” allows students to find self-confidence and enhances their overall wellbeing. Plus, playing with paints, clay, and crafting materials is enjoyable and exciting for most students.

Art in the classroom leads to greater art literacy

Art literacy provides a standard for students to discover the artistic process. While art is usually considered to be subjective, having art literacy sort of evens the playing field for how students learn the subject.

What is Art Literacy?

To put it simply, art literacy is the knowledge and understanding required to participate authentically in the arts. It provides students with the opportunity to work through the artistic process, as a part of their education and using visual arts standards.

Defining Art Literacy & Standards in the Montessori Classroom

What are the Visual Arts Standards?

The standards we use to teach visual arts were created after extensive studies and surveys of professional artists—from musicians to sculptors. Researchers observed and analyzed the way art is created, from visualization and ideation to a finished form. All these findings were evaluated and placed into a matrix called The Artistic Process, which consists of four actions: investigate, imagine, construct, reflect.

These visual art standards can be used by teachers all over the country to develop curriculum and evaluate artistic progression in their students. The National Coalition for Core Arts Standards (NCCAS) is one of the prominent organizations leading the efforts to unify art standards across the U.S.

As helpful as these standards are, they do not provide guidelines or instruction for how learning in the arts should be delivered. They give teachers the four basic art process actions children should experience while creating artwork. Deciding on the medium (such as crayons or clay), areas of focus (drawing or painting), and technique are all up to you. This is where it gets a little daunting, right?

Don’t freak out!

I’ve done years of research on the development of art understanding and abilities in children, and I’ve tailored my experience and learning to be useful and applicable in the Montessori classroom.

I don’t want you to feel overwhelmed. Even if you don’t have an arts background, you can still teach visual arts! In Defining Visual Arts, I break down the subject into five simple domains, and walk you through the mediums and techniques to use in each one. You can purchase a copy of the book online for the ultimate guide on giving your students art literacy and bring art into your classroom!

Buy Defining Visual Arts in Paperback or Digital Copy Here!

All rights reserved © 2024, Nature of Art®

No part of this blog may be used or be reproduced in any manner whatsoever including reproducing, publishing, performing, and making any adaptions of the work – including translation into another foreign language without written permission except in the case of brief quotations embodied in critical articles and reviews. Nature of Art® Publishing P.O. Box 443 Solana Beach, California 92075.