Montessori Art The Essential Elementary Guide – Second Plane 6-12

by Spramani Elaun

Are you eager to teach your students Montessori art lessons, yet uncertain about where to begin or what constitutes quality art instruction?

Ready to dive into the world of elementary art?

Spramani Elaun, an author, International Montessori Art Trainer, and art curriculum developer, is here to guide you. With her sensory art method and expertise as the founder of Nature of Art® art school , she has empowered tens of thousands of students to explore painting and drawing.

With the world wide web and social media saturated with Montessori art projects, many guides find themselves at a loss.

Which Montessori art lessons should take precedence?

How do you select the right mediums?

Do you need to be an artist yourself to lead art lessons effectively?

A Primer for Montessori Guides

Montessori Art –The Essential Elementary Guide – Second Plane 6-12

About this book:

This comprehensive guide offers clear, concise, and practical insights on establishing an art program tailored for elementary-aged children in the Montessori environment. Designed as an essential reference for Montessorians, it provides guidance, instructions, tips, and best practices in a structured and accessible format.

Delving into key visual art concepts, the optimal sequence of essential steps, and valuable insights accumulated over Spramani’s three decades of experience, this book offers actionable advice aimed at supporting beginner teachers and parents alike.

By simplifying intricate ideas surrounding art lessons and subjects, addressing common questions, and tackling challenges head-on, this guide empowers Montessorians with the knowledge and resources necessary to excel as an art facilitator.

This Essential Second Plane 6-12 art guide will:

  • Cover the essential visual art standards
  • Identify foundational building blocks and key initial lessons
  • Show you how to select suitable art materials
  • How to set-up art environments
  • Set up a proper Montessori art shelf effectively
  • Learn what art elements should be taught in elementary grades
  • Master Effective Teacher Management
  • Implement optimal art routines
  • Create Engaging and Meaningful Art Projects
  • Understand the Benefits of Integrating Art into the Montessori Curriculum
  • Foster Positive Art Dialogue and Encouragement
  • Receive guidance on crafting comprehensive art lesson plans

This book caters to Montessori teachers, art instructors, and homeschooling parents, equipping them with the knowledge and tools needed to excel in teaching art. By the end of this read, you’ll feel more confident and prepared to create a meaningful art program for elementary students.

Spramani shares foundational principles and practical examples drawn from her extensive 30 years of hands-on teaching experience. Her systems and processes streamline the art instruction process, making teaching art to children a rewarding and structured endeavor.

Embrace the vivid color pictures, rich examples, and insightful stories woven throughout this book to gain the confidence and support you need on your artistic teaching journey.

About the Author

Spramani Elaun is an author and art curriculum developer from San Diego California. She is a homeschooling mom, art teacher with a science art methodology. Her success is led by observations and real-life practice of how children cognitively and sensorially process art over twenty years. She is the founder of Nature of Art® Art school & Art supply company, Art Teaching Blueprint Montessori Certification Training Program. Spramani holds degrees in Graphic Design, Digital Media Design, Visual Communications, Print Media, and Fine Arts.

All Rights Reserved, © Spramani Elaun 2024

Other Books by Spramani Elaun

Montessori Art: Early Childhood Art Guide – Visual Arts Guide For Teaching 13 month olds – 6 years

Montessori Art – Esseintal Art Guide for Secondary 6-12 years

Early Childhood Art: Visual Arts Teaching Guide For 13 Months – 6 Years Old

Defining Visual Arts: Children’s standards for arts education, using the language of artist

Kids Color Theory: Contemparay color mixing guide with pigmented colorants for children.

Kids Painting: Teach young kids how to paint, materials & set-up guide

Clay Play: The natural art method that aligns with a child’s growth.

Nurturing Children in the Visual Arts Naturally

Introducing Visual Arts to The Montessori Classrooms: The natural art method that aligns with a child’s growth

10 Fun Big Bang Art To Share With Your Montessori Students

By Spramani Elaun

Fun Big Bang Art To Share With Your Montessori Students, spramani art album

As a Montessori teacher, you know it can be overwhelming to choose the best art activities for your students. That’s why I’m here with some guidance on which Montessori art activities for Big Bang lessons are most appropriate for your classroom.

Art activities related to the Big Bang are some of my favorites to teach. They allow children to explore their imaginations and get creative in a concrete, meaningful way. From drawing explosions to painting supernovas, students can visualize and understand such a big concept.

Integrating art with science helps kids express ideas creatively, stimulates their senses and provides tactile experiences. And when it comes to teaching the universe’s and the Big Bang, there is no shortage of art inspiration.

To get started, take a look at some of your books for visual inspiration. One of my favorites is “Born With a Bang: The Universe Tells Our Cosmic Story” by Jennifer Morgan. The illustrations are sure to inspire your students to create.

And for more ideas, download my top 5 Montessori Big Bang Art Activities. These activities can easily be adjusted to fit early childhood, lower elementary, or upper elementary classrooms. Click here to get started!

The Big Bang Theory is a fascinating science topic that Montessori teachers can incorporate into their art projects to make the learning experience interactive and fun. Below are ten art projects that Montessori teachers can use to teach elementary kids about the Big Bang Theory.

10 Fun Big Bang Art

1. Create a Cosmic Painting: Take your students on a journey through the universe with a cosmic painting activity. Discuss the Big Bang and the creation of the universe with your students, then have them create a painting depicting the birth of the universe.

2. Constellations: Give your students a chance to create their own constellations using paint or clay. Educate them on how the Big Bang gave birth to stars and how stars are the building blocks of constellations.

3. Paper Mache Planets: Introduce the concept of planets and solar systems by having your students make paper mache planets. You can use this opportunity to discuss the origins of planets and how they were formed following the Big Bang.

4. Galaxy in a Bottle: Encourage your students to learn about galaxies by creating a galaxy in a bottle. This can be a great way to explore the vastness of space and how galaxies form after the Big Bang.

5. Moon Phases Art: Discuss the moon phases and how they are caused by the changing position of the moon. Have your students create art that depicts the different phases of the moon using paint or chalk.

6. Starry Night Sky: Teach your students about stars by creating a starry night sky mural. This activity can help them learn about the different types of stars and how they are formed.

7. Cosmic Collage: Give your students an opportunity to create a cosmic collage by cutting out pictures of planets, stars, and galaxies from magazines and newspapers. Discuss the Big Bang and how all these celestial bodies came into existence.

Big Bang Art Montessori

8. Sun Catchers: Discuss the origins of our solar system’s star, the sun, and have your students create sun catchers using colorful tissue paper. This can be a great way to explore the different colors of the sun and how they are visible to us.

9. Universe Mobile: Make a universe mobile to showcase the Big Bang and the creation of our universe. Students can create planets, stars, and galaxies to hang from the mobile.

10. Astronaut Art: Discuss space travel and astronauts’ role in exploring space. Let your students create astronaut art that depicts them exploring the galaxies and space beyond, giving them a glimpse into the vast universe beyond our planet.

By incorporating these art projects into your Montessori lessons, your students can learn about the Big Bang Theory and explore the vastness of space in a fun and interactive way.

montessori art curriculum

Order my Montessori Art Books & Curriculum HERE

Exploring the World Through Art: Creative Activities for 3-6 Year Old Montessori Students

Exploring the World Through Art: Creative Activities for 3-6 Year Old Montessori Students

Hello are you new to teaching your Montessori student about visual arts? In this blog I want to give you some general art information if this is totally new to you. I’m a Montessori Art Teacher and the author of several Montessori art guides.

So lets get started… Montessori education is focused on hands-on, experiential learning, and this approach extends to art education as well!

Art lessons for 3 to 6 Montessori students should be designed to engage their all their senses, promote creativity, self-expression, fine-motor movement and independence. To give you an idea of what art lesson activities might look like here are three types of lessons that are well-suited for Montessori students in this age range:

Sensory Art

Nature Art

Process Art

  1. Sensory Art: Sensory art lessons are a great way to engage young children in the creative process. This type of art involves using materials such as clay and paint to support tactile experience. Sensory art projects allow children to explore different textures, colors, and shapes.
Exploring the World Through Art: Creative Activities for 3-6 Year Old Montessori Students
  1. Nature Art: Montessori education emphasizes the importance of connecting with the natural world, so nature-based art projects are a great fit for Montessori students. Nature art can include activities such as making leaf rubbings, creating collages with natural materials like sticks and leaves. Or even painting on these types of natural materials.
  1. Process Art: Process art is all about the creative process, rather than the end product. This type of art encourages children to experiment with different materials and techniques, and to focus on the experience of creating rather than the final result. Process art projects can include activities such as painting, collages, 3D sculptures and doodling. 
Exploring the World Through Art: Creative Activities for 3-6 Year Old Montessori Students art supplies
  1. Storytelling Art: Montessori education emphasizes the importance of storytelling, and this can be extended to art lessons as well. Storytelling is a wonderful way to connect children to art language through beautiful books. Sharing stories and pointing out the art elements helps children build a rich art language. 
Storytelling Art: Montessori education emphasizes the importance of storytelling

So this is just a few examples of what visual arts lools like for 3 to 6 year old Montessori students. Get on my newsletter to start gettting free advise and offerings how to teach art. Sign-up HERE

So overall, art lessons for 3 to 6 year old Montessori students should be designed to engage their senses, promote creativity and self-expression, and develop fine motor skills. Sensory art, nature art, process art, and storytelling art are all great options for Montessori students to start with.

If you would like to learn more and get all my resources for teaching for 3-6 Year Old Montessori Students check links below and on the top menu. I have a great FREE video you can take to understand what visual arts should look like for Montessori student.

By Spramani Elaun – Montessori Art Trainer

EARLY CHILDHOOD ART VIDEO INFO

5 Montessori Rocks and Minerals Art Lessons

This blog post is a part of a three-month series: Montessori Art in the Natural World: Kids Nature Journal Color Lessons. This series is about growing kids’ knowledge about the natural world by taking them outside their home or classroom and challenging them to create focused art, based on the nature around them. Every aspect of nature—seasons, layers of the earth’s soil, energy, rocks and minerals, fossils, landforms, water, flora, fauna, the atmosphere—can all be represented and expressed through art lessons. These Montessori rocks and minerals art lessons encourage your students to use natural rocks in their art projects and learn more about nature, rocks, and our world’s lands!

5 Montessori Rocks and Minerals Art Lessons

The natural rock cycle can be an interesting topic for Montessori students to learn; when you bring ideas from the Coming of the Universe and the Earth Great Lessons and combine them with rock art lessons—your students will really become engaged! You might even see them paying more attention to and investigating rock formations in the natural world.

It doesn’t matter what grade level you are teaching, rock art lessons can be fun for all Montessori students. I often work with rocks in my art studio and art programing classes, and have done many of these activities with children of all ages—sometimes even adults! You can use these art lessons to help introduce subjects like igneous rocks, sedimentary rocks, metamorphic rocks, or fossils; you can even use these rock art activities to help build fine-motor skills for early childhood students through rock arranging.

Here are five different ways to integrate art making with rock lessons in all areas of visual arts.

Montessori Rocks and Minerals Art Lessons:

  1. Rock painting
  2. Natural art arrangements
  3. Designing biomes
  4. Sketching rocks
  5. Making pigments from rocks 

Sticks n' Stones, Painting Art Projects For Kids

Painting on Rocks

Rock painting with acrylic paint is one of my all-time favorite art projects and kids love it too! This lesson can teach so many skills, such as brushstrokes, color mixing, creating textures, and making lines. Rocks are a wonderful surface to use as a canvas, plus, they’re 100% sustainable and can be found in any environment.

5 Montessori Rocks and Minerals Art Lessons

Natural Art Rock Arrangements

Arranging rocks into concentric designs is a fun way to teach kids about balance and develop their concentration skills. It also gets kids outdoors and sparks discussions about different types of rocks and how to select specimens for arrangements. With these types of Montessori rocks and minerals art lessons, I try to focus on collecting, sorting, and organizing the natural objects. While kids are organizing and arranging, they’ll also learn about key art elements like symmetry and balance. 

Designing Biomes with Rocks

Letting children design their own biomes with rocks they’ve collected is a great way to teach them about diverse natural biomes. You can even teach students about the Coming of Human Beings, and how humans have migrated to and from different biomes throughout history. There are many biomes children can design using rocks: rivers, mountains, caves, savannahs, and forests, etc.

5 Montessori Rocks and Minerals Art Lessons, spramani elaun art teacher

Sketching Rocks Shadows

Drawing is an important skill all students—especially at elementary ages—should have. I often use rocks to teach 3-D perspectives, identifying color value, and how to create shadows in drawings and paintings. Rocks can usually be found in every type of outdoor landscape and can be captured in outdoor nature journal sketching. Start this activity by collecting rocks locally; then you can have students make sketch marks in the shapes of the rocks they’re observing. The next step would be to have your students observe how light placement (like the sun in the sky) casts shadows, and have them include the shadows in their sketches.

5 Montessori Rocks and Minerals Art Lessons, art teacher spramani

Making Pigments from Rocks  and Minerals

Explaining to students how natural pigments can be made from minerals and rocks is a wonderful way to teach them to observe color in nature and connect how art and colors are made. Natural dyes and pigments can come from a wide variety of nature objects, including rocks! One of simplest ways to teach kids about rock composition is to have them make paint  from grounded rock minerals; for details and instructions on how to do this, check out this blog:

How to Make Paint, Inks & Dyes from Nature

Where to Start: Setting Up a Rock Painting Table

Again, painting rocks is one of my favorite activities to do with Montessori kids! The activity itself allows kids to be independent and creative, and the finished project is just so fun and colorful! It’s very simple to do, the majority of “work” just involves setting up a space for students to work.

You will need:

5 Montessori Rocks and Minerals Art Lessons

How to do it:

  1. Wash rocks in water and wipe clean (this ensures the paint sticks); completely dry rocks before painting
  2. Prepare and fill a palette with a variety of paint colors
  3. Set out paint brushes (a variety of brush sizes allows kids to create whatever brush stroke they desire)
  4. Paint one layer of color at a time; set aside to dry before painting the next color
  5. Once students finish their desired image, set rocks out to dry; rocks dry best when left in direct sunlight

One Step Further: Montessori Nature Activity Outdoor Journal Checklist

Here’s a bonus nature art activity for you! While your students are out collecting rocks outside, have them take out their nature journals and record their observations. (For information and instructions on how to create a nature art journal, click here.) 

Nature journaling is a relatively independent activity, but you should still guide your students to make sure they’re following scientific principles and standards. This Nature Journal Checklist will help you make sure your students are including data that helps them implement both scientific and artistic principles during their expedition.

To download the checklist for FREE, click here.

Print it out or save it on your phone so you have it with you the next time you lead your students outside to journal or collect nature objects for crafting.

A Short Cut Just for You: Buy Painting Step-by-Step Curriculum

spramani elaun paint curriculum for kids

One of the reasons I really like painting on rocks is because it opens up a whole world of painting for kids. A rock is such an interesting and unique canvas; once they start painting there, they’ll want to learn even more techniques. Before kids explore all the different ways to paint, it’s important that they learn proper paint brush and brushstroke techniques to help them develop their painting skills.

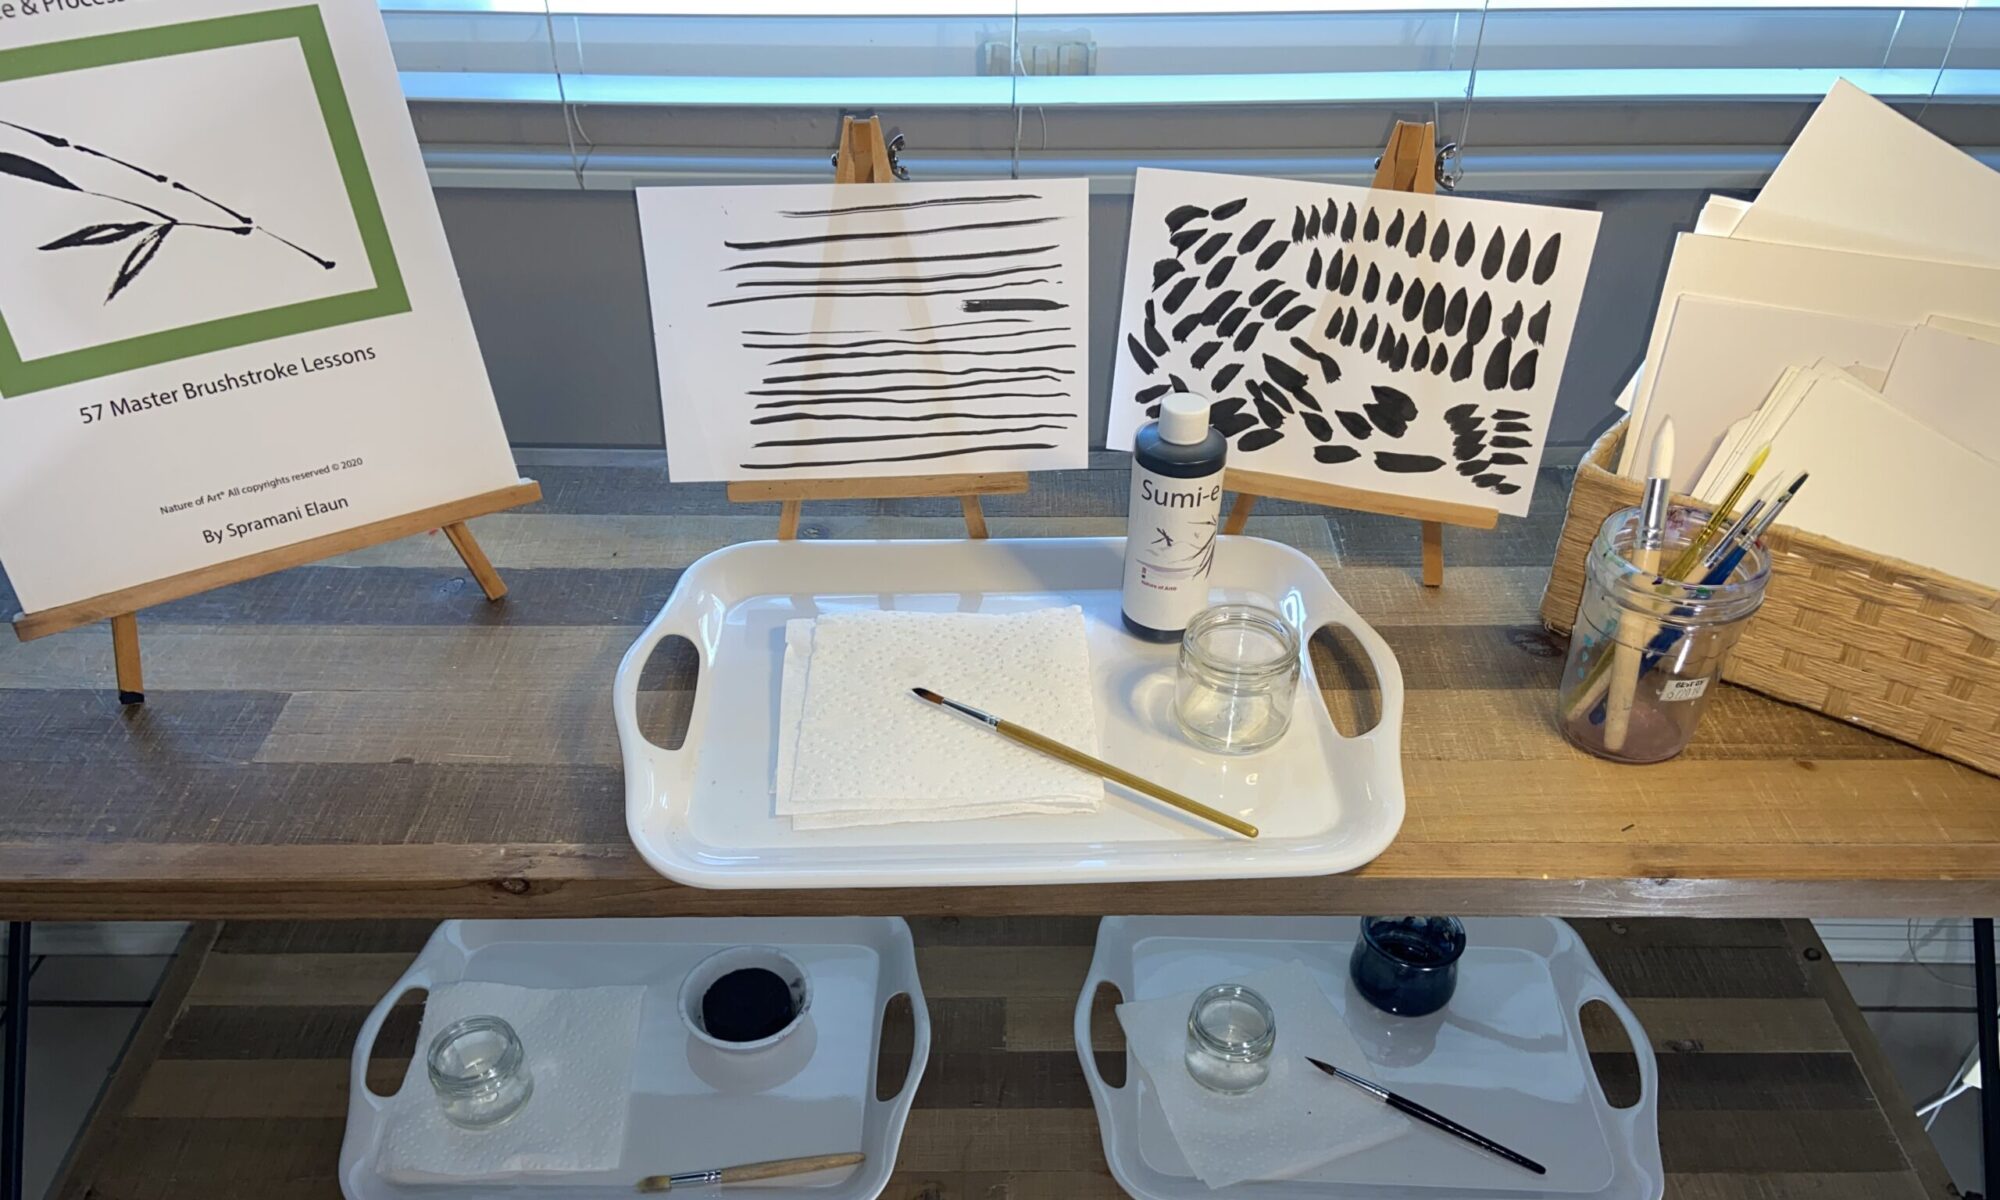
My Kids Painting Practice & Process Curriculum has 57 master lessons that take kids from setting up a paint station and holding a brush all the way to creating beautiful nature landscapes and painting different types of animals! Each lesson is featured as part of a sequence and includes all the information—materials, demonstration technique, and direct and indirect aims—you need to properly present the activity to your students.

To purchase the curriculum, click here.

All rights reserved © 2023, Nature of Art®

No part of this blog may be used or be reproduced in any manner whatsoever including reproducing, publishing, performing, and making any adaptions of the work – including translation into another foreign language without written permission except in the case of brief quotations embodied in critical articles and reviews. Nature of Art® Publishing P.O. Box 443 Solana Beach, California 92075.

Drawing and Painting Water | Montessori Art Activities

This blog post is a part of a three-month series: Montessori Art in the Natural World: Kids Nature Journal Color Lessons. This series is about growing kids’ knowledge about the natural world by taking them outside their home or classroom and challenging them to create focused art, based on the nature around them. Every aspect of nature—seasons, layers of the earth’s soil, energy, rocks and minerals, fossils, landforms, water, flora, fauna, the atmosphere—can all be represented and expressed through art lessons. The water texture art techniques in this blog will help your students learn how to paint water to use in their nature art projects. Drawing and painting water is an excellent way to teach students more about nature and our world’s waters!

painting water

With 71 percent of the earth’s surface being covered with water, chances are, your kids will encounter drawing or painting some kind of water feature in their artworks or biome field notes. Luckily, there are a ton of water texture techniques that can be explored for learning about our ocean salt water, fresh water, frozen ice formations, and water within our atmosphere. Focusing on our planet’s natural water systems is also a great way to connect them to nature! Another fun way to engage students in studying zoology is to draw or paint whales, sharks, rainbow fish, crocodiles, eels, and algae in the water they live in. 

Teaching students a unique way to express water images will make learning about the science aspects of lessons a lot more fun. Drawing and painting water textures open up childrens’ curiosities and will lead to interesting and enriching conversations within your Montessori classroom.

Fun Water Art Learning Prompts:

You can continue to guide your students’ interests and curiosities by exploring the questions:

  • Why is the ocean blue?
  • Why do some parts of the ocean (or large lakes) look darker or lighter? (This is also a great question to help them explore color values and color tones!)
  • What is a coastline?
  • What causes waves in the ocean? Why aren’t there waves in lakes?
  • How much water covers our planet?
  • Why is the largest body of water salty?
  • What kind of animals live in the different depths of the ocean?
  • How do freshwater biomes and saltwater biomes differ?
  • How are sea mammals and fish different?
  • Why is water so important to human life?
  • How can we protect our planet’s water systems?
how we montessori art lessons painting and drawing

Learning About Nature By Painting Water Texture 

Kids learn by connecting information through the process of expressing, which leads to meaningful learning. As a teacher, you can lead students through many engaging water texture art lessons which will help them make their artworks unique and personal. Rather than students slapping down blue paint to represent oceans, seas, lakes, rivers, or streams, they can look closer to the natural patterns found in water and try to replicate the movements and textures in their artworks. 

Water texture drawing or painting can be explored in primary and elementary grades. Younger students will need more hands-on assistance and need to work process-based, giving them more time to discover and explore. Lower and upper elementary children will be able to do the projects completely independently by following demonstrations and steps. There are many techniques to create water texture art with interesting lines and patterns, such as:

  • Crayon wax resist
  • Salt sprinkled over watercolor
  • Bubble wrap
  • Painting yarn to create line textures 

Where to Start: Bubble Wrap Water Painting Montessori Art Activity

Drawing and Painting Water | Montessori Art Activities

There are so many ways to create water texture drawings and paintings, but this technique is one of my favorites! It’s so much fun for kids and easy to do too. (Plus, it helps you recycle any bubble wrap you get from packages!)

One Step Further: Download My Montessori Nature Journal Checklist

how to teach kids montessori art lessons

If you’re lucky enough to live by a body of water you can take your students to, I highly encourage you to have students make and record their observations in their nature journals. (For information and instructions on how to create a nature art journal, click here.) 

montessori arts and crafts, painting and drawing

To download the checklist for FREE, click here.

I created this Outdoor Nature Journal Checklist to help you guide your students in their observations and recordings to make sure they’re following scientific principles and standards. This will help ensure your students are including data that helps them implement both scientific and artistic principles during their expedition. Print it out or save it on your phone so you have it with you the next time you lead your students outside.

montessori painting lessons and curriculum

A Short Cut Just for You

I like painting water texture activities because it opens up a whole world of painting for kids. It shows them how you can paint with tools other than fingers or paintbrushes! However, it’s essential that kids do learn paintbrushes and brushstroke techniques to help them develop their painting skills.

My Kids Painting Practice & Process Curriculum has 57 master lessons that take kids from setting up a paint station and holding a brush all the way to creating beautiful nature landscapes and painting different types of animals! Each lesson is featured as part of a sequence and includes all the information—materials, demonstration technique, and direct and indirect aims—you need to properly present the activity to your students.

To purchase the curriculum, click here.

Cosmic Rock Painting | Montessori Art Lesson

In my years of working with students, I’ve developed a few go-to art projects that are easy to put together and that kids LOVE. Cosmic Rock Painting is one of my favorite art projects for students. I think this project works especially well as a Montessori art project because it can be incorporated with the Great Lessons and cosmos. I find it a perfect fit for Lower L Montessori students, but with a few tweaks, it can be adapted for students at any age.

Cosmic Rock Painting | Montessori Art Lesson
Use any type of rocks!

I actually got my inspiration for this project from the book Born with a Bang: The Universe Tells Our Cosmic Story by Jennifer Morgan. It’s a very common book in the Montessori world—you may even already have it in your classroom! While you don’t need to read this story with your students, it makes a great foundation for jumping into this art activity.

Cosmic Rock Painting | Montessori Art Lesson
Born With a Bang –Book

Before you start this Cosmic Rock Painting project, make sure you go over the big bang, even if it’s only briefly. Show students photos of stars, constellations, and galaxies to serve as inspiration and give them ideas of what they can create.

Supplies:

  • Paintbrush
  • Paint (acrylic paint works best, tempera paint can also be used but may wash off)
  • Palette (egg cartons, paper plates, and small bowls also work)
  • Wash jar
  • Napkin
  • Rocks or stones (any will work, but river rocks are preferred)

Steps:

  1. Paint the surface of the rock black, let dry
  2. Using a variety of colors, paint on cosmic images (allow students to reference books and photos for inspiration)

Watch Cosmic Rock Painting Video

[In the video, I mention a tinting tutorial and brush stroke tutorial; to access these videos for free, register for my FREE online mini-course, Phases of Art Development. Each of these topics can be done as completely separate art lessons to help kids understand color tones and brush strokes.]

Montessori cosmic rock painting art lesson

Notes: Depending on how you want to introduce this lesson, you can have students complete the whole project in one day or break it up over the course of several days. You can teach this lesson in chronological order, starting with the big bang, then how galaxies develop, and then go into mini lessons on the milky way, super novas, the sun, Earth, and other planets. Students can paint individual rocks to represent each of these cosmic ideas.

acrylic rock painting art kids

This is just the tip of the iceberg when it comes to easy art activities for Montessori students! After working in the art industry for more than three decades, I’ve amassed a TON of art project ideas for kids. I’ve also developed and created my very own art teaching method that introduces art literacy to students in a way that’s fun and that makes sense to them.

To explore some of the ways students learn art at each age level, and to fun and easy art project ideas, make sure you register for my FREE online mini-course, Phases of Art Development!

Sign-up to receive video course & Montessori art teaching e-newsletter.

The Phases of Art Development is a quick digital course that explains how art making can help students develop their creativity, fine-motor skills, and focus. More importantly, I share what types of projects students at every age are capable of completing safely, and without making a mess.

Best of all—it’s free! To sign up for the course, click here.

All rights reserved © 2023, Nature of Art®

No part of this blog may be used or be reproduced in any manner whatsoever including reproducing, publishing, performing, and making any adaptions of the work – including translation into another foreign language without written permission except in the case of brief quotations embodied in critical articles and reviews. Nature of Art® Publishing P.O. Box 443 Solana Beach, California 92075.

Setting Up Your Montessori Classroom Art Space

Setting Up Your Montessori Classroom Art Space

By Spramani Elaun

Inspiring children to be creative is my business! I’ve spent more than 20 years observing how they learn and teaching them visual art. In my experience, one of the most essential components of students exploring and learning art is their environment. Luckily, it’s actually so easy to set up your Montessori classroom art space!

If you’ve been following this blog, then you know I believe every Montessori classroom should have an inspiration gallery and an art shelf, so I bet you’re wondering what else you could possibly need. I can go on and on about all the things you can use to set up an art space, but to keep it simple, I’ll just share the five basic necessities with you. (Of course, you can dive deeper and learn about all the fun, unique, colorful, exciting things that you can add to your classroom by reading my books Introducing Visual Arts to The Montessori Classroom and Defining Visual Arts.)

The most important thing to understand is that making a space for art means making space to get creative and have fun. Now, when I say that, I know a lot of teachers think fun means mess. While that’s the case sometimes, if you set up a designated space for making art, it’ll contain the mess, while still giving students the freedom to create as they please.

Setting Up an Art Space

Kids need an art space to doodle, draw, write, paint, craft, sew, knit, cut, glue, build, construct, and play with clay. For kids to make these types of art projects successfully, they need the proper space. Here are the five basic necessities for creating a place for art in your classroom.

1. Rugs & Floor Coverings

Spills are inevitable, so it’s important to consider the flooring of your art space. If your classroom has wood, tile, or linoleum floors then spills will be an easy, worry-free clean up. However you may still want to a rug to lay out that will protect your floors—especially if your floor is carpet.

Rugs come in many sizes and can be inexpensive or pricey. If you don’t want to invest in a rug, then you can use a drop cloth or tarp while your students are working, and then fold it up and put it away when they’re done.

Setting Up Your Montessori Classroom Art Space

2. Table

Table size will not affect your students’ ability to be creative, but the sturdiness of it will. I’ve witnessed kids create beautiful works of art on a surface as large as their lap, so don’t feel like you need a huge, glorious art table in your classroom.

When I’m hosting events and teaching art classes I’m usually setting up on the fly and rely on a small (but sturdy!), cheap, portable fold-up tables. These are great—not just for my events but in the classroom as well—because you can set them up when you need to and not be limited to a full-time art table since they can be folded up and tucked out of the way when not in use.

3. Chairs

Along with a sturdy table, kids need a sturdy chair or stool to sit on safely. A bench or folding chair can work just fine, as will pulling a chair from elsewhere in your classroom. Having a table and chairs available makes invites a child to create and lets them know art should be made in that specific place (containing any mess to that space as well).

Setting Up Your Montessori Classroom Art Space

4. Light Source

I’ve spent many years observing children making artworks, and the ways in which they visually perceive their work is key to developing their artistic skills. That’s why a good, bright light source is important—it helps them identify pigments and color hues. Natural sunlight is the best, but a lamp light source can work just as well.

5. Art Supply Storage

Every art space should have a place where art supplies are stored. I’ve found that children can be overly stimulated or even get bored if they’re given total access to every art supply in your classroom. The best way to keep them excited and engaged with art is to keep rotating the materials that are available to them. You can use jars, baskets, or closed plastic containers to separate different types of art supply and store them away from the art space when necessary.

Setting Up Your Montessori Classroom Art Space

Creating your Montessori classroom art space doesn’t need to be fancy or complicated; it’s really not that different from the areas you have set aside for other lessons.

If this has you inspired and eager to start teaching art in your classroom, you should definitely sign up for my online training, Art Teaching Blueprint. It’s a quick, seven-week course that takes everything I’ve learned about teaching art to students and breaks it down into 43 short, easily-digestible videos. It’ll help you build a foundation for teaching a quality visual arts program in your school or classroom. I’m so excited to offer this course to you and I really think it’ll empower you and give you invaluable teaching skills. You can click here to register.

All rights reserved © 2023, Nature of Art®

No part of this blog may be used or be reproduced in any manner whatsoever including reproducing, publishing, performing, and making any adaptions of the work – including translation into another foreign language without written permission except in the case of brief quotations embodied in critical articles and reviews. Nature of Art® Publishing P.O. Box 443 Solana Beach, California 92075.